# BrainCert Help Center

## Documentation

# Tracking Learner Progress in Test Reports

With the test Report feature in BrainCert, instructors can access complete information to track learner progress. Instructors with admin access can also get information about their tests including the number of learners who have attended, the number of learners who have completed the test, the last date they accessed the test, and other relevant information.

<iframe src="https://player.vimeo.com/video/1009778508?h=fb8d1f9dd3&amp;title=0&amp;byline=0&amp;portrait=0&amp;badge=0&amp;autopause=0&amp;player_id=0&amp;app_id=58479" frameborder="0" allow="autoplay; fullscreen; picture-in-picture; clipboard-write" style="position:absolute;top:0;left:0;width:100%;height:100%;" title="Tracking Learner Progress in Test Reports-">&ZeroWidthSpace;</iframe>

This article outlines how instructors can access course reports and track learner progress.

##   
  
**Step 1:**

Log in to your BrainCert account, navigate to '**Reports and Analytics**', and open '**Tests**'.

![1.png](https://support.braincert.com/kb/attachment/article/182/inline?token=eyJhbGciOiJodHRwOi8vd3d3LnczLm9yZy8yMDAxLzA0L3htbGRzaWctbW9yZSNobWFjLXNoYTI1NiIsInR5cCI6IkpXVCJ9.eyJpZCI6IjU0NDQiLCJvcmdpZCI6IjE2MDMiLCJpc3MiOiJzdXBwb3J0LmJyYWluY2VydC5jb20ifQ.74hoQ4hrItACifHgeKObZBY4w4soaCLsUyXpW12iKLk)

##   

## **Step 2:**

Once you click Reports, you will be redirected to the course '**Report**' page.

**i**. By default, the Course Report page will show you complete information on All user groups.

![2.png](https://support.braincert.com/kb/attachment/article/182/inline?token=eyJhbGciOiJodHRwOi8vd3d3LnczLm9yZy8yMDAxLzA0L3htbGRzaWctbW9yZSNobWFjLXNoYTI1NiIsInR5cCI6IkpXVCJ9.eyJpZCI6IjU1NDQiLCJvcmdpZCI6IjE2MDMiLCJpc3MiOiJzdXBwb3J0LmJyYWluY2VydC5jb20ifQ.Fj3-R6Nrb5LUV1uSW-JCs87gf46nlKvRjbtydVcJMMA)

**ii**. To generate reports based on groups, click on the '**All user groups**', and choose the group from the dropdown menu.

![3.png](https://support.braincert.com/kb/attachment/article/182/inline?token=eyJhbGciOiJodHRwOi8vd3d3LnczLm9yZy8yMDAxLzA0L3htbGRzaWctbW9yZSNobWFjLXNoYTI1NiIsInR5cCI6IkpXVCJ9.eyJpZCI6IjU1NDUiLCJvcmdpZCI6IjE2MDMiLCJpc3MiOiJzdXBwb3J0LmJyYWluY2VydC5jb20ifQ.6CMpAO_bzYWEWZG0UJJe4Fvro_PLFxjYDN3e0-K1TEc)

For instructors who wish to generate custom reports, we also have a “Custom Report” feature on BrainCert.

Still, have doubts? Feel free to reach out to us at support@braincert.com

Open the link to learn the '[Steps to Generate Custom Test Report](https://support.braincert.com/kb/article/181/steps-to-generate-custom-test-reports)'.

# Creating Course Bundles in the Training Platform

Course bundles give learners the chance to study two or more online courses at the same time. It contains multiple number of courses that can be sold together at one price. This feature helps to encourage more sales.

With our new add-on Course Bundles feature you can easily create any number of courses and add it to the bundle with a special title and description. Also, the created courses can be offered at a special price. This helps students to buy multiple courses simultaneously at a discounted price.

### **Find the Steps Below to Create Course Bundles**

## **Step 1:**

Navigate to '**Bundles**' under '**Products**' and click on '**+Create Bundles**'.

![1.png](https://support.braincert.com/kb/attachment/article/22/inline?token=eyJhbGciOiJodHRwOi8vd3d3LnczLm9yZy8yMDAxLzA0L3htbGRzaWctbW9yZSNobWFjLXNoYTI1NiIsInR5cCI6IkpXVCJ9.eyJpZCI6IjU1MjEiLCJvcmdpZCI6IjE2MDMiLCJpc3MiOiJzdXBwb3J0LmJyYWluY2VydC5jb20ifQ.Ap6yaH4lHUGdKvuZx0WhGNv_UzAp9oy3px_2kDKh9Ww)

####   

## **Step 2:**

Enter basic information in their respective fields, select '**Course Type**', and set a '**Bundle** **Image**' by choosing from the computer or library. Enter the description and finally '**Save**' the changes.

![2.png](https://support.braincert.com/kb/attachment/article/22/inline?token=eyJhbGciOiJodHRwOi8vd3d3LnczLm9yZy8yMDAxLzA0L3htbGRzaWctbW9yZSNobWFjLXNoYTI1NiIsInR5cCI6IkpXVCJ9.eyJpZCI6IjU1MjIiLCJvcmdpZCI6IjE2MDMiLCJpc3MiOiJzdXBwb3J0LmJyYWluY2VydC5jb20ifQ.E3_TPmS3s_czVA_euKmu0CmAS0VlbB8AXGwAl0j9BmQ)

## **Course Bundle Settings**

Click on the '**Options**' of the created course bundle. Open '**Enroll Individual Students**' from the list.

![3.png](https://support.braincert.com/kb/attachment/article/22/inline?token=eyJhbGciOiJodHRwOi8vd3d3LnczLm9yZy8yMDAxLzA0L3htbGRzaWctbW9yZSNobWFjLXNoYTI1NiIsInR5cCI6IkpXVCJ9.eyJpZCI6IjU1MjMiLCJvcmdpZCI6IjE2MDMiLCJpc3MiOiJzdXBwb3J0LmJyYWluY2VydC5jb20ifQ.C_CeCT_8F7EzKgctC4j4UAkRFu7yJtgtujt2Mb3hi9k)

**Publish:**

This option is to publish the created course bundle. After creating the course bundles you can either publish or unpublish the course bundle.

**Assign to Groups:**

Assign courses to user groups. Add user groups from the list of user groups and click save.

**Add/Edit Course Bundle:**

This option is to edit the course bundles name, course bundle price, currency and description.

**Delete Bundle:**

This option is to delete the course bundle.

**Enroll Individual Students:**

Instructors can send a course invite and enroll students automatically to the course bundle. Full access to the course bundle can be allowed to students before or without payment as per the Instructor's wish. Enrollment status of the students can be found and if an Instructor wish to delete the user enrollment it can be done.

![4.png](https://support.braincert.com/kb/attachment/article/22/inline?token=eyJhbGciOiJodHRwOi8vd3d3LnczLm9yZy8yMDAxLzA0L3htbGRzaWctbW9yZSNobWFjLXNoYTI1NiIsInR5cCI6IkpXVCJ9.eyJpZCI6IjU1MjQiLCJvcmdpZCI6IjE2MDMiLCJpc3MiOiJzdXBwb3J0LmJyYWluY2VydC5jb20ifQ.XJvwgoEBmQ4mpcuNGO0UjineRzWbznGoTE_e5xJAspA)

**Manage Enrolled Students:**

Instructors can manage enrolled students by either deactivating or deleting user enrollment.

**Email Enrolled Students:**

Email can be sent to enrolled students and the respective email analytics can be found.

**Email Prospective Students:**

Instructors can send email to prospective students to enroll in the course bundle.

###   

### **Course Bundle Email Notification Settings**

Instructors can enable '**Email Notification Settings**' for the course bundle created which is found in the settings option below.

![5.png](https://support.braincert.com/kb/attachment/article/22/inline?token=eyJhbGciOiJodHRwOi8vd3d3LnczLm9yZy8yMDAxLzA0L3htbGRzaWctbW9yZSNobWFjLXNoYTI1NiIsInR5cCI6IkpXVCJ9.eyJpZCI6IjU1MjUiLCJvcmdpZCI6IjE2MDMiLCJpc3MiOiJzdXBwb3J0LmJyYWluY2VydC5jb20ifQ.MbJTIii5uM769C9Gu0-vwO2V9CLAT5ewqEByisqN7V4)

- Instructors can get an email notification when a student enrolls in a course when notification is enabled.
- Instructors can get an email notification when a new payment occurs if notification is enabled.
- Instructors can get an email notification when a student enrolls in the course
- Email analytics can be seen for a selected date range if a student enrolls in the course bundle or when a new payment occurs.

![6.png](https://support.braincert.com/kb/attachment/article/22/inline?token=eyJhbGciOiJodHRwOi8vd3d3LnczLm9yZy8yMDAxLzA0L3htbGRzaWctbW9yZSNobWFjLXNoYTI1NiIsInR5cCI6IkpXVCJ9.eyJpZCI6IjU1MjYiLCJvcmdpZCI6IjE2MDMiLCJpc3MiOiJzdXBwb3J0LmJyYWluY2VydC5jb20ifQ.Vgnx7H1Qiqz9rlbmzGmnah2vyWq6q-8F1IuANOBEuiQ)

Hope this article is helpful.

# How to Link Zapier with Your BrainCert Account

Zapier is an extension tool that helps you perform workflow automation in seconds. This article will guide you through the steps to connect Zapier with your BrainCert.

## **Step 1:**

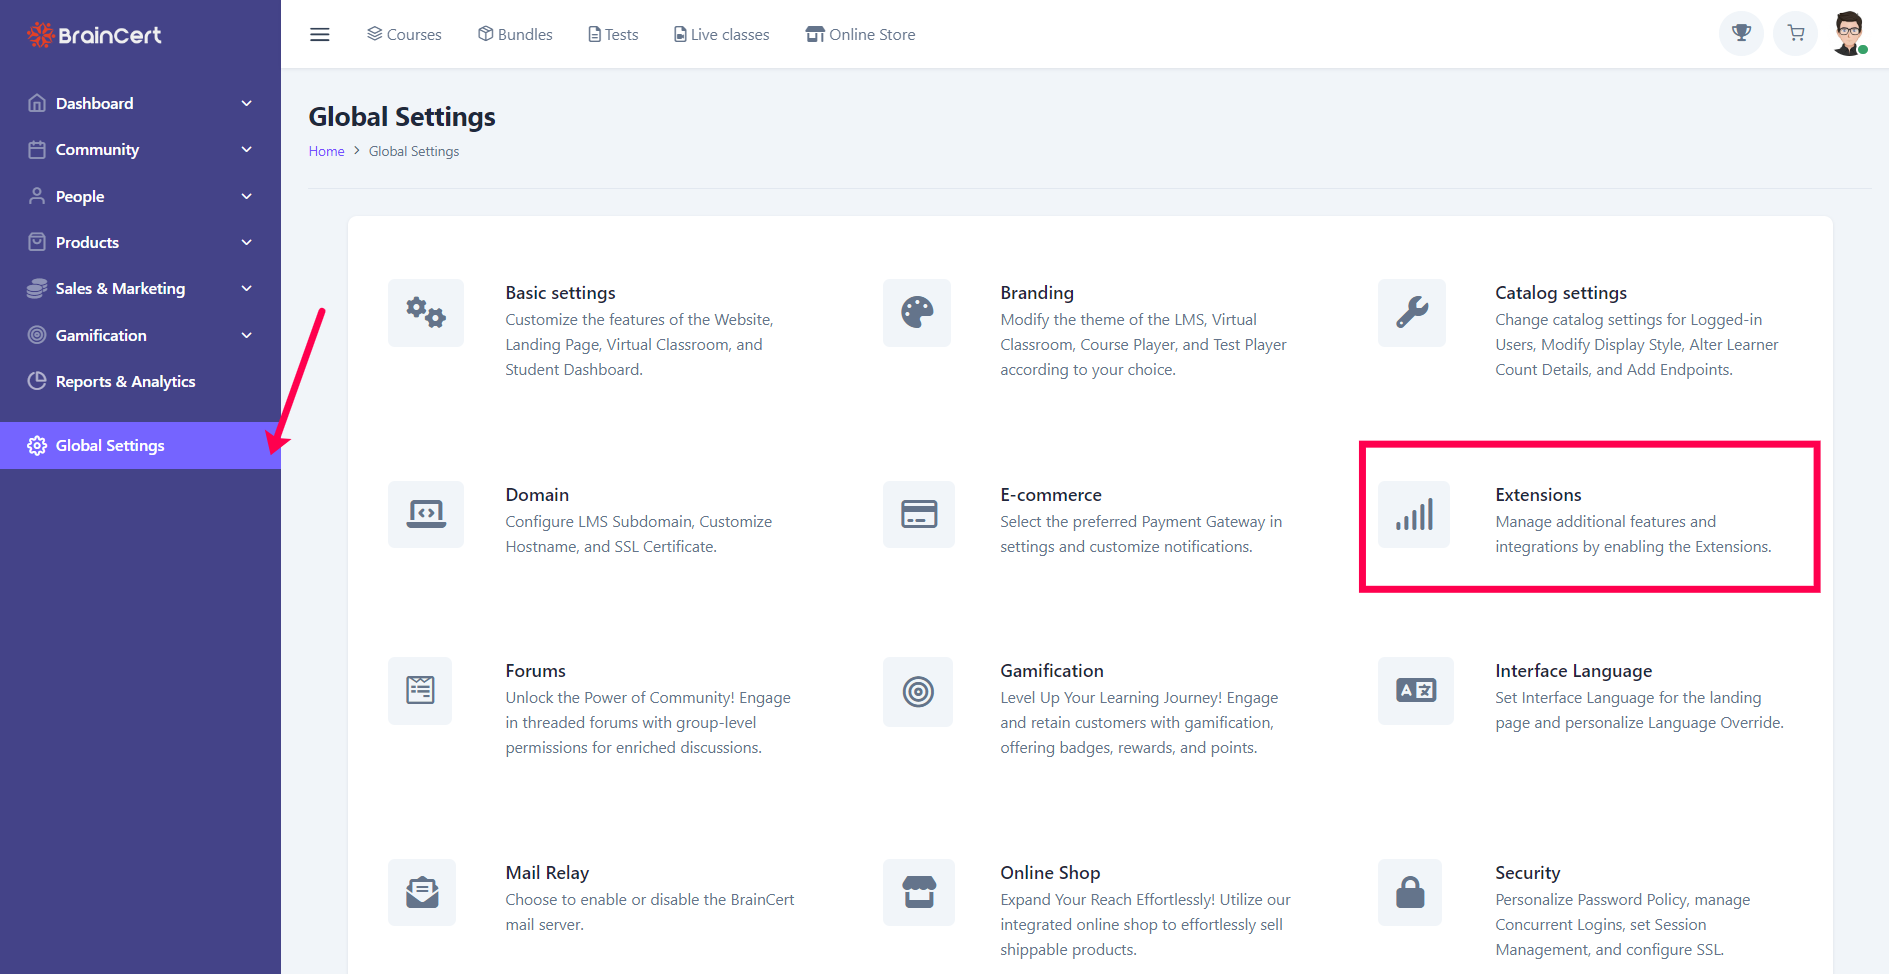
Login to your BrainCert admin account & navigate to '**Extensions**' in '**Global Settings**'.

![1.png](https://support.braincert.com/kb/attachment/article/141/inline?token=eyJhbGciOiJodHRwOi8vd3d3LnczLm9yZy8yMDAxLzA0L3htbGRzaWctbW9yZSNobWFjLXNoYTI1NiIsInR5cCI6IkpXVCJ9.eyJpZCI6IjUwMjgiLCJvcmdpZCI6IjE2MDMiLCJpc3MiOiJzdXBwb3J0LmJyYWluY2VydC5jb20ifQ.eyPPhKw_hg9SslDHpYkAesAeuSL080EUO1OM21zyWhc)

## **Step 2:**

Enable the Zapier extension, and note down the API key.

![2.png](https://support.braincert.com/kb/attachment/article/141/inline?token=eyJhbGciOiJodHRwOi8vd3d3LnczLm9yZy8yMDAxLzA0L3htbGRzaWctbW9yZSNobWFjLXNoYTI1NiIsInR5cCI6IkpXVCJ9.eyJpZCI6IjUwMzAiLCJvcmdpZCI6IjE2MDMiLCJpc3MiOiJzdXBwb3J0LmJyYWluY2VydC5jb20ifQ.MzuQ8KWKbKBDB2t2mPhmPTZuwF9lYHiyOZtl-tG3Lvw)

##   

## **Step 3:**

Log in to your Zapier account and select **My Apps** from the menu on the left side.

![3.png](https://support.braincert.com/kb/attachment/article/141/inline?token=eyJhbGciOiJodHRwOi8vd3d3LnczLm9yZy8yMDAxLzA0L3htbGRzaWctbW9yZSNobWFjLXNoYTI1NiIsInR5cCI6IkpXVCJ9.eyJpZCI6IjU2NDgiLCJvcmdpZCI6IjE2MDMiLCJpc3MiOiJzdXBwb3J0LmJyYWluY2VydC5jb20ifQ.tfHzI3aiWcYi-f6hxog0VoBEKzUUOux_o9qmrsowjbM)

##   

## **Step 4:**

Click on **Add Connection** and search for BrainCert in the search bar.

![4.png](https://support.braincert.com/kb/attachment/article/141/inline?token=eyJhbGciOiJodHRwOi8vd3d3LnczLm9yZy8yMDAxLzA0L3htbGRzaWctbW9yZSNobWFjLXNoYTI1NiIsInR5cCI6IkpXVCJ9.eyJpZCI6IjU2NDkiLCJvcmdpZCI6IjE2MDMiLCJpc3MiOiJzdXBwb3J0LmJyYWluY2VydC5jb20ifQ.Nh0NdayWlN1ZXKehl4HfidS68FnaUxCN4Ur5OB0Ypjs)

Type '**BrainCert**' in the search bar.

![5.png](https://support.braincert.com/kb/attachment/article/141/inline?token=eyJhbGciOiJodHRwOi8vd3d3LnczLm9yZy8yMDAxLzA0L3htbGRzaWctbW9yZSNobWFjLXNoYTI1NiIsInR5cCI6IkpXVCJ9.eyJpZCI6IjU2NTAiLCJvcmdpZCI6IjE2MDMiLCJpc3MiOiJzdXBwb3J0LmJyYWluY2VydC5jb20ifQ.PoCZt0839gHSGXA3yEtmnaMSyp2Yud9ql3lcixshdSQ)

##   
**Step 5:**

Enter the API key copied from your BrainCert Domain and click '**Yes, Continue**'.

![6.png](https://support.braincert.com/kb/attachment/article/141/inline?token=eyJhbGciOiJodHRwOi8vd3d3LnczLm9yZy8yMDAxLzA0L3htbGRzaWctbW9yZSNobWFjLXNoYTI1NiIsInR5cCI6IkpXVCJ9.eyJpZCI6IjU2NTEiLCJvcmdpZCI6IjE2MDMiLCJpc3MiOiJzdXBwb3J0LmJyYWluY2VydC5jb20ifQ.8yh4UGhGWLJIbaUmwVF65575ln_6pHzAvdvh4s0FXrM)

Your BrainCert and Zapier account will now be linked.

# Restricting Users to their Own Content using Roles

You can restrict users to their own content using the new update for the Roles feature on BrainCert.

This feature restricts new content created on or after April 15, 2016.

All other contents created before this date cannot be restricted due to the nature of granular permissions.

Roles come with 2 different permissions for courses, contents, tests, and live classes.

<iframe src="https://player.vimeo.com/video/1004416339?h=5dc71e33b0&amp;title=0&amp;byline=0&amp;portrait=0&amp;badge=0&amp;autopause=0&amp;player_id=0&amp;app_id=58479" frameborder="0" allow="autoplay; fullscreen; picture-in-picture; clipboard-write" style="position:absolute;top:0;left:0;width:100%;height:100%;" title="Restricting Users to their Own Content using Roles-">&ZeroWidthSpace;</iframe>

##   **Shared**

This is the default option and allows everyone with '**Super Admin**', and '**Teacher**' user types or users with specific permissions to see each other's content.

Navigate to '**Roles**' under '**People**' and scroll down to '**Courses**'.

**Shared** - Shared option allows all users to see each other's content.

## ![1.png](https://support.braincert.com/kb/attachment/article/62/inline?token=eyJhbGciOiJodHRwOi8vd3d3LnczLm9yZy8yMDAxLzA0L3htbGRzaWctbW9yZSNobWFjLXNoYTI1NiIsInR5cCI6IkpXVCJ9.eyJpZCI6IjU0NjYiLCJvcmdpZCI6IjE2MDMiLCJpc3MiOiJzdXBwb3J0LmJyYWluY2VydC5jb20ifQ.hsBeiI8pdqL2j6EJitp-RFi8TbiiSungx5h37EiYDyA)  
  
**Restricted**

**Restricted** - The restricted option does not show other users' content, and restricts users' own content.

![2.png](https://support.braincert.com/kb/attachment/article/62/inline?token=eyJhbGciOiJodHRwOi8vd3d3LnczLm9yZy8yMDAxLzA0L3htbGRzaWctbW9yZSNobWFjLXNoYTI1NiIsInR5cCI6IkpXVCJ9.eyJpZCI6IjU0NjciLCJvcmdpZCI6IjE2MDMiLCJpc3MiOiJzdXBwb3J0LmJyYWluY2VydC5jb20ifQ.ma8Ln-vLfVCkO1__jpkLoptJmWh_gSTfqFOcD7uSr9k)

## **Restricting the Users**

Restrict the users according to your preference by selecting any option from the dropdown menu.

- **None** – No permission is set.
- **Read** – Provides read-only access to the object.
- **Change** - Provides all permissions permitted by read, write, edit, and save.
- **Full Control** - Provides all permissions permitted by read, write, edit, save, and delete.
- **No Access** - Denies access to all.

![3.png](https://support.braincert.com/kb/attachment/article/62/inline?token=eyJhbGciOiJodHRwOi8vd3d3LnczLm9yZy8yMDAxLzA0L3htbGRzaWctbW9yZSNobWFjLXNoYTI1NiIsInR5cCI6IkpXVCJ9.eyJpZCI6IjU2MjMiLCJvcmdpZCI6IjE2MDMiLCJpc3MiOiJzdXBwb3J0LmJyYWluY2VydC5jb20ifQ.iuFDEbYSbbtwaVQ6NNldTFrrzgCQlquhtd5inIOYX5g)

- In the context of user permissions, restrictions play a crucial role in shaping user access.
- Take, for example, a scenario where a user is restricted from '**Managing courses**.'
- In this case, the user's access to courses will align with the specific options enabled, ensuring a streamlined and controlled experience.
- Similarly, the flexibility of these restrictions extends to various other fields, allowing administrators to tailor user access according to the organizational structure or specific requirements.
- The standout of this system lies in its adaptability – administrators can effortlessly edit existing roles, adjusting these access options, or create entirely new roles to accommodate their needs.

Refer to the link [Using Roles to Create a Role-Based Navigation Structure](https://support.braincert.com/kb/article/59/using-roles-to-create-role-based-navigation-structure "https://support.braincert.com/kb/article/59/using-roles-to-create-role-based-navigation-structure") to learn more.

# Steps to Collaborate using Google Docs on the Whiteboard

This article will guide you through the steps to collaborate using google docs on the whiteboard.

#####   

## **Step 1:**

Login to BrainCert and launch your live class.

#####   

## **Step 2:**

Navigate to the bottom right side and click on the "**+**" icon to upload files to the whiteboard and select the document tool.

**![](https://support.braincert.com/kb/attachment/article/146/inline?token=eyJhbGciOiJodHRwOi8vd3d3LnczLm9yZy8yMDAxLzA0L3htbGRzaWctbW9yZSNobWFjLXNoYTI1NiIsInR5cCI6IkpXVCJ9.eyJpZCI6IjQyNjEiLCJvcmdpZCI6IjE2MDMiLCJpc3MiOiJzdXBwb3J0LmJyYWluY2VydC5jb20ifQ.j68AvVJ8uLqYCppFmektIjw18ZZSHBDlplEBL_r_8yo)**

##   

## **Step 3:**

Select '**Upload from google doc**' and enter the google doc link and name on the next popup screen.

**![](https://support.braincert.com/kb/attachment/article/146/inline?token=eyJhbGciOiJodHRwOi8vd3d3LnczLm9yZy8yMDAxLzA0L3htbGRzaWctbW9yZSNobWFjLXNoYTI1NiIsInR5cCI6IkpXVCJ9.eyJpZCI6IjQyNjAiLCJvcmdpZCI6IjE2MDMiLCJpc3MiOiJzdXBwb3J0LmJyYWluY2VydC5jb20ifQ.Urhi_uEiXvsxsTyxf8l7ZXJ0SwZ7bKPtRvIEOM6zbXw)**

![](https://support.braincert.com/kb/attachment/article/146/inline?token=eyJhbGciOiJodHRwOi8vd3d3LnczLm9yZy8yMDAxLzA0L3htbGRzaWctbW9yZSNobWFjLXNoYTI1NiIsInR5cCI6IkpXVCJ9.eyJpZCI6IjQyNjkiLCJvcmdpZCI6IjE2MDMiLCJpc3MiOiJzdXBwb3J0LmJyYWluY2VydC5jb20ifQ.yPqXSypOM1HDUyhZwABBAVIBn2p-_n9nM3uP9zV5R4k)

## **Step 4:**

Once you enter the google doc link and name, click '**Done**' to collaborate with the document on the whiteboard.

![](https://support.braincert.com/kb/attachment/article/146/inline?token=eyJhbGciOiJodHRwOi8vd3d3LnczLm9yZy8yMDAxLzA0L3htbGRzaWctbW9yZSNobWFjLXNoYTI1NiIsInR5cCI6IkpXVCJ9.eyJpZCI6IjQyODIiLCJvcmdpZCI6IjE2MDMiLCJpc3MiOiJzdXBwb3J0LmJyYWluY2VydC5jb20ifQ.Y9ekZv_9eDWgWL4OXkUGQWTFdYf_8bl7yNeK7pxt_No)

We hope you found this article helpful.

# Steps to Personalize your LMS Security

Security is crucial in an LMS to safeguard sensitive data, protect user privacy, and prevent unauthorized access, ensuring a safe and reliable learning environment. This article guides you on personalizing password policies, managing concurrent logins, configuring session management, and setting up SSL.

<iframe src="https://player.vimeo.com/video/977862919?title=0&amp;byline=0&amp;portrait=0&amp;badge=0&amp;autopause=0&amp;player_id=0&amp;app_id=58479" frameborder="0" allow="autoplay; fullscreen; picture-in-picture; clipboard-write" style="position:absolute;top:0;left:0;width:100%;height:100%;" title="Steps to Personalize your LMS Security">&ZeroWidthSpace;</iframe>

## **Step 1:**

To set your LMS security, open '**Security**' in '**Global** **Settings**'.

**![1.png](https://support.braincert.com/kb/attachment/article/179/inline?token=eyJhbGciOiJodHRwOi8vd3d3LnczLm9yZy8yMDAxLzA0L3htbGRzaWctbW9yZSNobWFjLXNoYTI1NiIsInR5cCI6IkpXVCJ9.eyJpZCI6IjQ5NjUiLCJvcmdpZCI6IjE2MDMiLCJpc3MiOiJzdXBwb3J0LmJyYWluY2VydC5jb20ifQ.OyQ-Cl-tgGrAecmPDdmDvg3BA0UPuHlEBBIQfGhDGQU)**

## ﻿﻿  
﻿﻿  
**Step 2:**

If you want to allow multiple users to log in select '**Yes**', otherwise select '**No**'.

**Concurrent login**: Concurrent login allows multiple users to access a system using the same account simultaneously and is essential for both user convenience and security management.

## **![2.png](https://support.braincert.com/kb/attachment/article/179/inline?token=eyJhbGciOiJodHRwOi8vd3d3LnczLm9yZy8yMDAxLzA0L3htbGRzaWctbW9yZSNobWFjLXNoYTI1NiIsInR5cCI6IkpXVCJ9.eyJpZCI6IjQ5NjYiLCJvcmdpZCI6IjE2MDMiLCJpc3MiOiJzdXBwb3J0LmJyYWluY2VydC5jb20ifQ.6lReiRiPovkkbznA7FN5-7l1j8oz6PwwjDkkY9a0RWE)**  
﻿﻿  
**Step 3:**

Set a time limit in minutes to prevent learners from being inactive for an extended period.

## **![3.png](https://support.braincert.com/kb/attachment/article/179/inline?token=eyJhbGciOiJodHRwOi8vd3d3LnczLm9yZy8yMDAxLzA0L3htbGRzaWctbW9yZSNobWFjLXNoYTI1NiIsInR5cCI6IkpXVCJ9.eyJpZCI6IjQ5NjciLCJvcmdpZCI6IjE2MDMiLCJpc3MiOiJzdXBwb3J0LmJyYWluY2VydC5jb20ifQ.5ULilv81bX4OleVZAKWZgN_YSUrUw1JgO9zNRrXVW34)**  
  
Step 4:﻿﻿

LMS customers are required to set up SSL redirection to effectively use the new certificate. So, if you want to enable Force SSL, click '**Yes**'; otherwise, click '**No**' and '**Save**' your changes.

![4.png](https://support.braincert.com/kb/attachment/article/179/inline?token=eyJhbGciOiJodHRwOi8vd3d3LnczLm9yZy8yMDAxLzA0L3htbGRzaWctbW9yZSNobWFjLXNoYTI1NiIsInR5cCI6IkpXVCJ9.eyJpZCI6IjQ5NjgiLCJvcmdpZCI6IjE2MDMiLCJpc3MiOiJzdXBwb3J0LmJyYWluY2VydC5jb20ifQ.MOtyVO_PlCB41WqN5VViorrqMckE4fc7ZWQtxIKjRNs)

Using security measures not only protects your LMS but also fosters an environment where learners can thrive with confidence.

# How to Set up the Theme of Login Page or Register Page

Customizing the login and register pages allows you to create a personalized and branded experience for users interacting with your platform.

This guide helps you easily set up the look of your login and register pages with simple steps.

<iframe src="https://player.vimeo.com/video/958317096?badge=0&amp;autopause=0&amp;player_id=0&amp;app_id=58479/embed" allow="autoplay; fullscreen; picture-in-picture" allowfullscreen="" frameborder="0" style="position:absolute;top:0;left:0;width:100%;height:100%;">&ZeroWidthSpace;</iframe>

##   

## **Step 1﻿:**

Navigate to '**Global Settings**' and open '**Theme**'.

**![1.png](https://support.braincert.com/kb/attachment/article/184/inline?token=eyJhbGciOiJodHRwOi8vd3d3LnczLm9yZy8yMDAxLzA0L3htbGRzaWctbW9yZSNobWFjLXNoYTI1NiIsInR5cCI6IkpXVCJ9.eyJpZCI6IjU0NDUiLCJvcmdpZCI6IjE2MDMiLCJpc3MiOiJzdXBwb3J0LmJyYWluY2VydC5jb20ifQ.qiiLpPI8991LXeD34zC-MDG4hx60Kx0qC8PcTnIt4J4)**

##   

## **Step 2:﻿**

You'll find '**Pure Basics**' and '**Modern Education**' under '**Login/Register Page**'.

- **Pure Basic** - Basic Settings with minimal options.
- **Modern Education** - Advanced settings.

## **![2.png](https://support.braincert.com/kb/attachment/article/184/inline?token=eyJhbGciOiJodHRwOi8vd3d3LnczLm9yZy8yMDAxLzA0L3htbGRzaWctbW9yZSNobWFjLXNoYTI1NiIsInR5cCI6IkpXVCJ9.eyJpZCI6IjU0NDYiLCJvcmdpZCI6IjE2MDMiLCJpc3MiOiJzdXBwb3J0LmJyYWluY2VydC5jb20ifQ.b5GZTavpyVIn5jgoQ3S1outeELrtKoP4rSuCP0UTmvM)Step 3:**

Click on the icon under '**View**' to preview the page. Select the star icon under '**Default**' to make it a default page.

**![3.png](https://support.braincert.com/kb/attachment/article/184/inline?token=eyJhbGciOiJodHRwOi8vd3d3LnczLm9yZy8yMDAxLzA0L3htbGRzaWctbW9yZSNobWFjLXNoYTI1NiIsInR5cCI6IkpXVCJ9.eyJpZCI6IjU0NDciLCJvcmdpZCI6IjE2MDMiLCJpc3MiOiJzdXBwb3J0LmJyYWluY2VydC5jb20ifQ.vLEZuGT89kNAyXlsvIQruiTbKUASp_IjIMFP2tpZ-5Y)**

##   

## **Step 4:**

Click on '**Edit**' under the '**Options**' of the '**Pure** **Basics**' page.

**![4.png](https://support.braincert.com/kb/attachment/article/184/inline?token=eyJhbGciOiJodHRwOi8vd3d3LnczLm9yZy8yMDAxLzA0L3htbGRzaWctbW9yZSNobWFjLXNoYTI1NiIsInR5cCI6IkpXVCJ9.eyJpZCI6IjU0NDgiLCJvcmdpZCI6IjE2MDMiLCJpc3MiOiJzdXBwb3J0LmJyYWluY2VydC5jb20ifQ.QIxl4mGE3uKEjYyVjVD5U5GB-SjGRWuppscnXYFLBj4)**

## **Step 5﻿:**

Type the '**Home Page Title 1'** and **'Home Page Title 2**' with the Home page text that you want to be displayed on the login page.

**![5.png](https://support.braincert.com/kb/attachment/article/184/inline?token=eyJhbGciOiJodHRwOi8vd3d3LnczLm9yZy8yMDAxLzA0L3htbGRzaWctbW9yZSNobWFjLXNoYTI1NiIsInR5cCI6IkpXVCJ9.eyJpZCI6IjU0NDkiLCJvcmdpZCI6IjE2MDMiLCJpc3MiOiJzdXBwb3J0LmJyYWluY2VydC5jb20ifQ.wb41HR8_nepEaPGELbAgDEGvd6DtS5MmSjqQ7xo475U)**

## **Step﻿ 6:**

﻿﻿You can ﻿﻿customize the theme colors of the background and text colors. The login page image can be either browsed from your computer or chosen from the library.

**![6.png](https://support.braincert.com/kb/attachment/article/184/inline?token=eyJhbGciOiJodHRwOi8vd3d3LnczLm9yZy8yMDAxLzA0L3htbGRzaWctbW9yZSNobWFjLXNoYTI1NiIsInR5cCI6IkpXVCJ9.eyJpZCI6IjU0NTAiLCJvcmdpZCI6IjE2MDMiLCJpc3MiOiJzdXBwb3J0LmJyYWluY2VydC5jb20ifQ.x87b1TegRGSlkPenlWeb18koKRbcgz-O_kLCYsela0s)**

##   

## **Step ﻿7:**

Toggle the slide to enable or disable the options for the learners under the '**Catalog Settings**'.

Change the footer background and text color under '**Footer Settings**'. A new page also can be added to the footer by clicking on '**Add New**'.

**![7.png](https://support.braincert.com/kb/attachment/article/184/inline?token=eyJhbGciOiJodHRwOi8vd3d3LnczLm9yZy8yMDAxLzA0L3htbGRzaWctbW9yZSNobWFjLXNoYTI1NiIsInR5cCI6IkpXVCJ9.eyJpZCI6IjU0NTMiLCJvcmdpZCI6IjE2MDMiLCJpc3MiOiJzdXBwb3J0LmJyYWluY2VydC5jb20ifQ.flzvAWzM8AwYFr6cu4X2iCqso0caOC68gXtBJq86woY)**

## **Step 8:**

To edit the '**Modern Education**' page click on '**Edit**' under the '**Options**' of Modern Education.

Under this '**Registration Page**', '**Login Page**', and '**Forgot password page**' can be customized.

**![8.png](https://support.braincert.com/kb/attachment/article/184/inline?token=eyJhbGciOiJodHRwOi8vd3d3LnczLm9yZy8yMDAxLzA0L3htbGRzaWctbW9yZSNobWFjLXNoYTI1NiIsInR5cCI6IkpXVCJ9.eyJpZCI6IjU0NTQiLCJvcmdpZCI6IjE2MDMiLCJpc3MiOiJzdXBwb3J0LmJyYWluY2VydC5jb20ifQ.rrvRSTmsbD-B8hSeraJtYQxvrGjfxGtqECAuF8r6KrU)** ﻿Hope this guide helps you to effortlessly customize the appearance of these pages, ensuring a personalized and inviting interaction for your users.

# How to Set Up BrainCert Actions with Flowmattic

Flowmattic allows you to automate BrainCert actions seamlessly with other apps. By setting up an **action**, you can decide what should happen in another tool whenever something occurs in BrainCert.
<section class="info-box">Follow this guide to set up <a class="e-rte-anchor" href="https://support.braincert.com/kb/article/263/how-to-set-up-braincert-trigger-events-with-flowmattic" title="https://support.braincert.com/kb/article/264/how-to-set-up-braincert-actions-with-flowmattic" target="_blank" aria-label="Open in new window" rel="noopener noreferrer">Flowmattic triggers</a></section>
In this guide, we’ll walk you through how to configure a **BrainCert Action** in Flowmattic. For this example, we’ll use the **“User Created”** action, meaning every time a new user is created in BrainCert, Flowmattic will perform the linked action (like adding the user’s details to Google Sheets).

##   

## Example Use Case

Whenever a new row is added in Google Sheets, Flowmattic will automatically enroll that user into a BrainCert course.

Flowmattic supports **13 different BrainCert actions** to automate tasks like user creation, enrollments, and live class management.

| **#** | **Topics** | **Triggers** |
| --- | --- | --- |
| 1 | Create User | Creates a new user account in BrainCert. |
| 2 | Delete User | Deletes an existing user from the system. |
| 3 | Create Group | Creates a new user group in your BrainCert account. |
| 4 | Course Create | Adds a new course to your LMS. |
| 5 | Course Enrolled | Enrolls a user into a selected course |
| 6 | Course Unenrolled | Unenrolls a user from a course |
| 7 | Bundle Enroll | Enrolls a user in a course bundle |
| 8 | Bundle Unenrolled | Unenrolls a user from a course bundle |
| 9 | Test Enroll | Enrolls a user in a test |
| 10 | Test Unenrolled | Unenrolls a user from a test |
| 11 | Live Class Create | Creates a new live class in your LMS |
| 12 | Live Class Enroll | Enrolls a user into a live class |
| 13 | Live Class Unenrolled | Unenrolls a user from a live class |

##   

## Part 1: Connect Flowmattic with BrainCert

## Step 1: Open Flowmattic Dashboard

Go to [**Flowmattic Dashboard**](https://tryflowmattic.work/1Wz4xnrX/wp-admin/ "https://tryflowmattic.work/1Wz4xnrX/wp-admin/")**.** Click on Flowmatic --&gt; Connects and then click '**Connect Integration**'.

![1](https://support.braincert.com/kb/attachment/article/264/inline?token=eyJhbGciOiJodHRwOi8vd3d3LnczLm9yZy8yMDAxLzA0L3htbGRzaWctbW9yZSNobWFjLXNoYTI1NiIsInR5cCI6IkpXVCJ9.eyJpZCI6IjY5NjgiLCJvcmdpZCI6IjE2MDMiLCJpc3MiOiJzdXBwb3J0LmJyYWluY2VydC5jb20ifQ.iWfI8432sqo5NNHKay3x-QM3fsDCLFcb1D9sW6OPWlY)

##   

## Step 2: Select BrainCert

In the search field, type '**BrainCert'** and click on the BrainCert logo.

![2](https://support.braincert.com/kb/attachment/article/264/inline?token=eyJhbGciOiJodHRwOi8vd3d3LnczLm9yZy8yMDAxLzA0L3htbGRzaWctbW9yZSNobWFjLXNoYTI1NiIsInR5cCI6IkpXVCJ9.eyJpZCI6IjY5NjkiLCJvcmdpZCI6IjE2MDMiLCJpc3MiOiJzdXBwb3J0LmJyYWluY2VydC5jb20ifQ._f25fsMe99XN1SHmoCfB2c0QeBWEZYX1ZMBC9f9z3jQ)

##   

## Step 3: Enter API Key

Enter your '**BrainCert API Key'** (found in your BrainCert account under API settings).

![3](https://support.braincert.com/kb/attachment/article/264/inline?token=eyJhbGciOiJodHRwOi8vd3d3LnczLm9yZy8yMDAxLzA0L3htbGRzaWctbW9yZSNobWFjLXNoYTI1NiIsInR5cCI6IkpXVCJ9.eyJpZCI6IjY5NzAiLCJvcmdpZCI6IjE2MDMiLCJpc3MiOiJzdXBwb3J0LmJyYWluY2VydC5jb20ifQ._M5hQ_YkCh3y4PUaHj6XU6oyZEfev1Fx5O0tmvsr8nM)

##   

## Step 4: Get API Key from BrainCert

Go to your BrainCert Dashboard → **Global Settings** → **Extensions.** Scroll to '**Flowmattic**'. Toggle the button '**ON**' and click '**Save**'. Now, copy the '**API Key**' from this field.

![5](https://support.braincert.com/kb/attachment/article/264/inline?token=eyJhbGciOiJodHRwOi8vd3d3LnczLm9yZy8yMDAxLzA0L3htbGRzaWctbW9yZSNobWFjLXNoYTI1NiIsInR5cCI6IkpXVCJ9.eyJpZCI6IjY5NzkiLCJvcmdpZCI6IjE2MDMiLCJpc3MiOiJzdXBwb3J0LmJyYWluY2VydC5jb20ifQ.7a-Rm5v9mwBAeqiKMpKGhz_ieyxjbeo4b9oSK0Yxa9Y)

##   

## Step 5: Paste API Key in Flowmattic

Return to Flowmattic, paste the '**API key**' into the BrainCert connection field, and click '**Save Connect'**.

![6](https://support.braincert.com/kb/attachment/article/264/inline?token=eyJhbGciOiJodHRwOi8vd3d3LnczLm9yZy8yMDAxLzA0L3htbGRzaWctbW9yZSNobWFjLXNoYTI1NiIsInR5cCI6IkpXVCJ9.eyJpZCI6IjY5NzMiLCJvcmdpZCI6IjE2MDMiLCJpc3MiOiJzdXBwb3J0LmJyYWluY2VydC5jb20ifQ.86W8vd7SA5hhxB3N9Sfw_1rz-Y7djJLRqg4VIP_4_b8)

##   

## Step 6: Verify Connection

Once saved, BrainCert will appear under **Active Connections** in Flowmattic.

![7](https://support.braincert.com/kb/attachment/article/264/inline?token=eyJhbGciOiJodHRwOi8vd3d3LnczLm9yZy8yMDAxLzA0L3htbGRzaWctbW9yZSNobWFjLXNoYTI1NiIsInR5cCI6IkpXVCJ9.eyJpZCI6IjY5NzQiLCJvcmdpZCI6IjE2MDMiLCJpc3MiOiJzdXBwb3J0LmJyYWluY2VydC5jb20ifQ.3tptgV572skMyfqC9dLzm5gjePFGm_dYOtNP0ejKCyc)

##   

## Part 2: Choose a Trigger App

## Step 7: Create a New Automation

In Flowmattic, go to **Automations** → Click **Create New Automation**.

Click on the '**Webhooks by Flowmattic**'

![9](https://support.braincert.com/kb/attachment/article/264/inline?token=eyJhbGciOiJodHRwOi8vd3d3LnczLm9yZy8yMDAxLzA0L3htbGRzaWctbW9yZSNobWFjLXNoYTI1NiIsInR5cCI6IkpXVCJ9.eyJpZCI6IjY5NzYiLCJvcmdpZCI6IjE2MDMiLCJpc3MiOiJzdXBwb3J0LmJyYWluY2VydC5jb20ifQ.cqgP4nuRIX4Wc2rpFZIE92PcqOIP8dUILlDbehAZNvw)

##   

## Step 8: Switch Trigger App to BrainCert

Click the Change button → Search for '**Google Sheet**' → Select it. Pick a trigger event (e.g., **New Or Updated Spreadsheet Row** in Google Sheets).

![10](https://support.braincert.com/kb/attachment/article/264/inline?token=eyJhbGciOiJodHRwOi8vd3d3LnczLm9yZy8yMDAxLzA0L3htbGRzaWctbW9yZSNobWFjLXNoYTI1NiIsInR5cCI6IkpXVCJ9.eyJpZCI6IjY5ODMiLCJvcmdpZCI6IjE2MDMiLCJpc3MiOiJzdXBwb3J0LmJyYWluY2VydC5jb20ifQ.QuGJeDpwBj51IVH9HprVAl-RmTAIpSc8XMtqxVhPYKk)

##   

## Part 3: Add BrainCert Action

## Step 9: Add Action Step

Click **+ Add Action** → Search for **BrainCert** → Select it. You’ll see a list of supported BrainCert actions. Example: *Create User*.

![11](https://support.braincert.com/kb/attachment/article/264/inline?token=eyJhbGciOiJodHRwOi8vd3d3LnczLm9yZy8yMDAxLzA0L3htbGRzaWctbW9yZSNobWFjLXNoYTI1NiIsInR5cCI6IkpXVCJ9.eyJpZCI6IjY5ODIiLCJvcmdpZCI6IjE2MDMiLCJpc3MiOiJzdXBwb3J0LmJyYWluY2VydC5jb20ifQ.JJ8ALIJhVUbaXjMQqGd7ztKgAZno6EAc03tCwgmIcFk)

##   

## Step 10: Configure BrainCert Action

Example (Google Sheets → Enroll User):

- **Name** → Sheet Column A
- **Email** → Sheet Column B
- **Course ID** → Manually select from BrainCert

Depending on the action, you may need to provide additional details. Click '**Capture Response'** → Once you see the response, click '**Continue'**.

![13](https://support.braincert.com/kb/attachment/article/264/inline?token=eyJhbGciOiJodHRwOi8vd3d3LnczLm9yZy8yMDAxLzA0L3htbGRzaWctbW9yZSNobWFjLXNoYTI1NiIsInR5cCI6IkpXVCJ9.eyJpZCI6IjY5ODQiLCJvcmdpZCI6IjE2MDMiLCJpc3MiOiJzdXBwb3J0LmJyYWluY2VydC5jb20ifQ.F0uLR0W0BhB8G1gHpesGV0U4VSHuKTZ3f6sRJnUpO2Q)

##   

## Step 11: Add Conditions

If needed, enable **Conditional Execution** to only run the action when specific conditions are met (e.g., only enroll if `Payment Status = Success`).  

Click **Save & Close**.

![14](https://support.braincert.com/kb/attachment/article/264/inline?token=eyJhbGciOiJodHRwOi8vd3d3LnczLm9yZy8yMDAxLzA0L3htbGRzaWctbW9yZSNobWFjLXNoYTI1NiIsInR5cCI6IkpXVCJ9.eyJpZCI6IjY5ODUiLCJvcmdpZCI6IjE2MDMiLCJpc3MiOiJzdXBwb3J0LmJyYWluY2VydC5jb20ifQ.KE-Mdm9-8T3AaS1hjdMzD21MeEa37-pqMtJajl3iolE)

##   

## Part 4: Test & Activate

## Step 12: Run a Test

Add sample data in your Trigger app (e.g., add a row in Google Sheets). Check BrainCert → The user should be created/enrolled/assigned as per action. If the test succeeds → Click **Save Automation** → Switch it **ON**.

![15](https://support.braincert.com/kb/attachment/article/264/inline?token=eyJhbGciOiJodHRwOi8vd3d3LnczLm9yZy8yMDAxLzA0L3htbGRzaWctbW9yZSNobWFjLXNoYTI1NiIsInR5cCI6IkpXVCJ9.eyJpZCI6IjY5ODYiLCJvcmdpZCI6IjE2MDMiLCJpc3MiOiJzdXBwb3J0LmJyYWluY2VydC5jb20ifQ.fhqxcdB42tPBO2065qR0x216iFss_kL7RPkIpLFjx5A)

Your **Flowmattic–BrainCert Action integration** is now active.  

From now on, whenever the trigger happens (e.g., form submission, order, or sheet update), BrainCert will automatically perform the selected action.

##   

## Notes & Recommendations

- Ensure your **API Key** is active in BrainCert under **Extensions**.
- Required fields must be mapped correctly; otherwise, the action will fail.
- For testing, start with a **dummy user** before going live.
- Use **Conditions** in Flowmattic if you only want BrainCert actions for specific cases (e.g., only enroll if payment = success).

You’ve now successfully set up a **BrainCert Action** in Flowmattic using the **“User Created”** event as an example. This automation helps you eliminate manual work by instantly updating your connected apps whenever new users are added to BrainCert.

From here, you can explore other BrainCert actions in Flowmattic, such as course enrollment, assessment completion, or certificate issuance, to create powerful automations tailored to your training needs.

# Steps to Use the Dashboards to Activate and Manage Multiple Domains

This article helps to create, enable, disable, and manage multiple domains in the Reseller Portal.

<iframe src="https://player.vimeo.com/video/958316503?badge=0&amp;autopause=0&amp;player_id=0&amp;app_id=58479" frameborder="0" allow="autoplay; fullscreen; picture-in-picture; clipboard-write" style="position:absolute;top:0;left:0;width:100%;height:100%;" title="Activate and Manage Multiple Domains">&ZeroWidthSpace;</iframe>

##   

## **Step 1:** 

Login to your **'Reseller Portal**' on the App site  [https://app.braincert.com/](https://app.braincert.com/).![1.png](https://support.braincert.com/kb/attachment/article/37/inline?token=eyJhbGciOiJodHRwOi8vd3d3LnczLm9yZy8yMDAxLzA0L3htbGRzaWctbW9yZSNobWFjLXNoYTI1NiIsInR5cCI6IkpXVCJ9.eyJpZCI6IjU2OTQiLCJvcmdpZCI6IjE2MDMiLCJpc3MiOiJzdXBwb3J0LmJyYWluY2VydC5jb20ifQ.VT_psoUnqOqfocnw1-Ck3g6UmpKxnBjyE3IkrZd6DF4)

## **Domain Creation**

## **Step 2:**

Click on "**Create Domain**" to create a new domain and manage it.![2.png](https://support.braincert.com/kb/attachment/article/37/inline?token=eyJhbGciOiJodHRwOi8vd3d3LnczLm9yZy8yMDAxLzA0L3htbGRzaWctbW9yZSNobWFjLXNoYTI1NiIsInR5cCI6IkpXVCJ9.eyJpZCI6IjU2OTUiLCJvcmdpZCI6IjE2MDMiLCJpc3MiOiJzdXBwb3J0LmJyYWluY2VydC5jb20ifQ.DyvfYYngYrTSDexagolNJyu57D8rXb9yAA7pkQ5c8Hk)

##   

## **Step 3:**

**​**Enter the domain name and click “**Save**”. Multiple domains can be created by following the same process.![3.png](https://support.braincert.com/kb/attachment/article/37/inline?token=eyJhbGciOiJodHRwOi8vd3d3LnczLm9yZy8yMDAxLzA0L3htbGRzaWctbW9yZSNobWFjLXNoYTI1NiIsInR5cCI6IkpXVCJ9.eyJpZCI6IjU2OTYiLCJvcmdpZCI6IjE2MDMiLCJpc3MiOiJzdXBwb3J0LmJyYWluY2VydC5jb20ifQ.9Zg7wXV3iszKbe5Dex7qgSqqbPUWUwVxopGo-WGZw24)

## **<u style="box-sizing: border-box;"><br>Activating or Deactivating a Domain</u>**  
**Step 4:**

Use the toggle switch under the status to **“Enable or Disable**” the selected domain. Once a domain is disabled it will not be visible.

To enable it again the toggle switch can be used.

![4.png](https://support.braincert.com/kb/attachment/article/37/inline?token=eyJhbGciOiJodHRwOi8vd3d3LnczLm9yZy8yMDAxLzA0L3htbGRzaWctbW9yZSNobWFjLXNoYTI1NiIsInR5cCI6IkpXVCJ9.eyJpZCI6IjU2OTciLCJvcmdpZCI6IjE2MDMiLCJpc3MiOiJzdXBwb3J0LmJyYWluY2VydC5jb20ifQ.G0nU-31K0774a7hZn1k80i7coGQF01sSWczzoxH5ZlE)

**Please refer to the following articles:**

[Steps to Setup Custom Hostname and SSL Certificate for your Virtual Classroom (VC) API Domain](https://support.braincert.com/kb/article/119/steps-to-setup-custom-hostname-and-ssl-certificate-for-your-virtual-classroom-vc-api-domain "https://support.braincert.com/kb/article/119/steps-to-setup-custom-hostname-and-ssl-certificate-for-your-virtual-classroom-vc-api-domain")
[Steps to Setup Custom Hostname and SSL Certificate for your LMS Domain in 5 Minutes](https://support.braincert.com/kb/article/51/steps-to-setup-custom-hostname-and-ssl-certificate-for-your-lms-domain-in-5-minutes "https://support.braincert.com/kb/article/51/steps-to-setup-custom-hostname-and-ssl-certificate-for-your-lms-domain-in-5-minutes")

# How to Enable Cookie Consent Extension

The Cookie Consent feature helps you comply with data privacy regulations by notifying visitors that your platform uses cookies. Follow the steps below to enable and position the consent banner on your site.

##   
Step 1: Open Apps & Extensions

Log in to your admin dashboard, click '**Global Settings**', and select '**Apps & Extensions**'.

![1](https://support.braincert.com/kb/attachment/article/269/inline?token=eyJhbGciOiJodHRwOi8vd3d3LnczLm9yZy8yMDAxLzA0L3htbGRzaWctbW9yZSNobWFjLXNoYTI1NiIsInR5cCI6IkpXVCJ9.eyJpZCI6IjcwMjIiLCJvcmdpZCI6IjE2MDMiLCJpc3MiOiJzdXBwb3J0LmJyYWluY2VydC5jb20ifQ.rWgRgmd_dHpYDgKU_EIRY4V1J-JofbS079JB9ukSKo0)

##   
Step 2: Locate Cookie Consent

Locate '**Cookie Consent'** from the list of available extensions.

![7](https://support.braincert.com/kb/attachment/article/269/inline?token=eyJhbGciOiJodHRwOi8vd3d3LnczLm9yZy8yMDAxLzA0L3htbGRzaWctbW9yZSNobWFjLXNoYTI1NiIsInR5cCI6IkpXVCJ9.eyJpZCI6IjcwMjkiLCJvcmdpZCI6IjE2MDMiLCJpc3MiOiJzdXBwb3J0LmJyYWluY2VydC5jb20ifQ.2msy9WdNOJkbDkXt0f4Ea1hzgRqEo6lTtcNsrPHBIv4)

##   
Step 3: Set Banner Alignment 'Left'

To align the banner to the left side of the screen, select the '**Align Left**' option under banner alignment and click '**Save**'.

![1](https://support.braincert.com/kb/attachment/article/269/inline?token=eyJhbGciOiJodHRwOi8vd3d3LnczLm9yZy8yMDAxLzA0L3htbGRzaWctbW9yZSNobWFjLXNoYTI1NiIsInR5cCI6IkpXVCJ9.eyJpZCI6IjcwMjMiLCJvcmdpZCI6IjE2MDMiLCJpc3MiOiJzdXBwb3J0LmJyYWluY2VydC5jb20ifQ._ZAsIK_v_0zf7nc79NvE0QAhXUjRzQZEjbUsWVhoMK0)

##   
Left Alignment

The image below shows how the cookie consent banner appears when **aligned to the left**.

![2](https://support.braincert.com/kb/attachment/article/269/inline?token=eyJhbGciOiJodHRwOi8vd3d3LnczLm9yZy8yMDAxLzA0L3htbGRzaWctbW9yZSNobWFjLXNoYTI1NiIsInR5cCI6IkpXVCJ9.eyJpZCI6IjcwMjQiLCJvcmdpZCI6IjE2MDMiLCJpc3MiOiJzdXBwb3J0LmJyYWluY2VydC5jb20ifQ.lor6WxL1TQItwQ6wnmA-lcFgncdENqJ-bSfAhMsqo7c)

##   
Step 4: Set Banner Alignment 'Center'

To align the banner to the left side of the screen, select the '**Align Center**' option under banner alignment and click '**Save**'.
<section class="info-box">Center alignment is most commonly used for better visibility and user engagement.</section>
![3](https://support.braincert.com/kb/attachment/article/269/inline?token=eyJhbGciOiJodHRwOi8vd3d3LnczLm9yZy8yMDAxLzA0L3htbGRzaWctbW9yZSNobWFjLXNoYTI1NiIsInR5cCI6IkpXVCJ9.eyJpZCI6IjcwMjUiLCJvcmdpZCI6IjE2MDMiLCJpc3MiOiJzdXBwb3J0LmJyYWluY2VydC5jb20ifQ.WBDTDPwlauhkmlitFnbyjsnnePFKcKYvbbLyvKRTLwE)

##   
Center Alignment

The image below shows how the cookie consent banner appears when **aligned to the center**.

![4](https://support.braincert.com/kb/attachment/article/269/inline?token=eyJhbGciOiJodHRwOi8vd3d3LnczLm9yZy8yMDAxLzA0L3htbGRzaWctbW9yZSNobWFjLXNoYTI1NiIsInR5cCI6IkpXVCJ9.eyJpZCI6IjcwMjYiLCJvcmdpZCI6IjE2MDMiLCJpc3MiOiJzdXBwb3J0LmJyYWluY2VydC5jb20ifQ.RuKZ_Oq8ektYHQi7U70npG_DCh2rNk4AFp_z5SOrXgk)

##   
Step 5: Set Banner Alignment 'Right'

To align the banner to the left side of the screen, select the '**Align Right**' option under banner alignment and click '**Save**'.

![5](https://support.braincert.com/kb/attachment/article/269/inline?token=eyJhbGciOiJodHRwOi8vd3d3LnczLm9yZy8yMDAxLzA0L3htbGRzaWctbW9yZSNobWFjLXNoYTI1NiIsInR5cCI6IkpXVCJ9.eyJpZCI6IjcwMjciLCJvcmdpZCI6IjE2MDMiLCJpc3MiOiJzdXBwb3J0LmJyYWluY2VydC5jb20ifQ.KfCr8oqqXBM0gxwj9aChVBQGjYEdne6PXUEZ4mX7RxY)

##   
Right Alignment

The image below shows how the cookie consent banner appears when **aligned to the right**.

![6](https://support.braincert.com/kb/attachment/article/269/inline?token=eyJhbGciOiJodHRwOi8vd3d3LnczLm9yZy8yMDAxLzA0L3htbGRzaWctbW9yZSNobWFjLXNoYTI1NiIsInR5cCI6IkpXVCJ9.eyJpZCI6IjcwMjgiLCJvcmdpZCI6IjE2MDMiLCJpc3MiOiJzdXBwb3J0LmJyYWluY2VydC5jb20ifQ.k3BFsvin8SoO_M-1WoB2oKWMqegPVYpIiDyWoHHB5FQ)

Your **Cookie Consent** banner is now active. Visitors will see it when they access your platform, ensuring transparency and compliance with cookie regulations.

# Steps to Create Polls or Surveys in Virtual Classroom

The online polling feature is a must in virtual classrooms to collect feedback from attendees. This article will guide you through the steps to create polls or surveys in the BrainCert virtual classroom.

## **Step 1:**

Start your classroom session and click on the Poll button on the bottom right.

![](https://support.braincert.com/kb/attachment/article/131/inline?token=eyJhbGciOiJodHRwOi8vd3d3LnczLm9yZy8yMDAxLzA0L3htbGRzaWctbW9yZSNobWFjLXNoYTI1NiIsInR5cCI6IkpXVCJ9.eyJpZCI6IjQzMDgiLCJvcmdpZCI6IjE2MDMiLCJpc3MiOiJzdXBwb3J0LmJyYWluY2VydC5jb20ifQ.gq_RqFB-spD80JfFItEcckgVqP-9N9_3gZnKWAWiVZU)

## **Step 2:**

Once you open polls you will see a popup on your screen as shown below. This is where you need to add your poll questions.

To add questions to poll, type in your question on the top box. To add multiple options, click on '**Add New Option'** and when you are done, click on the '**Publish Poll'** button for attendees to attempt the poll.

![](https://support.braincert.com/kb/attachment/article/131/inline?token=eyJhbGciOiJodHRwOi8vd3d3LnczLm9yZy8yMDAxLzA0L3htbGRzaWctbW9yZSNobWFjLXNoYTI1NiIsInR5cCI6IkpXVCJ9.eyJpZCI6IjQzMDkiLCJvcmdpZCI6IjE2MDMiLCJpc3MiOiJzdXBwb3J0LmJyYWluY2VydC5jb20ifQ.TTAnrvmHhV9iZfuWE8tpH6Gx8kn0jtSJCSJy7VfvD2o)

## **Step 3:**

With the poll feature in BrainCert virtual classroom instructors can decide whether the attendees can see the poll results or not. Use the toggle button to allow attendees to see the poll results after the poll.

![](https://support.braincert.com/kb/attachment/article/131/inline?token=eyJhbGciOiJodHRwOi8vd3d3LnczLm9yZy8yMDAxLzA0L3htbGRzaWctbW9yZSNobWFjLXNoYTI1NiIsInR5cCI6IkpXVCJ9.eyJpZCI6IjQzMTAiLCJvcmdpZCI6IjE2MDMiLCJpc3MiOiJzdXBwb3J0LmJyYWluY2VydC5jb20ifQ.ZGWwQfAvkeT-wk2pmA668-udzdbe7IrTHn6qKbTf5KY)

## **Step 4:**

To end the poll click on the '**End poll**' icon.

![](https://support.braincert.com/kb/attachment/article/131/inline?token=eyJhbGciOiJodHRwOi8vd3d3LnczLm9yZy8yMDAxLzA0L3htbGRzaWctbW9yZSNobWFjLXNoYTI1NiIsInR5cCI6IkpXVCJ9.eyJpZCI6IjQzMTEiLCJvcmdpZCI6IjE2MDMiLCJpc3MiOiJzdXBwb3J0LmJyYWluY2VydC5jb20ifQ.tBJEGa-dv_9xbs-XR72AbZ6XisNkmoEbfAKP2HI9x4g)

Hope this article is helpful.

# How to Change the Course Player Theme

The course player in the BrainCert training platform comes built-in with various features to enhance the educational experiences. The theme of the course player can be changed as per your requirement by using the below-mentioned steps.

<iframe src="https://player.vimeo.com/video/1011291551?title=0&amp;byline=0&amp;portrait=0&amp;badge=0&amp;autopause=0&amp;player_id=0&amp;app_id=58479" frameborder="0" allow="autoplay; fullscreen; picture-in-picture; clipboard-write" style="position:absolute;top:0;left:0;width:100%;height:100%;" title="How to Change the Course Player Theme">&ZeroWidthSpace;</iframe>

## **Step 1:**

Scroll over to the '**Global Settings'** and open '**Branding**' in it.

![1.png](https://support.braincert.com/kb/attachment/article/64/inline?token=eyJhbGciOiJodHRwOi8vd3d3LnczLm9yZy8yMDAxLzA0L3htbGRzaWctbW9yZSNobWFjLXNoYTI1NiIsInR5cCI6IkpXVCJ9.eyJpZCI6IjUxNTciLCJvcmdpZCI6IjE2MDMiLCJpc3MiOiJzdXBwb3J0LmJyYWluY2VydC5jb20ifQ.coSUqGeLm5jwJebR6pXlcCa5OGYrDSsuRPJpYSk-mso)

#####  

## **Step 2:**

Now, click on '**Course Player theme**' click to edit the menu color.

You can change theme colors which include the course header menu background, course header menu text, chapter header, and more.

![2.png](https://support.braincert.com/kb/attachment/article/64/inline?token=eyJhbGciOiJodHRwOi8vd3d3LnczLm9yZy8yMDAxLzA0L3htbGRzaWctbW9yZSNobWFjLXNoYTI1NiIsInR5cCI6IkpXVCJ9.eyJpZCI6IjUxNTkiLCJvcmdpZCI6IjE2MDMiLCJpc3MiOiJzdXBwb3J0LmJyYWluY2VydC5jb20ifQ.3QNOBSRTLvnVrB39NKalAHOYcih18jUZkq1kPlRVhFw)

##   

## **Step 3:**

After making the necessary settings, click '**Save**.' Otherwise, click the '**Reset**' button to restore the defaults.

# Configuring SAML 2.0 with OneLogin

The OneLogin platform is an access management system that uses single sign-on (SSO) and a cloud directory to enable organizations to manage user access to on-premises and cloud applications. It is a tool to help empower employees, customers, and partners with secure access to your cloud and company apps on all devices.

Basically, it gives a layer of security and access to manage business applications. Instead of having to remember multiple passwords, URLs, and what apps you have access to, you are directed to an easy application catalog that will list your apps and can provide single sign-on.

Here is how users can configure SAML in BrainCert with OneLogin.

## **Step 1: Log in to your OneLogin account**

Log in to your OneLogin account. Click on the '**Applications**' menu and select '**Applications**'.

![](https://support.braincert.com/kb/attachment/article/16/inline?token=eyJhbGciOiJodHRwOi8vd3d3LnczLm9yZy8yMDAxLzA0L3htbGRzaWctbW9yZSNobWFjLXNoYTI1NiIsInR5cCI6IkpXVCJ9.eyJpZCI6IjQxMjQiLCJvcmdpZCI6IjE2MDMiLCJpc3MiOiJzdXBwb3J0LmJyYWluY2VydC5jb20ifQ.VQE974ZwgBcCwzXAHc8pvo-f5edpg3KNUsWPyecUiV8)

## **Step 2: Select SAML Test Connector**

Click on '**Add App**', search for SAML Test Connector, and select the app.

![](https://support.braincert.com/kb/attachment/article/16/inline?token=eyJhbGciOiJodHRwOi8vd3d3LnczLm9yZy8yMDAxLzA0L3htbGRzaWctbW9yZSNobWFjLXNoYTI1NiIsInR5cCI6IkpXVCJ9.eyJpZCI6IjQxMjUiLCJvcmdpZCI6IjE2MDMiLCJpc3MiOiJzdXBwb3J0LmJyYWluY2VydC5jb20ifQ.MpCfrsK7tiivvGpI3Mc0EWHunZ0LZKEFsQ4NCncemGE)

![](https://support.braincert.com/kb/attachment/article/16/inline?token=eyJhbGciOiJodHRwOi8vd3d3LnczLm9yZy8yMDAxLzA0L3htbGRzaWctbW9yZSNobWFjLXNoYTI1NiIsInR5cCI6IkpXVCJ9.eyJpZCI6IjQxMjYiLCJvcmdpZCI6IjE2MDMiLCJpc3MiOiJzdXBwb3J0LmJyYWluY2VydC5jb20ifQ.WxKUQoIZKfkS3mibzINhUegqtlibZhtXe2AvWWC3gKs)

##   
**Step 3: Create a New SAML Application**

Create a new SAML Application provide the display name and click '**Save**'.

![](https://support.braincert.com/kb/attachment/article/16/inline?token=eyJhbGciOiJodHRwOi8vd3d3LnczLm9yZy8yMDAxLzA0L3htbGRzaWctbW9yZSNobWFjLXNoYTI1NiIsInR5cCI6IkpXVCJ9.eyJpZCI6IjQxMjciLCJvcmdpZCI6IjE2MDMiLCJpc3MiOiJzdXBwb3J0LmJyYWluY2VydC5jb20ifQ.O_uXp4Bb2sCoRnqNkecL2fRmeap6gGzGOJOTFGBhyaM)

##   
**Step 4: Configure OneLogin**

To configure OneLogin with details from your BrainCert SSO dashboard, enter all the service provider details from the BrainCert LMS SSO dashboard to the OneLogin (IdP) Configuration Dashboard.

**BrainCert Dashboard**

Navigate to '**Global Settings**' --&gt; '**Extensions**' --&gt; '**SAML 2.0**'.

Toggle the switch and click ' **Save**'.

## **![1.png](https://support.braincert.com/kb/attachment/article/16/inline?token=eyJhbGciOiJodHRwOi8vd3d3LnczLm9yZy8yMDAxLzA0L3htbGRzaWctbW9yZSNobWFjLXNoYTI1NiIsInR5cCI6IkpXVCJ9.eyJpZCI6IjU1MTIiLCJvcmdpZCI6IjE2MDMiLCJpc3MiOiJzdXBwb3J0LmJyYWluY2VydC5jb20ifQ.1fSX7UgEm1v7au6FePbyRYNoYdteMAXgqs2GwTxCvSc)Service Provider**

**​**Copy Audience(**Entity ID**), **Recipient**, **ACS** (consumer) **URL** Validator, **ACS**(Consumer) **URL**, and **Single Logout URL** and paste it in the corresponding fields in OneLogin (IdP). Leave the remaining field blank.

****

![1.png](https://support.braincert.com/kb/attachment/article/16/inline?token=eyJhbGciOiJodHRwOi8vd3d3LnczLm9yZy8yMDAxLzA0L3htbGRzaWctbW9yZSNobWFjLXNoYTI1NiIsInR5cCI6IkpXVCJ9.eyJpZCI6IjU1NzYiLCJvcmdpZCI6IjE2MDMiLCJpc3MiOiJzdXBwb3J0LmJyYWluY2VydC5jb20ifQ.OzrM1NA_raqtozliZm3_YKcsnwNmdL9CedwSitfV1cU)

**OneLogin Dashboard**:

![](https://support.braincert.com/kb/attachment/article/16/inline?token=eyJhbGciOiJodHRwOi8vd3d3LnczLm9yZy8yMDAxLzA0L3htbGRzaWctbW9yZSNobWFjLXNoYTI1NiIsInR5cCI6IkpXVCJ9.eyJpZCI6IjQxMjkiLCJvcmdpZCI6IjE2MDMiLCJpc3MiOiJzdXBwb3J0LmJyYWluY2VydC5jb20ifQ.YoAyWbXGdRbxgr-V_9mGL3NFU36Y44Bq3ubgg9W-JN0)

###   

## **Step 5: Add the Identity Provider Details From OneLogin**

To add the identity provider details from OneLogin to the BrainCert SAML dashboard, go to the '**SSO'** tab on the OneLogin menu and copy the **Issuer URL, the SAML 2.0 Endpoint**, and the **SLO Endpoint** and paste it into BrainCert '**Identity Provider Details field**'.

**OneLogin Dashboard:**

![](https://support.braincert.com/kb/attachment/article/16/inline?token=eyJhbGciOiJodHRwOi8vd3d3LnczLm9yZy8yMDAxLzA0L3htbGRzaWctbW9yZSNobWFjLXNoYTI1NiIsInR5cCI6IkpXVCJ9.eyJpZCI6IjQxMzAiLCJvcmdpZCI6IjE2MDMiLCJpc3MiOiJzdXBwb3J0LmJyYWluY2VydC5jb20ifQ.anz7vEBa27fRThCwF4VQ5ZFchqCaLn9pX00LVKP9gu0)

Click on '**View Details**' below the X.509 certificate field and it will redirect you to the certificate page. Copy the '**X.509 Certificate**' and paste it into the LMS Dashboard.

![](https://support.braincert.com/kb/attachment/article/16/inline?token=eyJhbGciOiJodHRwOi8vd3d3LnczLm9yZy8yMDAxLzA0L3htbGRzaWctbW9yZSNobWFjLXNoYTI1NiIsInR5cCI6IkpXVCJ9.eyJpZCI6IjQxMzEiLCJvcmdpZCI6IjE2MDMiLCJpc3MiOiJzdXBwb3J0LmJyYWluY2VydC5jb20ifQ.rIFapzIk7dVwacZAFNzGhz4ejPjqv8f-o3WNM7rw9cM)

![](https://support.braincert.com/kb/attachment/article/16/inline?token=eyJhbGciOiJodHRwOi8vd3d3LnczLm9yZy8yMDAxLzA0L3htbGRzaWctbW9yZSNobWFjLXNoYTI1NiIsInR5cCI6IkpXVCJ9.eyJpZCI6IjQxMzMiLCJvcmdpZCI6IjE2MDMiLCJpc3MiOiJzdXBwb3J0LmJyYWluY2VydC5jb20ifQ.TGmA8GlRGa1UTIFf0de2GVNvtk1nwTGZbXVF_DwDDTs)

**BrainCert Dashboard:**

Paste the Issuer URL from OneLogin at the '**Entity ID**' on BrainCert. SAML 2.0 Endpoint in the '**SSO Service URL**' field, SLO Endpoint in '**SSO Logout Service URL**', and also paste the **X.509 Certificate**. Once this is done, '**Save**' the settings.

![2.png](https://support.braincert.com/kb/attachment/article/16/inline?token=eyJhbGciOiJodHRwOi8vd3d3LnczLm9yZy8yMDAxLzA0L3htbGRzaWctbW9yZSNobWFjLXNoYTI1NiIsInR5cCI6IkpXVCJ9.eyJpZCI6IjU1NzciLCJvcmdpZCI6IjE2MDMiLCJpc3MiOiJzdXBwb3J0LmJyYWluY2VydC5jb20ifQ.rb5XRA7BT71BzJ4hCXiOMvqMhFXN28l8PkNob3d02ZQ)

## **Step 6: Profile Field Mapping**

Now add the parameter Group to map BrainCert to OneLogin. Click the '**Profile Field Mapping**' on the OneLogin dashboard and add the attributes email, First Name, Last Name, and Username as given in the LMS Profile Field Mapping.

**BrainCert Dashboard:**

**![3.png](https://support.braincert.com/kb/attachment/article/16/inline?token=eyJhbGciOiJodHRwOi8vd3d3LnczLm9yZy8yMDAxLzA0L3htbGRzaWctbW9yZSNobWFjLXNoYTI1NiIsInR5cCI6IkpXVCJ9.eyJpZCI6IjU1NzgiLCJvcmdpZCI6IjE2MDMiLCJpc3MiOiJzdXBwb3J0LmJyYWluY2VydC5jb20ifQ.ZZHwzlBxpnqZovQBU78d0Bs8jxic1i1N58wCm7aJ8bs)**

**OneLogin Dashboard**:

Select the parameters tab on the OneLogin dashboard and click '**Add Attributes**'.

![](https://support.braincert.com/kb/attachment/article/16/inline?token=eyJhbGciOiJodHRwOi8vd3d3LnczLm9yZy8yMDAxLzA0L3htbGRzaWctbW9yZSNobWFjLXNoYTI1NiIsInR5cCI6IkpXVCJ9.eyJpZCI6IjQxMzUiLCJvcmdpZCI6IjE2MDMiLCJpc3MiOiJzdXBwb3J0LmJyYWluY2VydC5jb20ifQ.aqd6Ihkl8CEyIzid2Er9SVQkEgTUd1LqUIyvWvuaQiU)

Enter the attributes select the checkbox '**Include in SAML Assertion**' and click '**Save**'.

![](https://support.braincert.com/kb/attachment/article/16/inline?token=eyJhbGciOiJodHRwOi8vd3d3LnczLm9yZy8yMDAxLzA0L3htbGRzaWctbW9yZSNobWFjLXNoYTI1NiIsInR5cCI6IkpXVCJ9.eyJpZCI6IjQxMzYiLCJvcmdpZCI6IjE2MDMiLCJpc3MiOiJzdXBwb3J0LmJyYWluY2VydC5jb20ifQ.bBDmEEZG1n0kDY5uL1fCe5ZCLcVnVMNE15ONfrKInKU)

##   
**Step 7: Group Mapping**

Click on '**Group Mapping**' in the LMS and select the default group and roles from the drop-down menu. Note that users will automatically be registered in these groups at their first login. They will also be enrolled in all the courses/tests assigned to that group.

![4.png](https://support.braincert.com/kb/attachment/article/16/inline?token=eyJhbGciOiJodHRwOi8vd3d3LnczLm9yZy8yMDAxLzA0L3htbGRzaWctbW9yZSNobWFjLXNoYTI1NiIsInR5cCI6IkpXVCJ9.eyJpZCI6IjU1NzkiLCJvcmdpZCI6IjE2MDMiLCJpc3MiOiJzdXBwb3J0LmJyYWluY2VydC5jb20ifQ.JmYGjUdXBATvQoery7xRDPayxCZR8lRdC-LQEql5OpM)

Save all the settings and check your configuration. Once you have double-checked the configuration, open the LMS SSO identity providers and click on **Connect**.

![2.png](https://support.braincert.com/kb/attachment/article/16/inline?token=eyJhbGciOiJodHRwOi8vd3d3LnczLm9yZy8yMDAxLzA0L3htbGRzaWctbW9yZSNobWFjLXNoYTI1NiIsInR5cCI6IkpXVCJ9.eyJpZCI6IjU1ODAiLCJvcmdpZCI6IjE2MDMiLCJpc3MiOiJzdXBwb3J0LmJyYWluY2VydC5jb20ifQ.BIIoy2TpJuypgVwi18eXoKm1YkeevQCeBwNRwLP-IIk)

Congrats, you have successfully configured SAML with OneLogin.

# Edit, Clone, Copy, Move Test Questions

This article will guide you through the steps to edit, clone, copy and move test questions.

## **Step 1:**

Login to the training platform and navigate to 'Assessments'. Once you select 'Assessments', you will be redirected to a page with the list of tests you have created. Click on '**Options**' corresponding to the test you need to edit and select '**Questions**'.

![1.png](https://support.braincert.com/kb/attachment/article/117/inline?token=eyJhbGciOiJodHRwOi8vd3d3LnczLm9yZy8yMDAxLzA0L3htbGRzaWctbW9yZSNobWFjLXNoYTI1NiIsInR5cCI6IkpXVCJ9.eyJpZCI6IjUyOTYiLCJvcmdpZCI6IjE2MDMiLCJpc3MiOiJzdXBwb3J0LmJyYWluY2VydC5jb20ifQ.aGLXnfwh2azYgjmJRm99HSJRqb0G5yOr9bofsfcbEMs)

Once you select Questions you will be redirected to the page with a list of all questions in that particular test.

##   

## **<u style="box-sizing: border-box;">Editing Test Questions</u>**

## **Step 2:**

Select '**Edit Question**' corresponding to the test question you need to edit.

![2.png](https://support.braincert.com/kb/attachment/article/117/inline?token=eyJhbGciOiJodHRwOi8vd3d3LnczLm9yZy8yMDAxLzA0L3htbGRzaWctbW9yZSNobWFjLXNoYTI1NiIsInR5cCI6IkpXVCJ9.eyJpZCI6IjUyOTciLCJvcmdpZCI6IjE2MDMiLCJpc3MiOiJzdXBwb3J0LmJyYWluY2VydC5jb20ifQ.tw52xBkq4VScW6iSpoySzD14F4cmC2YYar-6b6f6SDU)

## **Step 3:**

You will be redirected to the question editor interface where you can make necessary changes to the test question. Save the question after you are done making changes to it.

![3.png](https://support.braincert.com/kb/attachment/article/117/inline?token=eyJhbGciOiJodHRwOi8vd3d3LnczLm9yZy8yMDAxLzA0L3htbGRzaWctbW9yZSNobWFjLXNoYTI1NiIsInR5cCI6IkpXVCJ9.eyJpZCI6IjUyOTgiLCJvcmdpZCI6IjE2MDMiLCJpc3MiOiJzdXBwb3J0LmJyYWluY2VydC5jb20ifQ.FhZPpUoFtQ_FmFfO0HmQ_HTuF1-g_lYSB42nH3i4kWs)

##   

## **<u>Moving a Test Question</u>**

## **Step 4:**

Select '**Move Question**' corresponding to the question which you need to move.

![4.png](https://support.braincert.com/kb/attachment/article/117/inline?token=eyJhbGciOiJodHRwOi8vd3d3LnczLm9yZy8yMDAxLzA0L3htbGRzaWctbW9yZSNobWFjLXNoYTI1NiIsInR5cCI6IkpXVCJ9.eyJpZCI6IjUyOTkiLCJvcmdpZCI6IjE2MDMiLCJpc3MiOiJzdXBwb3J0LmJyYWluY2VydC5jb20ifQ.o0zsjOcfADsQS04Yq4F_KE-RoR2gcjo6Y35NAtUk8-U)

##   

## **Step 5:**

Select the target test to which you need to move the selected question and click submit.

![5.png](https://support.braincert.com/kb/attachment/article/117/inline?token=eyJhbGciOiJodHRwOi8vd3d3LnczLm9yZy8yMDAxLzA0L3htbGRzaWctbW9yZSNobWFjLXNoYTI1NiIsInR5cCI6IkpXVCJ9.eyJpZCI6IjUzMDAiLCJvcmdpZCI6IjE2MDMiLCJpc3MiOiJzdXBwb3J0LmJyYWluY2VydC5jb20ifQ.jGuRXblNRG7ZyFlFKYaP91iqFIdvqWXGINl0rp0n2AM)

##   

## **<u>Copying Test Questions</u>**

## **Step 6:**

Select '**Copy Question**' corresponding to the question you need to copy.

![6.png](https://support.braincert.com/kb/attachment/article/117/inline?token=eyJhbGciOiJodHRwOi8vd3d3LnczLm9yZy8yMDAxLzA0L3htbGRzaWctbW9yZSNobWFjLXNoYTI1NiIsInR5cCI6IkpXVCJ9.eyJpZCI6IjUzMDEiLCJvcmdpZCI6IjE2MDMiLCJpc3MiOiJzdXBwb3J0LmJyYWluY2VydC5jb20ifQ.zvIpKPSA4Dm9lplcnAkfF1eXeM2-Y4THMNtUy0Z-f94)

##   

## **Step 7:**

Select the target test to which you need to copy the selected question and click submit.

![7.png](https://support.braincert.com/kb/attachment/article/117/inline?token=eyJhbGciOiJodHRwOi8vd3d3LnczLm9yZy8yMDAxLzA0L3htbGRzaWctbW9yZSNobWFjLXNoYTI1NiIsInR5cCI6IkpXVCJ9.eyJpZCI6IjUzMDIiLCJvcmdpZCI6IjE2MDMiLCJpc3MiOiJzdXBwb3J0LmJyYWluY2VydC5jb20ifQ.OdGGfLxrrZbjhmeQicbeoR3hXrJZi_mqJ9WFnabTwqI)

##   

## **<u style="box-sizing: border-box;">Cloning a Test</u>**

## **Step 8:**

Navigate to '**Assessments**' from the dashboard and select '**Clone**' from options.

![8.png](https://support.braincert.com/kb/attachment/article/117/inline?token=eyJhbGciOiJodHRwOi8vd3d3LnczLm9yZy8yMDAxLzA0L3htbGRzaWctbW9yZSNobWFjLXNoYTI1NiIsInR5cCI6IkpXVCJ9.eyJpZCI6IjUzMDMiLCJvcmdpZCI6IjE2MDMiLCJpc3MiOiJzdXBwb3J0LmJyYWluY2VydC5jb20ifQ.aTtm3ztJbdVpfTHKIFsdgFmOBD8Fol-iTsl_nLPr11s)

Once you select clone the test will automatically be cloned and saved as shown below.

We hope you found this article helpful.

# A Guide to Catalog Settings

This article provides guidance on how to customize your online learning environment by changing its appearance, adjusting learner details, and adding features for logged-in users.

​​

<iframe src="https://player.vimeo.com/video/977844482?h=5dfa861a48&amp;title=0&amp;byline=0&amp;portrait=0&amp;badge=0&amp;autopause=0&amp;player_id=0&amp;app_id=58479" frameborder="0" allow="autoplay; fullscreen; picture-in-picture; clipboard-write" style="position:absolute;top:0;left:0;width:100%;height:100%;" title="A Guide to Catalog Settings">&ZeroWidthSpace;</iframe>

## 

## **Step 1﻿:**

Open '**Catalog** **Settings**' under the '**Global** **Settings**'.

![1.png](https://support.braincert.com/kb/attachment/article/175/inline?token=eyJhbGciOiJodHRwOi8vd3d3LnczLm9yZy8yMDAxLzA0L3htbGRzaWctbW9yZSNobWFjLXNoYTI1NiIsInR5cCI6IkpXVCJ9.eyJpZCI6IjQ5MjYiLCJvcmdpZCI6IjE2MDMiLCJpc3MiOiJzdXBwb3J0LmJyYWluY2VydC5jb20ifQ.vBjizhMsPwNsZEpPflihCULA8SuKN8Z0aOJ8_8WYDyw)

##   

## **Step 2﻿﻿:**

You can choose to enable or disable what logged-in users and guest users can see.

**![2.png](https://support.braincert.com/kb/attachment/article/175/inline?token=eyJhbGciOiJodHRwOi8vd3d3LnczLm9yZy8yMDAxLzA0L3htbGRzaWctbW9yZSNobWFjLXNoYTI1NiIsInR5cCI6IkpXVCJ9.eyJpZCI6IjQ5MjkiLCJvcmdpZCI6IjE2MDMiLCJpc3MiOiJzdXBwb3J0LmJyYWluY2VydC5jb20ifQ.a4ifV9AvRXK-NeGMliB5-k1dNcw47eThC5kr-05KVzM)** **Logged-in users:** Enable preferred catalogs for logged-in users.

**Guest user:** Enable preferred catalogs for Guest users.

**Catalog display style:** Choose the catalog display style between basic and advanced.

**Learner count details:** Choose to hide learner count and test attempt for learners.

**Mark as learned:** Choose where the '**Mark as learned**' option can be displayed.

**Menu Settings:** The titles under the menu can be edited, and the respective redirecting URL links can be added to them.

##   

## **Step 3﻿﻿:**

Type the '**Footer Copy Right  Content**'.

**Footer copyright content:** Footer copyright content typically consists of legal information, such as the copyright symbol (©), the copyright holder's name, and the year of publication, which is placed at the bottom of a webpage or document to indicate copyright ownership.  
Configure the '**Footer Navigation**.'

- To add new footers, use the '**Add New**' option.
- Upload the logo and favicon, then click '**Save**' to apply the changes.
- Don't forget to click the '**Save**' icon at the end to save all your modifications.

**![3.png](https://support.braincert.com/kb/attachment/article/175/inline?token=eyJhbGciOiJodHRwOi8vd3d3LnczLm9yZy8yMDAxLzA0L3htbGRzaWctbW9yZSNobWFjLXNoYTI1NiIsInR5cCI6IkpXVCJ9.eyJpZCI6IjQ5MjgiLCJvcmdpZCI6IjE2MDMiLCJpc3MiOiJzdXBwb3J0LmJyYWluY2VydC5jb20ifQ.2P0U1FeJGGd0GbduAjQ2x6gbK0JNwjH_UiHeydnlf0k)** Hope you find this article useful!

# Using Gmail as your SMTP Server

A little-known feature of Gmail and Google Apps email is Google's portable **SMTP** server. Instead of having to manage your own outgoing mail server on your LMS, you can simply configure Google's SMTP server settings in **'Mail Relay**'.

All you need is either a (i) free Gmail account or (ii) paid Google Apps account.

**Benefits**

You have the option of having Google store and index the emails you send via its SMTP server, so all your sent emails will be searchable and backed up on Google's servers. If you elect to use your Gmail or Google Apps account for your incoming email as well, you'll have all your email in one convenient place. Also, since Google's SMTP server does not use Port 25, you'll reduce the probability that an ISP might block your email or flag it as SPAM.

##   

## **Google's SMTP Server Requires Authentication, so here's how to set it up:**  
  
**Step 1:**

Go to Google account settings and **'** **Turn On**' access for less secure applications.

## ![](https://support.braincert.com/kb/attachment/article/20/inline?token=eyJhbGciOiJodHRwOi8vd3d3LnczLm9yZy8yMDAxLzA0L3htbGRzaWctbW9yZSNobWFjLXNoYTI1NiIsInR5cCI6IkpXVCJ9.eyJpZCI6IjM5NjEiLCJvcmdpZCI6IjE2MDMiLCJpc3MiOiJzdXBwb3J0LmJyYWluY2VydC5jb20ifQ.ARqKrMp6vSWfkYdgP8JxgH60uT56axmzugU-V7mRX3o)  
  
**Step ﻿﻿2:**  

Sign in to your LMS domain with Super Admin privileges, and click on '**Mail Relay**' under '**Global Settings**'. Select '**No**' under **'Use BrainCert Mail Server**'.

![1.png](https://support.braincert.com/kb/attachment/article/20/inline?token=eyJhbGciOiJodHRwOi8vd3d3LnczLm9yZy8yMDAxLzA0L3htbGRzaWctbW9yZSNobWFjLXNoYTI1NiIsInR5cCI6IkpXVCJ9.eyJpZCI6IjU1MDkiLCJvcmdpZCI6IjE2MDMiLCJpc3MiOiJzdXBwb3J0LmJyYWluY2VydC5jb20ifQ.EI4vLQVauQjfJIE4_GPzxi8-FJBIGqzV9pjvOocD8Zk)

**Note:﻿﻿**

**From Name**: Name that you want to appear in the email sent

**From E-Mail Address:**  Your Gmail address

**SMTP Mail Server Hostname (i.e., outgoing mail)**: smtp.gmail.com

**SMTP port:** 587

**Use Secure Connection:** TLS

**SMTP username:** **​**Your full Gmail or Google Apps email address (e.g. example@gmail.com or example@yourdomain.com)

**SMTP password:** Your Gmail or Google Apps email password

In order to store a copy of outgoing emails in your Gmail or Google Apps Sent folder, log into your Gmail or Google Apps email Settings and

Click on the Forwarding/IMAP tab and scroll down to the IMAP Access section: IMAP must be enabled in order for emails to be properly copied to your sent folder.

![](https://support.braincert.com/kb/attachment/article/20/inline?token=eyJhbGciOiJodHRwOi8vd3d3LnczLm9yZy8yMDAxLzA0L3htbGRzaWctbW9yZSNobWFjLXNoYTI1NiIsInR5cCI6IkpXVCJ9.eyJpZCI6IjM5NjMiLCJvcmdpZCI6IjE2MDMiLCJpc3MiOiJzdXBwb3J0LmJyYWluY2VydC5jb20ifQ.0r2zwUEyDbx5fK6XacLmmoGG2qwpnGumV6ukKqyMQq4)

**Note:** Google automatically rewrites the From line of any email you send via its SMTP server to the default Send mail as email address in your Gmail or Google Apps email account Settings. You need to be aware of this nuance because it affects the presentation of your email, from the point of view of the recipient, and it may also affect the Reply-To setting of some programs.

##   
﻿﻿**Step 3:**

Here is a guide to generating an **SMTP Password**.

Navigate to '**Google Apps**' and select '**Account**'.

## ![Account.png](https://support.braincert.com/kb/attachment/article/20/inline?token=eyJhbGciOiJodHRwOi8vd3d3LnczLm9yZy8yMDAxLzA0L3htbGRzaWctbW9yZSNobWFjLXNoYTI1NiIsInR5cCI6IkpXVCJ9.eyJpZCI6IjQ3ODgiLCJvcmdpZCI6IjE2MDMiLCJpc3MiOiJzdXBwb3J0LmJyYWluY2VydC5jb20ifQ.-GVjpneVKASZ1dwApRq1pYoctayCB_IrVw_06guBTTU)  

Step 4:﻿﻿

Click on the '**Security**' icon and open '**2-Step Verification**'

## ![2 Step.png](https://support.braincert.com/kb/attachment/article/20/inline?token=eyJhbGciOiJodHRwOi8vd3d3LnczLm9yZy8yMDAxLzA0L3htbGRzaWctbW9yZSNobWFjLXNoYTI1NiIsInR5cCI6IkpXVCJ9.eyJpZCI6IjQ3ODkiLCJvcmdpZCI6IjE2MDMiLCJpc3MiOiJzdXBwb3J0LmJyYWluY2VydC5jb20ifQ.u1ci90UZgmAB7CaMkAFJBhikHPS--FKGe9b3BOyFFT4)  
Step 5:﻿﻿

Enter your password and click on the '**Next**' button.

![pswrd.png](https://support.braincert.com/kb/attachment/article/20/inline?token=eyJhbGciOiJodHRwOi8vd3d3LnczLm9yZy8yMDAxLzA0L3htbGRzaWctbW9yZSNobWFjLXNoYTI1NiIsInR5cCI6IkpXVCJ9.eyJpZCI6IjQ3OTAiLCJvcmdpZCI6IjE2MDMiLCJpc3MiOiJzdXBwb3J0LmJyYWluY2VydC5jb20ifQ.-d6bh0uGt3tO4GgE1aFk_6Dl0n4OCxS5UEd5AQWttVA)

##   
﻿﻿Step 6:

Click on the '**App Passwords**' button.**​**

**![App pswrd.png](https://support.braincert.com/kb/attachment/article/20/inline?token=eyJhbGciOiJodHRwOi8vd3d3LnczLm9yZy8yMDAxLzA0L3htbGRzaWctbW9yZSNobWFjLXNoYTI1NiIsInR5cCI6IkpXVCJ9.eyJpZCI6IjQ3OTIiLCJvcmdpZCI6IjE2MDMiLCJpc3MiOiJzdXBwb3J0LmJyYWluY2VydC5jb20ifQ.8m_mGTIymnRdwSvKpsNRgEPRda3pTW04t_sTXyrGe-0)**

##   
Step 7:﻿﻿

Now, select the option '**Mail**' and '**Windows Computer**' from the dropdown box. Click on the '**Generate**' button once it is done.

## ![Generate.png](https://support.braincert.com/kb/attachment/article/20/inline?token=eyJhbGciOiJodHRwOi8vd3d3LnczLm9yZy8yMDAxLzA0L3htbGRzaWctbW9yZSNobWFjLXNoYTI1NiIsInR5cCI6IkpXVCJ9.eyJpZCI6IjQ3OTMiLCJvcmdpZCI6IjE2MDMiLCJpc3MiOiJzdXBwb3J0LmJyYWluY2VydC5jb20ifQ.L3S8WZ3oQeXaOCbvYIMGgoz5G4YY8z8YCCfTEtLB-nY)  
  
﻿﻿Step 8:

Find your '**Generated app password**' here.

![Password.png](https://support.braincert.com/kb/attachment/article/20/inline?token=eyJhbGciOiJodHRwOi8vd3d3LnczLm9yZy8yMDAxLzA0L3htbGRzaWctbW9yZSNobWFjLXNoYTI1NiIsInR5cCI6IkpXVCJ9.eyJpZCI6IjQ3OTQiLCJvcmdpZCI6IjE2MDMiLCJpc3MiOiJzdXBwb3J0LmJyYWluY2VydC5jb20ifQ.QDvr9Beg5L3tSK4BbuhUeGqeMOOOXgoYtZKJ5OAhZo0)   
  
**Sending Limits**

Google limits the amount of mail a user can send, via its portable SMTP server. This limit restricts the number of messages sent per day to 99 emails; and the restriction is automatically removed within 24 hours after the limit was reached.

Workaround: In your Google email Settings, go to the Accounts tab/section and make "default" an account other than your Gmail/Google Apps account. This will cause Google's SMTP server to re-write the From field with whatever address you enabled as the default Send mail as address.

####   
**Can I use a different FROM email address when using Google SMTP?**

Unfortunately, this is not possible. Google rewrites the From and Reply-To headers in messages sent through its SMTP service with values that relate to your Gmail account. The SMTP feature of Gmail isn't supposed to be an open or relay service. If it allowed any values for the From header, it would significantly reduce Google's reputation with spam services because there would be no way to verify the credentials of the sender.

#### ﻿﻿**Can I use a different alias as the FROM email address from my Gsuite account?**

Absolutely! If you have a Google Gsuite business account, you can change your FROM email alias to something different, but it needs to be on the same domain. For personal Gmail accounts, you cannot change the FROM email address.

# How to Organize Users in a Group and Manage Enrollments

This article walks you through the steps to organize users in a group and manage enrollments.

<iframe src="https://player.vimeo.com/video/1004375989?h=d4da26d851&amp;title=0&amp;byline=0&amp;portrait=0&amp;badge=0&amp;autopause=0&amp;player_id=0&amp;app_id=58479" frameborder="0" allow="autoplay; fullscreen; picture-in-picture; clipboard-write" style="position:absolute;top:0;left:0;width:100%;height:100%;" title="How to Organize Users in a Group and Manage Enrollments" bis_size="{&quot;x&quot;:104,&quot;y&quot;:443,&quot;w&quot;:1062,&quot;h&quot;:597,&quot;abs_x&quot;:104,&quot;abs_y&quot;:443}">&ZeroWidthSpace;</iframe>

<section class="info-box"><strong>Note:</strong> The features described in this article are available exclusively in BrainCert business plans. To learn more, visit our <a class="e-rte-anchor" href="https://www.braincert.com/pricing/for-business" title="https://www.braincert.com/pricing/for-business" target="_blank" aria-label="Open in new window" rel="noopener noreferrer">pricing page</a><br></section>

## **Step 1:**

Log in to your LMS dashboard and open '**Groups**' under '**People**'. Click on '**Add Group**' to organize users.

![1.png](https://support.braincert.com/kb/attachment/article/91/inline?token=eyJhbGciOiJodHRwOi8vd3d3LnczLm9yZy8yMDAxLzA0L3htbGRzaWctbW9yZSNobWFjLXNoYTI1NiIsInR5cCI6IkpXVCJ9.eyJpZCI6IjUxMTIiLCJvcmdpZCI6IjE2MDMiLCJpc3MiOiJzdXBwb3J0LmJyYWluY2VydC5jb20ifQ.IP1el5iwf8-gkdvdyCtPHUEVp5RP8Vrr1ySsAt20QIY)

## **﻿﻿Step 2:**

Provide the necessary '**Group Name**' and '**Group Description**' and click the '**Save**' icon.

## **![2.png](https://support.braincert.com/kb/attachment/article/91/inline?token=eyJhbGciOiJodHRwOi8vd3d3LnczLm9yZy8yMDAxLzA0L3htbGRzaWctbW9yZSNobWFjLXNoYTI1NiIsInR5cCI6IkpXVCJ9.eyJpZCI6IjUxMTQiLCJvcmdpZCI6IjE2MDMiLCJpc3MiOiJzdXBwb3J0LmJyYWluY2VydC5jb20ifQ.ZytLUvPmu-ZgzWtWUt7nwd-T7icZQsyWtQtw_5t4K8o)** **Step 3:** 

After adding groups, you can now enroll users in specific groups. Click on '**Add users**' from the options.

![3.png](https://support.braincert.com/kb/attachment/article/91/inline?token=eyJhbGciOiJodHRwOi8vd3d3LnczLm9yZy8yMDAxLzA0L3htbGRzaWctbW9yZSNobWFjLXNoYTI1NiIsInR5cCI6IkpXVCJ9.eyJpZCI6IjUxMTUiLCJvcmdpZCI6IjE2MDMiLCJpc3MiOiJzdXBwb3J0LmJyYWluY2VydC5jb20ifQ.bR8ekYQBL5JfSsPP77qbU0JwbKuVMH6y8FifmQuHr-I)

##   
**Step 4:**

Select the names of the individuals you wish to enroll in the group, and click '**Save**'.

![4.png](https://support.braincert.com/kb/attachment/article/91/inline?token=eyJhbGciOiJodHRwOi8vd3d3LnczLm9yZy8yMDAxLzA0L3htbGRzaWctbW9yZSNobWFjLXNoYTI1NiIsInR5cCI6IkpXVCJ9.eyJpZCI6IjUxMTYiLCJvcmdpZCI6IjE2MDMiLCJpc3MiOiJzdXBwb3J0LmJyYWluY2VydC5jb20ifQ.kpD1pKl4xQk9Q9b4KrQ4Srkmd4uV0llMteigyHj-_Hw)

You can also edit and delete the group by clicking on the options menu present corresponding to the group name.

Hope the article helps.

# How to Create Digital Products in Online Store

Creating digital products in your online store allows you to sell individual videos, PDFs, and other files.

<iframe src="https://player.vimeo.com/video/1006136703?h=cc101124ec&amp;title=0&amp;byline=0&amp;portrait=0&amp;badge=0&amp;autopause=0&amp;player_id=0&amp;app_id=58479" frameborder="0" allow="autoplay; fullscreen; picture-in-picture; clipboard-write" style="position:absolute;top:0;left:0;width:100%;height:100%;" title="How to Create Digital Products in Online Store">&ZeroWidthSpace;</iframe>

Follow these simple steps to get started:

## **Creating a Digital Product**

## **Step 1:**

From the dashboard, navigate to '**Online Store**' under '**Products**'. Click on the '**Create Product**' button to create a new digital product.

![1.png](https://support.braincert.com/kb/attachment/article/218/inline?token=eyJhbGciOiJodHRwOi8vd3d3LnczLm9yZy8yMDAxLzA0L3htbGRzaWctbW9yZSNobWFjLXNoYTI1NiIsInR5cCI6IkpXVCJ9.eyJpZCI6IjU4NzAiLCJvcmdpZCI6IjE2MDMiLCJpc3MiOiJzdXBwb3J0LmJyYWluY2VydC5jb20ifQ.ZnM0df6AGBkvCm9KMrFI3WZymCGjo7oRdKdiDjjv_6I)

##   

## **Step 2:**

Choose '**Digital Product**' from the options provided.

Fill in Product Details

- **Name**: Enter a descriptive name for your product.
- **Excerpt**: Provide a short summary or tagline for your product.
- **Banner Text**: Add any promotional text you want to display prominently.
- **Set Price**: Determine the price for your digital product.
- **Description:** Write a detailed description of your product, including key features and benefits.

![2.png](https://support.braincert.com/kb/attachment/article/218/inline?token=eyJhbGciOiJodHRwOi8vd3d3LnczLm9yZy8yMDAxLzA0L3htbGRzaWctbW9yZSNobWFjLXNoYTI1NiIsInR5cCI6IkpXVCJ9.eyJpZCI6IjU4NzEiLCJvcmdpZCI6IjE2MDMiLCJpc3MiOiJzdXBwb3J0LmJyYWluY2VydC5jb20ifQ.4CZzYeKhU4fJcKqrR4FH_PpVmRhMQoQYQi6zR6lGock) 
##   

## **Step 3:**

Upload a product image by selecting an image from your device or upload one from our library.

## ![7d51c9d0-3de1-4eba-96be-9a8e31345710.png](https://support.braincert.com/kb/attachment/article/218/inline?token=eyJhbGciOiJodHRwOi8vd3d3LnczLm9yZy8yMDAxLzA0L3htbGRzaWctbW9yZSNobWFjLXNoYTI1NiIsInR5cCI6IkpXVCJ9.eyJpZCI6IjU4NzciLCJvcmdpZCI6IjE2MDMiLCJpc3MiOiJzdXBwb3J0LmJyYWluY2VydC5jb20ifQ.GNGT6y4qAJOTObPoRbulIYZe0gjsTGU9yPi25euNBUE)  
**Step 4:**

Now, upload the digital product from your device or paste the download link for your digital product in the 'External Download Link' field.

**![3.png](https://support.braincert.com/kb/attachment/article/218/inline?token=eyJhbGciOiJodHRwOi8vd3d3LnczLm9yZy8yMDAxLzA0L3htbGRzaWctbW9yZSNobWFjLXNoYTI1NiIsInR5cCI6IkpXVCJ9.eyJpZCI6IjU4NzIiLCJvcmdpZCI6IjE2MDMiLCJpc3MiOiJzdXBwb3J0LmJyYWluY2VydC5jb20ifQ.hrQF4K8mmvHM88bzoRN2PENAIKQVzYfNS0Ckm-oztcM)**

##   

## **Step 5:**
Set the download expiration by specifying the number of days or attempts allowed for the download. Finally, click '**Save**' to apply the changes.
**![4.png](https://support.braincert.com/kb/attachment/article/218/inline?token=eyJhbGciOiJodHRwOi8vd3d3LnczLm9yZy8yMDAxLzA0L3htbGRzaWctbW9yZSNobWFjLXNoYTI1NiIsInR5cCI6IkpXVCJ9.eyJpZCI6IjU4NzMiLCJvcmdpZCI6IjE2MDMiLCJpc3MiOiJzdXBwb3J0LmJyYWluY2VydC5jb20ifQ.RveAleY5ywszDmE4pnyKl50MfbNcmJ1XJa3IjUyMIBw)**

**![5.png](https://support.braincert.com/kb/attachment/article/218/inline?token=eyJhbGciOiJodHRwOi8vd3d3LnczLm9yZy8yMDAxLzA0L3htbGRzaWctbW9yZSNobWFjLXNoYTI1NiIsInR5cCI6IkpXVCJ9.eyJpZCI6IjU4NzQiLCJvcmdpZCI6IjE2MDMiLCJpc3MiOiJzdXBwb3J0LmJyYWluY2VydC5jb20ifQ.KOFKQ8uIS2OOWU5RqjVmgCzYseAn7fARyozStk1FWcs)**

##   

## **Step 6:**

Once saved, you can find your created digital product under the '**Manage Products**' section.

![6.png](https://support.braincert.com/kb/attachment/article/218/inline?token=eyJhbGciOiJodHRwOi8vd3d3LnczLm9yZy8yMDAxLzA0L3htbGRzaWctbW9yZSNobWFjLXNoYTI1NiIsInR5cCI6IkpXVCJ9.eyJpZCI6IjU4NzUiLCJvcmdpZCI6IjE2MDMiLCJpc3MiOiJzdXBwb3J0LmJyYWluY2VydC5jb20ifQ.p-8aUK-x1dJ71MZHju7uPSggMrOZt18m-47ddhCD8x8)

##   

## **Step 7:**

You can '**Unpublish**', '**Edit**', or '**Delete**' your product by selecting the appropriate option.

**![7.png](https://support.braincert.com/kb/attachment/article/218/inline?token=eyJhbGciOiJodHRwOi8vd3d3LnczLm9yZy8yMDAxLzA0L3htbGRzaWctbW9yZSNobWFjLXNoYTI1NiIsInR5cCI6IkpXVCJ9.eyJpZCI6IjU4NzYiLCJvcmdpZCI6IjE2MDMiLCJpc3MiOiJzdXBwb3J0LmJyYWluY2VydC5jb20ifQ.klqRK7lEz7Lskgvm2y_59hHNMHn4jFWs4VcWILPhVJI)**

## **Learner Dashboard**

Learners can easily navigate to the '**Products**' section and click on the product to purchase it.

**![8.png](https://support.braincert.com/kb/attachment/article/218/inline?token=eyJhbGciOiJodHRwOi8vd3d3LnczLm9yZy8yMDAxLzA0L3htbGRzaWctbW9yZSNobWFjLXNoYTI1NiIsInR5cCI6IkpXVCJ9.eyJpZCI6IjU4NzgiLCJvcmdpZCI6IjE2MDMiLCJpc3MiOiJzdXBwb3J0LmJyYWluY2VydC5jb20ifQ.JwHOi5CO3jsBSzWArrdGyO9SiIiJCh108CI4W_FPscM)**

Once the digital product is opened, learners can add it to the cart and proceed further.

![9.png](https://support.braincert.com/kb/attachment/article/218/inline?token=eyJhbGciOiJodHRwOi8vd3d3LnczLm9yZy8yMDAxLzA0L3htbGRzaWctbW9yZSNobWFjLXNoYTI1NiIsInR5cCI6IkpXVCJ9.eyJpZCI6IjU4NzkiLCJvcmdpZCI6IjE2MDMiLCJpc3MiOiJzdXBwb3J0LmJyYWluY2VydC5jb20ifQ.TriV3WUN6AjSOQ0pAAX3vgrv95SVzkCeF6pK9xFLIYI)

By following these steps, you can efficiently create and manage digital products in your online store, making it easy to sell individual files to your customers.

# Steps to Create and Manage Custom Course Categories

This article walks through the steps to create and manage custom course categories.

<iframe src="https://player.vimeo.com/video/1012334492?h=9e454a3fe3&amp;title=0&amp;byline=0&amp;portrait=0&amp;badge=0&amp;autopause=0&amp;player_id=0&amp;app_id=58479" frameborder="0" allow="autoplay; fullscreen; picture-in-picture; clipboard-write" style="position:absolute;top:0;left:0;width:100%;height:100%;" title="Steps to Create and Manage Custom Course Categories">&ZeroWidthSpace;</iframe>

## **Step 1:**

Navigate to '**Products**', select '**Courses**' from the dropdown menu, and click on '**Categories**'.

![1.png](https://support.braincert.com/kb/attachment/article/60/inline?token=eyJhbGciOiJodHRwOi8vd3d3LnczLm9yZy8yMDAxLzA0L3htbGRzaWctbW9yZSNobWFjLXNoYTI1NiIsInR5cCI6IkpXVCJ9.eyJpZCI6IjUxNjAiLCJvcmdpZCI6IjE2MDMiLCJpc3MiOiJzdXBwb3J0LmJyYWluY2VydC5jb20ifQ.XDh47g3qhWs8J4Uo9RhLKfeyPBXoAfibfgq7A2ZmmHg)

## **Step 2:** 

Now, click on '**Add** **Category**' as shown below.

![2.png](https://support.braincert.com/kb/attachment/article/60/inline?token=eyJhbGciOiJodHRwOi8vd3d3LnczLm9yZy8yMDAxLzA0L3htbGRzaWctbW9yZSNobWFjLXNoYTI1NiIsInR5cCI6IkpXVCJ9.eyJpZCI6IjUxNjEiLCJvcmdpZCI6IjE2MDMiLCJpc3MiOiJzdXBwb3J0LmJyYWluY2VydC5jb20ifQ.61RB98xPno7-xPnpZnfpFrI2toLg2SkVG2ngtAQJ8Js)

## **Step 3:**

Once the category option is clicked, add the '**Category Name**' and '**Category Description**' and '**Save**' the changes.

![3.png](https://support.braincert.com/kb/attachment/article/60/inline?token=eyJhbGciOiJodHRwOi8vd3d3LnczLm9yZy8yMDAxLzA0L3htbGRzaWctbW9yZSNobWFjLXNoYTI1NiIsInR5cCI6IkpXVCJ9.eyJpZCI6IjUxNjIiLCJvcmdpZCI6IjE2MDMiLCJpc3MiOiJzdXBwb3J0LmJyYWluY2VydC5jb20ifQ.FCJSupf6ESVAJdyZYTmQ5uWKpctzyJpeHmvibsV0Bro)

## **Step 4:**

You can manage the existing categories by clicking on the '**Options**' menu corresponding to the category name.

By clicking on the '**Options**' you can edit, delete, or unpublish the categories.

![4.png](https://support.braincert.com/kb/attachment/article/60/inline?token=eyJhbGciOiJodHRwOi8vd3d3LnczLm9yZy8yMDAxLzA0L3htbGRzaWctbW9yZSNobWFjLXNoYTI1NiIsInR5cCI6IkpXVCJ9.eyJpZCI6IjUxNjMiLCJvcmdpZCI6IjE2MDMiLCJpc3MiOiJzdXBwb3J0LmJyYWluY2VydC5jb20ifQ.xUezINeEZgumvwyHoeumWHh1ohfzzopNb5qPbTX59BI)

# Steps to Use the Integrated Content Library for Virtual Classroom to Upload Documents and Video Files

This article walks you through the steps to use the integrated content library in the Virtual Classroom to upload documents and video files.

## **Step 1:**

After uploading your docs, audio, and video files into your Content Library - Once in the session, click on the '**Document tool**' option to see a window pop-up with multiple options to load content into the classroom. Select the first option - '**C** **hoose from your library**'.

![](https://support.braincert.com/kb/attachment/article/142/inline?token=eyJhbGciOiJodHRwOi8vd3d3LnczLm9yZy8yMDAxLzA0L3htbGRzaWctbW9yZSNobWFjLXNoYTI1NiIsInR5cCI6IkpXVCJ9.eyJpZCI6IjQyNzMiLCJvcmdpZCI6IjE2MDMiLCJpc3MiOiJzdXBwb3J0LmJyYWluY2VydC5jb20ifQ.7mh7EZcbJsdLHMfan30V0eBKMg-X8SbE5lauUmD5N5w)

#####   

## **Step 2:**

Once you click on choose from your library, you will get instantaneous access to all your pre-uploaded content - You can either choose the files from the list or try using the filter option to find and upload the relevant file.

![](https://support.braincert.com/kb/attachment/article/142/inline?token=eyJhbGciOiJodHRwOi8vd3d3LnczLm9yZy8yMDAxLzA0L3htbGRzaWctbW9yZSNobWFjLXNoYTI1NiIsInR5cCI6IkpXVCJ9.eyJpZCI6IjQyNzIiLCJvcmdpZCI6IjE2MDMiLCJpc3MiOiJzdXBwb3J0LmJyYWluY2VydC5jb20ifQ.aa5oVgxo5iLjV9vhHsevM7WE28MlXrlnov99zkgrkhQ)

#####   

## **Step 3:**

Note that the uploaded file would take the shape of a new whiteboard tab as seen below.

![](https://support.braincert.com/kb/attachment/article/142/inline?token=eyJhbGciOiJodHRwOi8vd3d3LnczLm9yZy8yMDAxLzA0L3htbGRzaWctbW9yZSNobWFjLXNoYTI1NiIsInR5cCI6IkpXVCJ9.eyJpZCI6IjQyNzEiLCJvcmdpZCI6IjE2MDMiLCJpc3MiOiJzdXBwb3J0LmJyYWluY2VydC5jb20ifQ.3NqqfSZPcIKpVG9YANetAEUwRJXmDn_jMrApCD3FTyk)

## **Step 4:**

To play video content on the whiteboard - Click on the '**Video tool**' option to access the media player feature.

![](https://support.braincert.com/kb/attachment/article/142/inline?token=eyJhbGciOiJodHRwOi8vd3d3LnczLm9yZy8yMDAxLzA0L3htbGRzaWctbW9yZSNobWFjLXNoYTI1NiIsInR5cCI6IkpXVCJ9.eyJpZCI6IjQyODAiLCJvcmdpZCI6IjE2MDMiLCJpc3MiOiJzdXBwb3J0LmJyYWluY2VydC5jb20ifQ._nw66hGIIqom5vTeQwjkQmCBKaFiSLy0AtkMzZlmM-Y)

#####   

## **Step 5:**

You can choose to play videos from

1. YouTube/Vimeo
2. From content library

1) To play a video from YouTube/Vimeo paste the video URL on the corresponding field.

![](https://support.braincert.com/kb/attachment/article/142/inline?token=eyJhbGciOiJodHRwOi8vd3d3LnczLm9yZy8yMDAxLzA0L3htbGRzaWctbW9yZSNobWFjLXNoYTI1NiIsInR5cCI6IkpXVCJ9.eyJpZCI6IjQyNzAiLCJvcmdpZCI6IjE2MDMiLCJpc3MiOiJzdXBwb3J0LmJyYWluY2VydC5jb20ifQ.1AH6uYRKJEbcbvNHdSTdGH0reibuUWExQLn2vzKutVc)

2) To play videos from the content library click '**Browse**' and select the required file from your content library.

![](https://support.braincert.com/kb/attachment/article/142/inline?token=eyJhbGciOiJodHRwOi8vd3d3LnczLm9yZy8yMDAxLzA0L3htbGRzaWctbW9yZSNobWFjLXNoYTI1NiIsInR5cCI6IkpXVCJ9.eyJpZCI6IjQyNjgiLCJvcmdpZCI6IjE2MDMiLCJpc3MiOiJzdXBwb3J0LmJyYWluY2VydC5jb20ifQ.Vl3SepZFYyHHwztFXaWdVUtfp2DyaEWSkW1fsfWwN0E)

Utilize the integrated Content Library in the Virtual Classroom to easily upload and manage documents and video files.

# How to Include Custom Registration Fields Filter in Reports

This article provides a step-by-step guide on how to include custom registration fields in your reports, enabling you to filter users based on specific criteria. By following these instructions, you can create detailed and customized reports for courses and assessments using your system's custom registration fields.

##   
Configure Custom Registration Fields

## Step 1: Head to User Registration

Go to '**Global Settings**' and select '**User Registration**'.

![1.png](https://support.braincert.com/kb/attachment/article/216/inline?token=eyJhbGciOiJodHRwOi8vd3d3LnczLm9yZy8yMDAxLzA0L3htbGRzaWctbW9yZSNobWFjLXNoYTI1NiIsInR5cCI6IkpXVCJ9.eyJpZCI6IjU4NTIiLCJvcmdpZCI6IjE2MDMiLCJpc3MiOiJzdXBwb3J0LmJyYWluY2VydC5jb20ifQ.pQ_0n6cRMUN6tLxv0sm9f5UGnK62UTlaPrdqI26ow2Y)

##   
Step 2: Add Custom Signup

Navigate to the '**Custom registration fields**' section and click '**Add custom signup field**'.

**![2.png](https://support.braincert.com/kb/attachment/article/216/inline?token=eyJhbGciOiJodHRwOi8vd3d3LnczLm9yZy8yMDAxLzA0L3htbGRzaWctbW9yZSNobWFjLXNoYTI1NiIsInR5cCI6IkpXVCJ9.eyJpZCI6IjU4NTMiLCJvcmdpZCI6IjE2MDMiLCJpc3MiOiJzdXBwb3J0LmJyYWluY2VydC5jb20ifQ.Qm5edYBkmh0qxJM5qRcsL2tRjZ8gcHk6cPWJ38G3hHA)**

##   
Step 3: Choose your Field

Choose the type of field you want to create: '**Text Box**', '**Dropdown**', or '**Check** **Box**'.![3.png](https://support.braincert.com/kb/attachment/article/216/inline?token=eyJhbGciOiJodHRwOi8vd3d3LnczLm9yZy8yMDAxLzA0L3htbGRzaWctbW9yZSNobWFjLXNoYTI1NiIsInR5cCI6IkpXVCJ9.eyJpZCI6IjU4NTQiLCJvcmdpZCI6IjE2MDMiLCJpc3MiOiJzdXBwb3J0LmJyYWluY2VydC5jb20ifQ.1nL2tWU6VEDT6EJQyCoeVegXwy7QJPiuxdYerz9LzXM)

##   
Step 4: Free Form

Fill in the label and other details. Set the field to '**Required**' or '**Active**' as needed. Once done, '**Save**' the changes.

![d4be464b-30fa-4501-a2c4-9b2b45f56137](https://support.braincert.com/kb/attachment/article/216/inline?token=eyJhbGciOiJodHRwOi8vd3d3LnczLm9yZy8yMDAxLzA0L3htbGRzaWctbW9yZSNobWFjLXNoYTI1NiIsInR5cCI6IkpXVCJ9.eyJpZCI6IjcwNDgiLCJvcmdpZCI6IjE2MDMiLCJpc3MiOiJzdXBwb3J0LmJyYWluY2VydC5jb20ifQ.vX28gZFL1WpUcm0I6Szd7HG80wVQhSA9B4grUSvbrg0)

##   
Step 5: Make Your Label Active

Once the label is added, make sure to switch the toggle on to make it active.

**![5.png](https://support.braincert.com/kb/attachment/article/216/inline?token=eyJhbGciOiJodHRwOi8vd3d3LnczLm9yZy8yMDAxLzA0L3htbGRzaWctbW9yZSNobWFjLXNoYTI1NiIsInR5cCI6IkpXVCJ9.eyJpZCI6IjU4NTciLCJvcmdpZCI6IjE2MDMiLCJpc3MiOiJzdXBwb3J0LmJyYWluY2VydC5jb20ifQ.H3m1VqYrkRXY9ND0aqZuBK-Z4KZJQO_vGNxWdwIAeho)**

##   
Step 6: Edit or Delete the Label

To make any changes after saving, click on the options and '**Edit**' or '**Delete**' the label.

![6.png](https://support.braincert.com/kb/attachment/article/216/inline?token=eyJhbGciOiJodHRwOi8vd3d3LnczLm9yZy8yMDAxLzA0L3htbGRzaWctbW9yZSNobWFjLXNoYTI1NiIsInR5cCI6IkpXVCJ9.eyJpZCI6IjU4NjciLCJvcmdpZCI6IjE2MDMiLCJpc3MiOiJzdXBwb3J0LmJyYWluY2VydC5jb20ifQ.Qc9Zuo9lM1MS-jGBNkXxtUDoC3csjzbDIT9u_zCanR8)

##   
Filter Reports by Custom User Attributes

## ﻿﻿﻿﻿Step 7:

Now, navigate to the dashboard, select '**Reports & Analytics**', and open '**Courses**' within it.

<section class="info-box">The same steps can be followed for <strong>Tests </strong>under <strong>Reports &amp; Analytics</strong>.</section>

**![7.png](https://support.braincert.com/kb/attachment/article/216/inline?token=eyJhbGciOiJodHRwOi8vd3d3LnczLm9yZy8yMDAxLzA0L3htbGRzaWctbW9yZSNobWFjLXNoYTI1NiIsInR5cCI6IkpXVCJ9.eyJpZCI6IjU4NTkiLCJvcmdpZCI6IjE2MDMiLCJpc3MiOiJzdXBwb3J0LmJyYWluY2VydC5jb20ifQ.-pXRUjjHYqqI-_oE6BIx6YLDHQgf53OyGYiCkVp1Bcw)**

##   
Step 8: Custom User Attributes

Scroll down to the '**Custom User Attributes**' section and select the custom fields you created.

![8.png](https://support.braincert.com/kb/attachment/article/216/inline?token=eyJhbGciOiJodHRwOi8vd3d3LnczLm9yZy8yMDAxLzA0L3htbGRzaWctbW9yZSNobWFjLXNoYTI1NiIsInR5cCI6IkpXVCJ9.eyJpZCI6IjU4NjEiLCJvcmdpZCI6IjE2MDMiLCJpc3MiOiJzdXBwb3J0LmJyYWluY2VydC5jb20ifQ.PehEzsAz7lEjh6QnaFnMn22ZVa5GaNtZ3mRU10z402U)

##   
Step 9: Filter the Reports

Now, you'll be able to see the fields created in the list. You can now filter the reports using the dropdown option.

![9.png](https://support.braincert.com/kb/attachment/article/216/inline?token=eyJhbGciOiJodHRwOi8vd3d3LnczLm9yZy8yMDAxLzA0L3htbGRzaWctbW9yZSNobWFjLXNoYTI1NiIsInR5cCI6IkpXVCJ9.eyJpZCI6IjU4NjUiLCJvcmdpZCI6IjE2MDMiLCJpc3MiOiJzdXBwb3J0LmJyYWluY2VydC5jb20ifQ.G77rhml6gU4Pj_7CyiRdj5JKiPZkeRK9RK_hpvvrDUA)

##   
Create and Customize Reports

## Step 10: Create Custom Report

In the reports field, click on '**Create Custom Report**'.

**![10.png](https://support.braincert.com/kb/attachment/article/216/inline?token=eyJhbGciOiJodHRwOi8vd3d3LnczLm9yZy8yMDAxLzA0L3htbGRzaWctbW9yZSNobWFjLXNoYTI1NiIsInR5cCI6IkpXVCJ9.eyJpZCI6IjU4NjQiLCJvcmdpZCI6IjE2MDMiLCJpc3MiOiJzdXBwb3J0LmJyYWluY2VydC5jb20ifQ.Dqqmw5Lh1Snmj5K74DeyVqbPaNwJZntOOByxmVbf-Y4)**

##   
Step 11: Custom Fields

In the custom report setup, look for the '**Custom Fields**' section. Select the custom fields you created earlier and click '**Submit**'.

![11.png](https://support.braincert.com/kb/attachment/article/216/inline?token=eyJhbGciOiJodHRwOi8vd3d3LnczLm9yZy8yMDAxLzA0L3htbGRzaWctbW9yZSNobWFjLXNoYTI1NiIsInR5cCI6IkpXVCJ9.eyJpZCI6IjU4NjgiLCJvcmdpZCI6IjE2MDMiLCJpc3MiOiJzdXBwb3J0LmJyYWluY2VydC5jb20ifQ.VV1hhCkERIoBQ4EwA4Hq4_HLM0ngILCv8mg7ZwhSPZY)

##   
Step 12: View the Generated Report

After submitting, you can view the generated report.

![12.png](https://support.braincert.com/kb/attachment/article/216/inline?token=eyJhbGciOiJodHRwOi8vd3d3LnczLm9yZy8yMDAxLzA0L3htbGRzaWctbW9yZSNobWFjLXNoYTI1NiIsInR5cCI6IkpXVCJ9.eyJpZCI6IjU4NjkiLCJvcmdpZCI6IjE2MDMiLCJpc3MiOiJzdXBwb3J0LmJyYWluY2VydC5jb20ifQ.oK5JGiv9w9iw4lRfR4JkwtXCrP3GIv18oBpgvD9ZB-0)

By following these steps, you can create and filter reports based on custom registration fields, making it easier to analyze data relevant to your courses and assessments.

# How to Make Use of Whiteboard Tools & Features

BrainCert’s virtual classroom platform & Meeting room comes with an interactive whiteboard out of the box to help you better collaborate with your peers & learners. Every pixel of the fluid whiteboard canvas has been designed to give you the power to write or draw effortlessly.

This true 16:9 aspect ratio of the responsive whiteboard makes it possible for the content to appear on the same position and pixel across all viewing devices - be it Mobile, Web or Tablet.

This article will guide you through all the tools & features of the interactive whiteboard in detail.

## **How to Pin/Unpin the Toolbar?**

Select the pin/unpin option on the top of the toolbar.

![](https://support.braincert.com/kb/attachment/article/130/inline?token=eyJhbGciOiJodHRwOi8vd3d3LnczLm9yZy8yMDAxLzA0L3htbGRzaWctbW9yZSNobWFjLXNoYTI1NiIsInR5cCI6IkpXVCJ9.eyJpZCI6IjQzMTIiLCJvcmdpZCI6IjE2MDMiLCJpc3MiOiJzdXBwb3J0LmJyYWluY2VydC5jb20ifQ.lfzKBKKJ6P2hMlKXTSp89Xagevig9X3zfPPz83K9uDs)

###   

## **The different tools in whiteboard & their features**

- **Selector Tools**

Use this tool to select items to 'Edit' them or 'rag and place them anywhere on the whiteboard.

<u style="box-sizing: border-box;"><strong style="box-sizing: border-box; font-weight: 700;"><img src="https://support.braincert.com/kb/attachment/article/130/inline?token=eyJhbGciOiJodHRwOi8vd3d3LnczLm9yZy8yMDAxLzA0L3htbGRzaWctbW9yZSNobWFjLXNoYTI1NiIsInR5cCI6IkpXVCJ9.eyJpZCI6IjQzMTMiLCJvcmdpZCI6IjE2MDMiLCJpc3MiOiJzdXBwb3J0LmJyYWluY2VydC5jb20ifQ.IGMrgjzXedGABEAAnL3J2HjEjaU_UHlduC5usPHBHag" alt="" class="fr-fic fr-dii e-rte-image e-imginline e-resize" style="box-sizing: border-box; border-style: none; cursor: pointer; max-width: 1408px; display: inline-block; margin-left: 5px;" data-attachment="[object Object]" data-id="151011833708"></strong></u>

- **Pencil Tools**

![](https://support.braincert.com/kb/attachment/article/130/inline?token=eyJhbGciOiJodHRwOi8vd3d3LnczLm9yZy8yMDAxLzA0L3htbGRzaWctbW9yZSNobWFjLXNoYTI1NiIsInR5cCI6IkpXVCJ9.eyJpZCI6IjQzMTQiLCJvcmdpZCI6IjE2MDMiLCJpc3MiOiJzdXBwb3J0LmJyYWluY2VydC5jb20ifQ.N8756evtONBOZHDuTGTkDcjrjLYTjKC4ZK1wWk2xw0w)

- **Highlighter Tool**

Use this tool on the whiteboard while showing your presentations and documents on the whiteboard. Rotate, annotate, and highlight - all the essential document tools to engage your attendees.

![](https://support.braincert.com/kb/attachment/article/130/inline?token=eyJhbGciOiJodHRwOi8vd3d3LnczLm9yZy8yMDAxLzA0L3htbGRzaWctbW9yZSNobWFjLXNoYTI1NiIsInR5cCI6IkpXVCJ9.eyJpZCI6IjQzMTUiLCJvcmdpZCI6IjE2MDMiLCJpc3MiOiJzdXBwb3J0LmJyYWluY2VydC5jb20ifQ.hqrvtDZWITnUTc-iHlKDwJfSRmQM81aVnbD0iZ2S-V4)

- **Line Tools**

Powerful line tools and advanced shapes such as triangle, rhombus, pentagon, hexagon, cylinder, cube, cone and other shapes in the whiteboard makes it easy to deliver any type of creative and educational training online.

![](https://support.braincert.com/kb/attachment/article/130/inline?token=eyJhbGciOiJodHRwOi8vd3d3LnczLm9yZy8yMDAxLzA0L3htbGRzaWctbW9yZSNobWFjLXNoYTI1NiIsInR5cCI6IkpXVCJ9.eyJpZCI6IjQzMTYiLCJvcmdpZCI6IjE2MDMiLCJpc3MiOiJzdXBwb3J0LmJyYWluY2VydC5jb20ifQ.N0jl8VYgkxC8jKTYcKveZN_xAuPzN-f9vtEuJSQuJ0U)

- **Select Shapes for whiteboard:**

Click on the shapes option and select the shape you want to draw on the whiteboard. To make the shape colorful select the stroke and fill color from the top.

![](https://support.braincert.com/kb/attachment/article/130/inline?token=eyJhbGciOiJodHRwOi8vd3d3LnczLm9yZy8yMDAxLzA0L3htbGRzaWctbW9yZSNobWFjLXNoYTI1NiIsInR5cCI6IkpXVCJ9.eyJpZCI6IjQzMTciLCJvcmdpZCI6IjE2MDMiLCJpc3MiOiJzdXBwb3J0LmJyYWluY2VydC5jb20ifQ.-PgakjQnEoJNfrUHtN4_eN5Nq9OXa42k-8y323FDp9Y)

- **Different Whiteboard Background Papers**

**White Paper**

* * *

![](https://support.braincert.com/kb/attachment/article/130/inline?token=eyJhbGciOiJodHRwOi8vd3d3LnczLm9yZy8yMDAxLzA0L3htbGRzaWctbW9yZSNobWFjLXNoYTI1NiIsInR5cCI6IkpXVCJ9.eyJpZCI6IjQzMTgiLCJvcmdpZCI6IjE2MDMiLCJpc3MiOiJzdXBwb3J0LmJyYWluY2VydC5jb20ifQ.67E6RDfcBz2PMg1RJV6bxgjqxKQRiMgh6mtiGuauUEg)

- **Lined Paper**

* * *

![](https://support.braincert.com/kb/attachment/article/130/inline?token=eyJhbGciOiJodHRwOi8vd3d3LnczLm9yZy8yMDAxLzA0L3htbGRzaWctbW9yZSNobWFjLXNoYTI1NiIsInR5cCI6IkpXVCJ9.eyJpZCI6IjQzMTkiLCJvcmdpZCI6IjE2MDMiLCJpc3MiOiJzdXBwb3J0LmJyYWluY2VydC5jb20ifQ.KVLFrEFDJXoRNRGzm3V2T10P7RBOIhe6xDJ5Me3ieMw)

- **Grid Paper**

![](https://support.braincert.com/kb/attachment/article/130/inline?token=eyJhbGciOiJodHRwOi8vd3d3LnczLm9yZy8yMDAxLzA0L3htbGRzaWctbW9yZSNobWFjLXNoYTI1NiIsInR5cCI6IkpXVCJ9.eyJpZCI6IjQzMjAiLCJvcmdpZCI6IjE2MDMiLCJpc3MiOiJzdXBwb3J0LmJyYWluY2VydC5jb20ifQ.rwe5DnkIWjjrYT75mte4FXLgiXJmBffOYDzocoak24Q)

- **Millimeter Paper**

![](https://support.braincert.com/kb/attachment/article/130/inline?token=eyJhbGciOiJodHRwOi8vd3d3LnczLm9yZy8yMDAxLzA0L3htbGRzaWctbW9yZSNobWFjLXNoYTI1NiIsInR5cCI6IkpXVCJ9.eyJpZCI6IjQzMjEiLCJvcmdpZCI6IjE2MDMiLCJpc3MiOiJzdXBwb3J0LmJyYWluY2VydC5jb20ifQ.9a_CzgQA6xUdiVqS3bDfkhFHlo-DiNLFEsxMwF60SMY)

- **Eraser Tool**

Select the ‘eraser tool’ to erase anything that you have drawn on the whiteboard. To increase the thickness of the eraser, increase the number from 1 to a higher number.

![](https://support.braincert.com/kb/attachment/article/130/inline?token=eyJhbGciOiJodHRwOi8vd3d3LnczLm9yZy8yMDAxLzA0L3htbGRzaWctbW9yZSNobWFjLXNoYTI1NiIsInR5cCI6IkpXVCJ9.eyJpZCI6IjQzMjIiLCJvcmdpZCI6IjE2MDMiLCJpc3MiOiJzdXBwb3J0LmJyYWluY2VydC5jb20ifQ.KswYGBStd0ZB095gYGeq2pi0QD_C9vt-xK8Z2XQ2rTA)  
**Text Tool**

Use this tool to write anything in text. You can also change the color or the size of the text.

![](https://support.braincert.com/kb/attachment/article/130/inline?token=eyJhbGciOiJodHRwOi8vd3d3LnczLm9yZy8yMDAxLzA0L3htbGRzaWctbW9yZSNobWFjLXNoYTI1NiIsInR5cCI6IkpXVCJ9.eyJpZCI6IjQzMjMiLCJvcmdpZCI6IjE2MDMiLCJpc3MiOiJzdXBwb3J0LmJyYWluY2VydC5jb20ifQ.kFb_N3UPid8SYRZ0fvOZ3vib1EndnF3MknHhzWljkyw)

- **Emojis on Whiteboard**

To display action through emoji, click on the ‘emoticons tool’ and add any emojis on the whiteboard.

![](https://support.braincert.com/kb/attachment/article/130/inline?token=eyJhbGciOiJodHRwOi8vd3d3LnczLm9yZy8yMDAxLzA0L3htbGRzaWctbW9yZSNobWFjLXNoYTI1NiIsInR5cCI6IkpXVCJ9.eyJpZCI6IjQzMjQiLCJvcmdpZCI6IjE2MDMiLCJpc3MiOiJzdXBwb3J0LmJyYWluY2VydC5jb20ifQ.pYcwDF8Iq6F8xydeFzFrwAjMhSZ66qfOhhuXGvJWE9w)

- **LaTeX Equation Editor**

LaTeX Equation Editor is a powerful interactive tool that lets you create and display complex LaTeX mathematical equations inside a whiteboard using a graphical UI without typing any LaTex code.

![](https://support.braincert.com/kb/attachment/article/130/inline?token=eyJhbGciOiJodHRwOi8vd3d3LnczLm9yZy8yMDAxLzA0L3htbGRzaWctbW9yZSNobWFjLXNoYTI1NiIsInR5cCI6IkpXVCJ9.eyJpZCI6IjQzMjUiLCJvcmdpZCI6IjE2MDMiLCJpc3MiOiJzdXBwb3J0LmJyYWluY2VydC5jb20ifQ.r7RHWfjzVIXq_Bdx8lLjnK_P-089qN4bgqHZ68gzbjo)

- **Wolfram|Alpha**

Wolfram|Alpha gives you access to the world's facts and data and calculates answers across a range of topics, including science, nutrition, history, geography, engineering, mathematics, linguistics, sports, finance, music all right inside the whiteboard.

![](https://support.braincert.com/kb/attachment/article/130/inline?token=eyJhbGciOiJodHRwOi8vd3d3LnczLm9yZy8yMDAxLzA0L3htbGRzaWctbW9yZSNobWFjLXNoYTI1NiIsInR5cCI6IkpXVCJ9.eyJpZCI6IjQzMjYiLCJvcmdpZCI6IjE2MDMiLCJpc3MiOiJzdXBwb3J0LmJyYWluY2VydC5jb20ifQ.nRvQlGfZDdnfRJ1_1zqKZ1yj24uysIKmhKK78E-X7Qs)

- **Resize Text of Wolfram | Alpha**

To resize wolfram alpha text, use the selector tool and drag the corner to meet your requirement.

![](https://support.braincert.com/kb/attachment/article/130/inline?token=eyJhbGciOiJodHRwOi8vd3d3LnczLm9yZy8yMDAxLzA0L3htbGRzaWctbW9yZSNobWFjLXNoYTI1NiIsInR5cCI6IkpXVCJ9.eyJpZCI6IjQzMjciLCJvcmdpZCI6IjE2MDMiLCJpc3MiOiJzdXBwb3J0LmJyYWluY2VydC5jb20ifQ.hxu6_u9Ifhktks5mcgTwrt25_cJtD9MXvWo5ZCFx5AM)

- **Clearing the Whiteboard**

To clear everything from the whiteboard, click on the ‘clear all tool’. Just be aware that this action cannot be undone.

![](https://support.braincert.com/kb/attachment/article/130/inline?token=eyJhbGciOiJodHRwOi8vd3d3LnczLm9yZy8yMDAxLzA0L3htbGRzaWctbW9yZSNobWFjLXNoYTI1NiIsInR5cCI6IkpXVCJ9.eyJpZCI6IjQzMjgiLCJvcmdpZCI6IjE2MDMiLCJpc3MiOiJzdXBwb3J0LmJyYWluY2VydC5jb20ifQ.5pul8Sexh9ul2Ml87GmGS63BjLhjuSKwykPbhMk4oRo)

- **Class Settings / Extend Class / Set Alert**

Click on the ‘**Class Settings**’ icon to change the class duration or to set an alert or change the interface language.

![](https://support.braincert.com/kb/attachment/article/130/inline?token=eyJhbGciOiJodHRwOi8vd3d3LnczLm9yZy8yMDAxLzA0L3htbGRzaWctbW9yZSNobWFjLXNoYTI1NiIsInR5cCI6IkpXVCJ9.eyJpZCI6IjQzNDMiLCJvcmdpZCI6IjE2MDMiLCJpc3MiOiJzdXBwb3J0LmJyYWluY2VydC5jb20ifQ.V8Q9VVgSkUvaQJGyZY31u04UhLo4fuX_dMNgswgL-eY)

![](https://support.braincert.com/kb/attachment/article/130/inline?token=eyJhbGciOiJodHRwOi8vd3d3LnczLm9yZy8yMDAxLzA0L3htbGRzaWctbW9yZSNobWFjLXNoYTI1NiIsInR5cCI6IkpXVCJ9.eyJpZCI6IjQzNTciLCJvcmdpZCI6IjE2MDMiLCJpc3MiOiJzdXBwb3J0LmJyYWluY2VydC5jb20ifQ.5qypED9Go5LhrNO-zW6ubS4K045-C0s5dXLvWJR2Iuo)

![](https://support.braincert.com/kb/attachment/article/130/inline?token=eyJhbGciOiJodHRwOi8vd3d3LnczLm9yZy8yMDAxLzA0L3htbGRzaWctbW9yZSNobWFjLXNoYTI1NiIsInR5cCI6IkpXVCJ9.eyJpZCI6IjQzOTQiLCJvcmdpZCI6IjE2MDMiLCJpc3MiOiJzdXBwb3J0LmJyYWluY2VydC5jb20ifQ.Cz5nSLVoZy-G4uCY4Hh5UcCn5iUvVd0BXeK_sSkAmIM)

- **Report a bug**

To report any bugs in the platform navigate to the '**S** **ettings**' icon on top left & navigate to the '**Report a Problem**' option on the bottom.

![](https://support.braincert.com/kb/attachment/article/130/inline?token=eyJhbGciOiJodHRwOi8vd3d3LnczLm9yZy8yMDAxLzA0L3htbGRzaWctbW9yZSNobWFjLXNoYTI1NiIsInR5cCI6IkpXVCJ9.eyJpZCI6IjQzNTgiLCJvcmdpZCI6IjE2MDMiLCJpc3MiOiJzdXBwb3J0LmJyYWluY2VydC5jb20ifQ.HYwUUBkLkfBFq8jBWCgYAA5malqwQFVAvnMQvgerE-Y)

![](https://support.braincert.com/kb/attachment/article/130/inline?token=eyJhbGciOiJodHRwOi8vd3d3LnczLm9yZy8yMDAxLzA0L3htbGRzaWctbW9yZSNobWFjLXNoYTI1NiIsInR5cCI6IkpXVCJ9.eyJpZCI6IjQzODQiLCJvcmdpZCI6IjE2MDMiLCJpc3MiOiJzdXBwb3J0LmJyYWluY2VydC5jb20ifQ.eI1VpH7DsqPKLfjxOyCcEsq1czCgIS3resNM9qkHiFI)

![](https://support.braincert.com/kb/attachment/article/130/inline?token=eyJhbGciOiJodHRwOi8vd3d3LnczLm9yZy8yMDAxLzA0L3htbGRzaWctbW9yZSNobWFjLXNoYTI1NiIsInR5cCI6IkpXVCJ9.eyJpZCI6IjQzODUiLCJvcmdpZCI6IjE2MDMiLCJpc3MiOiJzdXBwb3J0LmJyYWluY2VydC5jb20ifQ.cCUjQg9knvhSlZRiJ8SQursEHd7VPCRBqZooBJQMSeA)

- **Undo action on whiteboard**

Click on the back arrow to ‘Undo action’ on the whiteboard.

![](https://support.braincert.com/kb/attachment/article/130/inline?token=eyJhbGciOiJodHRwOi8vd3d3LnczLm9yZy8yMDAxLzA0L3htbGRzaWctbW9yZSNobWFjLXNoYTI1NiIsInR5cCI6IkpXVCJ9.eyJpZCI6IjQzODYiLCJvcmdpZCI6IjE2MDMiLCJpc3MiOiJzdXBwb3J0LmJyYWluY2VydC5jb20ifQ.FSWPPcg6_4_amMeY0E14aPVF4-2OXsjTK-XKdzgyTc0)

- **Redo Action on whiteboard**

Click on the forward arrow to ‘**Redo action**’ on the whiteboard.

![](https://support.braincert.com/kb/attachment/article/130/inline?token=eyJhbGciOiJodHRwOi8vd3d3LnczLm9yZy8yMDAxLzA0L3htbGRzaWctbW9yZSNobWFjLXNoYTI1NiIsInR5cCI6IkpXVCJ9.eyJpZCI6IjQzODciLCJvcmdpZCI6IjE2MDMiLCJpc3MiOiJzdXBwb3J0LmJyYWluY2VydC5jb20ifQ.l2-mW5I5uTT8tiyFeYikVD4qM0Y-cTNp40MhhCG_1FU)

Hopefully, this article has provided you with an overview of the features and tools of a virtual classroom.

# Embedding Content in the Content Library

This article is to assist you in embedding content in the content library.

##   

## **Step 1:**

Navigate to Contents under '**Products**', open '**Embedded Content**', and click on '**Embed content**'.

![1.png](https://support.braincert.com/kb/attachment/article/39/inline?token=eyJhbGciOiJodHRwOi8vd3d3LnczLm9yZy8yMDAxLzA0L3htbGRzaWctbW9yZSNobWFjLXNoYTI1NiIsInR5cCI6IkpXVCJ9.eyJpZCI6IjUzNDEiLCJvcmdpZCI6IjE2MDMiLCJpc3MiOiJzdXBwb3J0LmJyYWluY2VydC5jb20ifQ.QNc9HdSJg1SGmYDe1LYSmkjKazSlvEKPozlXFIYvnZA)**​**

## **Step 2:**

The Embed drop-down list box allows you to select the required site.

![2.png](https://support.braincert.com/kb/attachment/article/39/inline?token=eyJhbGciOiJodHRwOi8vd3d3LnczLm9yZy8yMDAxLzA0L3htbGRzaWctbW9yZSNobWFjLXNoYTI1NiIsInR5cCI6IkpXVCJ9.eyJpZCI6IjUzNDIiLCJvcmdpZCI6IjE2MDMiLCJpc3MiOiJzdXBwb3J0LmJyYWluY2VydC5jb20ifQ.kEd7TnAp6Wo7fwQLHw8_FtPrdx7dSIZRySnN_a2i_4o)**​**

## **Step 3:**

Save the file after entering the '**URL**' and giving it a '**Title**'.

![3.png](https://support.braincert.com/kb/attachment/article/39/inline?token=eyJhbGciOiJodHRwOi8vd3d3LnczLm9yZy8yMDAxLzA0L3htbGRzaWctbW9yZSNobWFjLXNoYTI1NiIsInR5cCI6IkpXVCJ9.eyJpZCI6IjUzNDMiLCJvcmdpZCI6IjE2MDMiLCJpc3MiOiJzdXBwb3J0LmJyYWluY2VydC5jb20ifQ.Dh6tlnQ5-1Wsrpt49W3ilwMLv4owc3q0HWktrnelCFY)

##   

## **Step 4:**

The embedded content can be found by navigating to 'Contents'.

A list of a link embedded within it can be viewed here.

![4.png](https://support.braincert.com/kb/attachment/article/39/inline?token=eyJhbGciOiJodHRwOi8vd3d3LnczLm9yZy8yMDAxLzA0L3htbGRzaWctbW9yZSNobWFjLXNoYTI1NiIsInR5cCI6IkpXVCJ9.eyJpZCI6IjUzNDQiLCJvcmdpZCI6IjE2MDMiLCJpc3MiOiJzdXBwb3J0LmJyYWluY2VydC5jb20ifQ.EujBGbM6RvEqOTiH3S6mo4YO78pLh7W-Prq2CFtxM0A)

Hope you find this article helpful.

# Using Zoho Mail as your SMTP Server

We've documented the Zoho Mail SMTP server settings for sending mail from your LMS using your Zoho email.

####   

#### **App Specific Password**

You cannot use your email password when setting up a custom SMTP server using Zoho mail. Zoho requires Application-specific passwords which are 12-character passcodes that give an app permission to access your Zoho Mail from your LMS platform.

## **Step 1:**

To generate Application-specific passwords, go to the Zoho app password and click on '**Generate New Password**'.

![](https://support.braincert.com/kb/attachment/article/56/inline?token=eyJhbGciOiJodHRwOi8vd3d3LnczLm9yZy8yMDAxLzA0L3htbGRzaWctbW9yZSNobWFjLXNoYTI1NiIsInR5cCI6IkpXVCJ9.eyJpZCI6IjQwMTIiLCJvcmdpZCI6IjE2MDMiLCJpc3MiOiJzdXBwb3J0LmJyYWluY2VydC5jb20ifQ.ba5iA4jGck0ccLl2w2sRL4gfXhtBpAeFMRCm_yduhjQ)

## **Step 2:**

You can type any name such as '**LMS**' that helps you remember where the password is being used. This means that you can revoke the application-specific password you generated for the LMS anytime.

![](https://support.braincert.com/kb/attachment/article/56/inline?token=eyJhbGciOiJodHRwOi8vd3d3LnczLm9yZy8yMDAxLzA0L3htbGRzaWctbW9yZSNobWFjLXNoYTI1NiIsInR5cCI6IkpXVCJ9.eyJpZCI6IjQwMTEiLCJvcmdpZCI6IjE2MDMiLCJpc3MiOiJzdXBwb3J0LmJyYWluY2VydC5jb20ifQ.RudJz2AgTWQbXgSEQPHtAC20ElgaBgu_Qoi_OukfgNk)

## **Step 3:**

Copy the password as it will not be displayed again.

![](https://support.braincert.com/kb/attachment/article/56/inline?token=eyJhbGciOiJodHRwOi8vd3d3LnczLm9yZy8yMDAxLzA0L3htbGRzaWctbW9yZSNobWFjLXNoYTI1NiIsInR5cCI6IkpXVCJ9.eyJpZCI6IjQwMTAiLCJvcmdpZCI6IjE2MDMiLCJpc3MiOiJzdXBwb3J0LmJyYWluY2VydC5jb20ifQ.HROGMzIN5sGYmhPlqNfa0u5WNy8ObjHK6y9ayIOrH24)

####   

#### **SMTP Settings**

Go to '**Global Settings**' --&gt; '**Mail relay**' on BrainCert. Configure it as follows:

- **SMTP Mail Server Hostname:** smtp.zoho.com
- **Port**: 587
- **Use Secure Connection:** TLS
- **Username**: Your Zoho Mail address (example@zoho.com or your email address if you use Zoho Mail with your own domain)
- **Password**: Your Application-specific password was copied earlier

Now, click the '**Send Test Mail**' button and confirm you see the '**Mail sent successfully**' message. The platform will send you a test email to the same email address.

![Zoho.png](https://support.braincert.com/kb/attachment/article/56/inline?token=eyJhbGciOiJodHRwOi8vd3d3LnczLm9yZy8yMDAxLzA0L3htbGRzaWctbW9yZSNobWFjLXNoYTI1NiIsInR5cCI6IkpXVCJ9.eyJpZCI6IjU1MTEiLCJvcmdpZCI6IjE2MDMiLCJpc3MiOiJzdXBwb3J0LmJyYWluY2VydC5jb20ifQ.cwNW___q-DpK6mRIBTecIrX6vMFahxnTmBadrxHKeyc)

![](https://support.braincert.com/kb/attachment/article/56/inline?token=eyJhbGciOiJodHRwOi8vd3d3LnczLm9yZy8yMDAxLzA0L3htbGRzaWctbW9yZSNobWFjLXNoYTI1NiIsInR5cCI6IkpXVCJ9.eyJpZCI6IjM5ODUiLCJvcmdpZCI6IjE2MDMiLCJpc3MiOiJzdXBwb3J0LmJyYWluY2VydC5jb20ifQ.5b7bFP5lQ91dMYSzF7iDqakjZWEwcCGvVNb88yWAGY0)

This confirms sending emails from LMS using your Zoho mail account.

# How to Enable and Use the Accessibility Extension

The **Accessibility** Extension helps users personalize their learning experience by adjusting visual and accessibility settings directly within the platform. Follow the steps below to enable and use it.

##   
Step 1: Enable Accessibility Extension

Navigate to '**Global Settings**' and select '**Apps & Extensions**' to view and manage available integrations.

## ![1](https://support.braincert.com/kb/attachment/article/268/inline?token=eyJhbGciOiJodHRwOi8vd3d3LnczLm9yZy8yMDAxLzA0L3htbGRzaWctbW9yZSNobWFjLXNoYTI1NiIsInR5cCI6IkpXVCJ9.eyJpZCI6IjcwMTgiLCJvcmdpZCI6IjE2MDMiLCJpc3MiOiJzdXBwb3J0LmJyYWluY2VydC5jb20ifQ.TKUtm_a3rZJaLutGhdhYJTvHyHVQyQzVfwe9WiV1poc)

##   
Step 2: Enable Accessibility Widget

Locate the Accessibility Widget, toggle it '**ON**', and click '**Save**'.
<section class="info-box" style="text-align: start;"><span style="font-family: Inter; font-size: 14px; font-style: normal; font-weight: 400; text-align: start; text-indent: 0px; white-space: normal; float: none; display: inline !important;">Once enabled, the Accessibility icon will appear on your dashboard or course interface.</span></section>
## ![2](https://support.braincert.com/kb/attachment/article/268/inline?token=eyJhbGciOiJodHRwOi8vd3d3LnczLm9yZy8yMDAxLzA0L3htbGRzaWctbW9yZSNobWFjLXNoYTI1NiIsInR5cCI6IkpXVCJ9.eyJpZCI6IjcwMTkiLCJvcmdpZCI6IjE2MDMiLCJpc3MiOiJzdXBwb3J0LmJyYWluY2VydC5jb20ifQ.RTKlv7mowhJRKY-nyS8bom7wf7v1Dd_RQABlP_bRE14)

##   
Step 3: Open the Accessibility Assistant

Once enabled, a blue accessibility icon appears in the bottom left corner. Click it to launch the assistant.

## ![3](https://support.braincert.com/kb/attachment/article/268/inline?token=eyJhbGciOiJodHRwOi8vd3d3LnczLm9yZy8yMDAxLzA0L3htbGRzaWctbW9yZSNobWFjLXNoYTI1NiIsInR5cCI6IkpXVCJ9.eyJpZCI6IjcwMjAiLCJvcmdpZCI6IjE2MDMiLCJpc3MiOiJzdXBwb3J0LmJyYWluY2VydC5jb20ifQ.Q_rT5idPsBZiHGUvi4qlVIDYeUbpvhsix5NgK-QxBb4)

##   
Step 4: Choose Accessibility Options

Inside the assistant, select from the following options:

**Low Vision:** Enhances contrast and magnifies content to support users with limited eyesight.

**Color Blindness:** Adjusts colors to ensure content is distinguishable for color-impaired users.

**Dyslexia-Friendly:** Changes font styles and spacing for easier reading by users with dyslexia.

**Seizure Safe:** Eliminates flashing animations and risky color combinations to prevent seizures for epilepsy-prone users.

**Reduce Distractions:** Minimizes on-screen clutter to help users with ADHD or neurodevelopmental needs focus better.

**Motor Assistance:** Enables full navigation and action using keyboard controls for users with motor impairments.

**Cognitive Learning:** Adds assistive features to help users with cognitive disabilities like autism or dyslexia focus on essential elements.

**Keyboard Navigation:** Makes the LMS fully operable using only keyboard shortcuts and tabbing for mouse-free access.

## ![4](https://support.braincert.com/kb/attachment/article/268/inline?token=eyJhbGciOiJodHRwOi8vd3d3LnczLm9yZy8yMDAxLzA0L3htbGRzaWctbW9yZSNobWFjLXNoYTI1NiIsInR5cCI6IkpXVCJ9.eyJpZCI6IjcwMjEiLCJvcmdpZCI6IjE2MDMiLCJpc3MiOiJzdXBwb3J0LmJyYWluY2VydC5jb20ifQ.XSi7R6UZYUJi8l_XxKWLP098rEJ8gTEmC9zHgCBbImQ)

##   
Step 5: Reset the Settings

Once an option is enabled, you'll see the '**Reset**' icon. You can use this icon at any time to reset the settings.

![5](https://support.braincert.com/kb/attachment/article/268/inline?token=eyJhbGciOiJodHRwOi8vd3d3LnczLm9yZy8yMDAxLzA0L3htbGRzaWctbW9yZSNobWFjLXNoYTI1NiIsInR5cCI6IkpXVCJ9.eyJpZCI6IjcwMzQiLCJvcmdpZCI6IjE2MDMiLCJpc3MiOiJzdXBwb3J0LmJyYWluY2VydC5jb20ifQ.CpUBeNnQIA3arz4VRePIspSsHNms-5DCV0bwYP0gtOY)

Enabling Accessibility features ensures that every learner can interact with course materials in a way that best suits their needs, promoting an inclusive and supportive educational environment. By taking these steps, BrainCert users create equitable learning experiences for all, regardless of ability or circumstance.

# How to Enroll in a Course Without Payment

You've received an invite to enroll in a course for free, and it's easy to get started. All you need to do is follow a few simple steps using the invite link provided in the email. Here’s how you can enroll without any payment and begin learning right away.

## **Steps to Enroll Without Payment**

## **Step 1:**

Look for an email invitation in your inbox. This email will contain the name of the course and a unique link for enrolling without payment.

Click the '**Enroll Now**' button in the email to start the process.
<section class="warning-box">Be sure to check your spam/junk folder if you don’t see the email in your primary inbox.</section>
![1](https://support.braincert.com/kb/attachment/article/226/inline?token=eyJhbGciOiJodHRwOi8vd3d3LnczLm9yZy8yMDAxLzA0L3htbGRzaWctbW9yZSNobWFjLXNoYTI1NiIsInR5cCI6IkpXVCJ9.eyJpZCI6IjYwMDkiLCJvcmdpZCI6IjE2MDMiLCJpc3MiOiJzdXBwb3J0LmJyYWluY2VydC5jb20ifQ.eXIcmNuoEXG0Eu4BmRWWUdXrgz1cNIqvOQLftsOCAmE)

## **Step 2:**

Once you click the link, you’ll be redirected to the course page. Click the button '**Sign In And Continue**' to proceed further.

![2](https://support.braincert.com/kb/attachment/article/226/inline?token=eyJhbGciOiJodHRwOi8vd3d3LnczLm9yZy8yMDAxLzA0L3htbGRzaWctbW9yZSNobWFjLXNoYTI1NiIsInR5cCI6IkpXVCJ9.eyJpZCI6IjYwMTAiLCJvcmdpZCI6IjE2MDMiLCJpc3MiOiJzdXBwb3J0LmJyYWluY2VydC5jb20ifQ.LToUvZQhFD_nkuQbmE33iSlKSd9S4X1HEoShr-qCN1A)

## **Step 3:**

If you already have an account, enter your email and password and click '**Login**'.

If you don’t have an account yet, click '**Sign Up**' and fill in your details to create a new account. After registering, you’ll automatically be directed to the course page.

![3](https://support.braincert.com/kb/attachment/article/226/inline?token=eyJhbGciOiJodHRwOi8vd3d3LnczLm9yZy8yMDAxLzA0L3htbGRzaWctbW9yZSNobWFjLXNoYTI1NiIsInR5cCI6IkpXVCJ9.eyJpZCI6IjYwMTEiLCJvcmdpZCI6IjE2MDMiLCJpc3MiOiJzdXBwb3J0LmJyYWluY2VydC5jb20ifQ.nhIoSLUHw5iUH0WIZEn8nVAJhb1K7jSQNTRPQJPRFhM)

## **Step 4:**

After signing in (or signing up), you'll be directed to the course page. Click '**Enroll Now**' to confirm your enrollment.

![4](https://support.braincert.com/kb/attachment/article/226/inline?token=eyJhbGciOiJodHRwOi8vd3d3LnczLm9yZy8yMDAxLzA0L3htbGRzaWctbW9yZSNobWFjLXNoYTI1NiIsInR5cCI6IkpXVCJ9.eyJpZCI6IjYwMTIiLCJvcmdpZCI6IjE2MDMiLCJpc3MiOiJzdXBwb3J0LmJyYWluY2VydC5jb20ifQ.x2apkcD4fm_7YmoNXTBlLjJOt4KugqFHxbXQsT-zUy4)

## **Step 5:**

On this page, click '**Continue**' to finalize your enrollment and access the course materials.

![5](https://support.braincert.com/kb/attachment/article/226/inline?token=eyJhbGciOiJodHRwOi8vd3d3LnczLm9yZy8yMDAxLzA0L3htbGRzaWctbW9yZSNobWFjLXNoYTI1NiIsInR5cCI6IkpXVCJ9.eyJpZCI6IjYwMTMiLCJvcmdpZCI6IjE2MDMiLCJpc3MiOiJzdXBwb3J0LmJyYWluY2VydC5jb20ifQ.menp25nTJ_2ppyMd5Ymx72z4fKDQDQS3rRgK4JNG8Zo)

## **Step 6:**

Now that you’re enrolled, you’ll have full access to the course. Simply click the Play button to start watching or engaging with the course content.

Each topic or module will have a '**Mark as Learned**' button once completed. Be sure to check this option to keep track of your progress and unlock the next topics in the course.

**![6](https://support.braincert.com/kb/attachment/article/226/inline?token=eyJhbGciOiJodHRwOi8vd3d3LnczLm9yZy8yMDAxLzA0L3htbGRzaWctbW9yZSNobWFjLXNoYTI1NiIsInR5cCI6IkpXVCJ9.eyJpZCI6IjYwMTQiLCJvcmdpZCI6IjE2MDMiLCJpc3MiOiJzdXBwb3J0LmJyYWluY2VydC5jb20ifQ.4qmEhZHbmJcrsoeTG28d0cjZW7CtfphVboBGIk9cb7g)**

Now you’re all set to get started with your course completely free! Just follow these steps, and you’ll be learning in no time. Enjoy the course and keep track of your achievements by marking each section as complete. Happy learning!

# How to Integrate Vadoo TV

This article is intended to enable you to steer the Vadoo TV through the course.

## **Step 1:**

Log in to your BrainCert UTP with your Credentials and navigate to '**Contents**' under '**Products**'. Go to Embed Content and click on '**Embed** **Content**'.

![1.png](https://support.braincert.com/kb/attachment/article/76/inline?token=eyJhbGciOiJodHRwOi8vd3d3LnczLm9yZy8yMDAxLzA0L3htbGRzaWctbW9yZSNobWFjLXNoYTI1NiIsInR5cCI6IkpXVCJ9.eyJpZCI6IjUzNDAiLCJvcmdpZCI6IjE2MDMiLCJpc3MiOiJzdXBwb3J0LmJyYWluY2VydC5jb20ifQ.TaUXdnf0BEZ1DlcTmUPCkpxFpLMHZdmQa4DAm0Z02aA)

##   

## **Step 2:**

Select '**Vadoo TV'**  **** from the embed site drop-down list.

![2.png](https://support.braincert.com/kb/attachment/article/76/inline?token=eyJhbGciOiJodHRwOi8vd3d3LnczLm9yZy8yMDAxLzA0L3htbGRzaWctbW9yZSNobWFjLXNoYTI1NiIsInR5cCI6IkpXVCJ9.eyJpZCI6IjUzMzEiLCJvcmdpZCI6IjE2MDMiLCJpc3MiOiJzdXBwb3J0LmJyYWluY2VydC5jb20ifQ.yqa71MIih87WoclRd7UDY5ZoHevBZfiF8mSijn7dJ38)

Embed the video's URL and title and click on '**Save**' to add to the content library.

![3.png](https://support.braincert.com/kb/attachment/article/76/inline?token=eyJhbGciOiJodHRwOi8vd3d3LnczLm9yZy8yMDAxLzA0L3htbGRzaWctbW9yZSNobWFjLXNoYTI1NiIsInR5cCI6IkpXVCJ9.eyJpZCI6IjUzMzIiLCJvcmdpZCI6IjE2MDMiLCJpc3MiOiJzdXBwb3J0LmJyYWluY2VydC5jb20ifQ.1fpZ_mgMHA2WolZfCzBdIG0u7rs2BWFUDRJ6TIZoLis)

##   

## **Step 3:**

Go to the '**Contents**' under '**Products**'. Click on the '**Embedded Content**' tab to see the video that you have embedded.

![4.png](https://support.braincert.com/kb/attachment/article/76/inline?token=eyJhbGciOiJodHRwOi8vd3d3LnczLm9yZy8yMDAxLzA0L3htbGRzaWctbW9yZSNobWFjLXNoYTI1NiIsInR5cCI6IkpXVCJ9.eyJpZCI6IjUzMzMiLCJvcmdpZCI6IjE2MDMiLCJpc3MiOiJzdXBwb3J0LmJyYWluY2VydC5jb20ifQ.r3jsCNOQN300ia64Is4myZw3E03KxfAe9O2LXHRojzo)

##   

## **Step 4:**

Navigate to the '**Manage** **Courses**' page, where you'll find the list of courses. Click on the options of the course and select '**Curriculum**' to which you can add Vadoo TV.

![5.png](https://support.braincert.com/kb/attachment/article/76/inline?token=eyJhbGciOiJodHRwOi8vd3d3LnczLm9yZy8yMDAxLzA0L3htbGRzaWctbW9yZSNobWFjLXNoYTI1NiIsInR5cCI6IkpXVCJ9.eyJpZCI6IjUzMzQiLCJvcmdpZCI6IjE2MDMiLCJpc3MiOiJzdXBwb3J0LmJyYWluY2VydC5jb20ifQ.M_6xPanzWGKecZ7erfWaKE6L9t68aWccAuWpktRQXwY)

##   

## **Step 5:**

Click on the '**Add**' icon under the lecture to add the content. A pop-up appears when the drop-down icon is selected.

![6.png](https://support.braincert.com/kb/attachment/article/76/inline?token=eyJhbGciOiJodHRwOi8vd3d3LnczLm9yZy8yMDAxLzA0L3htbGRzaWctbW9yZSNobWFjLXNoYTI1NiIsInR5cCI6IkpXVCJ9.eyJpZCI6IjUzMzUiLCJvcmdpZCI6IjE2MDMiLCJpc3MiOiJzdXBwb3J0LmJyYWluY2VydC5jb20ifQ.TTljfIuSiymOHJ55J3b7h2g5-KPEgRIku_PJ-tgV5-Y)

##   

## **Step 6:**

A pop-up appears with the video from Vadoo TV that you embedded earlier, select the Vadoo TV and click on the Add button.

![7.png](https://support.braincert.com/kb/attachment/article/76/inline?token=eyJhbGciOiJodHRwOi8vd3d3LnczLm9yZy8yMDAxLzA0L3htbGRzaWctbW9yZSNobWFjLXNoYTI1NiIsInR5cCI6IkpXVCJ9.eyJpZCI6IjUzMzYiLCJvcmdpZCI6IjE2MDMiLCJpc3MiOiJzdXBwb3J0LmJyYWluY2VydC5jb20ifQ.RYqxY0IO2rX_r1rpTD6h0-42aS0OY2VXpUg7vsneZws)

## **Step 7:**

The video gets added and aligned with the simple drag-and-drop method.

![8.png](https://support.braincert.com/kb/attachment/article/76/inline?token=eyJhbGciOiJodHRwOi8vd3d3LnczLm9yZy8yMDAxLzA0L3htbGRzaWctbW9yZSNobWFjLXNoYTI1NiIsInR5cCI6IkpXVCJ9.eyJpZCI6IjUzMzciLCJvcmdpZCI6IjE2MDMiLCJpc3MiOiJzdXBwb3J0LmJyYWluY2VydC5jb20ifQ.BMR43kid8c30b6r6bjm9XfcLREqSMqG2LmTHpdVukvM)

It gets displayed on the course details page.

![9.png](https://support.braincert.com/kb/attachment/article/76/inline?token=eyJhbGciOiJodHRwOi8vd3d3LnczLm9yZy8yMDAxLzA0L3htbGRzaWctbW9yZSNobWFjLXNoYTI1NiIsInR5cCI6IkpXVCJ9.eyJpZCI6IjUzMzgiLCJvcmdpZCI6IjE2MDMiLCJpc3MiOiJzdXBwb3J0LmJyYWluY2VydC5jb20ifQ.anhExmAChVHk-4jhQuPIis3paCT86j6Eq_fSwR0Hi7Y)

And Vadoo TV gets integrated into the course.

![10.png](https://support.braincert.com/kb/attachment/article/76/inline?token=eyJhbGciOiJodHRwOi8vd3d3LnczLm9yZy8yMDAxLzA0L3htbGRzaWctbW9yZSNobWFjLXNoYTI1NiIsInR5cCI6IkpXVCJ9.eyJpZCI6IjUzMzkiLCJvcmdpZCI6IjE2MDMiLCJpc3MiOiJzdXBwb3J0LmJyYWluY2VydC5jb20ifQ.QcBFPLOjJoLr_OiXzzSr8NF8leoIoWzkFP9NnL1wqBc)

Hope you find this article helpful.

# How to Enable and Configure Recommended Courses & Set the Default Course Tab for Learners

This guide explains how to enable or disable recommended courses across your platform and configure the default tab (either “Description” or “Content”) on the course details page. These settings help you personalize the learner experience and drive engagement by showing the most relevant content first.

The **Recommended Courses** feature lets you display related courses on the learner dashboard and below course pages. Follow the steps below to enable and configure this setting.

###   

### Step 1: Go to Catalog Settings

Click on '**Global Settings**' and open '**Catalog Settings**.'

![1](https://support.braincert.com/kb/attachment/article/257/inline?token=eyJhbGciOiJodHRwOi8vd3d3LnczLm9yZy8yMDAxLzA0L3htbGRzaWctbW9yZSNobWFjLXNoYTI1NiIsInR5cCI6IkpXVCJ9.eyJpZCI6IjY3OTEiLCJvcmdpZCI6IjE2MDMiLCJpc3MiOiJzdXBwb3J0LmJyYWluY2VydC5jb20ifQ.akPa7fLFI-5Nx7wnydsw3nUUhU1VE0PrYQw5A51uCf0)

###   

### Step 2: Enable Show Recommended Courses

Locate the **Show Recommended Courses** option. Choose **Yes** to display recommended courses:

    - On the learner dashboard
    - Below each course page

Choose '**No'** if you don't want to show recommended courses to learners, and click '**Save**.'

> 
> **Recommended:** Set this to **Yes** to boost course visibility and learner engagement.
> 

### ![2](https://support.braincert.com/kb/attachment/article/257/inline?token=eyJhbGciOiJodHRwOi8vd3d3LnczLm9yZy8yMDAxLzA0L3htbGRzaWctbW9yZSNobWFjLXNoYTI1NiIsInR5cCI6IkpXVCJ9.eyJpZCI6IjY3OTMiLCJvcmdpZCI6IjE2MDMiLCJpc3MiOiJzdXBwb3J0LmJyYWluY2VydC5jb20ifQ.Gaz7QSiHiyMHD_X_euLutnG8667Ny8U7Wa8mQUawEuk) 

When '**Yes**' is selected, the courses will be displayed under '**Recommended Courses.**'

![5](https://support.braincert.com/kb/attachment/article/257/inline?token=eyJhbGciOiJodHRwOi8vd3d3LnczLm9yZy8yMDAxLzA0L3htbGRzaWctbW9yZSNobWFjLXNoYTI1NiIsInR5cCI6IkpXVCJ9.eyJpZCI6IjY3OTYiLCJvcmdpZCI6IjE2MDMiLCJpc3MiOiJzdXBwb3J0LmJyYWluY2VydC5jb20ifQ.N3r96Ay8BEDcJgfmbFA3vfqG7vU2VdDCoEClyRXVJms)

###   

### Step 3: Set Default Course Details Tab

In the same '**Catalog Settings'** section, find the '**Default Course Details Tab'** dropdown.

Select one of the following:

1. **Content**: Displays course modules and lessons first.
2. **Description**: Displays the course overview first.

Click '**Save**' once done.

![6](https://support.braincert.com/kb/attachment/article/257/inline?token=eyJhbGciOiJodHRwOi8vd3d3LnczLm9yZy8yMDAxLzA0L3htbGRzaWctbW9yZSNobWFjLXNoYTI1NiIsInR5cCI6IkpXVCJ9.eyJpZCI6IjY3OTciLCJvcmdpZCI6IjE2MDMiLCJpc3MiOiJzdXBwb3J0LmJyYWluY2VydC5jb20ifQ.bx6b6aJRP3qMJDQIqm4sxzTd-lehBfC4rTraCLy3na4)

The option you select will appear as the default tab when a learner opens any course.

Below is the image shown when the '**Content**' option is selected

![7](https://support.braincert.com/kb/attachment/article/257/inline?token=eyJhbGciOiJodHRwOi8vd3d3LnczLm9yZy8yMDAxLzA0L3htbGRzaWctbW9yZSNobWFjLXNoYTI1NiIsInR5cCI6IkpXVCJ9.eyJpZCI6IjY3OTIiLCJvcmdpZCI6IjE2MDMiLCJpc3MiOiJzdXBwb3J0LmJyYWluY2VydC5jb20ifQ.b3cV2wuM3LzJWJnEwpHJJujlzKiWIrTdmElN33Qs81s)

Below is the image shown when the '**Description**' option is selected

![8](https://support.braincert.com/kb/attachment/article/257/inline?token=eyJhbGciOiJodHRwOi8vd3d3LnczLm9yZy8yMDAxLzA0L3htbGRzaWctbW9yZSNobWFjLXNoYTI1NiIsInR5cCI6IkpXVCJ9.eyJpZCI6IjY3OTgiLCJvcmdpZCI6IjE2MDMiLCJpc3MiOiJzdXBwb3J0LmJyYWluY2VydC5jb20ifQ.m6b5mKvdmUjG-jsQX1oavz4Uf2KjWWzWAc0vBLLQBiM)

By following these steps, you can successfully configure how recommended courses appear and how course details are presented to your learners.

# How to Use White-Label Email Service

Setting up a reliable and fully branded email delivery system is essential for professional communication. With the white-label email service, you can send all platform-generated emails directly from your own domain, improving trust, deliverability, and overall user experience.

This guide walks you through the simple steps to enable the service, configure your domain, and generate the required DNS records for seamless email sending.

## Step 1: Open Mail Relay in Global Settings

Go to '**Global Settings**' and select '**Mail Relay**'.

![1](https://support.braincert.com/kb/attachment/article/276/inline?token=eyJhbGciOiJodHRwOi8vd3d3LnczLm9yZy8yMDAxLzA0L3htbGRzaWctbW9yZSNobWFjLXNoYTI1NiIsInR5cCI6IkpXVCJ9.eyJpZCI6IjcwOTAiLCJvcmdpZCI6IjE2MDMiLCJpc3MiOiJzdXBwb3J0LmJyYWluY2VydC5jb20ifQ.gZdrcsDBlz6USBER6oLjlHfGjtPz-SywTomeifenxbk)

## Step 2: Choose White-Label Email Service

If you are currently using SMTP, click the '**Change**' button to proceed.

![2](https://support.braincert.com/kb/attachment/article/276/inline?token=eyJhbGciOiJodHRwOi8vd3d3LnczLm9yZy8yMDAxLzA0L3htbGRzaWctbW9yZSNobWFjLXNoYTI1NiIsInR5cCI6IkpXVCJ9.eyJpZCI6IjcwOTEiLCJvcmdpZCI6IjE2MDMiLCJpc3MiOiJzdXBwb3J0LmJyYWluY2VydC5jb20ifQ.BEiQZbQzhBthh0X1Om5kqcjwL-NXEzu2UiT4XeJp4_4)

## Step 3: Purchase White-Label E-Mail Access

In the SMTP Settings (Outgoing Email Configuration) section, you’ll see two choices:

- ***SMTP Relay***(Traditional) lets you send emails using your own SMTP details, such as Gmail or Office 365.
- ***White-Label Email Service*** uses a built-in email system with better deliverability and a dedicated sending setup for your domain.

Select '**White-Label E-Mail Service**', and click '**Buy White-Label Access**' to purchase.

![3](https://support.braincert.com/kb/attachment/article/276/inline?token=eyJhbGciOiJodHRwOi8vd3d3LnczLm9yZy8yMDAxLzA0L3htbGRzaWctbW9yZSNobWFjLXNoYTI1NiIsInR5cCI6IkpXVCJ9.eyJpZCI6IjcwOTIiLCJvcmdpZCI6IjE2MDMiLCJpc3MiOiJzdXBwb3J0LmJyYWluY2VydC5jb20ifQ.ss5yIKJqeP0JAyNhn6KAz9JPb32OOLSdmyyipBSLPH4)

## Step 4: Complete the Payment

You will be taken to the payment page. Complete the payment by entering the required details and clicking '**Pay**'. Once the payment is successful, you will be redirected back to the setup page.

## Step 5: Add Your Sending Domain & Generate DNS Records

Enter your '**Sending Domain**' (for example, **mail.yourcompany.com** or **yourcompany.net**) in the text box and click '**Generate DNS Records**'.

![5](https://support.braincert.com/kb/attachment/article/276/inline?token=eyJhbGciOiJodHRwOi8vd3d3LnczLm9yZy8yMDAxLzA0L3htbGRzaWctbW9yZSNobWFjLXNoYTI1NiIsInR5cCI6IkpXVCJ9.eyJpZCI6IjcwOTgiLCJvcmdpZCI6IjE2MDMiLCJpc3MiOiJzdXBwb3J0LmJyYWluY2VydC5jb20ifQ.zaKtpifx2930mshJc4yC9JA4hlYllwCOCDkc7PENZlo)

## Step 6: Generate DNS Records for the Sending Domain

BrainCert will generate the DNS entries (typically TXT and CNAME records) required for SPF, DKIM, and DMARC email authentication.
<section class="info-box" style="text-align: start;"><span style="font-family: Inter, Roboto, -apple-system, BlinkMacSystemFont, &quot;Segoe UI&quot;, &quot;Helvetica Neue&quot;, sans-serif; font-size: 16px; font-style: normal; font-weight: 400; text-align: start; text-indent: 0px; white-space: normal; float: none; display: inline !important;">Copy each host/name and value pair carefully, as you will need them in your domain registrar or DNS hosting provider.</span></section>
![6](https://support.braincert.com/kb/attachment/article/276/inline?token=eyJhbGciOiJodHRwOi8vd3d3LnczLm9yZy8yMDAxLzA0L3htbGRzaWctbW9yZSNobWFjLXNoYTI1NiIsInR5cCI6IkpXVCJ9.eyJpZCI6IjcwOTUiLCJvcmdpZCI6IjE2MDMiLCJpc3MiOiJzdXBwb3J0LmJyYWluY2VydC5jb20ifQ.kQPSxIP0b4GB4B2w7HgP4HvcFDzLmhzNsKmo-GJISoM)

## Step 7: Verify Connection

Now, in the DNS configuration screen, click '**Verify DNS & Connect** **.**' Once verified, your domain will be activated for white-label email sending.

![7](https://support.braincert.com/kb/attachment/article/276/inline?token=eyJhbGciOiJodHRwOi8vd3d3LnczLm9yZy8yMDAxLzA0L3htbGRzaWctbW9yZSNobWFjLXNoYTI1NiIsInR5cCI6IkpXVCJ9.eyJpZCI6IjcwOTYiLCJvcmdpZCI6IjE2MDMiLCJpc3MiOiJzdXBwb3J0LmJyYWluY2VydC5jb20ifQ.gED7qcQ7cLP2ScNoonElYJj1t0vmCDZTTxjUCE34FYo)

## Step 8: Monitor Domain Warm‑Up Status

After a successful DNS connection, the '**Domain Warm‑Up**' process starts automatically to build your domain’s reputation with mailbox providers. Then, use '**Send test email to myself**' to verify everything works correctly.
<section class="info-box" style="text-align: start;"><span style="font-family: fkGroteskNeue, ui-sans-serif, system-ui, -apple-system, BlinkMacSystemFont, &quot;Segoe UI&quot;, Roboto, &quot;Helvetica Neue&quot;, Arial, &quot;Noto Sans&quot;, sans-serif, &quot;Apple Color Emoji&quot;, &quot;Segoe UI Emoji&quot;, &quot;Segoe UI Symbol&quot;, &quot;Noto Color Emoji&quot;, &quot;Hiragino Sans&quot;, &quot;PingFang SC&quot;, &quot;Apple SD Gothic Neo&quot;, &quot;Yu Gothic&quot;, &quot;Microsoft YaHei&quot;, &quot;Microsoft JhengHei&quot;, Meiryo; font-size: 16px; font-style: normal; font-weight: 400; text-align: start; text-indent: 0px; white-space: normal; float: none; display: inline !important;">During warm‑up, only some emails use the new white‑label domain, with more switching over as reputation grows. When warm‑up hits 100%, all emails are sent through your white‑labeled domain automatically.</span></section>
![8](https://support.braincert.com/kb/attachment/article/276/inline?token=eyJhbGciOiJodHRwOi8vd3d3LnczLm9yZy8yMDAxLzA0L3htbGRzaWctbW9yZSNobWFjLXNoYTI1NiIsInR5cCI6IkpXVCJ9.eyJpZCI6IjcwOTkiLCJvcmdpZCI6IjE2MDMiLCJpc3MiOiJzdXBwb3J0LmJyYWluY2VydC5jb20ifQ.vL3x4DDZvWqWfZie4QiS0vcK94xEZlZOZ8ip2xBB7Kg)
<section class="info-box" style="text-align: start;"><span style="font-family: fkGroteskNeue, ui-sans-serif, system-ui, -apple-system, BlinkMacSystemFont, &quot;Segoe UI&quot;, Roboto, &quot;Helvetica Neue&quot;, Arial, &quot;Noto Sans&quot;, sans-serif, &quot;Apple Color Emoji&quot;, &quot;Segoe UI Emoji&quot;, &quot;Segoe UI Symbol&quot;, &quot;Noto Color Emoji&quot;, &quot;Hiragino Sans&quot;, &quot;PingFang SC&quot;, &quot;Apple SD Gothic Neo&quot;, &quot;Yu Gothic&quot;, &quot;Microsoft YaHei&quot;, &quot;Microsoft JhengHei&quot;, Meiryo; font-size: 16px; font-style: normal; font-weight: 400; text-align: start; text-indent: 0px; white-space: normal; float: none; display: inline !important;">To reset, please contact the BrainCert support team with your account details.</span></section>
You have now completed the setup for the white-label email service. Once your DNS entries are verified, all system emails, including notifications, updates, and password resets, will be sent from your custom domain, improving branding and deliverability.

If you need further help, reach out to support.

# How to View Virtual Classroom Reports

This article guides you on how to track the learner's attendance and get details on them with Virtual Classroom reports.

<iframe src="https://player.vimeo.com/video/1008391507?h=bc3cac93eb&amp;title=0&amp;byline=0&amp;portrait=0&amp;badge=0&amp;autopause=0&amp;player_id=0&amp;app_id=58479" frameborder="0" allow="autoplay; fullscreen; picture-in-picture; clipboard-write" style="position:absolute;top:0;left:0;width:100%;height:100%;" title="How to View Virtual Classroom Reports">&ZeroWidthSpace;</iframe>

﻿﻿

## **Step 1:﻿**

Navigate to '**Reports & Analytics**' and open '**Virtual** **Classroom**'.

## **![1.png](https://support.braincert.com/kb/attachment/article/183/inline?token=eyJhbGciOiJodHRwOi8vd3d3LnczLm9yZy8yMDAxLzA0L3htbGRzaWctbW9yZSNobWFjLXNoYTI1NiIsInR5cCI6IkpXVCJ9.eyJpZCI6IjU0MjgiLCJvcmdpZCI6IjE2MDMiLCJpc3MiOiJzdXBwb3J0LmJyYWluY2VydC5jb20ifQ.iNEuViIVJcQdb9KzYCDZJLKAmdArB2IYpKYM3C78hvg)** **Step 2:﻿**

Now, click on '**Select a class for Reports**' and choose a class from the dropdown menu.

**![2.png](https://support.braincert.com/kb/attachment/article/183/inline?token=eyJhbGciOiJodHRwOi8vd3d3LnczLm9yZy8yMDAxLzA0L3htbGRzaWctbW9yZSNobWFjLXNoYTI1NiIsInR5cCI6IkpXVCJ9.eyJpZCI6IjU0MjkiLCJvcmdpZCI6IjE2MDMiLCJpc3MiOiJzdXBwb3J0LmJyYWluY2VydC5jb20ifQ.StoH2H9oNaZhJvYaZhxgOuDpMaqHano-tyV2NOIyHGo)**

##   

## **Step 3:**

Once the class is chosen, you'll be able to see the results of it. Reports can also be downloaded in '**CSV**', '**Excel**' and '**PDF**' formats.﻿﻿

**![3.png](https://support.braincert.com/kb/attachment/article/183/inline?token=eyJhbGciOiJodHRwOi8vd3d3LnczLm9yZy8yMDAxLzA0L3htbGRzaWctbW9yZSNobWFjLXNoYTI1NiIsInR5cCI6IkpXVCJ9.eyJpZCI6IjU0MzAiLCJvcmdpZCI6IjE2MDMiLCJpc3MiOiJzdXBwb3J0LmJyYWluY2VydC5jb20ifQ.JXKomRbWwC5goK9Erfihmy1crPMWcO2DQZkSKGNol3Y)**

##   

## **﻿﻿Step 4:**

To view the '**instructor's**' report, click on Instructor and scroll down to get the details.  
![4.png](https://support.braincert.com/kb/attachment/article/183/inline?token=eyJhbGciOiJodHRwOi8vd3d3LnczLm9yZy8yMDAxLzA0L3htbGRzaWctbW9yZSNobWFjLXNoYTI1NiIsInR5cCI6IkpXVCJ9.eyJpZCI6IjU0MzEiLCJvcmdpZCI6IjE2MDMiLCJpc3MiOiJzdXBwb3J0LmJyYWluY2VydC5jb20ifQ.yvOERX4MCnOBmatlAtUK1jKHz2nCCxis1DyGIXEUDpc)  
Hope this article is helpful.﻿﻿

****

****

****

****

# How to Create Groups and Assign Courses to the Groups

Follow the following steps to create groups and assign courses to groups.

<iframe src="https://player.vimeo.com/video/1004375942?h=5dcec9ffed&amp;title=0&amp;byline=0&amp;portrait=0&amp;badge=0&amp;autopause=0&amp;player_id=0&amp;app_id=58479" frameborder="0" allow="autoplay; fullscreen; picture-in-picture; clipboard-write" style="position:absolute;top:0;left:0;width:100%;height:100%;" title="How to Create Groups and Assign Courses to the Groups" bis_size="{&quot;x&quot;:104,&quot;y&quot;:410,&quot;w&quot;:1062,&quot;h&quot;:597,&quot;abs_x&quot;:104,&quot;abs_y&quot;:410}">&ZeroWidthSpace;</iframe>
<section class="info-box"><strong>Note:</strong> The features described in this article are available exclusively in BrainCert business plans. To learn more, visit our <a data-start="351" data-end="413" rel="noopener noreferrer" target="_blank" href="https://www.braincert.com/pricing/for-business" title="" aria-label="Open in new window">pricing page</a>.<br></section>
## **Step 1:** 

Log in to your LMS domain. Navigate to '**Groups**' under '**People**.' Now, open '**+ Add Group**.'

**![1.png](https://support.braincert.com/kb/attachment/article/81/inline?token=eyJhbGciOiJodHRwOi8vd3d3LnczLm9yZy8yMDAxLzA0L3htbGRzaWctbW9yZSNobWFjLXNoYTI1NiIsInR5cCI6IkpXVCJ9.eyJpZCI6IjUzNjIiLCJvcmdpZCI6IjE2MDMiLCJpc3MiOiJzdXBwb3J0LmJyYWluY2VydC5jb20ifQ.258n8y_c7EsGy2gxvuFfMw_B3WqHvdsFfYKZzWn-_oM)**

## **Step 2:**

Enter the '**Group Name**,' select the '**Group Type,**' and enter the '**Group Description**.' Finally, click on the '**Save**' icon.

![2.png](https://support.braincert.com/kb/attachment/article/81/inline?token=eyJhbGciOiJodHRwOi8vd3d3LnczLm9yZy8yMDAxLzA0L3htbGRzaWctbW9yZSNobWFjLXNoYTI1NiIsInR5cCI6IkpXVCJ9.eyJpZCI6IjUzNjMiLCJvcmdpZCI6IjE2MDMiLCJpc3MiOiJzdXBwb3J0LmJyYWluY2VydC5jb20ifQ.BOSrC6JTqxZ6rbWJpGyxNEe5YlyOD4ufT7DNfUrSZYU)

## **Step 3:**

Click on '**Add Users**' in the options.

![3.png](https://support.braincert.com/kb/attachment/article/81/inline?token=eyJhbGciOiJodHRwOi8vd3d3LnczLm9yZy8yMDAxLzA0L3htbGRzaWctbW9yZSNobWFjLXNoYTI1NiIsInR5cCI6IkpXVCJ9.eyJpZCI6IjUzNjQiLCJvcmdpZCI6IjE2MDMiLCJpc3MiOiJzdXBwb3J0LmJyYWluY2VydC5jb20ifQ.8gjxYn89WWLZ2BgLWqX5aknHoM5hGyCjlJTqeze1dV8)

## **Step 4:**

Select the users you need to add to the group and '**Save**' the changes.

![4.png](https://support.braincert.com/kb/attachment/article/81/inline?token=eyJhbGciOiJodHRwOi8vd3d3LnczLm9yZy8yMDAxLzA0L3htbGRzaWctbW9yZSNobWFjLXNoYTI1NiIsInR5cCI6IkpXVCJ9.eyJpZCI6IjUzNjUiLCJvcmdpZCI6IjE2MDMiLCJpc3MiOiJzdXBwb3J0LmJyYWluY2VydC5jb20ifQ.DfDaujxg93RUy_QksqF2pfqLMGeJOFgkS_Daoyk3VvI)

## **Step 5:**

To assign users to a group, Navigate to '**Courses**' under '**Products**' and open '**Manage Courses**.'

Click on the options of the course that you need to add to the group and then select '**Assign User Group**.'

![5.png](https://support.braincert.com/kb/attachment/article/81/inline?token=eyJhbGciOiJodHRwOi8vd3d3LnczLm9yZy8yMDAxLzA0L3htbGRzaWctbW9yZSNobWFjLXNoYTI1NiIsInR5cCI6IkpXVCJ9.eyJpZCI6IjUzNjYiLCJvcmdpZCI6IjE2MDMiLCJpc3MiOiJzdXBwb3J0LmJyYWluY2VydC5jb20ifQ.jGRTCqfo-J5pCvdFCNaLELJuAbUCf6GUTiKXiRB4dKY)

## **Step 6:**

Select the user group to assign the course and click on '**Save**.'

![6.png](https://support.braincert.com/kb/attachment/article/81/inline?token=eyJhbGciOiJodHRwOi8vd3d3LnczLm9yZy8yMDAxLzA0L3htbGRzaWctbW9yZSNobWFjLXNoYTI1NiIsInR5cCI6IkpXVCJ9.eyJpZCI6IjUzNjciLCJvcmdpZCI6IjE2MDMiLCJpc3MiOiJzdXBwb3J0LmJyYWluY2VydC5jb20ifQ.Oa9zVStkzx5l1RJqOA8Ps7LQPG6NZPFeg15b8aZhq78)

You have successfully assigned courses to the groups.

# How to Integrate accessiBe Extension

With the **accessiBe** extension in the LMS, it is now super easy to enable an automated web accessibility Solution for ADA & WCAG Compliance without writing a single code or any other complex integrations.

This AI-powered UI adjustment tool makes accessibility modifications based on a user's individual needs a breeze. All adjustments are compliant with WCAG 2.1 AA & AAA requirements ADA Title III, Section 508, EAA, ACA, AODA, and IS5568 requirements.

## **Step 1:**

Create an account with accessiBe ([https://accessibe.com/](https://accessibe.com/ "https://accessibe.com/")) and log in with your credentials.

## **Step 2:**

Under "**My Websites**" add your domain.

![Accessible-02](https://support.braincert.com/kb/attachment/article/69/inline?token=eyJhbGciOiJodHRwOi8vd3d3LnczLm9yZy8yMDAxLzA0L3htbGRzaWctbW9yZSNobWFjLXNoYTI1NiIsInR5cCI6IkpXVCJ9.eyJpZCI6IjQwMTkiLCJvcmdpZCI6IjE2MDMiLCJpc3MiOiJzdXBwb3J0LmJyYWluY2VydC5jb20ifQ.QFCEXi8g9mpQ8vnVavxur24PlLmm1aLS5621FO-OyKk)

## **Step 3:**

Copy the installation code under "**Installation**".

![](https://support.braincert.com/kb/attachment/article/69/inline?token=eyJhbGciOiJodHRwOi8vd3d3LnczLm9yZy8yMDAxLzA0L3htbGRzaWctbW9yZSNobWFjLXNoYTI1NiIsInR5cCI6IkpXVCJ9.eyJpZCI6IjQwMTgiLCJvcmdpZCI6IjE2MDMiLCJpc3MiOiJzdXBwb3J0LmJyYWluY2VydC5jb20ifQ.LY4yz6KMCa6lI-W4_jsucgTgeXeWbrNoeQBJ6gFDoHo)

## **Step 4:**

Log in to your LMS domain with your credentials and click "**Extensions**" under "**Global Settings**". You will be redirected to the Extensions page.

![1.png](https://support.braincert.com/kb/attachment/article/69/inline?token=eyJhbGciOiJodHRwOi8vd3d3LnczLm9yZy8yMDAxLzA0L3htbGRzaWctbW9yZSNobWFjLXNoYTI1NiIsInR5cCI6IkpXVCJ9.eyJpZCI6IjUwNjMiLCJvcmdpZCI6IjE2MDMiLCJpc3MiOiJzdXBwb3J0LmJyYWluY2VydC5jb20ifQ.rpYh0avq4Bkkxk8RhD-V8E4HLHn80PAmU15Oo78MyxE)

## **Step 5:**

Paste the activation code you copied from accessiBe on the highlighted field and click on '**Save**'. Once you save the code, enable the plugin using the toggle switch.![2.png](https://support.braincert.com/kb/attachment/article/69/inline?token=eyJhbGciOiJodHRwOi8vd3d3LnczLm9yZy8yMDAxLzA0L3htbGRzaWctbW9yZSNobWFjLXNoYTI1NiIsInR5cCI6IkpXVCJ9.eyJpZCI6IjUwNjQiLCJvcmdpZCI6IjE2MDMiLCJpc3MiOiJzdXBwb3J0LmJyYWluY2VydC5jb20ifQ.Isi6dZbSYPQOcvEJq3RNHue0freRJTkJG2-2iUe-KSs)  
  
After successful installation, the Accessibility icon will be enabled:

![](https://support.braincert.com/kb/attachment/article/69/inline?token=eyJhbGciOiJodHRwOi8vd3d3LnczLm9yZy8yMDAxLzA0L3htbGRzaWctbW9yZSNobWFjLXNoYTI1NiIsInR5cCI6IkpXVCJ9.eyJpZCI6IjQwMTQiLCJvcmdpZCI6IjE2MDMiLCJpc3MiOiJzdXBwb3J0LmJyYWluY2VydC5jb20ifQ.9NfOM7hSLniEl9NU_tOGd6BFPJO0niZw4LMh42HfD0w)

![](https://support.braincert.com/kb/attachment/article/69/inline?token=eyJhbGciOiJodHRwOi8vd3d3LnczLm9yZy8yMDAxLzA0L3htbGRzaWctbW9yZSNobWFjLXNoYTI1NiIsInR5cCI6IkpXVCJ9.eyJpZCI6IjQwMTMiLCJvcmdpZCI6IjE2MDMiLCJpc3MiOiJzdXBwb3J0LmJyYWluY2VydC5jb20ifQ.UtxEUCBQSs8EvfUj5aHD4l90CzJJCZdLwk7HBSEw6gQ)

Hope this article is useful.

# Steps to Setup Interface Language in HTML5 Virtual Classroom

This article will guide you through the steps to change the interface language of the Virtual Classroom.

#####   

## **Step 1:**

When you schedule a live class, use option as shown below to allow all attendees to change the virtual classroom interface language.

![](https://support.braincert.com/kb/attachment/article/148/inline?token=eyJhbGciOiJodHRwOi8vd3d3LnczLm9yZy8yMDAxLzA0L3htbGRzaWctbW9yZSNobWFjLXNoYTI1NiIsInR5cCI6IkpXVCJ9.eyJpZCI6IjQzMDIiLCJvcmdpZCI6IjE2MDMiLCJpc3MiOiJzdXBwb3J0LmJyYWluY2VydC5jb20ifQ.8GOX3mZm8ygOUr10u0bCfXajpdR1WETE6Kj1_dRdPJo)

#####   

## **Step 2:**

Attendees can click on the '**Settings**' icon on the top left of the platform to bring up the language selection and change the interface language of choice.

![](https://support.braincert.com/kb/attachment/article/148/inline?token=eyJhbGciOiJodHRwOi8vd3d3LnczLm9yZy8yMDAxLzA0L3htbGRzaWctbW9yZSNobWFjLXNoYTI1NiIsInR5cCI6IkpXVCJ9.eyJpZCI6IjQzMDEiLCJvcmdpZCI6IjE2MDMiLCJpc3MiOiJzdXBwb3J0LmJyYWluY2VydC5jb20ifQ.U3mIHQDm4kh_arnGyq_GVMLFUbivil5xZZho9bn6MGI)

## **Step 3:**

Select '**Language Settings**' and the dialogue box will be open up. Select the required language by clicking the language in the dropdown.

![](https://support.braincert.com/kb/attachment/article/148/inline?token=eyJhbGciOiJodHRwOi8vd3d3LnczLm9yZy8yMDAxLzA0L3htbGRzaWctbW9yZSNobWFjLXNoYTI1NiIsInR5cCI6IkpXVCJ9.eyJpZCI6IjQzMDAiLCJvcmdpZCI6IjE2MDMiLCJpc3MiOiJzdXBwb3J0LmJyYWluY2VydC5jb20ifQ.Lg8KjH29XZ50DlTWXrNc4S0oJucmkbmvS1Cim6PF_po)

![](https://support.braincert.com/kb/attachment/article/148/inline?token=eyJhbGciOiJodHRwOi8vd3d3LnczLm9yZy8yMDAxLzA0L3htbGRzaWctbW9yZSNobWFjLXNoYTI1NiIsInR5cCI6IkpXVCJ9.eyJpZCI6IjQyOTkiLCJvcmdpZCI6IjE2MDMiLCJpc3MiOiJzdXBwb3J0LmJyYWluY2VydC5jb20ifQ.Bc_51E9bkChYP0JLeFsIJXfM425_WPDZTE9NNLy2x5k)

## **Step 4:**

The list of supported languages:

- Bosnian

- Bulgarian
- Catalan
- Chinese-simplified
- Chinese-traditional
- Croatian
- Danish
- English
- Haitian-creole
- Hebrew
- Hindi
- Hmong-daw
- Hungarian
- Indonesian
- Italian
- Japanese
- Kiswahili
- Klingon
- Korean
- Lithuanian
- Malayalam
- Malay
- Maltese
- Norwegian-bokma
- Persian
- Polish
- Portuguese
- Romanian
- Russian
- Serbian
- Slovak
- Slovenian
- Spanish
- Swedish
- Tamil
- Telugu
- Thai
- Turkish
- Ukrainian
- Urdu
- Vietnamese
- Welsh

# A Guide to Use the Question Analysis Feature

The question analysis feature is a premium feature on BrainCert that has been designed to help instructors measure the overall performance & quality of Assessments. The system will automatically generate a report & give a recommendation on whether or not the questions (Multiple choice questions & True or False) in an assessment needs a review based on calculations that measure the **** **Difficulty Index** and **Discrimination Index**.

## **Difficulty Index:**

As the name suggest, **Difficulty index** is used to identify the difficulty level of questions. The purpose of finding the DI is to decide whether we need to retain the question or modify or remove it for the next test in the same subject.

## **Discrimination Index:**

**Discrimination Index** is used to identify whether the question helps us to find the low and high performers and it decides whether the question is good at telling who is good performers or bad performers.

##   

## <u style="box-sizing: border-box;"><strong style="box-sizing: border-box; font-weight: 700;">Using the Assessment Analysis Feature</strong></u>

## **Step 1:**

Login to the Platform and navigate to '**Assessments**' under '**Products**'. Select '**Run analysis'** under options corresponding to the test you want to analyze. Once you click **Run Analysis** you will be redirected to the **Question Analysis** page.

![1.png](https://support.braincert.com/kb/attachment/article/105/inline?token=eyJhbGciOiJodHRwOi8vd3d3LnczLm9yZy8yMDAxLzA0L3htbGRzaWctbW9yZSNobWFjLXNoYTI1NiIsInR5cCI6IkpXVCJ9.eyJpZCI6IjUyODgiLCJvcmdpZCI6IjE2MDMiLCJpc3MiOiJzdXBwb3J0LmJyYWluY2VydC5jb20ifQ.8epGnROTaFu-Uc6W4J_RThaXebpInzZSP5XqGBQLZrM)

##   

## **Step 2:**

On the **Question Analysis** page you will get a complete report on the Average Score, Possible Questions, Completed attempts, Average time spent, Discrimination, and Difficulty. The system will automatically give you recommendations on the questions that needs to be reviewed.

![f10.png](https://support.braincert.com/kb/attachment/article/105/inline?token=eyJhbGciOiJodHRwOi8vd3d3LnczLm9yZy8yMDAxLzA0L3htbGRzaWctbW9yZSNobWFjLXNoYTI1NiIsInR5cCI6IkpXVCJ9.eyJpZCI6IjQ1ODIiLCJvcmdpZCI6IjE2MDMiLCJpc3MiOiJzdXBwb3J0LmJyYWluY2VydC5jb20ifQ.qELe9CdLG1SK-3Vur2dXjEo_DzmG15KPjSklOLqoYNk)

##   

## **<u style="box-sizing: border-box;">Using the Question Analysis Feature</u>**

Here is how you can use the analysis feature on individual questions.

## **Step 1:**

Go to '**Assessments**' and click on the more option of the required course. Now select '**Questions**' from the list.

![3.png](https://support.braincert.com/kb/attachment/article/105/inline?token=eyJhbGciOiJodHRwOi8vd3d3LnczLm9yZy8yMDAxLzA0L3htbGRzaWctbW9yZSNobWFjLXNoYTI1NiIsInR5cCI6IkpXVCJ9.eyJpZCI6IjUyODkiLCJvcmdpZCI6IjE2MDMiLCJpc3MiOiJzdXBwb3J0LmJyYWluY2VydC5jb20ifQ.plB-toX7c6ojBx3eVBud_B6uhCw4XC3wXSfHlRA9SsI)

##   

## **Step 2:**

Select '**Options**' corresponding to the assessment whose questions you need to analyze and select '**Question Analysis**'.

![4.png](https://support.braincert.com/kb/attachment/article/105/inline?token=eyJhbGciOiJodHRwOi8vd3d3LnczLm9yZy8yMDAxLzA0L3htbGRzaWctbW9yZSNobWFjLXNoYTI1NiIsInR5cCI6IkpXVCJ9.eyJpZCI6IjUyOTAiLCJvcmdpZCI6IjE2MDMiLCJpc3MiOiJzdXBwb3J0LmJyYWluY2VydC5jb20ifQ.46zHEydEVALJp9zycgIwl7p3uDMCyf7_yikmFQTKmWg)

##   

## **Step 3:**

Once you select questions, you will be redirected to a page with the list of all questions under the assessment. Select '**Question Analysis**' under options, corresponding to the question you want to analyze.

![4.png](https://support.braincert.com/kb/attachment/article/105/inline?token=eyJhbGciOiJodHRwOi8vd3d3LnczLm9yZy8yMDAxLzA0L3htbGRzaWctbW9yZSNobWFjLXNoYTI1NiIsInR5cCI6IkpXVCJ9.eyJpZCI6IjUyOTEiLCJvcmdpZCI6IjE2MDMiLCJpc3MiOiJzdXBwb3J0LmJyYWluY2VydC5jb20ifQ.WsdC8Pk8heQYWVpv5mspSY8BXLdck3pPVCZ8Y-RSnr8)

##   

## **Step 4:**

Once you select '**Question Analysis**' you will be redirected to a page with a complete report on the Discrimination and Difficulty of the question along with review recommendations.

![f13.png](https://support.braincert.com/kb/attachment/article/105/inline?token=eyJhbGciOiJodHRwOi8vd3d3LnczLm9yZy8yMDAxLzA0L3htbGRzaWctbW9yZSNobWFjLXNoYTI1NiIsInR5cCI6IkpXVCJ9.eyJpZCI6IjQ1ODgiLCJvcmdpZCI6IjE2MDMiLCJpc3MiOiJzdXBwb3J0LmJyYWluY2VydC5jb20ifQ.8_8LOUyhoCnFyInYjk_pFx8uk_-NbU_bf-QWu-MNtN4)

Hope you found this article helpful.

# How to Configure and Enable Gamification Extension

To solve the issue of declining learner engagement, the BrainCert training platform comes with native support for a Gamification engine. Gamification has been added as an extension in the platform to give users a free hand to activate/deactivate the feature when they choose to.

### **Core Gamification Features on BrainCert**

Core gamification features in BrainCert include

- Custom badges
- Points
- Leaderboards
- Reward system.

> Here is a blog article to learn about the [gamification engine on BrainCert](https://blog.braincert.com/gamify-your-elearning-programs-with-braincert/).

This KB article will guide you through the steps to enable and configure the gamification feature on BrainCert. Here is how you enable gamification on BrainCert.

##   

## **Enable & Configure Gamification Elements on BrainCert** **Step 1:**

Login to your BrainCert admin account and navigate to '**Extensions**' under '**Global Settings**'.

![1.png](https://support.braincert.com/kb/attachment/article/87/inline?token=eyJhbGciOiJodHRwOi8vd3d3LnczLm9yZy8yMDAxLzA0L3htbGRzaWctbW9yZSNobWFjLXNoYTI1NiIsInR5cCI6IkpXVCJ9.eyJpZCI6IjUwMTYiLCJvcmdpZCI6IjE2MDMiLCJpc3MiOiJzdXBwb3J0LmJyYWluY2VydC5jb20ifQ.p1N4zeXMeCFmfNj7hpJSubtwhMYG9XcvvjmMZEYw-Mk)

##   

## **Step 2:**

Once you select Extensions, you will be redirected to a page containing the list of all extensions. Navigate to '**Gamification**' and enable it using the toggle switch.

**Note**: Once you enable Gamification from extensions, the gamification elements will only be visible to the Super Admins by default.

![2.png](https://support.braincert.com/kb/attachment/article/87/inline?token=eyJhbGciOiJodHRwOi8vd3d3LnczLm9yZy8yMDAxLzA0L3htbGRzaWctbW9yZSNobWFjLXNoYTI1NiIsInR5cCI6IkpXVCJ9.eyJpZCI6IjUwMTkiLCJvcmdpZCI6IjE2MDMiLCJpc3MiOiJzdXBwb3J0LmJyYWluY2VydC5jb20ifQ.7ouhtSUmNTNdiMMzwByyEd-FyRmpAke9Ki1cproliaI)

##   

## **Step 3:**

To enable gamification for all your users navigate to the '**Gamification**' in the '**Global Settings**'.

![3.png](https://support.braincert.com/kb/attachment/article/87/inline?token=eyJhbGciOiJodHRwOi8vd3d3LnczLm9yZy8yMDAxLzA0L3htbGRzaWctbW9yZSNobWFjLXNoYTI1NiIsInR5cCI6IkpXVCJ9.eyJpZCI6IjUwMTgiLCJvcmdpZCI6IjE2MDMiLCJpc3MiOiJzdXBwb3J0LmJyYWluY2VydC5jb20ifQ.c5p5GxTN7G13dTBtraDLhPGd3kuT4bY3qu3fC_A5G64)

1. Enable **Activate Gamification for all learners** to enable gamification for all learners.
2. Enable **Enable Rewards for all learners** to enable rewards for all learners.
3. Enable **Enable Leaderboard for all learners** to enable leaderboard for all learners.

Now that you have enabled gamification, let's discuss the steps to customize the badges & points.

## **Step 4:**

#### **Points**

- Open '**Points**', under '**Gamification**'.
- This points to several actions, such as logging in, completing the course, following the login path, taking assessments, joining virtual classroom sessions, downloading course completion certificates, test completion certificates, and more actions.
- Enable the options, add the required **Points**, and click on '**Save**'.

![4.png](https://support.braincert.com/kb/attachment/article/87/inline?token=eyJhbGciOiJodHRwOi8vd3d3LnczLm9yZy8yMDAxLzA0L3htbGRzaWctbW9yZSNobWFjLXNoYTI1NiIsInR5cCI6IkpXVCJ9.eyJpZCI6IjUwMjAiLCJvcmdpZCI6IjE2MDMiLCJpc3MiOiJzdXBwb3J0LmJyYWluY2VydC5jb20ifQ.wd7tjp5hobmtVQV-ti1J2eccb0IsPHhvAXsBQ-ayzrQ)

##   

## **Step 5:**

##### **Badges**

Navigate to '**Badges'** under '**Gamification'** and you will be redirected to a page with a list of existing badge icons, names, and points.

To create a new badge select '**Create New Badge**'.

![5.png](https://support.braincert.com/kb/attachment/article/87/inline?token=eyJhbGciOiJodHRwOi8vd3d3LnczLm9yZy8yMDAxLzA0L3htbGRzaWctbW9yZSNobWFjLXNoYTI1NiIsInR5cCI6IkpXVCJ9.eyJpZCI6IjUwMjEiLCJvcmdpZCI6IjE2MDMiLCJpc3MiOiJzdXBwb3J0LmJyYWluY2VydC5jb20ifQ.CyU7r16nLdzf_Y0O5-AqXEFjPHNyeSqE2sWNwQJLeVY)

##   

## **Step 6:**

##### **Create New Badge**

- Once you select Create New Badge you will be redirected to the page where you can set up a new badge.

- Fill in the Badge name, Badge mini text, and Badge description.

- You can choose to add your customized badges or use the ones from the library.
- To add custom badges select '**Attach** **files**' and add the required badges.

![6.png](https://support.braincert.com/kb/attachment/article/87/inline?token=eyJhbGciOiJodHRwOi8vd3d3LnczLm9yZy8yMDAxLzA0L3htbGRzaWctbW9yZSNobWFjLXNoYTI1NiIsInR5cCI6IkpXVCJ9.eyJpZCI6IjUwMjIiLCJvcmdpZCI6IjE2MDMiLCJpc3MiOiJzdXBwb3J0LmJyYWluY2VydC5jb20ifQ.PHs6_kDb3M_iYmjFI8PXOndH5ZvawctEDVUrV8n3tpE)

##   

## **Step 7:**

You can assign the badge based on '**Activity**' or '**Points**'.

To award badges based on activity, choose '**Activity'** and select the required activity from the dropdown.

To award badges based on points, choose '**Points**', enter the minimum point the learner should score to get the badge, and click '**Save**'.

## ![7.png](https://support.braincert.com/kb/attachment/article/87/inline?token=eyJhbGciOiJodHRwOi8vd3d3LnczLm9yZy8yMDAxLzA0L3htbGRzaWctbW9yZSNobWFjLXNoYTI1NiIsInR5cCI6IkpXVCJ9.eyJpZCI6IjUwMjMiLCJvcmdpZCI6IjE2MDMiLCJpc3MiOiJzdXBwb3J0LmJyYWluY2VydC5jb20ifQ.pP7LE9CdLdukA3MWv2rFK3Id-QsHl4xXXBOm6kL3sJA)**Step 8:**

To edit an existing badge, select the '**Edit**' option corresponding to the badge you need to edit, and make the necessary changes to it.

![8.png](https://support.braincert.com/kb/attachment/article/87/inline?token=eyJhbGciOiJodHRwOi8vd3d3LnczLm9yZy8yMDAxLzA0L3htbGRzaWctbW9yZSNobWFjLXNoYTI1NiIsInR5cCI6IkpXVCJ9.eyJpZCI6IjUwMjQiLCJvcmdpZCI6IjE2MDMiLCJpc3MiOiJzdXBwb3J0LmJyYWluY2VydC5jb20ifQ.WJrdlPSfVviJvIzWT-xYdO33spQICmmzY_Afiw-N3oU)

## **Step 9:**

This user interface is presented in a clearly understood, streamlined manner.

![9.png](https://support.braincert.com/kb/attachment/article/87/inline?token=eyJhbGciOiJodHRwOi8vd3d3LnczLm9yZy8yMDAxLzA0L3htbGRzaWctbW9yZSNobWFjLXNoYTI1NiIsInR5cCI6IkpXVCJ9.eyJpZCI6IjU0NTUiLCJvcmdpZCI6IjE2MDMiLCJpc3MiOiJzdXBwb3J0LmJyYWluY2VydC5jb20ifQ.SiOeu-tmj2Tus5_-svP5lfQkmS0-CG1X6AjPdMcNMe0)

We hope you found this article helpful.

# How to Introduce LaTeX Equations in Assessment Questions

This step-by-step guide will show you how to add LaTeX equations to your assessment questions in BrainCert.

LaTeX allows you to include complex mathematical expressions and equations, making your assessments more accurate and professional. Follow these instructions to create detailed math assessments.

<section class="info-box"><p style=" font-family: var(--font-style); max-width: 100%; font-size: 16px; font-style: normal; font-weight: 400; text-align: left; text-indent: 0px; white-space: normal;"><strong>Supported Question Types:</strong></p><p style=" font-family: var(--font-style); max-width: 100%; font-size: 16px; font-style: normal; font-weight: 400; text-align: left; text-indent: 0px; white-space: normal;">LaTeX equations can be added to various question types, including Multiple Choice, Multiple True or False, Multiple Answer, Audio Questions, Video Questions, and Scenario Questions.</p></section>

##   

## **Steps to Add LaTeX Equations**

## **Step 1:**

Log in to your BrainCert account. Navigate to the '**Products**' section and select '**Assessments**'.

![1.png](https://support.braincert.com/kb/attachment/article/213/inline?token=eyJhbGciOiJodHRwOi8vd3d3LnczLm9yZy8yMDAxLzA0L3htbGRzaWctbW9yZSNobWFjLXNoYTI1NiIsInR5cCI6IkpXVCJ9.eyJpZCI6IjU4MzkiLCJvcmdpZCI6IjE2MDMiLCJpc3MiOiJzdXBwb3J0LmJyYWluY2VydC5jb20ifQ.wWGKCW_I0vyjgEqKGBZL4V6Ynqh-0XbZ3k5E41GZico)

##   

## **Step 2:**

Navigate to a Test and Select '**Questions**' from the options.

![2.png](https://support.braincert.com/kb/attachment/article/213/inline?token=eyJhbGciOiJodHRwOi8vd3d3LnczLm9yZy8yMDAxLzA0L3htbGRzaWctbW9yZSNobWFjLXNoYTI1NiIsInR5cCI6IkpXVCJ9.eyJpZCI6IjU4NDAiLCJvcmdpZCI6IjE2MDMiLCJpc3MiOiJzdXBwb3J0LmJyYWluY2VydC5jb20ifQ.344DnPqb8t5he-nLGi-oghLyg9v3hAMafvH2qk9oVLw)

##   

## **Step 3:**

Click the '**Add Questions**' button to start creating a new question.

![3.png](https://support.braincert.com/kb/attachment/article/213/inline?token=eyJhbGciOiJodHRwOi8vd3d3LnczLm9yZy8yMDAxLzA0L3htbGRzaWctbW9yZSNobWFjLXNoYTI1NiIsInR5cCI6IkpXVCJ9.eyJpZCI6IjU4NDEiLCJvcmdpZCI6IjE2MDMiLCJpc3MiOiJzdXBwb3J0LmJyYWluY2VydC5jb20ifQ.BNmCYLGFUpMewTt-J5Kd8GN5Cu4jsZkb1bRotcHgLoY)

##   

## **Step 4:**

Fill in all the necessary details for your question. To add a LaTeX equation to the question, click the '**LaTeX**' button in the editor toolbar.

![4.png](https://support.braincert.com/kb/attachment/article/213/inline?token=eyJhbGciOiJodHRwOi8vd3d3LnczLm9yZy8yMDAxLzA0L3htbGRzaWctbW9yZSNobWFjLXNoYTI1NiIsInR5cCI6IkpXVCJ9.eyJpZCI6IjU4NDIiLCJvcmdpZCI6IjE2MDMiLCJpc3MiOiJzdXBwb3J0LmJyYWluY2VydC5jb20ifQ.HkPBBqwqRfqoAZaT9h3UexRpifNTCJvE1Z1kAsPmDpA)

##   

## **Step 5:**

Add the LaTeX code for your equation in the provided field and click the '**Submit**' button.

![5.png](https://support.braincert.com/kb/attachment/article/213/inline?token=eyJhbGciOiJodHRwOi8vd3d3LnczLm9yZy8yMDAxLzA0L3htbGRzaWctbW9yZSNobWFjLXNoYTI1NiIsInR5cCI6IkpXVCJ9.eyJpZCI6IjU4NDMiLCJvcmdpZCI6IjE2MDMiLCJpc3MiOiJzdXBwb3J0LmJyYWluY2VydC5jb20ifQ.3YP4UcljKuZwMQ8RH6rRGIXKm8ivgLQQO-U_rBl3wB4)

##   

## **Step 6:**

You will now see the equation displayed in the question field.

![6.png](https://support.braincert.com/kb/attachment/article/213/inline?token=eyJhbGciOiJodHRwOi8vd3d3LnczLm9yZy8yMDAxLzA0L3htbGRzaWctbW9yZSNobWFjLXNoYTI1NiIsInR5cCI6IkpXVCJ9.eyJpZCI6IjU4NDQiLCJvcmdpZCI6IjE2MDMiLCJpc3MiOiJzdXBwb3J0LmJyYWluY2VydC5jb20ifQ.rbihE8Mr9Bj5b1yqnTE7MM663gZ1jwNiJCxT7DdFNmU)

##   

## **Step 7:**

Using the same LaTeX button found in the answer field, you can type equations for the answers. Once done, **Save** the changes made.

![7.png](https://support.braincert.com/kb/attachment/article/213/inline?token=eyJhbGciOiJodHRwOi8vd3d3LnczLm9yZy8yMDAxLzA0L3htbGRzaWctbW9yZSNobWFjLXNoYTI1NiIsInR5cCI6IkpXVCJ9.eyJpZCI6IjU4NDUiLCJvcmdpZCI6IjE2MDMiLCJpc3MiOiJzdXBwb3J0LmJyYWluY2VydC5jb20ifQ.ulWudq99Ea-WomBr2y2ovtL5d_7XsFEOrx7ohvASKW4)

By following these steps, you can effectively add LaTeX equations to your assessment questions, enhancing the clarity and professionalism of your math assessments.

# How to Set Up BrainCert Action Events Using Pabbly Connect

Automate your workflows and reduce manual work by integrating BrainCert with Pabbly Connect. This guide shows you how to automate workflows using Pabbly Connect by triggering actions from BrainCert events (like user enrollment, course completion, etc.) and pushing the data to a Google Sheet. This is useful for logging user activity, creating reports, or syncing data between platforms.

##   

## Example Use Cases

- Automatically enroll learners into BrainCert courses when new rows are added in Google Sheets, perfect for form submissions or internal data updates.
- Trigger personalized welcome emails through Mailchimp, Sendinblue, or similar platforms when a new user is created in BrainCert.
- Update or create contacts in CRMs like HubSpot or Zoho whenever a user is added or enrolled in BrainCert, keeping your sales and support teams in sync.

##   

## BrainCert – Pabbly Actions List

Use these 13 available actions in Pabbly to automate tasks inside BrainCert, like user creation, enrollments, and live class management.

| **#** | **Topics** | **Triggers** |
| --- | --- | --- |
| 1 | Create User | Creates a new user account in BrainCert. |
| 2 | Delete User | Deletes an existing user from the system. |
| 3 | Create Group | Creates a new user group in your BrainCert account. |
| 4 | Course Create | Adds a new course to your LMS. |
| 5 | Course Enrolled | Enrolls a user into a selected course |
| 6 | Course Unenrolled | Unenrolls a user from a course |
| 7 | Bundle Enroll | Enrolls a user in a course bundle |
| 8 | Bundle Unenrolled | Unenrolls a user from a course bundle |
| 9 | Test Enroll | Enrolls a user in a test |
| 10 | Test Unenrolled | Unenrolls a user from a test |
| 11 | Live Class Create | Creates a new live class in your LMS |
| 12 | Live Class Enroll | Enrolls a user into a live class |
| 13 | Live Class Unenrolled | Unenrolls a user from a live class |

##   

## Step 1: Create a New Workflow in Pabbly

Start by logging into your '**Pabbly Connect'** account. Click on the '**Create Workflow'** button in the top right.

![1](https://support.braincert.com/kb/attachment/article/260/inline?token=eyJhbGciOiJodHRwOi8vd3d3LnczLm9yZy8yMDAxLzA0L3htbGRzaWctbW9yZSNobWFjLXNoYTI1NiIsInR5cCI6IkpXVCJ9.eyJpZCI6IjY4NTkiLCJvcmdpZCI6IjE2MDMiLCJpc3MiOiJzdXBwb3J0LmJyYWluY2VydC5jb20ifQ.GUmKIuLditg61eyD3OjFHtkcnAVLqVudEf8YOhplGdo)

##   

## Step 2: Name Your Workflow

Give your workflow a name like '**Create User,'** and click '**Create'** to proceed.

![1](https://support.braincert.com/kb/attachment/article/260/inline?token=eyJhbGciOiJodHRwOi8vd3d3LnczLm9yZy8yMDAxLzA0L3htbGRzaWctbW9yZSNobWFjLXNoYTI1NiIsInR5cCI6IkpXVCJ9.eyJpZCI6IjY4NjAiLCJvcmdpZCI6IjE2MDMiLCJpc3MiOiJzdXBwb3J0LmJyYWluY2VydC5jb20ifQ.7JLpJN0jZIytRKtz6tUTWceZ9jSTznkdYU3xL4pYwwk)

##   

## Step 3: Set Trigger App

In your new workflow, under the **Trigger** step, search for your required app as the Trigger App. Ex: Google Sheet

Choose your required app. Ex: **New or Updated Spreadsheet Row”** as the trigger event.

Pabbly will now generate a '**Webhook URL**.'

Copy this URL; you’ll use it in your Google Sheet shortly.

![2](https://support.braincert.com/kb/attachment/article/260/inline?token=eyJhbGciOiJodHRwOi8vd3d3LnczLm9yZy8yMDAxLzA0L3htbGRzaWctbW9yZSNobWFjLXNoYTI1NiIsInR5cCI6IkpXVCJ9.eyJpZCI6IjY4NjEiLCJvcmdpZCI6IjE2MDMiLCJpc3MiOiJzdXBwb3J0LmJyYWluY2VydC5jb20ifQ.65fHKsppKEoU2VSlJAeTNfypUyqaVA7mYEruVx8moVg)

##   

## Step 4: Install the Pabbly Webhooks Extension

- Log into a single '**Google Sheets'** account.
- Create a new spreadsheet and navigate to the '**Extensions**', move to the '**Add-ons**' option, and then click on '**Get add-on**s'.

![3](https://support.braincert.com/kb/attachment/article/260/inline?token=eyJhbGciOiJodHRwOi8vd3d3LnczLm9yZy8yMDAxLzA0L3htbGRzaWctbW9yZSNobWFjLXNoYTI1NiIsInR5cCI6IkpXVCJ9.eyJpZCI6IjY4NjUiLCJvcmdpZCI6IjE2MDMiLCJpc3MiOiJzdXBwb3J0LmJyYWluY2VydC5jb20ifQ._rfTwJRDsJUEmhpxZQvR3QH8FUAzmZMyOITL0dSi1fw)

##  

Search for and install the '**Pabbly Connect**' Webhooks add-on and refresh the page.

![4](https://support.braincert.com/kb/attachment/article/260/inline?token=eyJhbGciOiJodHRwOi8vd3d3LnczLm9yZy8yMDAxLzA0L3htbGRzaWctbW9yZSNobWFjLXNoYTI1NiIsInR5cCI6IkpXVCJ9.eyJpZCI6IjY4NjMiLCJvcmdpZCI6IjE2MDMiLCJpc3MiOiJzdXBwb3J0LmJyYWluY2VydC5jb20ifQ.Mu3G0r7Ub6yYwgsiQaFQeXqyqaUBVq2QPqXIxbvpNnI)

##   

## Step 5: Open the Initial Setup Menu

Once installed, go to **Extensions → Pabbly Connect Webhooks → Initial Setup**.

![5](https://support.braincert.com/kb/attachment/article/260/inline?token=eyJhbGciOiJodHRwOi8vd3d3LnczLm9yZy8yMDAxLzA0L3htbGRzaWctbW9yZSNobWFjLXNoYTI1NiIsInR5cCI6IkpXVCJ9.eyJpZCI6IjY4NjYiLCJvcmdpZCI6IjE2MDMiLCJpc3MiOiJzdXBwb3J0LmJyYWluY2VydC5jb20ifQ.dAN0YQyo04IEMLEENTwhn2N_kfg1Oo4EzQoGMYm2YMw)

##   

## Step 6: Configure Webhook Settings

1. In the **** Initial Setup popup:

    - Paste the '**Webhook URL**' you copied from Pabbly.
    - Enter the name of the '**Last Trigger Column**' (i.e., the column that completes the row and should trigger the webhook).
2. Click **Send Test** to push sample data to Pabbly.
3. Then click **Submit** to save your settings.

![6](https://support.braincert.com/kb/attachment/article/260/inline?token=eyJhbGciOiJodHRwOi8vd3d3LnczLm9yZy8yMDAxLzA0L3htbGRzaWctbW9yZSNobWFjLXNoYTI1NiIsInR5cCI6IkpXVCJ9.eyJpZCI6IjY4NjciLCJvcmdpZCI6IjE2MDMiLCJpc3MiOiJzdXBwb3J0LmJyYWluY2VydC5jb20ifQ.YHvhLVqGdvgXm1X9GUey05C-1GeVpkeF6DHTWpAKme0)

##   

## Step 7: Capture the Webhook Response in Pabbly

Next, in Pabbly Connect, click **“Capture Webhook Response”** and return to your Google Sheet to submit a test row.
<section class="info-box" style="text-align: start;"><span style=" font-family: Inter; font-size: 14px; font-style: normal; font-weight: 400; text-align: start; text-indent: 0px; white-space: normal; display: inline !important; float: none;">Pabbly should now display the received data, confirming that the webhook connection is working.</span><br></section>
![7](https://support.braincert.com/kb/attachment/article/260/inline?token=eyJhbGciOiJodHRwOi8vd3d3LnczLm9yZy8yMDAxLzA0L3htbGRzaWctbW9yZSNobWFjLXNoYTI1NiIsInR5cCI6IkpXVCJ9.eyJpZCI6IjY4NjgiLCJvcmdpZCI6IjE2MDMiLCJpc3MiOiJzdXBwb3J0LmJyYWluY2VydC5jb20ifQ.jPASc98a6nDNImHubjVkOyLPL52lZ_88UyHq08jY0L8)

##   

## Step 8: Add BrainCert as the Action App

Scroll down in your Pabbly workflow and click the **“+”** icon to add a new action step.

1. Search and select '**BrainCert'** as your '**Action App**.'
2. Choose an '**Action Event'** for example, “Enroll User to Course," "Create User,” or any other available BrainCert action depending on your use case.
3. Click '**Connect'** and authorize access to your BrainCert account.

![8](https://support.braincert.com/kb/attachment/article/260/inline?token=eyJhbGciOiJodHRwOi8vd3d3LnczLm9yZy8yMDAxLzA0L3htbGRzaWctbW9yZSNobWFjLXNoYTI1NiIsInR5cCI6IkpXVCJ9.eyJpZCI6IjY4NzMiLCJvcmdpZCI6IjE2MDMiLCJpc3MiOiJzdXBwb3J0LmJyYWluY2VydC5jb20ifQ.CryRXKABFLuMtMBiIS5hmb2XiMQPa0DMqk9A5VYhLFY)

##   
Step 9: Enable Extension & Copy API

Go to your BrainCert dashboard, then navigate to '**Global Settings' → 'Extensions.'** Scroll down to find the '**Pabbly'** integration, switch the toggle **ON**, and click **Save**.

Next, copy the '**API key'** displayed; you’ll need it to link BrainCert with Pabbly Connect.

![12](https://support.braincert.com/kb/attachment/article/260/inline?token=eyJhbGciOiJodHRwOi8vd3d3LnczLm9yZy8yMDAxLzA0L3htbGRzaWctbW9yZSNobWFjLXNoYTI1NiIsInR5cCI6IkpXVCJ9.eyJpZCI6IjY4NzUiLCJvcmdpZCI6IjE2MDMiLCJpc3MiOiJzdXBwb3J0LmJyYWluY2VydC5jb20ifQ.-vDrqsoMud2LLAwo5wediO45WFXixRnpdzdTOlFFhaM)

Now, head back to Pabbly, paste the '**API key**' in the given field, and click '**Save**.'

## ![13](https://support.braincert.com/kb/attachment/article/260/inline?token=eyJhbGciOiJodHRwOi8vd3d3LnczLm9yZy8yMDAxLzA0L3htbGRzaWctbW9yZSNobWFjLXNoYTI1NiIsInR5cCI6IkpXVCJ9.eyJpZCI6IjY4NzYiLCJvcmdpZCI6IjE2MDMiLCJpc3MiOiJzdXBwb3J0LmJyYWluY2VydC5jb20ifQ.ajRJzMyRaazUEXKZBDXzqw70726EJvUeIEGXfC0y7F4) 

##   

## Step 10: Map Data to BrainCert

You’ll see a set of BrainCert action fields. Use the dropdown menus to **map data** from the webhook response:

- Map '**User Name'** from a Google Sheets column
- Map '**Email'** from another column

Once all required fields are mapped, click '**Save & Send Test Request.'**

Pabbly will send the test data to BrainCert.
<section class="info-box" style="text-align: start;"><span style=" font-family: Inter; font-size: 14px; font-style: normal; font-weight: 400; text-align: start; text-indent: 0px; white-space: normal; display: inline !important; float: none;">If everything is set up correctly, Pabbly will send test data to BrainCert.</span><br></section>
![9](https://support.braincert.com/kb/attachment/article/260/inline?token=eyJhbGciOiJodHRwOi8vd3d3LnczLm9yZy8yMDAxLzA0L3htbGRzaWctbW9yZSNobWFjLXNoYTI1NiIsInR5cCI6IkpXVCJ9.eyJpZCI6IjY4NzAiLCJvcmdpZCI6IjE2MDMiLCJpc3MiOiJzdXBwb3J0LmJyYWluY2VydC5jb20ifQ.MC1VTDFXdU6FFRzS69_LQ49EFsu0Cd2XgHNrBzrX2_w)

##   

## Step 11: Verify the Action in BrainCert

To confirm that the action executed successfully:

1. Log in to your **BrainCert dashboard**.
2. Go to **People → Users**.
3. Confirm that the user was successfully created or enrolled, based on your setup.

![10](https://support.braincert.com/kb/attachment/article/260/inline?token=eyJhbGciOiJodHRwOi8vd3d3LnczLm9yZy8yMDAxLzA0L3htbGRzaWctbW9yZSNobWFjLXNoYTI1NiIsInR5cCI6IkpXVCJ9.eyJpZCI6IjY4NzEiLCJvcmdpZCI6IjE2MDMiLCJpc3MiOiJzdXBwb3J0LmJyYWluY2VydC5jb20ifQ.pgxfW7gbc3-x1Ck2lN0hR2RQWHaEMTQ1iUI9ExC4ymM)

##   

## Step 12: Save and Test with Real Data

Click '**Save'** in your Pabbly workflow to keep your automation.

Then test the entire flow using real entries in your Google Sheet to ensure everything works as expected.

![11](https://support.braincert.com/kb/attachment/article/260/inline?token=eyJhbGciOiJodHRwOi8vd3d3LnczLm9yZy8yMDAxLzA0L3htbGRzaWctbW9yZSNobWFjLXNoYTI1NiIsInR5cCI6IkpXVCJ9.eyJpZCI6IjY4NzIiLCJvcmdpZCI6IjE2MDMiLCJpc3MiOiJzdXBwb3J0LmJyYWluY2VydC5jb20ifQ.7HRe6y--uvt95gCL0fd79CR5C2oKMKcw_KN41C1KzKM)

Check out the KB article [**How to Set Up BrainCert Trigger Events with Pabbly Connect**](https://support.braincert.com/kb/article/256/how-to-trigger-braincert-with-pabbly-connect "https://support.braincert.com/kb/article/256/how-to-trigger-braincert-with-pabbly-connect") for a step-by-step guide.

You've successfully created a smart automation between Google Sheets and BrainCert using Pabbly Connect. Whether you're enrolling users, sending updates, or syncing data, this integration can save you hours of manual work.

# How to Redirect Users to a Custom URL After They Logout from the Training Platform

This article guides you on how to redirect users to a custom URL after they log out from your training platform.

<iframe src="https://player.vimeo.com/video/958317988?badge=0&amp;autopause=0&amp;player_id=0&amp;app_id=58479" frameborder="0" allow="autoplay; fullscreen; picture-in-picture; clipboard-write" style="position:absolute;top:0;left:0;width:100%;height:100%;" title="How to Redirect Users to a Custom URL After They Logout from the Training Platform">&ZeroWidthSpace;</iframe>

## **Step 1:**

Log in to your training platform using your account credentials. Navigate to '**Global Settings**,' and select '**Basic Settings'.**

**![1.png](https://support.braincert.com/kb/attachment/article/74/inline?token=eyJhbGciOiJodHRwOi8vd3d3LnczLm9yZy8yMDAxLzA0L3htbGRzaWctbW9yZSNobWFjLXNoYTI1NiIsInR5cCI6IkpXVCJ9.eyJpZCI6IjQ4OTAiLCJvcmdpZCI6IjE2MDMiLCJpc3MiOiJzdXBwb3J0LmJyYWluY2VydC5jb20ifQ.Nuy5CA8KFmYYqTYLkrrHQwgytSce-BSUFYeRskCjBJ0)**

## **Step 2:**

Now, select '**Redirect URL**' to set the URL to Redirect users after logout.

![2.png](https://support.braincert.com/kb/attachment/article/74/inline?token=eyJhbGciOiJodHRwOi8vd3d3LnczLm9yZy8yMDAxLzA0L3htbGRzaWctbW9yZSNobWFjLXNoYTI1NiIsInR5cCI6IkpXVCJ9.eyJpZCI6IjQ4OTIiLCJvcmdpZCI6IjE2MDMiLCJpc3MiOiJzdXBwb3J0LmJyYWluY2VydC5jb20ifQ.he5Nti-2Ywwy8j20ztvFuW2srbYe-hn9g-46gPSP5WA)

## **Step 3:**

Update the “**URL**” under '**Redirect users after logout**' and click “**Save**”.

![3.png](https://support.braincert.com/kb/attachment/article/74/inline?token=eyJhbGciOiJodHRwOi8vd3d3LnczLm9yZy8yMDAxLzA0L3htbGRzaWctbW9yZSNobWFjLXNoYTI1NiIsInR5cCI6IkpXVCJ9.eyJpZCI6IjQ4OTMiLCJvcmdpZCI6IjE2MDMiLCJpc3MiOiJzdXBwb3J0LmJyYWluY2VydC5jb20ifQ.r1pZX6JMs-QaxI21fZPWUHqTNKCJjmC9-dd46s4Liyk)

Hope this article helps you.

# How to Create Webinar in Your Meeting Rooms

In this Article, Webinars offer a powerful platform for interactive online sessions, with features like **Users List**, **Chat Panel**, **Screen Sharing**, **Polls** **, Recording** and more to facilitate communication. Additional tools such as **Whiteboard**, **RTMP/WHIP Broadcasting**, and **video quality settings** enhance content delivery and engagement. Features like **Choose Languages** and **Manage Waiting Rooms** ensure a smooth, personalized experience for all participants.

## Step 1: Login to Your Account

Login to **** [**BrainCert Account**](https://app.braincert.com/ "https://app.braincert.com/"), Navigate to **'Explore Meeting Rooms'.**

![KB 1 - WEBINAR](https://support.braincert.com/kb/attachment/article/238/inline?token=eyJhbGciOiJodHRwOi8vd3d3LnczLm9yZy8yMDAxLzA0L3htbGRzaWctbW9yZSNobWFjLXNoYTI1NiIsInR5cCI6IkpXVCJ9.eyJpZCI6IjY0MTEiLCJvcmdpZCI6IjE2MDMiLCJpc3MiOiJzdXBwb3J0LmJyYWluY2VydC5jb20ifQ.D96r2EmdTD8kA6v_Tcy7pbvkipRt4C1TBnSY7ulm0z0)

## Step 2: Access the Meeting rooms Dashboard

Then Meeting Rooms Dashboard Displays, Click **'Webinars'.**![KB 2 - Meeting Room Webinar](https://support.braincert.com/kb/attachment/article/238/inline?token=eyJhbGciOiJodHRwOi8vd3d3LnczLm9yZy8yMDAxLzA0L3htbGRzaWctbW9yZSNobWFjLXNoYTI1NiIsInR5cCI6IkpXVCJ9.eyJpZCI6IjY2MjMiLCJvcmdpZCI6IjE2MDMiLCJpc3MiOiJzdXBwb3J0LmJyYWluY2VydC5jb20ifQ._L0uu9ah3vMzB-j1Hi0e528SB3d5lQfn65kInOBvKyo)

## Step 3: Create Webinar

Click **'Create Webinar'** in front of search engine.

![KB 3 - Meetin Room Webinar](https://support.braincert.com/kb/attachment/article/238/inline?token=eyJhbGciOiJodHRwOi8vd3d3LnczLm9yZy8yMDAxLzA0L3htbGRzaWctbW9yZSNobWFjLXNoYTI1NiIsInR5cCI6IkpXVCJ9.eyJpZCI6IjY2MjQiLCJvcmdpZCI6IjE2MDMiLCJpc3MiOiJzdXBwb3J0LmJyYWluY2VydC5jb20ifQ.RZgoLRpKmOHruHiVoyy_4G75QEOT8-3yD0Ea5bGq0X4)

## Step 4: Enter Webinar Name

Insert **'Webinar Name'**  **** in the designated box.

![KB 4 - MEETING ROOMS WEBINAR](https://support.braincert.com/kb/attachment/article/238/inline?token=eyJhbGciOiJodHRwOi8vd3d3LnczLm9yZy8yMDAxLzA0L3htbGRzaWctbW9yZSNobWFjLXNoYTI1NiIsInR5cCI6IkpXVCJ9.eyJpZCI6IjY2MjUiLCJvcmdpZCI6IjE2MDMiLCJpc3MiOiJzdXBwb3J0LmJyYWluY2VydC5jb20ifQ.t6DW5Ei-ECMUEwgkOKGoNCwpqFG6jPf8rtTT2C9JQPA)

## Step 5: Select the Datacenter Region

Go to **'Datacenter Region'**, Click dropdown and Select the Datacenter Region to host your Webinar.
<section class="info-box">For best Performance, Choose the region closer to you, All your webinar Session regardless of student's location will be maintained in this region. </section>
![KB 5 - MEETING ROOMS WEBINAR](https://support.braincert.com/kb/attachment/article/238/inline?token=eyJhbGciOiJodHRwOi8vd3d3LnczLm9yZy8yMDAxLzA0L3htbGRzaWctbW9yZSNobWFjLXNoYTI1NiIsInR5cCI6IkpXVCJ9.eyJpZCI6IjY2MjYiLCJvcmdpZCI6IjE2MDMiLCJpc3MiOiJzdXBwb3J0LmJyYWluY2VydC5jb20ifQ.gp8pi57FV3pVJoDGPwTcCdMji--5mRSEZGItIQy1WLM)

## Step 6: Choose the Webinar Domain

In the **'Webinar domain'**, Click dropdown and Select the existing domain as shown.

![KB 6 - MEETING ROOMS WEBINAR](https://support.braincert.com/kb/attachment/article/238/inline?token=eyJhbGciOiJodHRwOi8vd3d3LnczLm9yZy8yMDAxLzA0L3htbGRzaWctbW9yZSNobWFjLXNoYTI1NiIsInR5cCI6IkpXVCJ9.eyJpZCI6IjY2MjciLCJvcmdpZCI6IjE2MDMiLCJpc3MiOiJzdXBwb3J0LmJyYWluY2VydC5jb20ifQ.Q9Rt977No_DQaeUo3le0B7IXo215Y4YRCIxSHgOJ6co)

## Step 7: Enable Waiting Room

Enable **'Waiting Room'** for attendees, before the webinar Starts, allowing the host to admit participants when ready.

![KB 7 - MEETING ROOMS WEBINAR](https://support.braincert.com/kb/attachment/article/238/inline?token=eyJhbGciOiJodHRwOi8vd3d3LnczLm9yZy8yMDAxLzA0L3htbGRzaWctbW9yZSNobWFjLXNoYTI1NiIsInR5cCI6IkpXVCJ9.eyJpZCI6IjY2MjgiLCJvcmdpZCI6IjE2MDMiLCJpc3MiOiJzdXBwb3J0LmJyYWluY2VydC5jb20ifQ.CiACY_pZIEYXYLIo7KzhIL_GQvIzfJp_zhQWBErx-8A)

## Step 8: Manage Attendee Entry Via Meeting Room

Here is the Waiting Room Page that Participants wait until a moderator will approve.

![KB - 8 Webinar](https://support.braincert.com/kb/attachment/article/238/inline?token=eyJhbGciOiJodHRwOi8vd3d3LnczLm9yZy8yMDAxLzA0L3htbGRzaWctbW9yZSNobWFjLXNoYTI1NiIsInR5cCI6IkpXVCJ9.eyJpZCI6IjY0NzQiLCJvcmdpZCI6IjE2MDMiLCJpc3MiOiJzdXBwb3J0LmJyYWluY2VydC5jb20ifQ.GQ5ZS5OGJw0XI1gfzhCEuL_8F0QdkqyPdrXt1c6e-cA)

## Step 9: Enable Email Collection and Block Disposable Email

1. By enabling **'Collect Email,'** attendees will be prompted to provide their email along with their name when joining the webinar for lead capturing.

2. Selecting **'Yes'** on **'Block Disposable Emails'** restricts registration using temporary or disposable email Addresses.

![KB 8 - MEETING ROOMS WEBINAR](https://support.braincert.com/kb/attachment/article/238/inline?token=eyJhbGciOiJodHRwOi8vd3d3LnczLm9yZy8yMDAxLzA0L3htbGRzaWctbW9yZSNobWFjLXNoYTI1NiIsInR5cCI6IkpXVCJ9.eyJpZCI6IjY2MjkiLCJvcmdpZCI6IjE2MDMiLCJpc3MiOiJzdXBwb3J0LmJyYWluY2VydC5jb20ifQ.rSDbXtQOAYrqXRbSeKr3YDGEdzmwQtMYeSIoQOSy_7c)

##   
Step 10: Record Webinar

Start **'Recording'** the Sessions in the Server and Store in the Cloud Database.

![KB 10 - MEETING ROOMS WEBINAR](https://support.braincert.com/kb/attachment/article/238/inline?token=eyJhbGciOiJodHRwOi8vd3d3LnczLm9yZy8yMDAxLzA0L3htbGRzaWctbW9yZSNobWFjLXNoYTI1NiIsInR5cCI6IkpXVCJ9.eyJpZCI6IjY2MzAiLCJvcmdpZCI6IjE2MDMiLCJpc3MiOiJzdXBwb3J0LmJyYWluY2VydC5jb20ifQ.rA0Pmb6H7GbRpgwFQgosmzxOrJpeCJ2oB7dGPcS9h5M)

## Step 11: Add Description 

Enter **'Description'** in the desired box and use following elements to Customize: HTML, Format, Bold, Italic, Strikethrough, Lists and Links.

Finally, Click **'Create Webinar'.** Webinar has been successfully created.

![KB 11 - MEETING ROOMS WEBINAR](https://support.braincert.com/kb/attachment/article/238/inline?token=eyJhbGciOiJodHRwOi8vd3d3LnczLm9yZy8yMDAxLzA0L3htbGRzaWctbW9yZSNobWFjLXNoYTI1NiIsInR5cCI6IkpXVCJ9.eyJpZCI6IjY2MzIiLCJvcmdpZCI6IjE2MDMiLCJpc3MiOiJzdXBwb3J0LmJyYWluY2VydC5jb20ifQ.UIC0cBRO8z2pq0f1QVo08SdZzbsw4O12vHd7OfwFrVk)

## Step 12: View Webinar Details and Invite links

1. On the Table, Shows Webinar Name.
2. Below Status that Indicates **'Active/Inactive'** Sessions.
3. View Created Date of the Webinar.
4. Click **'Join Link'** that popup two Links that Invite Guest to this broadcast.

- **Link 1:** You can have up to **10 co-hosts** at once.
- **Link 2:** You can have up to **15 webinar participants.**

![KB 12 - MEETING ROOMS WEBINAR](https://support.braincert.com/kb/attachment/article/238/inline?token=eyJhbGciOiJodHRwOi8vd3d3LnczLm9yZy8yMDAxLzA0L3htbGRzaWctbW9yZSNobWFjLXNoYTI1NiIsInR5cCI6IkpXVCJ9.eyJpZCI6IjY2MzMiLCJvcmdpZCI6IjE2MDMiLCJpc3MiOiJzdXBwb3J0LmJyYWluY2VydC5jb20ifQ.QNFc44VrVgFHbCSvS7lXnuwTagQ7ZrLOtVUNvAi2quc)

## Step 13: Edit, Host and Record the Webinar

1. To Change webinar name, description and all from scratch, click **'Edit'.**
2. To delete the existing webinar, Click **'Remove'.**
3. To Host your created webinar, select **'Go Live'.**
4. Click **'Report'** to view the data of Participants and Presenter.
5. Click **'Recording'** to view the Recorded Sessions.

![KB 13 - MEETING ROOMS WEBINAR](https://support.braincert.com/kb/attachment/article/238/inline?token=eyJhbGciOiJodHRwOi8vd3d3LnczLm9yZy8yMDAxLzA0L3htbGRzaWctbW9yZSNobWFjLXNoYTI1NiIsInR5cCI6IkpXVCJ9.eyJpZCI6IjY2MzQiLCJvcmdpZCI6IjE2MDMiLCJpc3MiOiJzdXBwb3J0LmJyYWluY2VydC5jb20ifQ.6DmbTHYwEFxUocIosWQ84bFXGFpvAwpkWMSUPsieMWw)

## Step 14: Review Participants Report

Here is the Report of Participants & Presenter. It Includes class duration, Time in, Time Out and User Type.

![Step 11 - Webinar](https://support.braincert.com/kb/attachment/article/238/inline?token=eyJhbGciOiJodHRwOi8vd3d3LnczLm9yZy8yMDAxLzA0L3htbGRzaWctbW9yZSNobWFjLXNoYTI1NiIsInR5cCI6IkpXVCJ9.eyJpZCI6IjY0NzMiLCJvcmdpZCI6IjE2MDMiLCJpc3MiOiJzdXBwb3J0LmJyYWluY2VydC5jb20ifQ.iBR7l1jGRkZeuVlT7iimnL3Ooe-NUPIh1EL2cfZMWLY)

## Step 15: Export and Print Charts

Click **'Chart Context Menu'** to print chart and Download in various Formats: PNG, JPEG, PDF, SVG Vector.

![KB 14 - WEBINAR (m)](https://support.braincert.com/kb/attachment/article/238/inline?token=eyJhbGciOiJodHRwOi8vd3d3LnczLm9yZy8yMDAxLzA0L3htbGRzaWctbW9yZSNobWFjLXNoYTI1NiIsInR5cCI6IkpXVCJ9.eyJpZCI6IjY1NzkiLCJvcmdpZCI6IjE2MDMiLCJpc3MiOiJzdXBwb3J0LmJyYWluY2VydC5jb20ifQ.LwKrojRM-_NIxMJuVp6gNbcDh5NJdI506sAGXc4WH88)

## Step 16: Webinar Recording

1. You Can Rename the Recording by click the Edit Icon.
2. Click the icon to Publish the Recordings.
3. Select the **'Download'** icon to Store the Recording in the Folder.
4. Select the **'Play'** icon to start the recorded Sessions.

![Webinar Recording 4](https://support.braincert.com/kb/attachment/article/238/inline?token=eyJhbGciOiJodHRwOi8vd3d3LnczLm9yZy8yMDAxLzA0L3htbGRzaWctbW9yZSNobWFjLXNoYTI1NiIsInR5cCI6IkpXVCJ9.eyJpZCI6IjY2MzUiLCJvcmdpZCI6IjE2MDMiLCJpc3MiOiJzdXBwb3J0LmJyYWluY2VydC5jb20ifQ.78YT99cM8Gzw8vA9cu6sIpZqcy2xB47YwB1fcSqDJJI)

## Step 17: Play the Recordings

Here is the Page Contains to Play the Recordings.

- Click the Dropdown Menu, Choose the Recorded Lists to View.

1. Toggle the Button to Change as Public Recording You can Share links to the Participants.

- Simply, Click **'Copy'** to Duplicate the Link and also Reset the Shareable Link if you needed.

**Public:** Enabling this, It generates the Shareable link to the participants.

**Private:** By Disabling, It Enables as Private Recdording and locks your Recordinga only you can access.

![KB 6 - LMS WEBINAR RECORDING](https://support.braincert.com/kb/attachment/article/238/inline?token=eyJhbGciOiJodHRwOi8vd3d3LnczLm9yZy8yMDAxLzA0L3htbGRzaWctbW9yZSNobWFjLXNoYTI1NiIsInR5cCI6IkpXVCJ9.eyJpZCI6IjY2MzYiLCJvcmdpZCI6IjE2MDMiLCJpc3MiOiJzdXBwb3J0LmJyYWluY2VydC5jb20ifQ.c3RQ7LpzIHtiayl7R5dQ-M-DNolJ_w7ZkFfvCiSn6ig)

This structured guide ensures a seamless process for creating, managing, and hosting webinars on BrainCert, enhancing user experience and engagement.

# How to Enable Basic or Advanced Course Catalog

This article helps you to enable a basic or advanced course catalog. Follow the below steps to do the same.

<iframe src="https://player.vimeo.com/video/1012334791?h=c863a366d7&amp;title=0&amp;byline=0&amp;portrait=0&amp;badge=0&amp;autopause=0&amp;player_id=0&amp;app_id=58479" frameborder="0" allow="autoplay; fullscreen; picture-in-picture; clipboard-write" style="position:absolute;top:0;left:0;width:100%;height:100%;" title="How to Enable Basic or Advanced Course Catalog">&ZeroWidthSpace;</iframe>

## **Step 1:** 

Log in to the LMS dashboard with your login credentials, go to '**Global Settings'**, and open '**Catalog Settings**'.

![1.png](https://support.braincert.com/kb/attachment/article/94/inline?token=eyJhbGciOiJodHRwOi8vd3d3LnczLm9yZy8yMDAxLzA0L3htbGRzaWctbW9yZSNobWFjLXNoYTI1NiIsInR5cCI6IkpXVCJ9.eyJpZCI6IjUxNjQiLCJvcmdpZCI6IjE2MDMiLCJpc3MiOiJzdXBwb3J0LmJyYWluY2VydC5jb20ifQ.dJd0FYIftr05HNG2GUuT6nJzAseciAPXdd-N9ZFVZRI)

## **Step 2:**

Scroll and find '**Catalog display style**'. You have two options under the course catalog display style. Select the required option as per your requirement.

![2.png](https://support.braincert.com/kb/attachment/article/94/inline?token=eyJhbGciOiJodHRwOi8vd3d3LnczLm9yZy8yMDAxLzA0L3htbGRzaWctbW9yZSNobWFjLXNoYTI1NiIsInR5cCI6IkpXVCJ9.eyJpZCI6IjUxNjUiLCJvcmdpZCI6IjE2MDMiLCJpc3MiOiJzdXBwb3J0LmJyYWluY2VydC5jb20ifQ.HCcg_GUU4l647kgMG3PWuMBA5lnfnHn8uZVK04kv0iw)

**Basic Catalog:** If you select the basic setting, the course catalog will get displayed with search and course blocks.

**Advanced Catalog:** If you select the advanced setting, course catalog will get displayed with search, course blocks and filter options.

# How to Request and Sign a Business Associate Amendment (BAA) for HIPAA Compliance

If you need to sign a Business Associate Amendment (BAA) with BrainCert, follow the steps below to get started.

We make our **Business Associate Amendment (BAA)** available to all customers on a qualifying **[Enterprise Silver plan](https://www.braincert.com/business "https://www.braincert.com/business") or higher**. A generic BAA is available for review on our website at [https://www.braincert.com/baa](https://www.braincert.com/baa).

If you're eligible, and you need to sign the BAA online, please create a **[support ticket](https://www.braincert.com "https://www.braincert.com")** with BrainCert to request access to the online agreement for signature. Once your ticket is submitted, our team will provide the necessary steps to complete the signing process.

Please note that **we do not sign customer-specific BAA agreements**. Our BAA is designed to cover our relationship from a SaaS platform perspective, ensuring compliance with HIPAA. For legal reasons, we cannot make adjustments to our BAAs, as they accurately reflect the scope of the services we provide.

Once signed, your organization will have access to a fully compliant BAA with BrainCert, ensuring HIPAA compliance for our LMS platform, which includes courses, tests, virtual classrooms, gamification, and other features.

### **Security Information**

**Does BrainCert encourage the 'minimum necessary' rule for PHI?**  
Yes, BrainCert advises all customers to adhere to HIPAA's **'minimum necessary'** standard when sharing PHI with BrainCert, ensuring that only the essential information required for processing is disclosed. This helps reduce the risk of unnecessary exposure of sensitive data while ensuring compliance with HIPAA guidelines.

**How does BrainCert ensure proper use of workstations to support access and protection of ePHI?**  
BrainCert utilizes Amazon Web Services (AWS) infrastructure, with all production data hosted in a Virtual Private Cloud (VPC). Internal access is secured by firewalls, and employees must authenticate via VPN and multi-factor authentication (MFA) to access sensitive data.

**Do you have a security policy to ensure the confidentiality, integrity, and availability of ePHI?**  
Yes, BrainCert follows strict security measures aligned with **SOC 2 Type 2**, **ISO/IEC 27001:2013**, and **HIPAA** compliance. For details on how data is protected in transit and at rest, please refer to our [Security Page](https://www.braincert.com/security).

**How does BrainCert secure its physical infrastructure?**  
BrainCert’s infrastructure is hosted on **AWS**, which provides robust physical security measures, including locked doors, surveillance, and intrusion detection. AWS has achieved **SOC 1, 2, 3**, **ISO 27001**, and **PCI DSS Level 1** certifications, ensuring a high level of security compliance. For more information, refer to [Amazon AWS](https://d0.awsstatic.com/whitepapers/Security/AWS_Security_Whitepaper.pdf "https://d0.awsstatic.com/whitepapers/Security/AWS_Security_Whitepaper.pdf")[Security Whitepaper](https://d0.awsstatic.com/whitepapers/Security/AWS_Security_Whitepaper.pdf "https://d0.awsstatic.com/whitepapers/Security/AWS_Security_Whitepaper.pdf").

**What happens when an employee leaves BrainCert?**  
BrainCert has strict offboarding processes in place. Upon termination, all access to privileged accounts, including AWS cloud and other sensitive systems, is revoked immediately. Any permissions granted for specific job functions, including those involving access to sensitive or protected data, are disabled. Former employees are required to securely destroy any remaining local data.

**How does BrainCert protect against malicious software and ensure security patches are applied?**  
We follow industry best practices, upgrading to stable software releases and applying security patches regularly. Security scans are performed frequently to identify vulnerabilities, and our internal IT policy ensures the safety of our environment.

**Do you have policies for strong passwords?**  
Yes, we enforce strong password policies in compliance with **[NIST guidelines](https://pages.nist.gov/800-63-3/sp800-63b.html "https://pages.nist.gov/800-63-3/sp800-63b.html")**, ensuring password complexity, length, and secure management.

**Does BrainCert conduct security audits or tests?**  
Yes, we conduct regular audits, including static and dynamic code analysis, vulnerability scans, and third-party penetration tests to ensure our platform remains secure. For further details on our compliance and certifications, visit our [Security Page](https://www.braincert.com/security).

# Creating your First Online Academy, Learning Portal, or LMS Domain

Congrats on creating your free BrainCert account! The next step is to create and launch your first Online Academy, Learning Portal, or LMS Domain in the Unified Training Platform dashboard.

<iframe src="https://player.vimeo.com/video/958316630?badge=0&amp;autopause=0&amp;player_id=0&amp;app_id=58479/embed" allow="autoplay; fullscreen; picture-in-picture" allowfullscreen="" frameborder="0" style="position:absolute;top:0;left:0;width:100%;height:100%;">&ZeroWidthSpace;</iframe>

As soon as your account is created and validated, you'll land on the Unified Training Platform dashboard. Click the '**Create Domain**' button to get started.

![1.png](https://support.braincert.com/kb/attachment/article/43/inline?token=eyJhbGciOiJodHRwOi8vd3d3LnczLm9yZy8yMDAxLzA0L3htbGRzaWctbW9yZSNobWFjLXNoYTI1NiIsInR5cCI6IkpXVCJ9.eyJpZCI6IjU2ODUiLCJvcmdpZCI6IjE2MDMiLCJpc3MiOiJzdXBwb3J0LmJyYWluY2VydC5jb20ifQ.LXmchs8oL4J3Ejzz1JcAV8-gd66fGnidJzAwjJOYjZc)

##   

## **Create a New Domain**

You'll see a popup like the one below. Type your desired subdomain name that reflects your brand, company, or catchy word. Click '**Save**' to register your domain.

**Note**: You can always change the domain name without losing data.

![2.png](https://support.braincert.com/kb/attachment/article/43/inline?token=eyJhbGciOiJodHRwOi8vd3d3LnczLm9yZy8yMDAxLzA0L3htbGRzaWctbW9yZSNobWFjLXNoYTI1NiIsInR5cCI6IkpXVCJ9.eyJpZCI6IjU2ODciLCJvcmdpZCI6IjE2MDMiLCJpc3MiOiJzdXBwb3J0LmJyYWluY2VydC5jb20ifQ._64jybO3kvvMGvnP6Wd3WvAWQY1D_245YrKiLmuf1Wc)

##   

## **Domain Options**

All available options can be found under the '**Options**' column for the domain.

Click '**Preview**' to start using your new domain.

![3.png](https://support.braincert.com/kb/attachment/article/43/inline?token=eyJhbGciOiJodHRwOi8vd3d3LnczLm9yZy8yMDAxLzA0L3htbGRzaWctbW9yZSNobWFjLXNoYTI1NiIsInR5cCI6IkpXVCJ9.eyJpZCI6IjU2ODgiLCJvcmdpZCI6IjE2MDMiLCJpc3MiOiJzdXBwb3J0LmJyYWluY2VydC5jb20ifQ.eNsurubqlhMVWOfYtp385ssjLdKA4ePeVfyvxU36StU)

##   

## **Upgrading your Domain**
The new domain starts with a free 14-day trial and you can upgrade anytime by clicking on the "**Upgrade/downgrade**" option.
![4.png](https://support.braincert.com/kb/attachment/article/43/inline?token=eyJhbGciOiJodHRwOi8vd3d3LnczLm9yZy8yMDAxLzA0L3htbGRzaWctbW9yZSNobWFjLXNoYTI1NiIsInR5cCI6IkpXVCJ9.eyJpZCI6IjU2ODkiLCJvcmdpZCI6IjE2MDMiLCJpc3MiOiJzdXBwb3J0LmJyYWluY2VydC5jb20ifQ.XsN7Q_C39FKdmp2pbSXoRpHscEC6FFqXU_xa2X9sptk)

The pricing page shows all the plans designed for '**very small businesses**' and **'most businesses**'. Upgrade to your desired plan of choice.

##   

## **Unlock & Logout Admin Owner Account**

If you get locked out due to the '[concurrent login](https://support.braincert.com/article/91-how-to-disable-concurrent-logins-in-the-lms-platform)' setting, it is easier to unlock and log out the domain owner from the unified training platform [dashboard](https://app.braincert.com/lms/domain).

![6.png](https://support.braincert.com/kb/attachment/article/43/inline?token=eyJhbGciOiJodHRwOi8vd3d3LnczLm9yZy8yMDAxLzA0L3htbGRzaWctbW9yZSNobWFjLXNoYTI1NiIsInR5cCI6IkpXVCJ9.eyJpZCI6IjU2OTAiLCJvcmdpZCI6IjE2MDMiLCJpc3MiOiJzdXBwb3J0LmJyYWluY2VydC5jb20ifQ.yLUu7dXEdl814tY0FnmVc2eRo57kURSdQh1TzguknNM)

## **Deleting your Domain**

You can delete your domain anytime which deletes all your content such as courses and uploaded documents, learner data, and reports. This action is not reversible. <u style="box-sizing: border-box; margin-bottom: 0px; margin-left: 0px; padding: 0px; border: 0px;">Deleting a domain is not a proper way to cancel your active subscription.</u> All subscriptions are managed through our payment partner Stripe. Contact our friendly support team using the chat icon below for help with this.

![](https://support.braincert.com/kb/attachment/article/43/inline?token=eyJhbGciOiJodHRwOi8vd3d3LnczLm9yZy8yMDAxLzA0L3htbGRzaWctbW9yZSNobWFjLXNoYTI1NiIsInR5cCI6IkpXVCJ9.eyJpZCI6IjM3MDQiLCJvcmdpZCI6IjE2MDMiLCJpc3MiOiJzdXBwb3J0LmJyYWluY2VydC5jb20ifQ.Le9kk7tSkc8zFVHvFd8r-rUJxFWd-Iea0rvZSE3N24g)

##   
**Changing your Domain Name**

Please note that you can always edit the domain and change the domain name. To change the domain name, log in to your LMS domain, and navigate to '**Global Settings**' and '**Domain**'.

Type your new name, and click '**Change domain name**'.

![abef8a8f-41a4-444e-9184-855ff1a4b75e.png](https://support.braincert.com/kb/attachment/article/43/inline?token=eyJhbGciOiJodHRwOi8vd3d3LnczLm9yZy8yMDAxLzA0L3htbGRzaWctbW9yZSNobWFjLXNoYTI1NiIsInR5cCI6IkpXVCJ9.eyJpZCI6IjU1MDUiLCJvcmdpZCI6IjE2MDMiLCJpc3MiOiJzdXBwb3J0LmJyYWluY2VydC5jb20ifQ.viu1E-CdhCgKQtAYUuRWJb-grmAmWQkKJQpukKlzSRs)

##   

## **Custom Domain & SSL Certificate**

If your plan supports a custom hostname and SSL certificate, this can be done inside the domain after signing.

Follow this guide to [set up your custom hostname and SSL certificate in less than 5 minutes](https://support.braincert.com/kb/article/51/steps-to-setup-custom-hostname-and-ssl-certificate-for-your-lms-domain-in-5-minutes "https://support.braincert.com/kb/article/51/steps-to-setup-custom-hostname-and-ssl-certificate-for-your-lms-domain-in-5-minutes") -- all completely automated.

## **Creating Multiple Domains (Reseller Access)**

By default, you can create only one domain. To create and manage multiple domains for your customers as a reseller, [contact](https://www.braincert.com/contact-us) the BrainCert team.

# Step-by-Step Guide to Creating  a Social Hub

Creating a Social Hub within BrainCert's Community feature allow you to facilitate engagement and interaction among learners. Follow these step-by-step instructions to set up your Social Hub.

## **Enabling the Social Hub**

## **Step 1:**

Go to '**Global Settings**' and open '**Extensions**'.

**![1.png](https://support.braincert.com/kb/attachment/article/209/inline?token=eyJhbGciOiJodHRwOi8vd3d3LnczLm9yZy8yMDAxLzA0L3htbGRzaWctbW9yZSNobWFjLXNoYTI1NiIsInR5cCI6IkpXVCJ9.eyJpZCI6IjU3OTkiLCJvcmdpZCI6IjE2MDMiLCJpc3MiOiJzdXBwb3J0LmJyYWluY2VydC5jb20ifQ.QmYMAM0TLUemXm8GfPee56pfz2GcXfXtQoTlK2X8LBE)**

##   **Step 2:**

Next, enable '**Social Hub**' and '**Save**' the changes.

**![2.png](https://support.braincert.com/kb/attachment/article/209/inline?token=eyJhbGciOiJodHRwOi8vd3d3LnczLm9yZy8yMDAxLzA0L3htbGRzaWctbW9yZSNobWFjLXNoYTI1NiIsInR5cCI6IkpXVCJ9.eyJpZCI6IjU4MDAiLCJvcmdpZCI6IjE2MDMiLCJpc3MiOiJzdXBwb3J0LmJyYWluY2VydC5jb20ifQ.ovc3ubnaT8RyuiTj53Lmlt9wdp4YyKr2dBv84bLVVeg)**

##   **Creating a Social Hub**

## **Step 1:**

Log in to your BrainCert account, navigate to '**Community**,' and click '**Social Hub**.'

![1.png](https://support.braincert.com/kb/attachment/article/209/inline?token=eyJhbGciOiJodHRwOi8vd3d3LnczLm9yZy8yMDAxLzA0L3htbGRzaWctbW9yZSNobWFjLXNoYTI1NiIsInR5cCI6IkpXVCJ9.eyJpZCI6IjU3OTciLCJvcmdpZCI6IjE2MDMiLCJpc3MiOiJzdXBwb3J0LmJyYWluY2VydC5jb20ifQ.vxQkxI4ttkfK6giBIUHA-xxQ2Mv4bKgFczsj6yLu3_g)

## **Step 2:**

Click on the '**Create Hub**' button.

![2.png](https://support.braincert.com/kb/attachment/article/209/inline?token=eyJhbGciOiJodHRwOi8vd3d3LnczLm9yZy8yMDAxLzA0L3htbGRzaWctbW9yZSNobWFjLXNoYTI1NiIsInR5cCI6IkpXVCJ9.eyJpZCI6IjU3OTgiLCJvcmdpZCI6IjE2MDMiLCJpc3MiOiJzdXBwb3J0LmJyYWluY2VydC5jb20ifQ.FUWrA8TCfZ4-Nhmbdlh8-HgbpBMkMSYCPyzvdWyj7cA)

## **Step 3:**

Create the Social Hub by adding a '**Hub Name**' and '**Description**', and uploading the '**Icon**' and '**Cover Images**'.

![5.png](https://support.braincert.com/kb/attachment/article/209/inline?token=eyJhbGciOiJodHRwOi8vd3d3LnczLm9yZy8yMDAxLzA0L3htbGRzaWctbW9yZSNobWFjLXNoYTI1NiIsInR5cCI6IkpXVCJ9.eyJpZCI6IjU4MzQiLCJvcmdpZCI6IjE2MDMiLCJpc3MiOiJzdXBwb3J0LmJyYWluY2VydC5jb20ifQ.QDo0_eHrwd26QVJuq-KDc_d3Tp-FQxn5k1OmNucsOdo)

**Hub Name:** Enter a name for your Social Hub that reflects its purpose or community focus.

**Hub Description:** Provide a brief description of the Social Hub to inform users about its purpose and what they can expect.

**Upload Icon:** Click on the ' **Upload Icon**' button to select and upload an icon representing your Social Hub.

**Upload Cover:** Click on the ' **Upload Cover**' button to select and upload a cover image for your Social Hub. This image will be displayed as the header of your hub.

## 
  **Access Management**

## 
  **Step 4:**

Select from the following access control options.

**All Users Currently Signed In:**

Allow all users who are logged into the platform to access the Social Hub.

**![1](https://support.braincert.com/kb/attachment/article/209/inline?token=eyJhbGciOiJodHRwOi8vd3d3LnczLm9yZy8yMDAxLzA0L3htbGRzaWctbW9yZSNobWFjLXNoYTI1NiIsInR5cCI6IkpXVCJ9.eyJpZCI6IjYxODEiLCJvcmdpZCI6IjE2MDMiLCJpc3MiOiJzdXBwb3J0LmJyYWluY2VydC5jb20ifQ.bhk8V1yQmAO9nuoza3fagL96_6iHQeWb8648OiukgXg)**

**Learners Enrolled in Specific Products for paid hub:**

Limit access to only those learners who are enrolled in designated products. Select the specific '**Courses**', '**Course Bundles**', '**Tests**', and '**Classes**' from the dropdown menu.
<section class="info-box">You Can only Select Courses, Bundles, Tests, Live Classes there must be in live.</section><section class="info-box">For Paid Hub, users must enroll in the admin added courses and purchase the Hub to access those courses.<br></section><section class="info-box" style="text-align: start;">After buying the Hub, users can also access any additional courses added for free by the admin.<br></section>
![2](https://support.braincert.com/kb/attachment/article/209/inline?token=eyJhbGciOiJodHRwOi8vd3d3LnczLm9yZy8yMDAxLzA0L3htbGRzaWctbW9yZSNobWFjLXNoYTI1NiIsInR5cCI6IkpXVCJ9.eyJpZCI6IjYxODIiLCJvcmdpZCI6IjE2MDMiLCJpc3MiOiJzdXBwb3J0LmJyYWluY2VydC5jb20ifQ.rxIQkBS_aYPfq6zYaSqYmEswkYGauzkFkmmanGuL2xg)

**Members Part of Selected Groups:**

Grant access to users who are part of certain groups. Choose the groups you want to include from the available list.

![3](https://support.braincert.com/kb/attachment/article/209/inline?token=eyJhbGciOiJodHRwOi8vd3d3LnczLm9yZy8yMDAxLzA0L3htbGRzaWctbW9yZSNobWFjLXNoYTI1NiIsInR5cCI6IkpXVCJ9.eyJpZCI6IjYxODMiLCJvcmdpZCI6IjE2MDMiLCJpc3MiOiJzdXBwb3J0LmJyYWluY2VydC5jb20ifQ.sMVcZvAZCOj9hnIAUPq0PZt9KjTYM9ge-FEu-mPwxx0)

## **Access Options**

## **Step 5:**

Choose between '**Free**' or '**Paid**' options to allow users to access the hub at no cost or for a fee.

![4](https://support.braincert.com/kb/attachment/article/209/inline?token=eyJhbGciOiJodHRwOi8vd3d3LnczLm9yZy8yMDAxLzA0L3htbGRzaWctbW9yZSNobWFjLXNoYTI1NiIsInR5cCI6IkpXVCJ9.eyJpZCI6IjYxODUiLCJvcmdpZCI6IjE2MDMiLCJpc3MiOiJzdXBwb3J0LmJyYWluY2VydC5jb20ifQ.zYuJE0JxQ6kXhWNettEYkKpU4diUeb7RIv_MbXGRt2c)

## **Visibility Settings**

## **Step 6:**

Choose the access level for your Social Hub. This determines who can join and participate in the hub.

**Private:** Select private if you want the hub to be accessible only to invited members.

**Public:** Select public if you want the hub to be open for anyone to join.

![5](https://support.braincert.com/kb/attachment/article/209/inline?token=eyJhbGciOiJodHRwOi8vd3d3LnczLm9yZy8yMDAxLzA0L3htbGRzaWctbW9yZSNobWFjLXNoYTI1NiIsInR5cCI6IkpXVCJ9.eyJpZCI6IjYxODciLCJvcmdpZCI6IjE2MDMiLCJpc3MiOiJzdXBwb3J0LmJyYWluY2VydC5jb20ifQ.flS-un8RUmgSvCC8IWdSyVSHxwCbeIWU9xOoG41dQiE)

## **Step 7:**

If you choose the public option, you can toggle the visibility of your logo to display either from '**Basic Settings**' or '**Catalog Settings**'.

![6](https://support.braincert.com/kb/attachment/article/209/inline?token=eyJhbGciOiJodHRwOi8vd3d3LnczLm9yZy8yMDAxLzA0L3htbGRzaWctbW9yZSNobWFjLXNoYTI1NiIsInR5cCI6IkpXVCJ9.eyJpZCI6IjYxODgiLCJvcmdpZCI6IjE2MDMiLCJpc3MiOiJzdXBwb3J0LmJyYWluY2VydC5jb20ifQ.C1stGtdTSjVTNkqmBGb8-mQDaksOQQ0dkDd9dXuoafo)

##  **Step 8:**

Decide whether to enable the catalog footer by selecting the options '**Yes**' or '**No**'.

![7](https://support.braincert.com/kb/attachment/article/209/inline?token=eyJhbGciOiJodHRwOi8vd3d3LnczLm9yZy8yMDAxLzA0L3htbGRzaWctbW9yZSNobWFjLXNoYTI1NiIsInR5cCI6IkpXVCJ9.eyJpZCI6IjYxODkiLCJvcmdpZCI6IjE2MDMiLCJpc3MiOiJzdXBwb3J0LmJyYWluY2VydC5jb20ifQ.k_Pi4inqx3J-t0IUX9bR60tMcnvYb1E04Q21buoe1cE)

##  **Catalog Settings**

## 

## **Step 9:**

Enable the tabs under '**Catalog**' that you want to include in the hub, and use the '**Save**' button to save your changes.

![8](https://support.braincert.com/kb/attachment/article/209/inline?token=eyJhbGciOiJodHRwOi8vd3d3LnczLm9yZy8yMDAxLzA0L3htbGRzaWctbW9yZSNobWFjLXNoYTI1NiIsInR5cCI6IkpXVCJ9.eyJpZCI6IjYxOTUiLCJvcmdpZCI6IjE2MDMiLCJpc3MiOiJzdXBwb3J0LmJyYWluY2VydC5jb20ifQ.OvjKdkf95bvVib78J8NDUvwVC9txdrsgxvQq9hfWWsA)

## **Setting Price**

## **Step 10:**

If you have selected the '**Paid**' option, once the changes are saved, head back to the Social Hub page. Select the '**Options**' of the particular hub and open '**Shopping Cart**' from the list.

Refer to the KB article '[**How to Create Subscriptions in Shopping Cart**](https://support.braincert.com/kb/article/168/how-to-create-one-time-and-recurring-subscriptions-in-shopping-cart-for-courses "https://support.braincert.com/kb/article/168/how-to-create-one-time-and-recurring-subscriptions-in-shopping-cart-for-courses")' to learn how to set pricing.
<section class="info-box"><strong>Note</strong>: Access expires based on the set duration and access type.</section>
**![9](https://support.braincert.com/kb/attachment/article/209/inline?token=eyJhbGciOiJodHRwOi8vd3d3LnczLm9yZy8yMDAxLzA0L3htbGRzaWctbW9yZSNobWFjLXNoYTI1NiIsInR5cCI6IkpXVCJ9.eyJpZCI6IjYxOTEiLCJvcmdpZCI6IjE2MDMiLCJpc3MiOiJzdXBwb3J0LmJyYWluY2VydC5jb20ifQ.id4RkiIFVOt2LxRGWyIyqttU6D7GP1z-mfgBXhnCq54)**

## **Step 11:**

If the status of the hub is '**Inactive**,' click the icon to activate it.

**![10](https://support.braincert.com/kb/attachment/article/209/inline?token=eyJhbGciOiJodHRwOi8vd3d3LnczLm9yZy8yMDAxLzA0L3htbGRzaWctbW9yZSNobWFjLXNoYTI1NiIsInR5cCI6IkpXVCJ9.eyJpZCI6IjYxOTIiLCJvcmdpZCI6IjE2MDMiLCJpc3MiOiJzdXBwb3J0LmJyYWluY2VydC5jb20ifQ.kpJkWTcyxruHyyLWoulEa1zaC5D5cHBjAu_jj2mol_Q)**

## **Step 12:**

You'll be redirected to a page where you can confirm the activation by selecting '**Yes**'.

**![11](https://support.braincert.com/kb/attachment/article/209/inline?token=eyJhbGciOiJodHRwOi8vd3d3LnczLm9yZy8yMDAxLzA0L3htbGRzaWctbW9yZSNobWFjLXNoYTI1NiIsInR5cCI6IkpXVCJ9.eyJpZCI6IjYxOTMiLCJvcmdpZCI6IjE2MDMiLCJpc3MiOiJzdXBwb3J0LmJyYWluY2VydC5jb20ifQ.5x6rEy78RMRsifzPoKZuzpZ1cFoXD942Ct-IpYYg5cE)**

## **Step 13:**

Once activated, you'll see a notification, and the status will change to '**Active**'.

**![12](https://support.braincert.com/kb/attachment/article/209/inline?token=eyJhbGciOiJodHRwOi8vd3d3LnczLm9yZy8yMDAxLzA0L3htbGRzaWctbW9yZSNobWFjLXNoYTI1NiIsInR5cCI6IkpXVCJ9.eyJpZCI6IjYxOTQiLCJvcmdpZCI6IjE2MDMiLCJpc3MiOiJzdXBwb3J0LmJyYWluY2VydC5jb20ifQ.C5-KAiHE2QhcM4YPAAGmP2XUa3AYv1a3YFaPB6zkJ4s)**

## **Learner Dashboard**

In the Social Hub section, learners will see all the public hubs. Learners can access all the hub's features by clicking on the ' **Join Hub**' button.

![7.png](https://support.braincert.com/kb/attachment/article/209/inline?token=eyJhbGciOiJodHRwOi8vd3d3LnczLm9yZy8yMDAxLzA0L3htbGRzaWctbW9yZSNobWFjLXNoYTI1NiIsInR5cCI6IkpXVCJ9.eyJpZCI6IjU4MzgiLCJvcmdpZCI6IjE2MDMiLCJpc3MiOiJzdXBwb3J0LmJyYWluY2VydC5jb20ifQ.yrk2wRVXzPS-7Wl9GYIsb2ww-Ccpb6WwBbX2mkmOj34)

After joining, learners can view all posts or share their own within the hub.

![13](https://support.braincert.com/kb/attachment/article/209/inline?token=eyJhbGciOiJodHRwOi8vd3d3LnczLm9yZy8yMDAxLzA0L3htbGRzaWctbW9yZSNobWFjLXNoYTI1NiIsInR5cCI6IkpXVCJ9.eyJpZCI6IjYxOTYiLCJvcmdpZCI6IjE2MDMiLCJpc3MiOiJzdXBwb3J0LmJyYWluY2VydC5jb20ifQ.3_f20kle9kcHWzEP2nNwOEhncYGAfFYx9GqsZidKAT8)

**Posts** - These posts may include announcements, discussions, and shared resources.

**About** - This area provides a description of the hub and any additional information provided by the hub's administrators.

**Members** - Learners can see a list of all members who have joined the hub.

**Courses, Bundles, Tests, and Classes** - All selected products will be displayed here for learners to access.

By following these steps, you can create a Social Hub within BrainCert's Community, enhancing interaction and engagement among your learners.

# Create Interactive SCORM Content with the Lumi Authoring Tool

In the pursuit of delivering unparalleled digital learning experiences, BrainCert proudly recommends the [Lumi authoring tool](https://app.lumi.education/ "https://app.lumi.education/") for creating SCORM-compatible H5P content. This powerful, free tool enables educators and trainers to design highly interactive and engaging course materials, further enriching the BrainCert learning environment. By integrating SCORM content created with Lumi into your BrainCert courses, you can elevate the educational experience, making it more immersive and effective for learners.

## Why Lumi as BrainCert's Recommended Authoring Tool?

- **Free**: Lumi Cloud is available at no cost, providing a budget-friendly solution for creating premium interactive content.
- **Interactive Content Creation**: With Lumi, you have access to over 60 interactive content types, allowing for the creation of dynamic learning materials that engage students in various ways, from interactive videos to quizzes and interactive presentations.
- **Content Ownership and Offline Editing**: Your content remains your own. Lumi ensures that you can download, edit offline, and fully control your creations. This feature is particularly useful for educators who wish to modify content without constant internet access.
- **Compatibility**: Lumi-created content is universally compatible, ensuring that your materials look great on all devices and browsers. This ensures a seamless learning experience for your students, regardless of their chosen learning platform.
- **Ease of Sharing**: Even without a Learning Management System, Lumi makes it simple to share your content. Distribute your interactive lessons via link, QR code, or embed them directly on your website.
- **Content Publishing**: Lumi also offers a platform for publishing your content, making it accessible to a wider audience. This feature is perfect for educators looking to expand their reach and impact.
- **SCORM Compatibility**: Importing your SCORM packages into BrainCert is straightforward, with support for SCORM 1.2 and 2004 4th edition content packages. This ensures a smooth integration of your interactive content into BrainCert's comprehensive LMS.

## Creating and Importing SCORM Content with Lumi

1. **Create with Lumi**: Start by exploring the wide range of templates and interactive content types on Lumi. Customize your lessons to fit your curriculum and educational goals.  
   ![](https://support.braincert.com/kb/attachment/article/200/inline?token=eyJhbGciOiJodHRwOi8vd3d3LnczLm9yZy8yMDAxLzA0L3htbGRzaWctbW9yZSNobWFjLXNoYTI1NiIsInR5cCI6IkpXVCJ9.eyJpZCI6IjU2OTgiLCJvcmdpZCI6IjE2MDMiLCJpc3MiOiJzdXBwb3J0LmJyYWluY2VydC5jb20ifQ.a54DXBMQv7xIYHPh-e0UZbOahJFN2ipgG-BjWd0Uge4)
2. **Export as SCORM**: Once your content is ready, export it as a SCORM package, making it ready for upload to BrainCert.
    - Edit your H5P content and upon completion, select the 'Export' option.  
![](https://support.braincert.com/kb/attachment/article/200/inline?token=eyJhbGciOiJodHRwOi8vd3d3LnczLm9yZy8yMDAxLzA0L3htbGRzaWctbW9yZSNobWFjLXNoYTI1NiIsInR5cCI6IkpXVCJ9.eyJpZCI6IjU2OTkiLCJvcmdpZCI6IjE2MDMiLCJpc3MiOiJzdXBwb3J0LmJyYWluY2VydC5jb20ifQ.KMfYPx-gu3P_vo3JeA622rn_WcmbLQEhOGhgTG929mM)
    - Select the 'SCORM package' option and click 'Export Now' button.  
![](https://support.braincert.com/kb/attachment/article/200/inline?token=eyJhbGciOiJodHRwOi8vd3d3LnczLm9yZy8yMDAxLzA0L3htbGRzaWctbW9yZSNobWFjLXNoYTI1NiIsInR5cCI6IkpXVCJ9.eyJpZCI6IjU3MDAiLCJvcmdpZCI6IjE2MDMiLCJpc3MiOiJzdXBwb3J0LmJyYWluY2VydC5jb20ifQ.SumBhM-7CxSsaLJPmLbvWhaNyxnZfdEDTmoH-0Bg-VE)
    - Allow some time for the content to be processed. After it's done, the zip file will be available for download.  
 ![](https://support.braincert.com/kb/attachment/article/200/inline?token=eyJhbGciOiJodHRwOi8vd3d3LnczLm9yZy8yMDAxLzA0L3htbGRzaWctbW9yZSNobWFjLXNoYTI1NiIsInR5cCI6IkpXVCJ9.eyJpZCI6IjU3MDEiLCJvcmdpZCI6IjE2MDMiLCJpc3MiOiJzdXBwb3J0LmJyYWluY2VydC5jb20ifQ.4cSI9eyAVRkFABEHQJz8IMGeIhxVO4U5Fw92EXcpaa4)
3. **Import to BrainCert**: Log into your BrainCert dashboard, navigate to your content library, and upload your SCORM package.   
![](https://support.braincert.com/kb/attachment/article/200/inline?token=eyJhbGciOiJodHRwOi8vd3d3LnczLm9yZy8yMDAxLzA0L3htbGRzaWctbW9yZSNobWFjLXNoYTI1NiIsInR5cCI6IkpXVCJ9.eyJpZCI6IjU3MDIiLCJvcmdpZCI6IjE2MDMiLCJpc3MiOiJzdXBwb3J0LmJyYWluY2VydC5jb20ifQ.gGX1GTO7XJvcnPeKQ9zdVOexI8un-AZk9MScABqsc4U)
4. Select the uploaded SCORM file to preview the content.   
![](https://support.braincert.com/kb/attachment/article/200/inline?token=eyJhbGciOiJodHRwOi8vd3d3LnczLm9yZy8yMDAxLzA0L3htbGRzaWctbW9yZSNobWFjLXNoYTI1NiIsInR5cCI6IkpXVCJ9.eyJpZCI6IjU3MDMiLCJvcmdpZCI6IjE2MDMiLCJpc3MiOiJzdXBwb3J0LmJyYWluY2VydC5jb20ifQ.wAIkpaCNLjfpG6uocQ9P3nEvTqt076bw6LMsmA1TwjE)
5. After creating interactive H5P content as a SCORM package and importing it into BrainCert, go to your course and use the curriculum builder to add this content as a lecture item.  
![](https://support.braincert.com/kb/attachment/article/200/inline?token=eyJhbGciOiJodHRwOi8vd3d3LnczLm9yZy8yMDAxLzA0L3htbGRzaWctbW9yZSNobWFjLXNoYTI1NiIsInR5cCI6IkpXVCJ9.eyJpZCI6IjU3MDQiLCJvcmdpZCI6IjE2MDMiLCJpc3MiOiJzdXBwb3J0LmJyYWluY2VydC5jb20ifQ.lCLgey43MAs7modmwRqVNz4qnck3wS1TeDKpxxL1WwM)
6. Your SCORM content is now available for student engagement within your courses.  
![](https://support.braincert.com/kb/attachment/article/200/inline?token=eyJhbGciOiJodHRwOi8vd3d3LnczLm9yZy8yMDAxLzA0L3htbGRzaWctbW9yZSNobWFjLXNoYTI1NiIsInR5cCI6IkpXVCJ9.eyJpZCI6IjU3MDUiLCJvcmdpZCI6IjE2MDMiLCJpc3MiOiJzdXBwb3J0LmJyYWluY2VydC5jb20ifQ.njY2THqqCo_tYQS-ejVPcTwxwlz7mtwH0TptYNFnhiY)

## Conclusion

Lumi stands out as an exceptional free tool for educators and trainers using BrainCert, combining ease of use with powerful interactive content creation capabilities. By leveraging Lumi authoring tool to enrich your courses, you ensure that your educational offerings are not only engaging but also tailored to the needs of today's learners. Start creating with Lumi today and bring your BrainCert courses to life.

**Discover More:**
To dive deeper into creating interactive content with Lumi, visit [Lumi's website](https://app.lumi.education/) and choose between Lumi Desktop and Lumi Cloud. For further information on leveraging SCORM content within BrainCert, explore our support resources or contact our team for assistance.

# Best Way to Convert my Videos

Using high-quality videos in your courses plays an important role in providing a seamless learning experience for your students. BrainCert's cloud media player is designed to play video formats like mp4, m4v, f4v, flv, and webm from your content library. MP4 video plays better when encoded in H.264 resulting in a better user experience.

Some of the common issues with poorly encoded videos are:

- Your students only hear the audio but no video
- Unwanted echo in video playback

BrainCert recommends [HandBrake](https://handbrake.fr/ "https://handbrake.fr/")- an open-source free video encoder with Windows, Mac, and Linux computers.

![](https://support.braincert.com/kb/attachment/article/139/inline?token=eyJhbGciOiJodHRwOi8vd3d3LnczLm9yZy8yMDAxLzA0L3htbGRzaWctbW9yZSNobWFjLXNoYTI1NiIsInR5cCI6IkpXVCJ9.eyJpZCI6IjQzNzkiLCJvcmdpZCI6IjE2MDMiLCJpc3MiOiJzdXBwb3J0LmJyYWluY2VydC5jb20ifQ.EiFayO36Quk_XAU_Pn76sQcP5PMut-KizcdsB4EOa8w)

HandBrake is a tool for converting video from nearly any format to a selection of modern, widely supported codecs.

Reasons you’ll love HandBrake :

- Convert video from nearly any format
- Free and Open Source
- Multi-Platform (Windows, Mac, and Linux)

![](https://support.braincert.com/kb/attachment/article/139/inline?token=eyJhbGciOiJodHRwOi8vd3d3LnczLm9yZy8yMDAxLzA0L3htbGRzaWctbW9yZSNobWFjLXNoYTI1NiIsInR5cCI6IkpXVCJ9.eyJpZCI6IjQ1MTAiLCJvcmdpZCI6IjE2MDMiLCJpc3MiOiJzdXBwb3J0LmJyYWluY2VydC5jb20ifQ.Hw8X4kZlLMsdHoy5lDzwq3SvDKUkVk_KEKgJIuCYZgc)

# Steps to Integrate Zoom Video Conferencing

The Zoom integration in BrainCert includes several features that enhance the online teaching and learning experience. The integration is easy to set up and use, and it provides a secure and reliable connection between the BrainCert LMS and Zoom. The integration is easy to set up and use, and it provides a secure and reliable connection between the BrainCert LMS and Zoom.
<section class="info-box">Note: <span style=" font-family: &quot;Graphik Web&quot;, &quot;Helvetica Neue&quot;, Helvetica, Arial, Tahoma, sans-serif; font-size: 15px; font-style: normal; font-weight: 400; text-align: start; text-indent: 0px; white-space: normal; display: inline !important; float: none;">With the deprecation of Zoom's JSON Web Tokens (JWT) app type, which previously facilitated secure server-to-server authentication using account API keys and secrets, we have transitioned to OAuth-based authentication for our Zoom integration. This change is essential as the JWT method is being phased out and will no longer support open API requests.</span></section>To maintain seamless integration with Zoom, we have migrated to the server-to-server OAuth app or OAuth app, providing enhanced security and compliance with Zoom's latest authentication standards. This transition ensures uninterrupted service and aligns with Zoom’s updated API authentication methods.
##   

## **Create a Zoom Account**  

## **Step 1:** 

Before you begin the integration, make sure you have a Zoom account. If you don't have one, you can sign up for free on the [Zoom website](https://zoom.us/ "https://zoom.us/").

##   

## **Open App Marketplace**  

## **Step 2:**

Access the '**[App Marketplace](https://marketplace.zoom.us/ "https://marketplace.zoom.us/")**' to start the integration process. This is where you will create and manage the necessary credentials for Zoom to communicate with your LMS.

![0](https://support.braincert.com/kb/attachment/article/159/inline?token=eyJhbGciOiJodHRwOi8vd3d3LnczLm9yZy8yMDAxLzA0L3htbGRzaWctbW9yZSNobWFjLXNoYTI1NiIsInR5cCI6IkpXVCJ9.eyJpZCI6IjU5MjciLCJvcmdpZCI6IjE2MDMiLCJpc3MiOiJzdXBwb3J0LmJyYWluY2VydC5jb20ifQ.atoDFmWTQYp9n9pg3UyeH8bDrpJDfH68Y51rJy9re5k)

##   

## **Develop and Build Your Zoom App** 

## **Step 3:** 

Log in to your Zoom account. Navigate to the '**Zoom Marketplace**' and select '**Develop**'. Choose '**Build App**' to start creating your Zoom app.

![1](https://support.braincert.com/kb/attachment/article/159/inline?token=eyJhbGciOiJodHRwOi8vd3d3LnczLm9yZy8yMDAxLzA0L3htbGRzaWctbW9yZSNobWFjLXNoYTI1NiIsInR5cCI6IkpXVCJ9.eyJpZCI6IjU5MjgiLCJvcmdpZCI6IjE2MDMiLCJpc3MiOiJzdXBwb3J0LmJyYWluY2VydC5jb20ifQ.6QY89dS2eNnVhfiwXL91Ul-r6XXpzsodKAMM7cbKjQ4)

##   

## **Step 4:**

Select '**General App**' and click '**Create**'.

![2](https://support.braincert.com/kb/attachment/article/159/inline?token=eyJhbGciOiJodHRwOi8vd3d3LnczLm9yZy8yMDAxLzA0L3htbGRzaWctbW9yZSNobWFjLXNoYTI1NiIsInR5cCI6IkpXVCJ9.eyJpZCI6IjU5MjkiLCJvcmdpZCI6IjE2MDMiLCJpc3MiOiJzdXBwb3J0LmJyYWluY2VydC5jb20ifQ.3MTDWjMvXiLm6rqOHlC_pm7PDyjUZjo0TST_rKMGcoo)

##   

## **Generate Your App Credentials**

## **Step 5:** 

After creating the app, you will receive your '**Client ID**' and '**Client Secret'**. Keep these handy as they will be used later in your LMS.![3](https://support.braincert.com/kb/attachment/article/159/inline?token=eyJhbGciOiJodHRwOi8vd3d3LnczLm9yZy8yMDAxLzA0L3htbGRzaWctbW9yZSNobWFjLXNoYTI1NiIsInR5cCI6IkpXVCJ9.eyJpZCI6IjU5MzIiLCJvcmdpZCI6IjE2MDMiLCJpc3MiOiJzdXBwb3J0LmJyYWluY2VydC5jb20ifQ.fMoic89M_a87A76_mTnBGZgIe7zEygWEG8JSLGv3oig)

##   

## **Configure the App in your LMS**

## **Step 6:**

Log in to your BrainCert LMS dashboard. Navigate to the '**Extensions**' section in '**Global Settings**'.

![1](https://support.braincert.com/kb/attachment/article/159/inline?token=eyJhbGciOiJodHRwOi8vd3d3LnczLm9yZy8yMDAxLzA0L3htbGRzaWctbW9yZSNobWFjLXNoYTI1NiIsInR5cCI6IkpXVCJ9.eyJpZCI6IjU5MzMiLCJvcmdpZCI6IjE2MDMiLCJpc3MiOiJzdXBwb3J0LmJyYWluY2VydC5jb20ifQ.LT_TI7LWTrbACyqcx5D2dQA_fxMirwBx5fz0r193fas)

##   

## **Step 7:**

Scroll down to find the '**Zoom**' enable the Zoom extension and click '**Save**'.

![2](https://support.braincert.com/kb/attachment/article/159/inline?token=eyJhbGciOiJodHRwOi8vd3d3LnczLm9yZy8yMDAxLzA0L3htbGRzaWctbW9yZSNobWFjLXNoYTI1NiIsInR5cCI6IkpXVCJ9.eyJpZCI6IjU5MzQiLCJvcmdpZCI6IjE2MDMiLCJpc3MiOiJzdXBwb3J0LmJyYWluY2VydC5jb20ifQ.abgzaK3FhWeXAHaohxiAbTvlITtPLRgv-KsGrx-L0VQ)

##   

## **Step 8:**  

Now, click on the API keys and enter your '**Zoom email ID**', '**Client ID**', and '**Client Secret**' obtained from the Zoom Marketplace. Click '**Save**' to apply the changes.

![3](https://support.braincert.com/kb/attachment/article/159/inline?token=eyJhbGciOiJodHRwOi8vd3d3LnczLm9yZy8yMDAxLzA0L3htbGRzaWctbW9yZSNobWFjLXNoYTI1NiIsInR5cCI6IkpXVCJ9.eyJpZCI6IjU5MzUiLCJvcmdpZCI6IjE2MDMiLCJpc3MiOiJzdXBwb3J0LmJyYWluY2VydC5jb20ifQ.Jid167_8BGwSoDrVBHK-yg2eMIDylq8PT3p33L7lbDc)

##   

## **Set Up the Zoom App**

## **Step 9:**

Head back to Zoom Marketplace. Under OAuth Information, paste your '**Domain URL**' in the given field and click '**Continue**'.

<section class="info-box">Remember to copy the link with the slash (/) at the end.</section>

![4](https://support.braincert.com/kb/attachment/article/159/inline?token=eyJhbGciOiJodHRwOi8vd3d3LnczLm9yZy8yMDAxLzA0L3htbGRzaWctbW9yZSNobWFjLXNoYTI1NiIsInR5cCI6IkpXVCJ9.eyJpZCI6IjU5MzYiLCJvcmdpZCI6IjE2MDMiLCJpc3MiOiJzdXBwb3J0LmJyYWluY2VydC5jb20ifQ.iSXNKl5-nG1YAYUpUQHzza8JEoNZrgYoo6tT_sNiHZ8)

##   

## **Step 10:**

Navigate to '**Surface**'.

Select '**Meetings**' from the list provide the URL in the '**Home URL**' field and click '**Continue**' to proceed.

![5](https://support.braincert.com/kb/attachment/article/159/inline?token=eyJhbGciOiJodHRwOi8vd3d3LnczLm9yZy8yMDAxLzA0L3htbGRzaWctbW9yZSNobWFjLXNoYTI1NiIsInR5cCI6IkpXVCJ9.eyJpZCI6IjU5MzciLCJvcmdpZCI6IjE2MDMiLCJpc3MiOiJzdXBwb3J0LmJyYWluY2VydC5jb20ifQ.cqiov4feq_6smb5pzuWKoT-iVMfCOzCT6Rl7rZtYfIc)

##   

## **Set Zoom App Permissions - Scopes**

## **Step 11:**  

To allow your LMS to manage Zoom meetings, you’ll need to set the appropriate permissions. Navigate to '**Scopes**' and click on '**+Add Scopes**'.

![6](https://support.braincert.com/kb/attachment/article/159/inline?token=eyJhbGciOiJodHRwOi8vd3d3LnczLm9yZy8yMDAxLzA0L3htbGRzaWctbW9yZSNobWFjLXNoYTI1NiIsInR5cCI6IkpXVCJ9.eyJpZCI6IjU5MzgiLCJvcmdpZCI6IjE2MDMiLCJpc3MiOiJzdXBwb3J0LmJyYWluY2VydC5jb20ifQ.qBGYO4l_K20C99xrEihr20qB9ggQuxKHZlst4OaZG-Q)

##   

## **Step 12:**

Under '**Recording**' scopes, select:

**View all user recordings** -&gt; 'View a recording'

**View and manage your meetings** -&gt; 'Create a meeting for a user' and 'Update a meeting'.

![7](https://support.braincert.com/kb/attachment/article/159/inline?token=eyJhbGciOiJodHRwOi8vd3d3LnczLm9yZy8yMDAxLzA0L3htbGRzaWctbW9yZSNobWFjLXNoYTI1NiIsInR5cCI6IkpXVCJ9.eyJpZCI6IjU5MzkiLCJvcmdpZCI6IjE2MDMiLCJpc3MiOiJzdXBwb3J0LmJyYWluY2VydC5jb20ifQ._FVZztrHf-kz0urYIaoIQmHQKx16FaS0dKf8QcoAZyY)

##   

## **Step 13:**

Under '**User**' scopes, select:

**View all user information** -&gt; 'View a user'

![8](https://support.braincert.com/kb/attachment/article/159/inline?token=eyJhbGciOiJodHRwOi8vd3d3LnczLm9yZy8yMDAxLzA0L3htbGRzaWctbW9yZSNobWFjLXNoYTI1NiIsInR5cCI6IkpXVCJ9.eyJpZCI6IjU5NDAiLCJvcmdpZCI6IjE2MDMiLCJpc3MiOiJzdXBwb3J0LmJyYWluY2VydC5jb20ifQ.SFKQ_5YLMQtjC61baEKHi2nqk8en4ZfI5YLkwTSCoz4)

##   

## **Step 14:**

**Under 'Meeting' scopes, select:**

**View all user meetings** -&gt; 'View a meeting'

**View and manage your meetings** -&gt; 'Create a meeting for a user' and 'Update a meeting'

![9](https://support.braincert.com/kb/attachment/article/159/inline?token=eyJhbGciOiJodHRwOi8vd3d3LnczLm9yZy8yMDAxLzA0L3htbGRzaWctbW9yZSNobWFjLXNoYTI1NiIsInR5cCI6IkpXVCJ9.eyJpZCI6IjU5NDEiLCJvcmdpZCI6IjE2MDMiLCJpc3MiOiJzdXBwb3J0LmJyYWluY2VydC5jb20ifQ.qRxrLr9VylPKLg89ojoPftp0g2s0ddIvNS6CHYy6dy0)

##   

## **Step 15:**

Next, select all the boxes except '**Zoom App**', enter the '**Scope Description**' and click '**Continue**'.

**![10](https://support.braincert.com/kb/attachment/article/159/inline?token=eyJhbGciOiJodHRwOi8vd3d3LnczLm9yZy8yMDAxLzA0L3htbGRzaWctbW9yZSNobWFjLXNoYTI1NiIsInR5cCI6IkpXVCJ9.eyJpZCI6IjU5NDIiLCJvcmdpZCI6IjE2MDMiLCJpc3MiOiJzdXBwb3J0LmJyYWluY2VydC5jb20ifQ.ndyNBJ6-mK9ZnNxrSq_-vvqzGVdxMvXUiPikKEJfC1Q)**

##   

## **Step 16:**

On the '**App Listing**' page, add '**App Icon**', enter the '**App Name**' and fill in the other details and click '**Continue**' to proceed.

![11](https://support.braincert.com/kb/attachment/article/159/inline?token=eyJhbGciOiJodHRwOi8vd3d3LnczLm9yZy8yMDAxLzA0L3htbGRzaWctbW9yZSNobWFjLXNoYTI1NiIsInR5cCI6IkpXVCJ9.eyJpZCI6IjU5NDMiLCJvcmdpZCI6IjE2MDMiLCJpc3MiOiJzdXBwb3J0LmJyYWluY2VydC5jb20ifQ.5UsfAa17nkokFqu8wv73YLTFZ4oxuQdkuqwvWPSEzyA)

##   

## **Step 17:**

Provide all the links listed on the '**Link & Support**' page and click '**Continue**' to proceed.

![12](https://support.braincert.com/kb/attachment/article/159/inline?token=eyJhbGciOiJodHRwOi8vd3d3LnczLm9yZy8yMDAxLzA0L3htbGRzaWctbW9yZSNobWFjLXNoYTI1NiIsInR5cCI6IkpXVCJ9.eyJpZCI6IjU5NDQiLCJvcmdpZCI6IjE2MDMiLCJpc3MiOiJzdXBwb3J0LmJyYWluY2VydC5jb20ifQ.cYSfsuCIIxTtgcl-7U6AXJMoHbl3Ke-ksBUg02edq5c)

##   

## **Finalize the App Integration**

**## Step 18:**

Click '**Add App**' in Zoom Marketplace and allow the integration by clicking '**Add App Now**'.

![13](https://support.braincert.com/kb/attachment/article/159/inline?token=eyJhbGciOiJodHRwOi8vd3d3LnczLm9yZy8yMDAxLzA0L3htbGRzaWctbW9yZSNobWFjLXNoYTI1NiIsInR5cCI6IkpXVCJ9.eyJpZCI6IjU5NDUiLCJvcmdpZCI6IjE2MDMiLCJpc3MiOiJzdXBwb3J0LmJyYWluY2VydC5jb20ifQ.BKp8NF3OWJV8Hx0thpYJz84BOin7kvVUuJ1LqOTNU8o)

##   

## **Step 19:**

Ensure all permissions are ticked and click on the '**Allow**' button.

![14](https://support.braincert.com/kb/attachment/article/159/inline?token=eyJhbGciOiJodHRwOi8vd3d3LnczLm9yZy8yMDAxLzA0L3htbGRzaWctbW9yZSNobWFjLXNoYTI1NiIsInR5cCI6IkpXVCJ9.eyJpZCI6IjU5NDYiLCJvcmdpZCI6IjE2MDMiLCJpc3MiOiJzdXBwb3J0LmJyYWluY2VydC5jb20ifQ.gm65mrp-Orp2inh6RE6atr0OlP9Wa6ySGz1ebzMpLdY)

##   

## **Step 20:**

Now, you'll be redirected to the LMS, where you'll be notified that '**Zoom Integrated Successfully**'.

![15](https://support.braincert.com/kb/attachment/article/159/inline?token=eyJhbGciOiJodHRwOi8vd3d3LnczLm9yZy8yMDAxLzA0L3htbGRzaWctbW9yZSNobWFjLXNoYTI1NiIsInR5cCI6IkpXVCJ9.eyJpZCI6IjU5NDciLCJvcmdpZCI6IjE2MDMiLCJpc3MiOiJzdXBwb3J0LmJyYWluY2VydC5jb20ifQ.lbvBAwrC1r3Fm8Ed9AwpwMKlWKf6PXkeZk_HEOTpT9w)

##   

## **Schedule Zoom Classes in your LMS**

## **Step 21:**

Now that Zoom is integrated with your LMS, you can schedule and manage Zoom meetings directly from the LMS dashboard:

Navigate to the '**Products**' section, and open the '**Virtual Classroom**'. Click on '**Schedule Class**' and select '**Zoom Meeting**' from the options.

Fill in the required details such as date, time, and duration. Click '**Save**' to schedule your Zoom meeting.

![16](https://support.braincert.com/kb/attachment/article/159/inline?token=eyJhbGciOiJodHRwOi8vd3d3LnczLm9yZy8yMDAxLzA0L3htbGRzaWctbW9yZSNobWFjLXNoYTI1NiIsInR5cCI6IkpXVCJ9.eyJpZCI6IjU5NDgiLCJvcmdpZCI6IjE2MDMiLCJpc3MiOiJzdXBwb3J0LmJyYWluY2VydC5jb20ifQ.XI342NU9AAApe3MprDsQ3ccXwbvenHSc2bwUAXYlVA4)

##   

## **Step 22:**  

Navigate to **'Manage Classes'** and on the respective class, click on '**L** **aunch'** to start the meeting.

![17](https://support.braincert.com/kb/attachment/article/159/inline?token=eyJhbGciOiJodHRwOi8vd3d3LnczLm9yZy8yMDAxLzA0L3htbGRzaWctbW9yZSNobWFjLXNoYTI1NiIsInR5cCI6IkpXVCJ9.eyJpZCI6IjU5NDkiLCJvcmdpZCI6IjE2MDMiLCJpc3MiOiJzdXBwb3J0LmJyYWluY2VydC5jb20ifQ.K3gfMuArNOpSSfW4bE-lA90SKaRGjbCIQ1z9Wv3FgDg)

##   

## **Step 23:**

The meeting is successfully launched.

![18](https://support.braincert.com/kb/attachment/article/159/inline?token=eyJhbGciOiJodHRwOi8vd3d3LnczLm9yZy8yMDAxLzA0L3htbGRzaWctbW9yZSNobWFjLXNoYTI1NiIsInR5cCI6IkpXVCJ9.eyJpZCI6IjU5NTAiLCJvcmdpZCI6IjE2MDMiLCJpc3MiOiJzdXBwb3J0LmJyYWluY2VydC5jb20ifQ.fQ4sjs8vibd4RRkOnwYuBEG1rNr3KaObekx6pJyslbQ)
##   

## **Watching and Sharing Zoom Videos**

**## Step 24:**

Go to the '**Products**' section, click on '**Virtual Classroom**', and then select '**Recordings**' from the menu.

Find the Zoom recording you want to watch or share and click the '**Edit**' icon to open it.

![19](https://support.braincert.com/kb/attachment/article/159/inline?token=eyJhbGciOiJodHRwOi8vd3d3LnczLm9yZy8yMDAxLzA0L3htbGRzaWctbW9yZSNobWFjLXNoYTI1NiIsInR5cCI6IkpXVCJ9.eyJpZCI6IjU5NTEiLCJvcmdpZCI6IjE2MDMiLCJpc3MiOiJzdXBwb3J0LmJyYWluY2VydC5jb20ifQ.kttAlo_JxGvvUGeoTgRJ1hHlLh3tK5avow5Umzcrmtk)

##   

## **Step 25:**

Choose '**Public**' from the dropdown menu.

![20](https://support.braincert.com/kb/attachment/article/159/inline?token=eyJhbGciOiJodHRwOi8vd3d3LnczLm9yZy8yMDAxLzA0L3htbGRzaWctbW9yZSNobWFjLXNoYTI1NiIsInR5cCI6IkpXVCJ9.eyJpZCI6IjU5NTIiLCJvcmdpZCI6IjE2MDMiLCJpc3MiOiJzdXBwb3J0LmJyYWluY2VydC5jb20ifQ.Jp8I-rL0cRz7C_GxlB3tnX6oHAVWR7kQ4YuebpOBQGY)

##   

## **Step 26:**

Now, copy the '**URL link**' provided and share it with others.

![21](https://support.braincert.com/kb/attachment/article/159/inline?token=eyJhbGciOiJodHRwOi8vd3d3LnczLm9yZy8yMDAxLzA0L3htbGRzaWctbW9yZSNobWFjLXNoYTI1NiIsInR5cCI6IkpXVCJ9.eyJpZCI6IjU5NTMiLCJvcmdpZCI6IjE2MDMiLCJpc3MiOiJzdXBwb3J0LmJyYWluY2VydC5jb20ifQ.oHh1zr9S8LaO8ZdhxEI4vVQFmE9OyvhCz6Vj7ylI0bA)

##   

## **Step 27:**

Or, you can also share through the mail using the '**Share Recording**' button. Type in the recipient's email address, subject, and a custom message. Click '**Send**' to share the recording.

![22](https://support.braincert.com/kb/attachment/article/159/inline?token=eyJhbGciOiJodHRwOi8vd3d3LnczLm9yZy8yMDAxLzA0L3htbGRzaWctbW9yZSNobWFjLXNoYTI1NiIsInR5cCI6IkpXVCJ9.eyJpZCI6IjU5NTQiLCJvcmdpZCI6IjE2MDMiLCJpc3MiOiJzdXBwb3J0LmJyYWluY2VydC5jb20ifQ.HWHjdsAL2__AObxgSdwITGMek7y1147eRbvglE1hW0U)

##   

## **Adding Zoom Videos to your Course Lecture**

**## Step 28:**

Navigate to the '**Products**' section and select '**Manage Courses**' under the '**Courses**'.

Choose the course to which you want to add the recording, click on the '**Options**' of the course, and then select '**Curriculum**' to add the course content.

![23](https://support.braincert.com/kb/attachment/article/159/inline?token=eyJhbGciOiJodHRwOi8vd3d3LnczLm9yZy8yMDAxLzA0L3htbGRzaWctbW9yZSNobWFjLXNoYTI1NiIsInR5cCI6IkpXVCJ9.eyJpZCI6IjU5NTUiLCJvcmdpZCI6IjE2MDMiLCJpc3MiOiJzdXBwb3J0LmJyYWluY2VydC5jb20ifQ.9AbY_pYKZijwjQ5uKikAfPXvBoaGZqDBVfDI9M73Hls)

##   

## **Step 29:**

Click the '**+Add**' button in the lecture field. Choose '**Add Class Recording**' from the list of options.

![24](https://support.braincert.com/kb/attachment/article/159/inline?token=eyJhbGciOiJodHRwOi8vd3d3LnczLm9yZy8yMDAxLzA0L3htbGRzaWctbW9yZSNobWFjLXNoYTI1NiIsInR5cCI6IkpXVCJ9.eyJpZCI6IjU5NTYiLCJvcmdpZCI6IjE2MDMiLCJpc3MiOiJzdXBwb3J0LmJyYWluY2VydC5jb20ifQ.Pmv7SiKB_Ky90V9yZZ4r77vvlPxVU3p-DsZQ2U69Z-E)

##   

## **Step 30:**

Select the Zoom recording you want to add from the list of available recordings. Click '**Add**' to insert the recording into your course curriculum.

![25](https://support.braincert.com/kb/attachment/article/159/inline?token=eyJhbGciOiJodHRwOi8vd3d3LnczLm9yZy8yMDAxLzA0L3htbGRzaWctbW9yZSNobWFjLXNoYTI1NiIsInR5cCI6IkpXVCJ9.eyJpZCI6IjU5NTciLCJvcmdpZCI6IjE2MDMiLCJpc3MiOiJzdXBwb3J0LmJyYWluY2VydC5jb20ifQ.b_tN7iLDvJBjbsjuiVoyAcxqgPWJOq_aWOiEYE5Oi5A)

##   

## **Step 31:**

The recording has been successfully added and can now be seen under the lecture.

**![26](https://support.braincert.com/kb/attachment/article/159/inline?token=eyJhbGciOiJodHRwOi8vd3d3LnczLm9yZy8yMDAxLzA0L3htbGRzaWctbW9yZSNobWFjLXNoYTI1NiIsInR5cCI6IkpXVCJ9.eyJpZCI6IjU5NTgiLCJvcmdpZCI6IjE2MDMiLCJpc3MiOiJzdXBwb3J0LmJyYWluY2VydC5jb20ifQ.l5mpTc1QwzaBfTJ0lh4O4ueqitbzn3HMxATSNojJxe8)**

By following these steps, you’ve successfully integrated Zoom Video Conferencing into your LMS. You can now easily schedule, manage, and conduct virtual classes using Zoom directly within your LMS, providing an easy learning experience for your students.

# Exploring Certificate Features: A Step by Step Guide to Personalize Certificates

Certificates in learning serve as definite recognition, validating the completion of a course or program and providing learners with documented proof of their acquired skills and knowledge.

BrainCert offers an intuitive drag-and-drop certificate designer tool to customize and award course completion certificates online easily.

##   

## **Certificate Selection**

## **Step 1:**

On your '**Manage Course**' page, click on the options corresponding to the course to which you need to add certificates and choose '**Certificate**' from the list.

![1.png](https://support.braincert.com/kb/attachment/article/97/inline?token=eyJhbGciOiJodHRwOi8vd3d3LnczLm9yZy8yMDAxLzA0L3htbGRzaWctbW9yZSNobWFjLXNoYTI1NiIsInR5cCI6IkpXVCJ9.eyJpZCI6IjUzOTIiLCJvcmdpZCI6IjE2MDMiLCJpc3MiOiJzdXBwb3J0LmJyYWluY2VydC5jb20ifQ.DgLn4FA6LXkMJOG8-rSrsTakaquFeiFHO2CkmYmpnhQ)

##   

## **Step 2:**

This brings up the certificate selection page. Select the desired certificate template.

![2.png](https://support.braincert.com/kb/attachment/article/97/inline?token=eyJhbGciOiJodHRwOi8vd3d3LnczLm9yZy8yMDAxLzA0L3htbGRzaWctbW9yZSNobWFjLXNoYTI1NiIsInR5cCI6IkpXVCJ9.eyJpZCI6IjUzOTMiLCJvcmdpZCI6IjE2MDMiLCJpc3MiOiJzdXBwb3J0LmJyYWluY2VydC5jb20ifQ.YBglHI7QxN1TXJE6R7wy1xCAbteWsl-nuYu2YenbecM)

##   

## **Step 3:**

You can also upload your certificate template from your computer by clicking the '**Choose File**' option.

![3.png](https://support.braincert.com/kb/attachment/article/97/inline?token=eyJhbGciOiJodHRwOi8vd3d3LnczLm9yZy8yMDAxLzA0L3htbGRzaWctbW9yZSNobWFjLXNoYTI1NiIsInR5cCI6IkpXVCJ9.eyJpZCI6IjUzOTQiLCJvcmdpZCI6IjE2MDMiLCJpc3MiOiJzdXBwb3J0LmJyYWluY2VydC5jb20ifQ.8H8KvkBDFv2LEbGzFbiZ-m2Fru4ByzUt381IE7CYTi0)

Make sure to toggle the '**Learners can download this certificate**' option to allow students to download their certificate.

## **A Closer Look at Editing Features**

## **1. Certificate Canvas**

- **Our newly designed certificate canvas is completely responsive and loaded with powerful features.**
- **With customizable fonts and custom tags, you can offer a one-of-a-kind and amazing certificate that your student would be happy to receive in just a few clicks.**

**![7.png](https://support.braincert.com/kb/attachment/article/97/inline?token=eyJhbGciOiJodHRwOi8vd3d3LnczLm9yZy8yMDAxLzA0L3htbGRzaWctbW9yZSNobWFjLXNoYTI1NiIsInR5cCI6IkpXVCJ9.eyJpZCI6IjU2NTIiLCJvcmdpZCI6IjE2MDMiLCJpc3MiOiJzdXBwb3J0LmJyYWluY2VydC5jb20ifQ.TMo1hfQ69MzUDj71L8kIVj4IWJQzKpN7lAA_eFaC9ok) ﻿﻿**

## **2.** **Create a Professional Certificate**

Pick one of our certificate templates or upload your own certificate background image and customize it with just a few clicks.

![8.png](https://support.braincert.com/kb/attachment/article/97/inline?token=eyJhbGciOiJodHRwOi8vd3d3LnczLm9yZy8yMDAxLzA0L3htbGRzaWctbW9yZSNobWFjLXNoYTI1NiIsInR5cCI6IkpXVCJ9.eyJpZCI6IjU2NTMiLCJvcmdpZCI6IjE2MDMiLCJpc3MiOiJzdXBwb3J0LmJyYWluY2VydC5jb20ifQ.uTE0wNcaiqmo1HPuL5hTksjkEx9CNGTJggmrbVi5SmY)

## **﻿﻿**

## **3. Editor Like Tools**

- Give your students the recognition they deserve.
- Pick a bold font and use our editor-like tools to align the text, and change size and color.
- Upload your logo or signature and use your brand color scheme and fonts.

![9.png](https://support.braincert.com/kb/attachment/article/97/inline?token=eyJhbGciOiJodHRwOi8vd3d3LnczLm9yZy8yMDAxLzA0L3htbGRzaWctbW9yZSNobWFjLXNoYTI1NiIsInR5cCI6IkpXVCJ9.eyJpZCI6IjU2NTQiLCJvcmdpZCI6IjE2MDMiLCJpc3MiOiJzdXBwb3J0LmJyYWluY2VydC5jb20ifQ.QMUNz6bL7VjtT85YxfYVRxBKqZ4u75qxBkl93yg70SY)

##   

## **4. Custom Tags and Registration Data**

**- The most amazing feature of the certificate designer tool is the ability to import custom registration fields captured during the self-registration process.- Custom tags on the other hand allow you to generate dynamic content for each recipient on your list such as automatically substituting a student's name, course or test name, and completion date.![12.png](https://support.braincert.com/kb/attachment/article/97/inline?token=eyJhbGciOiJodHRwOi8vd3d3LnczLm9yZy8yMDAxLzA0L3htbGRzaWctbW9yZSNobWFjLXNoYTI1NiIsInR5cCI6IkpXVCJ9.eyJpZCI6IjU2NTciLCJvcmdpZCI6IjE2MDMiLCJpc3MiOiJzdXBwb3J0LmJyYWluY2VydC5jb20ifQ.O6abK0Lyui_qcu48Gy3GfjA6ZNKJegIefGcwnuhRvxg)**

##   

## **5. Auto-Fill Data**

- Click on the certificate thumbnail from the selection page as shown above to enter the certificate design area. Every certificate can be individually customized based on the certificate template selected.

> ***BrainCert generates the student's name, course name, and completion date in the certificate automatically using tags.*** 

**Note:**

Student names and course names need not be typed manually; they will be processed automatically using the tags { }.

- Some of the supported tags are {StudentName}, {CourseName}, and {Completion Date}.

You can also upload your company's logo or signature image. BrainCert allows you to customize the text in the certificate similar to the example given below:

![4.png](https://support.braincert.com/kb/attachment/article/97/inline?token=eyJhbGciOiJodHRwOi8vd3d3LnczLm9yZy8yMDAxLzA0L3htbGRzaWctbW9yZSNobWFjLXNoYTI1NiIsInR5cCI6IkpXVCJ9.eyJpZCI6IjUzOTYiLCJvcmdpZCI6IjE2MDMiLCJpc3MiOiJzdXBwb3J0LmJyYWluY2VydC5jb20ifQ.zdBfo2HDmysMwLTqPc9fBdF_Jfi62yu-8yj42sCqj-0)

You can drag and move the text and image blocks inside the certificate template to change the position. You can also preview the actual certificate output by clicking the '**Live Preview**' button and generating a high-quality PDF certificate.

![5.png](https://support.braincert.com/kb/attachment/article/97/inline?token=eyJhbGciOiJodHRwOi8vd3d3LnczLm9yZy8yMDAxLzA0L3htbGRzaWctbW9yZSNobWFjLXNoYTI1NiIsInR5cCI6IkpXVCJ9.eyJpZCI6IjUzOTciLCJvcmdpZCI6IjE2MDMiLCJpc3MiOiJzdXBwb3J0LmJyYWluY2VydC5jb20ifQ.6Mk4dy9Y-_Lbu4G_wm4njwuMLeTVc0jSSj_tOOFj-ko)

##   

## **6. Custom Certificate Number**

- Create an auto-generated unique certificate number based on the prefix, suffix, and minimum digits. Insert the certificate number anywhere on the certificate canvas using the {certificate\_number} custom tag.
- Generating a unique certificate number is an easy way to verify the certification.
- The certificate number is also included in both course and test reports and can be used to generate custom reports as well.

![10.png](https://support.braincert.com/kb/attachment/article/97/inline?token=eyJhbGciOiJodHRwOi8vd3d3LnczLm9yZy8yMDAxLzA0L3htbGRzaWctbW9yZSNobWFjLXNoYTI1NiIsInR5cCI6IkpXVCJ9.eyJpZCI6IjU2NTYiLCJvcmdpZCI6IjE2MDMiLCJpc3MiOiJzdXBwb3J0LmJyYWluY2VydC5jb20ifQ.V-hsqTGL4w5G4LQPwDsgVsSZnuSyKmQa6ieYRnfu0IM)

##   

## **7. Drag-and-Drop Designer**

- This game-changing certificate designer tool can make your life so much easier when it comes to delivering professional certificates online.
- Unlike most LMS platforms that limit what can be done with certificates, BrainCert gives beginners and pros the flexibility to create an online certificate just like the paper ones.
- Simply drag an object anywhere on the canvas and '**Save**' it.

![11.png](https://support.braincert.com/kb/attachment/article/97/inline?token=eyJhbGciOiJodHRwOi8vd3d3LnczLm9yZy8yMDAxLzA0L3htbGRzaWctbW9yZSNobWFjLXNoYTI1NiIsInR5cCI6IkpXVCJ9.eyJpZCI6IjU2NTgiLCJvcmdpZCI6IjE2MDMiLCJpc3MiOiJzdXBwb3J0LmJyYWluY2VydC5jb20ifQ.hwEKbOo8Kewq_HWzSCF9s3o1F4oxvptLpvloAMnO_QI)

##   

## **8. Download Certificates in Print Quality**

- Allow your students to download the course and test certificates as a high-quality PDF file.
- Our certificate templates are formatted for standard A1-A5 papers, making the design-to-print process seamless.
- The certificate can be automatically mailed after completion of the courses and tests or the student can download it from their dashboard anytime.

![6.png](https://support.braincert.com/kb/attachment/article/97/inline?token=eyJhbGciOiJodHRwOi8vd3d3LnczLm9yZy8yMDAxLzA0L3htbGRzaWctbW9yZSNobWFjLXNoYTI1NiIsInR5cCI6IkpXVCJ9.eyJpZCI6IjU2NTkiLCJvcmdpZCI6IjE2MDMiLCJpc3MiOiJzdXBwb3J0LmJyYWluY2VydC5jb20ifQ.dzkudVgAzBA4LD_3uFPjgDMfkTMn0cWdPaL5_9OTlos)

Create certificates effortlessly according to your preference.

# Configuring SAML 2.0 with Okta

Okta is an enterprise-grade, identity management service, built for the cloud, but compatible with many on-premises applications. With Okta, IT teams can manage employee access to applications or devices. Okta comes with features such as Provisioning, Single Sign-On (SSO), Active Directory (AD) and LDAP integration, Centralized de-provisioning of users, multifactor authentication (MFA), mobile identity management, and flexible policies for organization security and control.

This article will discuss in detail how users can configure SAML on BrainCert with Okta.

###   

## **Configuring SAML on BrainCert with Okta**

## **Step 1:**

Log in to Okta click on '**Applications**' and select '**Add Application**'.

![](https://support.braincert.com/kb/attachment/article/10/inline?token=eyJhbGciOiJodHRwOi8vd3d3LnczLm9yZy8yMDAxLzA0L3htbGRzaWctbW9yZSNobWFjLXNoYTI1NiIsInR5cCI6IkpXVCJ9.eyJpZCI6IjQyMDIiLCJvcmdpZCI6IjE2MDMiLCJpc3MiOiJzdXBwb3J0LmJyYWluY2VydC5jb20ifQ.Py2TOvTBOHqHwyAQ7iXli3DfC5ZRqbCP4zQVTaEXgiY)

![](https://support.braincert.com/kb/attachment/article/10/inline?token=eyJhbGciOiJodHRwOi8vd3d3LnczLm9yZy8yMDAxLzA0L3htbGRzaWctbW9yZSNobWFjLXNoYTI1NiIsInR5cCI6IkpXVCJ9.eyJpZCI6IjQyMDMiLCJvcmdpZCI6IjE2MDMiLCJpc3MiOiJzdXBwb3J0LmJyYWluY2VydC5jb20ifQ.fuDt_IswKcpcDsp832Q_1Ls0YbrRdkDLezFdxyCRbyE)

#####   

## **Step 2:**

Click on '**Create New App**'.

![](https://support.braincert.com/kb/attachment/article/10/inline?token=eyJhbGciOiJodHRwOi8vd3d3LnczLm9yZy8yMDAxLzA0L3htbGRzaWctbW9yZSNobWFjLXNoYTI1NiIsInR5cCI6IkpXVCJ9.eyJpZCI6IjQyMDQiLCJvcmdpZCI6IjE2MDMiLCJpc3MiOiJzdXBwb3J0LmJyYWluY2VydC5jb20ifQ.TO5gGEUxBoPtuT8JcMjDuQr8gGjBg-JS6D5bHLs0zW8)  
  
Select '**Web**' as the platform and '**SAML 2.0**'.

![](https://support.braincert.com/kb/attachment/article/10/inline?token=eyJhbGciOiJodHRwOi8vd3d3LnczLm9yZy8yMDAxLzA0L3htbGRzaWctbW9yZSNobWFjLXNoYTI1NiIsInR5cCI6IkpXVCJ9.eyJpZCI6IjQyMDUiLCJvcmdpZCI6IjE2MDMiLCJpc3MiOiJzdXBwb3J0LmJyYWluY2VydC5jb20ifQ.4pucvNPCCiyWYbKd9XqZJQhaXkQ2XK7Nw6sXCO-51gM)

#####   

## **Step 3:**

Provide the '**App name**' and click on next. For reference, we have named the app as BrainCert.

![](https://support.braincert.com/kb/attachment/article/10/inline?token=eyJhbGciOiJodHRwOi8vd3d3LnczLm9yZy8yMDAxLzA0L3htbGRzaWctbW9yZSNobWFjLXNoYTI1NiIsInR5cCI6IkpXVCJ9.eyJpZCI6IjQyMDYiLCJvcmdpZCI6IjE2MDMiLCJpc3MiOiJzdXBwb3J0LmJyYWluY2VydC5jb20ifQ.rrICewfbyGZdTHsKckJNfomi7rNn1fzyi1EWcPINAZo)

## **Step 4:**

Copy the consumer URL from the SSO dashboard and paste it into the Okta SAML configuration. Then select the checkbox Use this for '**Recipient URL'** and '**Destination URL'**.

**BrainCert Dashboard**

![1.png](https://support.braincert.com/kb/attachment/article/10/inline?token=eyJhbGciOiJodHRwOi8vd3d3LnczLm9yZy8yMDAxLzA0L3htbGRzaWctbW9yZSNobWFjLXNoYTI1NiIsInR5cCI6IkpXVCJ9.eyJpZCI6IjU1ODEiLCJvcmdpZCI6IjE2MDMiLCJpc3MiOiJzdXBwb3J0LmJyYWluY2VydC5jb20ifQ.5ImxsjG0tvjQceEZYy7HifxunCBaHslJQGKRyBFH0hM)

**Okta Dashboard**

![](https://support.braincert.com/kb/attachment/article/10/inline?token=eyJhbGciOiJodHRwOi8vd3d3LnczLm9yZy8yMDAxLzA0L3htbGRzaWctbW9yZSNobWFjLXNoYTI1NiIsInR5cCI6IkpXVCJ9.eyJpZCI6IjQyMDgiLCJvcmdpZCI6IjE2MDMiLCJpc3MiOiJzdXBwb3J0LmJyYWluY2VydC5jb20ifQ.rRaY-q9hsfvLhs8uRqVjvJm1gDISV__H8Zn_JN9795g)

#####   

## **Step 5:**

Open the BrainCert dashboard from the '**Global Settings' --&gt;** '**User Registration**', '**Profile Field Mapping**' copy all the attributes, and paste them into Okta.

**LMS Dashboard**

**![2.png](https://support.braincert.com/kb/attachment/article/10/inline?token=eyJhbGciOiJodHRwOi8vd3d3LnczLm9yZy8yMDAxLzA0L3htbGRzaWctbW9yZSNobWFjLXNoYTI1NiIsInR5cCI6IkpXVCJ9.eyJpZCI6IjU1ODIiLCJvcmdpZCI6IjE2MDMiLCJpc3MiOiJzdXBwb3J0LmJyYWluY2VydC5jb20ifQ.GYhkR25tiuVGln8r1uDZlS3vvsoinaz8A8wwwp-dSMo)**

**Okta Dashboard**

![](https://support.braincert.com/kb/attachment/article/10/inline?token=eyJhbGciOiJodHRwOi8vd3d3LnczLm9yZy8yMDAxLzA0L3htbGRzaWctbW9yZSNobWFjLXNoYTI1NiIsInR5cCI6IkpXVCJ9.eyJpZCI6IjQyMTAiLCJvcmdpZCI6IjE2MDMiLCJpc3MiOiJzdXBwb3J0LmJyYWluY2VydC5jb20ifQ.E5GHgpLFnNIr4T3yIbUOX-yNbQu5RufzbCD4kzBHhp4)

![](https://support.braincert.com/kb/attachment/article/10/inline?token=eyJhbGciOiJodHRwOi8vd3d3LnczLm9yZy8yMDAxLzA0L3htbGRzaWctbW9yZSNobWFjLXNoYTI1NiIsInR5cCI6IkpXVCJ9.eyJpZCI6IjQxOTEiLCJvcmdpZCI6IjE2MDMiLCJpc3MiOiJzdXBwb3J0LmJyYWluY2VydC5jb20ifQ.D8wtsEdeLtR45e1ANNeQqQ4esYbWt9a3jshemIzJ-TE)

#####   

## **Step 6:**

Select '**I'm an Okta customer adding an internal app**' and click on the check box This is an internal app that we have created.

![](https://support.braincert.com/kb/attachment/article/10/inline?token=eyJhbGciOiJodHRwOi8vd3d3LnczLm9yZy8yMDAxLzA0L3htbGRzaWctbW9yZSNobWFjLXNoYTI1NiIsInR5cCI6IkpXVCJ9.eyJpZCI6IjQyMTEiLCJvcmdpZCI6IjE2MDMiLCJpc3MiOiJzdXBwb3J0LmJyYWluY2VydC5jb20ifQ.T9KVuR8kfhcraceQVLeCkm_59X5BPNIWu8Y8qpxmNPE)

After completing the configuration, click next and you will be redirected to the '**S** **ign On'** tab. Download the metadata and copy the entity id and certificate.

**Okta Dashboard:**

![](https://support.braincert.com/kb/attachment/article/10/inline?token=eyJhbGciOiJodHRwOi8vd3d3LnczLm9yZy8yMDAxLzA0L3htbGRzaWctbW9yZSNobWFjLXNoYTI1NiIsInR5cCI6IkpXVCJ9.eyJpZCI6IjQxOTAiLCJvcmdpZCI6IjE2MDMiLCJpc3MiOiJzdXBwb3J0LmJyYWluY2VydC5jb20ifQ.vZn2Fqu3EmGOkvA2qm0q2GxSAJGDXi9phcwaVQ52YNA)

![](https://support.braincert.com/kb/attachment/article/10/inline?token=eyJhbGciOiJodHRwOi8vd3d3LnczLm9yZy8yMDAxLzA0L3htbGRzaWctbW9yZSNobWFjLXNoYTI1NiIsInR5cCI6IkpXVCJ9.eyJpZCI6IjQxODgiLCJvcmdpZCI6IjE2MDMiLCJpc3MiOiJzdXBwb3J0LmJyYWluY2VydC5jb20ifQ.89b9It5xVjuFFAUbG9AvRvRDoaaLS1wS5KrtY1ITeuo)

#####   

## **Step 7:**

Paste the configuration on the BrainCert dashboard and Okta audience URL.

![3.png](https://support.braincert.com/kb/attachment/article/10/inline?token=eyJhbGciOiJodHRwOi8vd3d3LnczLm9yZy8yMDAxLzA0L3htbGRzaWctbW9yZSNobWFjLXNoYTI1NiIsInR5cCI6IkpXVCJ9.eyJpZCI6IjU1ODMiLCJvcmdpZCI6IjE2MDMiLCJpc3MiOiJzdXBwb3J0LmJyYWluY2VydC5jb20ifQ.Pbx6-bQVALYrs9dEmQgcUbXdLolCi4KCwwsmzHj0KKM)

**Okta Dashboard:**

Click '**General**' edit SAML settings, add the audience URL, and finish the settings.

![](https://support.braincert.com/kb/attachment/article/10/inline?token=eyJhbGciOiJodHRwOi8vd3d3LnczLm9yZy8yMDAxLzA0L3htbGRzaWctbW9yZSNobWFjLXNoYTI1NiIsInR5cCI6IkpXVCJ9.eyJpZCI6IjQxNzAiLCJvcmdpZCI6IjE2MDMiLCJpc3MiOiJzdXBwb3J0LmJyYWluY2VydC5jb20ifQ.JJ5oiN7yu_DMHE5vrU_BjpvLp1O-xqZvEQ0QLh_QzRA)

![](https://support.braincert.com/kb/attachment/article/10/inline?token=eyJhbGciOiJodHRwOi8vd3d3LnczLm9yZy8yMDAxLzA0L3htbGRzaWctbW9yZSNobWFjLXNoYTI1NiIsInR5cCI6IkpXVCJ9.eyJpZCI6IjQxNzEiLCJvcmdpZCI6IjE2MDMiLCJpc3MiOiJzdXBwb3J0LmJyYWluY2VydC5jb20ifQ.xRLGmLdkJt9Bt2KmL2Of0utpz8z77e-uKwVi6sMl6iI)

#####   

## **Step 8:**

Click on '**Group Mapping**' in the BrainCert and select the default group and roles from the drop down menu. The user will automatically be registered in that group at their first login.

![4.png](https://support.braincert.com/kb/attachment/article/10/inline?token=eyJhbGciOiJodHRwOi8vd3d3LnczLm9yZy8yMDAxLzA0L3htbGRzaWctbW9yZSNobWFjLXNoYTI1NiIsInR5cCI6IkpXVCJ9.eyJpZCI6IjU1ODQiLCJvcmdpZCI6IjE2MDMiLCJpc3MiOiJzdXBwb3J0LmJyYWluY2VydC5jb20ifQ.aJ5NLwissO9pu4Q7Lh4GHvXLOmQYBGIzfWDdiWbbj4s)

Save all the settings and check your configuration. If everything is correct you can connect the service provider with the IdP. Click on **My Apps** and you can see the BrainCert app listed under App.

![](https://support.braincert.com/kb/attachment/article/10/inline?token=eyJhbGciOiJodHRwOi8vd3d3LnczLm9yZy8yMDAxLzA0L3htbGRzaWctbW9yZSNobWFjLXNoYTI1NiIsInR5cCI6IkpXVCJ9.eyJpZCI6IjQxNzMiLCJvcmdpZCI6IjE2MDMiLCJpc3MiOiJzdXBwb3J0LmJyYWluY2VydC5jb20ifQ.pAqOIKVa6XSn_zgP1zqPxfE6oN8VhM9VKR-i_jiyK30)

![](https://support.braincert.com/kb/attachment/article/10/inline?token=eyJhbGciOiJodHRwOi8vd3d3LnczLm9yZy8yMDAxLzA0L3htbGRzaWctbW9yZSNobWFjLXNoYTI1NiIsInR5cCI6IkpXVCJ9.eyJpZCI6IjQxNzQiLCJvcmdpZCI6IjE2MDMiLCJpc3MiOiJzdXBwb3J0LmJyYWluY2VydC5jb20ifQ.CGzuk4WdMGcfWV_D7Ooqu_u7ZGhkKNmezR8q9X0IU9A)

The BrainCert App on Okta will now be redirected to BrainCert.

# Customize the Theme of your LMS with Branding

Customize Your Learning Experience: Learn how to effortlessly modify the themes of LMS, Virtual Classroom, Course Player, and Test Player to suit your preferences and create a personalized educational journey.

﻿﻿

<iframe src="https://player.vimeo.com/video/977852278?title=0&amp;byline=0&amp;portrait=0&amp;badge=0&amp;autopause=0&amp;player_id=0&amp;app_id=58479" frameborder="0" allow="autoplay; fullscreen; picture-in-picture; clipboard-write" style="position:absolute;top:0;left:0;width:100%;height:100%;" title="Customize the Theme of your LMS with Branding">&ZeroWidthSpace;</iframe>

## **Branding**

Login to your account click on  '**Global** **Settings**', and access the '**Branding**' section.

## **![1.png](https://support.braincert.com/kb/attachment/article/174/inline?token=eyJhbGciOiJodHRwOi8vd3d3LnczLm9yZy8yMDAxLzA0L3htbGRzaWctbW9yZSNobWFjLXNoYTI1NiIsInR5cCI6IkpXVCJ9.eyJpZCI6IjQ5MjEiLCJvcmdpZCI6IjE2MDMiLCJpc3MiOiJzdXBwb3J0LmJyYWluY2VydC5jb20ifQ._NNrqPwN7xc73xOnUDYOFmUFmQ32Dh8DCqdEQ44Ipvk) ﻿﻿LMS Theme**

Your LMS theme can be customized under this setting. '**Background** **color**' and '**Text** **Color**' can be customized according to your needs.

## **![2.png](https://support.braincert.com/kb/attachment/article/174/inline?token=eyJhbGciOiJodHRwOi8vd3d3LnczLm9yZy8yMDAxLzA0L3htbGRzaWctbW9yZSNobWFjLXNoYTI1NiIsInR5cCI6IkpXVCJ9.eyJpZCI6IjQ5MjIiLCJvcmdpZCI6IjE2MDMiLCJpc3MiOiJzdXBwb3J0LmJyYWluY2VydC5jb20ifQ.UMKg43Hp4eojhS-Nw_7s7p1TW3PNt_3gLaZNFT8CGRQ) ​**  
﻿﻿  
**Visual Classroom Theme**

Set up the appearance of your **Virtual Classroom** according to your preferred color.

## **![3.png](https://support.braincert.com/kb/attachment/article/174/inline?token=eyJhbGciOiJodHRwOi8vd3d3LnczLm9yZy8yMDAxLzA0L3htbGRzaWctbW9yZSNobWFjLXNoYTI1NiIsInR5cCI6IkpXVCJ9.eyJpZCI6IjQ5MjQiLCJvcmdpZCI6IjE2MDMiLCJpc3MiOiJzdXBwb3J0LmJyYWluY2VydC5jb20ifQ.2ubk66_nvRjG9HBfweu985kH5kP_SFbG6cicAZAUffU)**   
﻿﻿  
**Course Player Theme**

The Course Player theme can be modified for '**Navigation and Buttons**', including changes to the course header menu background, course header menu text, chapter header, and more.

**Navigation:**

![4.png](https://support.braincert.com/kb/attachment/article/174/inline?token=eyJhbGciOiJodHRwOi8vd3d3LnczLm9yZy8yMDAxLzA0L3htbGRzaWctbW9yZSNobWFjLXNoYTI1NiIsInR5cCI6IkpXVCJ9.eyJpZCI6IjQ5NjkiLCJvcmdpZCI6IjE2MDMiLCJpc3MiOiJzdXBwb3J0LmJyYWluY2VydC5jb20ifQ.uZa19z0LQ5804I3wk_TT10ArE7L1z62_0IYJESq9AAc)

**Buttons:**

![5.png](https://support.braincert.com/kb/attachment/article/174/inline?token=eyJhbGciOiJodHRwOi8vd3d3LnczLm9yZy8yMDAxLzA0L3htbGRzaWctbW9yZSNobWFjLXNoYTI1NiIsInR5cCI6IkpXVCJ9.eyJpZCI6IjQ5NzAiLCJvcmdpZCI6IjE2MDMiLCJpc3MiOiJzdXBwb3J0LmJyYWluY2VydC5jb20ifQ.MC_jYO79XOuz-E2gpGmZhltLjRdV2WeRGqP348TICcQ)

## **Test Player Theme﻿**

Select your desired background, text, and header button colors for the '**Test** **Player**'.

![5.png](https://support.braincert.com/kb/attachment/article/174/inline?token=eyJhbGciOiJodHRwOi8vd3d3LnczLm9yZy8yMDAxLzA0L3htbGRzaWctbW9yZSNobWFjLXNoYTI1NiIsInR5cCI6IkpXVCJ9.eyJpZCI6IjQ5MjUiLCJvcmdpZCI6IjE2MDMiLCJpc3MiOiJzdXBwb3J0LmJyYWluY2VydC5jb20ifQ.-Mdz79T5U6lAQekNi81wnQCSUjKdqhy8-rClGm2tkek)

**** Your branding theme is now customized to your preferences.

****

****

****

****

****

****

****

****

# Setting up Global Currency Based on Payment Gateways

This article will help you with the steps in changing currency globally for courses and products based on the payment gateways.

<iframe src="https://player.vimeo.com/video/958317330?badge=0&amp;autopause=0&amp;player_id=0&amp;app_id=58479" frameborder="0" allow="autoplay; fullscreen; picture-in-picture; clipboard-write" style="position:absolute;top:0;left:0;width:100%;height:100%;" title="Setting up Global Currency Based on Payment Gateways">&ZeroWidthSpace;</iframe>

##   

## **Step 1:**

Your preferred currency can now be set as a global setting to collect payments. This means that creating courses, tests, live classes, and products no longer requires selecting a preferred currency.

Navigate to **'E-commerce**' under the '**Global Settings**'.

## ![1.png](https://support.braincert.com/kb/attachment/article/52/inline?token=eyJhbGciOiJodHRwOi8vd3d3LnczLm9yZy8yMDAxLzA0L3htbGRzaWctbW9yZSNobWFjLXNoYTI1NiIsInR5cCI6IkpXVCJ9.eyJpZCI6IjQ5MDEiLCJvcmdpZCI6IjE2MDMiLCJpc3MiOiJzdXBwb3J0LmJyYWluY2VydC5jb20ifQ.g1LPE1piAoTZBCpP4VK0mQWc0_VQ7lXY7fnkjwEyEHs)  
**Step 2:**

To proceed with the payment using a credit/debit card, enable the preferred payment gateway and select the currency from the dropdown box that supports the selected payment.

![2.png](https://support.braincert.com/kb/attachment/article/52/inline?token=eyJhbGciOiJodHRwOi8vd3d3LnczLm9yZy8yMDAxLzA0L3htbGRzaWctbW9yZSNobWFjLXNoYTI1NiIsInR5cCI6IkpXVCJ9.eyJpZCI6IjQ5MDIiLCJvcmdpZCI6IjE2MDMiLCJpc3MiOiJzdXBwb3J0LmJyYWluY2VydC5jb20ifQ.Q9a_W6sfnuo3ZrcvE2DWB_i3BpjbfwYNPi3zpxAKoDM)

## **Step 3:**

To enable **PayPal** payments, toggle the switch and select the currency.

**Note:** PayPal and any one of the credit/debit card payment methods can be enabled simultaneously.

**![3.png](https://support.braincert.com/kb/attachment/article/52/inline?token=eyJhbGciOiJodHRwOi8vd3d3LnczLm9yZy8yMDAxLzA0L3htbGRzaWctbW9yZSNobWFjLXNoYTI1NiIsInR5cCI6IkpXVCJ9.eyJpZCI6IjQ5MDMiLCJvcmdpZCI6IjE2MDMiLCJpc3MiOiJzdXBwb3J0LmJyYWluY2VydC5jb20ifQ.v2AVm_1H-Xzj-SuVJvkf0ifNmeOdTbJq0ktBxTjKmk0)**

Having a centralized currency setting eliminates the need to set it up in each course, assessment, product, and live class.

# How to Sign-in/Register Users from your Website Using HTTP Single Sign-On (SSO)

Enable your website users to register or log in once and effortlessly navigate across BrainCert's Enterprise LMS without needing to log in again. Single sign-on creates a better user experience and reduces the need to create users manually in the LMS.

Single sign-on (SSO) is a session and user authentication service that permits a user to use one set of login credentials (e.g., username and password) to access multiple applications. The service authenticates the end user for all the applications the user has been given rights to and eliminates further prompts when the user switches applications during the same session.

##### **What are the requirements?**

The feature integrates easily with your website with a few lines of code, making it quick and straightforward to set up Single Sign-On (SSO) for your entire website users. No need for complex identity provider setup or Security Assertion Markup Language 2.0 (SAML 2.0) integration.

##### **How does it work?**

Copy the attached SSO code and use the example PHP code in your website to register new users and allow the SSO of existing users without typing their username and password in the LMS login screen. Identity mapping is based on the email address which must be the same in both origin (your website) and target (Enterprise LMS).

##### **How do I use it on my website?**

To enable HTTP SSO in your Enterprise LMS, click on "**Extensions**" under '**Global** **Settings**'.

![1.png](https://support.braincert.com/kb/attachment/article/83/inline?token=eyJhbGciOiJodHRwOi8vd3d3LnczLm9yZy8yMDAxLzA0L3htbGRzaWctbW9yZSNobWFjLXNoYTI1NiIsInR5cCI6IkpXVCJ9.eyJpZCI6IjUwMDkiLCJvcmdpZCI6IjE2MDMiLCJpc3MiOiJzdXBwb3J0LmJyYWluY2VydC5jb20ifQ.Va4oQdmnHI9bNX9aDghJ6pG5GfTXuC5Z3-ovYKZludM)

Enable HTTP SSO extension, and save your API and Auth keys. A new user account will be created in the LMS when your website users click on the SSO hyperlink for the very first time.

![2.png](https://support.braincert.com/kb/attachment/article/83/inline?token=eyJhbGciOiJodHRwOi8vd3d3LnczLm9yZy8yMDAxLzA0L3htbGRzaWctbW9yZSNobWFjLXNoYTI1NiIsInR5cCI6IkpXVCJ9.eyJpZCI6IjUwMTAiLCJvcmdpZCI6IjE2MDMiLCJpc3MiOiJzdXBwb3J0LmJyYWluY2VydC5jb20ifQ.QrRh9SSssPQBmaashfrNkz1KyoIsJ9JV0sAwx2BFDsE)

Copy the following PHP library and use it on your website where you would like the users to launch the LMS link. You can also set Group IDs separated by a comma to easily add users to LMS groups.

    <?php// Define your LMS URL and user information$lmsurl = 'YOUR_LMS_URL'; // For example, https://acme.braincert.com/ $email = "youremail@example.com"; // Email address of the user$username = "YOUR_USERNAME"; // Username$first_name = "YOUR_FIRSTNAME"; // First name of the user$last_name = "YOUR_LASTNAME"; // Last name of the user$group_id = "YOUR_LMS_GROUP_IDS"; // LMS group IDs separated by a comma// Define your API credentials$sso_api_key = "YOUR_API_KEY"; // API KEY$sso_auth_key = "YOUR_AUTH_KEY"; // AUTH KEY// Prepare the data to be sent in the POST request$data = ['sso_api_key' => $sso_api_key,'sso_auth_key' => $sso_auth_key,'username' => $username,'email' => $email,];$data_string = json_encode($data);// Ensure the LMS URL does not end with a slash$lmsurl = rtrim($lmsurl, "/");// Initialize cURL session$ch = curl_init();curl_setopt($ch, CURLOPT_URL, $lmsurl . "/sso");curl_setopt($ch, CURLOPT_HTTPHEADER, ['Content-Type: application/json']);curl_setopt($ch, CURLOPT_POST, 1);curl_setopt($ch, CURLOPT_POSTFIELDS, $data_string);curl_setopt($ch, CURLOPT_RETURNTRANSFER, true);// Execute the cURL request and get the response$result_json = curl_exec($ch);if (curl_errno($ch)) {// Handle cURL errorecho 'Curl error: ' . curl_error($ch);curl_close($ch);exit;}curl_close($ch);// Decode the JSON response$result = json_decode($result_json, true);// Check the response status and handle accordinglyif ($result['status'] == 'ok') {$token = $result['token'];$ssourl = sprintf('<a href="%s/?token=%s&email=%s&username=%s&first_name=%s&last_name=%s&group_id=%s">%s</a>',htmlspecialchars($lmsurl, ENT_QUOTES, 'UTF-8'),htmlspecialchars($token, ENT_QUOTES, 'UTF-8'),htmlspecialchars($email, ENT_QUOTES, 'UTF-8'),htmlspecialchars($username, ENT_QUOTES, 'UTF-8'),htmlspecialchars($first_name, ENT_QUOTES, 'UTF-8'),htmlspecialchars($last_name, ENT_QUOTES, 'UTF-8'),htmlspecialchars($group_id, ENT_QUOTES, 'UTF-8'),htmlspecialchars($email, ENT_QUOTES, 'UTF-8'));echo $ssourl;} elseif ($result['status'] == 'error') {echo htmlspecialchars($result['message'], ENT_QUOTES, 'UTF-8');}?>

Put the above code on a page and populate relevant parameters such as email addresses using DB queries specific to your website. The hyperlink may look like this when you mouse over:

    <a href='https://mylmsdomain.braincert.com/?token=59eeaasasa42cad9&email=sso@braincert.com&username=JohnW&first_name=John&last_name=Wick&group_id=1,2,3'>﻿﻿

* * *

#####   
Where do I find Group ID?

You can find the ID of the group under "**People**" --&gt; "**Groups**".

##### **![3.png](https://support.braincert.com/kb/attachment/article/83/inline?token=eyJhbGciOiJodHRwOi8vd3d3LnczLm9yZy8yMDAxLzA0L3htbGRzaWctbW9yZSNobWFjLXNoYTI1NiIsInR5cCI6IkpXVCJ9.eyJpZCI6IjUwMTEiLCJvcmdpZCI6IjE2MDMiLCJpc3MiOiJzdXBwb3J0LmJyYWluY2VydC5jb20ifQ.2Ne_c7F0Q3JGMffzXhsclTjXOwFB8_kHsyFiEzJX8kw)**  
How to mail account details to new users?

Remember to enable an account notification email, so the new account details including the generated password will be emailed to the user after registration automatically.

Navigate to '**User Registration**' under '**Global Settings**'. Click on '**Notifications**' and open '**User Notifications**'.

![4.png](https://support.braincert.com/kb/attachment/article/83/inline?token=eyJhbGciOiJodHRwOi8vd3d3LnczLm9yZy8yMDAxLzA0L3htbGRzaWctbW9yZSNobWFjLXNoYTI1NiIsInR5cCI6IkpXVCJ9.eyJpZCI6IjUwMTIiLCJvcmdpZCI6IjE2MDMiLCJpc3MiOiJzdXBwb3J0LmJyYWluY2VydC5jb20ifQ.oqSS5eWT82ZEVQ8xarN3NpwSnW4pWuiYcg3Cot9uL00)

Benefit from HTTP SSO to suit your specific requirements.

# How to Share Files in Global Chat Room

This article will guide you through the steps to upload or add file from library in global chat room in the Virtual Classroom.

##   

## **Step 1:**

Login to the Virtual Classroom platform and launch your live class. Click on the '**Add File**' option in the chat window to share media in global chat.

![](https://support.braincert.com/kb/attachment/article/107/inline?token=eyJhbGciOiJodHRwOi8vd3d3LnczLm9yZy8yMDAxLzA0L3htbGRzaWctbW9yZSNobWFjLXNoYTI1NiIsInR5cCI6IkpXVCJ9.eyJpZCI6IjQ0MjMiLCJvcmdpZCI6IjE2MDMiLCJpc3MiOiJzdXBwb3J0LmJyYWluY2VydC5jb20ifQ.15Gvy7qiFA6bbT6YIBWJH2APGPXAxld1Ba4NUdtYwas)

There are two ways to share files to the global chat room in the virtual classroom.

1. From content library
2. Upload from your computer

###   

## **<u style="box-sizing: border-box;">Uploading File From Computer</u>**

## **Step 2:**

Click on the '**Upload File**' option and choose the respective file from computer and click '**Open**  **to share file**' in global chat room in the virtual classroom.

![](https://support.braincert.com/kb/attachment/article/107/inline?token=eyJhbGciOiJodHRwOi8vd3d3LnczLm9yZy8yMDAxLzA0L3htbGRzaWctbW9yZSNobWFjLXNoYTI1NiIsInR5cCI6IkpXVCJ9.eyJpZCI6IjQ0MjQiLCJvcmdpZCI6IjE2MDMiLCJpc3MiOiJzdXBwb3J0LmJyYWluY2VydC5jb20ifQ.-8VFa49SWblsnUch1q6rROUGy3JuxUliQGtWZHSvNCo)

###   

##   **Sharing File From Content Library**

## **Step 3:**

Click on '**Add File**' from Library option and select the required file.

![](https://support.braincert.com/kb/attachment/article/107/inline?token=eyJhbGciOiJodHRwOi8vd3d3LnczLm9yZy8yMDAxLzA0L3htbGRzaWctbW9yZSNobWFjLXNoYTI1NiIsInR5cCI6IkpXVCJ9.eyJpZCI6IjQ0MjUiLCJvcmdpZCI6IjE2MDMiLCJpc3MiOiJzdXBwb3J0LmJyYWluY2VydC5jb20ifQ.3qlw9AOx-vUX7s1cIvnX2__8AwZQjQoed0wt20XPf0I)

##   

## **Step 4:**

Choose the file to be shared in the global chat.

![](https://support.braincert.com/kb/attachment/article/107/inline?token=eyJhbGciOiJodHRwOi8vd3d3LnczLm9yZy8yMDAxLzA0L3htbGRzaWctbW9yZSNobWFjLXNoYTI1NiIsInR5cCI6IkpXVCJ9.eyJpZCI6IjQ0MjYiLCJvcmdpZCI6IjE2MDMiLCJpc3MiOiJzdXBwb3J0LmJyYWluY2VydC5jb20ifQ.NE78LWrnqctIoLRNiNJ551mrXhuC1PLynLyylxOVbyg)

Follow the same process to share more files to the global chat.

# Scoring Open-Ended Questions Manually using Rubric System

Open-ended questions are questions that allow someone to give a free-form answer to an essay-type question. Closed-ended questions can be answered with “**Yes**” or “**No**,” or they have a limited set of possible answers (such as A, B, C, D, or multiple answer choices).  
  
An open-ended question is designed to encourage a full, meaningful answer using the subject's own knowledge to the question. It is the opposite of a closed-ended question, which encourages a short or single-word answer. Open-ended questions also tend to be more objective and less leading than closed-ended questions.

The rubric-based scoring outlined here is specific to "adaptive scoring" and is not relevant when using the "standard" or "partial-credit" scoring systems in the BrainCert assessment platform.

##   
**Step 1:**

BrainCert supports "**Free** **text**" and "**Essay** **type**" open-ended question types.

![1.png](https://support.braincert.com/kb/attachment/article/176/inline?token=eyJhbGciOiJodHRwOi8vd3d3LnczLm9yZy8yMDAxLzA0L3htbGRzaWctbW9yZSNobWFjLXNoYTI1NiIsInR5cCI6IkpXVCJ9.eyJpZCI6IjU0OTIiLCJvcmdpZCI6IjE2MDMiLCJpc3MiOiJzdXBwb3J0LmJyYWluY2VydC5jb20ifQ.-ERdxHyXwoTt54WAr9fU64g3rXzWXdTnO6J8P5kcLUo)

##   

## **Step 2:﻿﻿**

Essay question types are not graded automatically. The final test score will be adjusted after the instructor finishes grading essay questions manually.  
  
To grade an essay question-type test, go to the test report. Use the '**Grade'** option to review questions and score open-ended questions.

![2.png](https://support.braincert.com/kb/attachment/article/176/inline?token=eyJhbGciOiJodHRwOi8vd3d3LnczLm9yZy8yMDAxLzA0L3htbGRzaWctbW9yZSNobWFjLXNoYTI1NiIsInR5cCI6IkpXVCJ9.eyJpZCI6IjU0OTMiLCJvcmdpZCI6IjE2MDMiLCJpc3MiOiJzdXBwb3J0LmJyYWluY2VydC5jb20ifQ.pFZzCXAqsCS_fKMXdpaPzUCaQ_V2GIiiBOJQBpNBzug)

##   

## Step 3:

Easily locate questions marked '**Not graded'**. Assign points to the question and record the score. The potential points mirror the weightage determined during question creation. In this scenario, the points span from 0 to 5, with 5 being the maximum score an open-ended question can receive. A score of '0' indicates that no points have been given.

![3.png](https://support.braincert.com/kb/attachment/article/176/inline?token=eyJhbGciOiJodHRwOi8vd3d3LnczLm9yZy8yMDAxLzA0L3htbGRzaWctbW9yZSNobWFjLXNoYTI1NiIsInR5cCI6IkpXVCJ9.eyJpZCI6IjU0OTQiLCJvcmdpZCI6IjE2MDMiLCJpc3MiOiJzdXBwb3J0LmJyYWluY2VydC5jb20ifQ.Af-SlPuH-8Nw6-adLNTtJs2yLJn5-YHAxoH3MrH1w2M)

###   

### **Open-Ended Question Scoring Rubric Criteria**

To ensure clarity and consistency in scoring open-ended questions, refer to the detailed assessment criteria provided below. The criteria are ranked on a scale from "Excellent" to "Unacceptable", and they delineate the expected quality of response for each level. Dive into the specifics of each rating:

- **Excellent (Point 5):** A thorough understanding of the task, reflects a strong understanding of the relevant knowledge and skills, completes all requirements, and provides an insightful explanation or opinion of the text, or extends aspects of the text.
- **Very Good (Point 4):** Clearly demonstrates an understanding of the task, completes all requirements, and provides an insightful explanation or opinion of the text, or extends aspects of the text.
- **Good (Point 3):** Demonstrates an understanding of the task, completes all requirements, and provides some explanation or opinion using situations or ideas from the text as support.
- **Fair (Point 2):** May address all of the requirements, but demonstrates only a partial understanding of the task and uses text incorrectly or with limited success resulting in an inconsistent or flawed explanation.
- **Poor (Point 1):** Demonstrates minimal understanding of the task, does not complete all requirements, and provides only a vague reference to, or no use of, the text.
- **Unacceptable (Point 0)**: Is completely irrelevant or off-topic.

###   
  
**Question Feedback**

You can use the "**Question** **feedback**” option to share your feedback with your students.

![4.png](https://support.braincert.com/kb/attachment/article/176/inline?token=eyJhbGciOiJodHRwOi8vd3d3LnczLm9yZy8yMDAxLzA0L3htbGRzaWctbW9yZSNobWFjLXNoYTI1NiIsInR5cCI6IkpXVCJ9.eyJpZCI6IjU0OTUiLCJvcmdpZCI6IjE2MDMiLCJpc3MiOiJzdXBwb3J0LmJyYWluY2VydC5jb20ifQ.bHoJZxLbhmY_OuXiK-z1AP7auPcXpXnT6Gc4Kef77Ug)

​In summary, effectively scoring open-ended questions requires a thorough understanding of the question type and a structured approach to evaluation. By utilizing BrainCert's user-friendly grading system and adhering to the provided assessment criteria, educators can ensure that students' responses are evaluated fairly and consistently. Always remember to provide constructive feedback to aid in your student's learning journey. We trust that this guide makes the scoring process more straightforward by using a rubric-based grading system.

# Assigning Courses to 'Categories' and Switching to the Advanced Course Catalog with Filters

As per popular request, we've now introduced the ability to divide and organize courses into categories. The course category groups courses into logical groups and makes it easy to filter courses in the catalog.

### **Creating a Course Category**

## **Step 1:**

To create a course category, Click on the '**Categories**' under '**Courses**' and click on '**Add Category'**.

**![1.png](https://support.braincert.com/kb/attachment/article/57/inline?token=eyJhbGciOiJodHRwOi8vd3d3LnczLm9yZy8yMDAxLzA0L3htbGRzaWctbW9yZSNobWFjLXNoYTI1NiIsInR5cCI6IkpXVCJ9.eyJpZCI6IjU1MjciLCJvcmdpZCI6IjE2MDMiLCJpc3MiOiJzdXBwb3J0LmJyYWluY2VydC5jb20ifQ.-DhSwQzGCEQ0ESl_EsiOo-_iMrsfqPVE22DAzj5CwAU)**

##   

## **Step 2:**

Next, insert the '**Category Name**' & '**Category Description**' and '**Save**' it.

![2.png](https://support.braincert.com/kb/attachment/article/57/inline?token=eyJhbGciOiJodHRwOi8vd3d3LnczLm9yZy8yMDAxLzA0L3htbGRzaWctbW9yZSNobWFjLXNoYTI1NiIsInR5cCI6IkpXVCJ9.eyJpZCI6IjU1MjkiLCJvcmdpZCI6IjE2MDMiLCJpc3MiOiJzdXBwb3J0LmJyYWluY2VydC5jb20ifQ.YFGNyY0gwAI_VtYPagBq-arSLRnj31n2kZ2nOxZIDzk)

#####   

## **Step 3:**

When creating new courses (or editing existing courses), you'll see the option to assign a '**Course Category**'.

![3.png](https://support.braincert.com/kb/attachment/article/57/inline?token=eyJhbGciOiJodHRwOi8vd3d3LnczLm9yZy8yMDAxLzA0L3htbGRzaWctbW9yZSNobWFjLXNoYTI1NiIsInR5cCI6IkpXVCJ9.eyJpZCI6IjU1MzIiLCJvcmdpZCI6IjE2MDMiLCJpc3MiOiJzdXBwb3J0LmJyYWluY2VydC5jb20ifQ.lf8HfZjlUlFMYMF8zXp64WROxbSDj0TqAJylnrffsbA)

## **Switching to the Advanced Course Catalog**

To switch to the new course catalog with filters to sort courses by category, go to '**Global Settings**' --&gt; '**Catalog Settings**'. Scroll all the way down, select '**Advanced catalog with filter options**', and '**Save**' it.

![4.png](https://support.braincert.com/kb/attachment/article/57/inline?token=eyJhbGciOiJodHRwOi8vd3d3LnczLm9yZy8yMDAxLzA0L3htbGRzaWctbW9yZSNobWFjLXNoYTI1NiIsInR5cCI6IkpXVCJ9.eyJpZCI6IjU1MzMiLCJvcmdpZCI6IjE2MDMiLCJpc3MiOiJzdXBwb3J0LmJyYWluY2VydC5jb20ifQ.q7E0mFey93aAhDo8zwee32s-huurV7-xMiWWDNmW_P0)

Now, when you navigate to the course catalog, you'll be able to see the newly created course catalog.

![5.png](https://support.braincert.com/kb/attachment/article/57/inline?token=eyJhbGciOiJodHRwOi8vd3d3LnczLm9yZy8yMDAxLzA0L3htbGRzaWctbW9yZSNobWFjLXNoYTI1NiIsInR5cCI6IkpXVCJ9.eyJpZCI6IjU1MzQiLCJvcmdpZCI6IjE2MDMiLCJpc3MiOiJzdXBwb3J0LmJyYWluY2VydC5jb20ifQ.lrtwOjubUIXTxdoAAmoQBAgoMNHYhrCh0Cqyg7pZg3g)

You can switch between the two catalog display styles anytime.

# Scheduling a Live Class in your LMS

Scheduling a live class in the BrainCert LMS allows you to easily organize and manage virtual classroom sessions. Whether you're setting up a one-time event or a recurring series, the platform provides a straightforward interface to customize every detail of your class.

This guide will walk you through the steps to schedule a live class efficiently and ensure everything is set for a smooth teaching experience.

## **Navigate to Products**

## **Step 1:**

Log in to your LMS account. Go to the '**Products**', and select '**Schedule Class**' under '**Virtual Classroom**' from the menu.

![1](https://support.braincert.com/kb/attachment/article/133/inline?token=eyJhbGciOiJodHRwOi8vd3d3LnczLm9yZy8yMDAxLzA0L3htbGRzaWctbW9yZSNobWFjLXNoYTI1NiIsInR5cCI6IkpXVCJ9.eyJpZCI6IjU5OTEiLCJvcmdpZCI6IjE2MDMiLCJpc3MiOiJzdXBwb3J0LmJyYWluY2VydC5jb20ifQ.V62N7iLH3EJ8EQ5u35FLQSAN9LAxPoIna6DCnBhWEuU)

## **Choose Meeting Type**

## **Step 2:**

Select the '**Meeting Type**' from the dropdown menu.
<section class="info-box">Note:<span> Zoom meetings will appear in the dropdown menu only if they are integrated. Follow the KB article '<a class="e-rte-anchor" href="https://support.braincert.com/kb/article/159/steps-to-integrate-zoom-video-conferencing" title="https://support.braincert.com/kb/article/159/steps-to-integrate-zoom-video-conferencing" target="_blank" aria-label="Open in new window" rel="noopener noreferrer">Steps to Integrate Zoom Video Conferencing</a>' to complete the integration.</span></section>
![2](https://support.braincert.com/kb/attachment/article/133/inline?token=eyJhbGciOiJodHRwOi8vd3d3LnczLm9yZy8yMDAxLzA0L3htbGRzaWctbW9yZSNobWFjLXNoYTI1NiIsInR5cCI6IkpXVCJ9.eyJpZCI6IjU5OTIiLCJvcmdpZCI6IjE2MDMiLCJpc3MiOiJzdXBwb3J0LmJyYWluY2VydC5jb20ifQ.YEtGv4vZoMBajZxtgPPBOFqgEvq274Vuf9JE5WFvI7U)

## **Manage Class Instructors**

## **Step 3:**

If you need to change the primary instructor, click on the '**Change**' button to update the instructor.
<section class="info-box">Note: The '<strong>Change Instructor</strong>' and '<strong>Add Class Instructor</strong>' options are available only for the Virtual Classroom meeting option.</section>
![3](https://support.braincert.com/kb/attachment/article/133/inline?token=eyJhbGciOiJodHRwOi8vd3d3LnczLm9yZy8yMDAxLzA0L3htbGRzaWctbW9yZSNobWFjLXNoYTI1NiIsInR5cCI6IkpXVCJ9.eyJpZCI6IjU5OTMiLCJvcmdpZCI6IjE2MDMiLCJpc3MiOiJzdXBwb3J0LmJyYWluY2VydC5jb20ifQ.edLdOi2qmhjihDIGNZs2RJKaoDTGDon6iFQ6tyJh4BU)

## **Step 4:**

Choose the instructor from the list and click on the '**Select**' button to change.

![4](https://support.braincert.com/kb/attachment/article/133/inline?token=eyJhbGciOiJodHRwOi8vd3d3LnczLm9yZy8yMDAxLzA0L3htbGRzaWctbW9yZSNobWFjLXNoYTI1NiIsInR5cCI6IkpXVCJ9.eyJpZCI6IjU5OTQiLCJvcmdpZCI6IjE2MDMiLCJpc3MiOiJzdXBwb3J0LmJyYWluY2VydC5jb20ifQ.IvqCXj977mzoxUE_t1xW09qH0Du2d-iCco3JFtaTEvc)

## **Step 5:**

To add instructors to your class, click on the '**Add Class Instructor**' link.

![5](https://support.braincert.com/kb/attachment/article/133/inline?token=eyJhbGciOiJodHRwOi8vd3d3LnczLm9yZy8yMDAxLzA0L3htbGRzaWctbW9yZSNobWFjLXNoYTI1NiIsInR5cCI6IkpXVCJ9.eyJpZCI6IjU5OTUiLCJvcmdpZCI6IjE2MDMiLCJpc3MiOiJzdXBwb3J0LmJyYWluY2VydC5jb20ifQ.Fy1tZpJn6fAY0zTy-e5SMh73BSQTiQyg-RkboHRwqGc)

## **Step 6:**

You can add up to 10 instructors (including the primary instructor). Select the instructors from the list and click on the '**Add**' button.

![6](https://support.braincert.com/kb/attachment/article/133/inline?token=eyJhbGciOiJodHRwOi8vd3d3LnczLm9yZy8yMDAxLzA0L3htbGRzaWctbW9yZSNobWFjLXNoYTI1NiIsInR5cCI6IkpXVCJ9.eyJpZCI6IjU5OTYiLCJvcmdpZCI6IjE2MDMiLCJpc3MiOiJzdXBwb3J0LmJyYWluY2VydC5jb20ifQ.0Y6QOav11B0QlE0yS206ZMbGYdNL2y5EdA6UAu7fEKc)

## **Step 7:**

You can use the link '**Remove**' given below the instructor's name to remove the instructor.

![7](https://support.braincert.com/kb/attachment/article/133/inline?token=eyJhbGciOiJodHRwOi8vd3d3LnczLm9yZy8yMDAxLzA0L3htbGRzaWctbW9yZSNobWFjLXNoYTI1NiIsInR5cCI6IkpXVCJ9.eyJpZCI6IjU5OTciLCJvcmdpZCI6IjE2MDMiLCJpc3MiOiJzdXBwb3J0LmJyYWluY2VydC5jb20ifQ.5Eg5fu83X_EO3a9RwFnfkymDZHj01BIKPFBNhNl8kx8)

## **Step 8:**

Or navigate to the '**Add Class Instructor**' link, go to the '**Remove Instructors**' field, and use the '**Remove**' button to remove instructors from the list.

![8](https://support.braincert.com/kb/attachment/article/133/inline?token=eyJhbGciOiJodHRwOi8vd3d3LnczLm9yZy8yMDAxLzA0L3htbGRzaWctbW9yZSNobWFjLXNoYTI1NiIsInR5cCI6IkpXVCJ9.eyJpZCI6IjYwMDYiLCJvcmdpZCI6IjE2MDMiLCJpc3MiOiJzdXBwb3J0LmJyYWluY2VydC5jb20ifQ.hv518rhRXFt_5uuRuLDmjFkaszKemLGigEu4IMYW1iE)

## **Set Location**

## **Step 9:**

Set your location using the drop-down menu and check the box below to list your class in the catalog.

![9](https://support.braincert.com/kb/attachment/article/133/inline?token=eyJhbGciOiJodHRwOi8vd3d3LnczLm9yZy8yMDAxLzA0L3htbGRzaWctbW9yZSNobWFjLXNoYTI1NiIsInR5cCI6IkpXVCJ9.eyJpZCI6IjU5OTkiLCJvcmdpZCI6IjE2MDMiLCJpc3MiOiJzdXBwb3J0LmJyYWluY2VydC5jb20ifQ.fZhD6YCA-tn_jnjgPLJUXIUl82ytOGK4FCUDeKx2pOs)

## **Enter Class Details**

## **Step 10:**

**Title:** Provide a descriptive title for your class.

**Date:** Choose the date on which the class will take place.

**From & To:** Set the start and end times for the class.

**Change Time Zone:** Ensure the correct time zone is selected to match your location.

![10](https://support.braincert.com/kb/attachment/article/133/inline?token=eyJhbGciOiJodHRwOi8vd3d3LnczLm9yZy8yMDAxLzA0L3htbGRzaWctbW9yZSNobWFjLXNoYTI1NiIsInR5cCI6IkpXVCJ9.eyJpZCI6IjYwMDgiLCJvcmdpZCI6IjE2MDMiLCJpc3MiOiJzdXBwb3J0LmJyYWluY2VydC5jb20ifQ.ldO1Y5QDuQp-TjbMCPxVX6nCx0BraNkoQgvrTaL86mQ)

## **Schedule a Recurring Class**

## **Step 11:**

If you want to schedule a recurring class, click the checkbox. Set the frequency of the class repetition by using the dropdown box under '**When class repeats**'.

**Ends:** Specify the '**End**' time or '**On**' date for the recurring series.

![11](https://support.braincert.com/kb/attachment/article/133/inline?token=eyJhbGciOiJodHRwOi8vd3d3LnczLm9yZy8yMDAxLzA0L3htbGRzaWctbW9yZSNobWFjLXNoYTI1NiIsInR5cCI6IkpXVCJ9.eyJpZCI6IjYwMDEiLCJvcmdpZCI6IjE2MDMiLCJpc3MiOiJzdXBwb3J0LmJyYWluY2VydC5jb20ifQ.Aui5fkBPeQFSg3kmTKgvQiUQEbs6KeZO5ak2V9v22wU)

## **Set Interface Language**

## **Step 12:**

If you wish to allow the attendees to change their interface language, select '**Yes**.' Or select '**No**' and set an interface language from the dropdown menu.

![12](https://support.braincert.com/kb/attachment/article/133/inline?token=eyJhbGciOiJodHRwOi8vd3d3LnczLm9yZy8yMDAxLzA0L3htbGRzaWctbW9yZSNobWFjLXNoYTI1NiIsInR5cCI6IkpXVCJ9.eyJpZCI6IjYwMDIiLCJvcmdpZCI6IjE2MDMiLCJpc3MiOiJzdXBwb3J0LmJyYWluY2VydC5jb20ifQ.Mc4LG3_2IyI6E7pncB_YPDYOoQ7AF0H5FUM46gwjIcs)

## **Record Live Class**

## **Step 13:**

Select '**Yes**' to record your class, and set the other options according to your preferences. Set the maximum number of attendees for the class.

## ![13](https://support.braincert.com/kb/attachment/article/133/inline?token=eyJhbGciOiJodHRwOi8vd3d3LnczLm9yZy8yMDAxLzA0L3htbGRzaWctbW9yZSNobWFjLXNoYTI1NiIsInR5cCI6IkpXVCJ9.eyJpZCI6IjYwMDQiLCJvcmdpZCI6IjE2MDMiLCJpc3MiOiJzdXBwb3J0LmJyYWluY2VydC5jb20ifQ.cEYorT4Jcag_d2XMZapsFgxGWMJlxRgLrDj231DQJeI)

## **Select Payment Method**

## **Step 14:**

Choose between the '**Free**' or '**Paid**' option to join the class. When the '**Paid**' option is selected, the default currency set on the E-Commerce page will be displayed. Finally, click the '**Schedule and Continue**' button to schedule your class.

![14](https://support.braincert.com/kb/attachment/article/133/inline?token=eyJhbGciOiJodHRwOi8vd3d3LnczLm9yZy8yMDAxLzA0L3htbGRzaWctbW9yZSNobWFjLXNoYTI1NiIsInR5cCI6IkpXVCJ9.eyJpZCI6IjYwMDMiLCJvcmdpZCI6IjE2MDMiLCJpc3MiOiJzdXBwb3J0LmJyYWluY2VydC5jb20ifQ.opR9xJzm_fM4tpcRhM_B1sMiZRDM8pM_ODKxpP5Y7Ns)

## **Step 15:**

To view the scheduled class, go to '**Manage Classes**,' where you'll find the class and its details. Click on the '**Launch**' button to start your class.
<section class="info-box"><p><span>Note: As an instructor, you can enter to prepare the class 30 minutes before the start time. </span></p></section>
![15](https://support.braincert.com/kb/attachment/article/133/inline?token=eyJhbGciOiJodHRwOi8vd3d3LnczLm9yZy8yMDAxLzA0L3htbGRzaWctbW9yZSNobWFjLXNoYTI1NiIsInR5cCI6IkpXVCJ9.eyJpZCI6IjYwMDUiLCJvcmdpZCI6IjE2MDMiLCJpc3MiOiJzdXBwb3J0LmJyYWluY2VydC5jb20ifQ.xGEBEosJ7KSbG_hDb2c893YWmG9oReRtrjjcKjo4LXM)

Once you’ve completed these steps, your live class will be scheduled and ready to go. The BrainCert LMS's intuitive scheduling tools ensure that your classes are organized effectively and that all necessary details are in place.

# Understanding eLearning Standards: SCORM, CMI5, AICC, and Tin Can (xAPI)

In the context of eLearning, compatibility and interoperability between different platforms and content are crucial factors for successful knowledge delivery. eLearning standards, such as SCORM, CMI5, AICC, and Tin Can (xAPI), provide a set of guidelines and specifications that ensure the seamless exchange and integration of learning materials across various systems, including BrainCert LMS.

This knowledge base article aims to provide an in-depth understanding of eLearning standards SCORM, CMI5, AICC, and Tin Can (xAPI), focusing on their history, purpose, and file formats. By understanding these standards, you can effectively utilize BrainCert LMS to create, import, and manage eLearning content that adheres to these widely accepted specifications, ensuring a smooth and efficient learning experience for your users. Let's delve into the details of these eLearning standards and discover their significance in the context of BrainCert LMS.

## **SCORM**

SCORM is a set of technical standards for eLearning software products. It defines how online learning content and Learning Management Systems (LMSs) should communicate with each other. SCORM enables interoperability between different eLearning systems, allowing content to be easily reused and shared across various platforms. The primary purpose of SCORM is to standardize the way that eLearning content is created, launched, and tracked.

SCORM content is usually packaged as a ZIP file, containing a collection of HTML, CSS, JavaScript, media files, and an XML file called the "imsmanifest.xml." This manifest file provides metadata about the course and defines the structure and organization of the content. When a SCORM package is imported into an LMS, the LMS reads the imsmanifest.xml file to understand how to present and launch the content.

## **CMI5**

CMI5 is a modern eLearning specification designed to replace some of the older SCORM standards. It builds on the concepts of SCORM but leverages the Experience API (xAPI) for communication between the content and the LMS. CMI5 provides a more flexible and extensible framework for eLearning content, allowing for more advanced tracking and reporting capabilities. The purpose of cmi5 is to create a bridge between traditional SCORM content and newer xAPI-based learning experiences, offering improved functionality and better support for mobile and offline learning.

CMI5 content, similar to SCORM, is packaged as a ZIP file containing HTML, CSS, JavaScript, media files, and a JSON file called "cmi5.xml." This file serves a similar purpose as the imsmanifest.xml file in SCORM packages. It provides metadata about the course, defines the structure of the content, and specifies how the content should communicate with the LMS using the xAPI standard.

## **AICC**

AICC (Aviation Industry Computer-Based Training Committee) is an older set of eLearning standards initially developed for the aviation industry but later adopted by other industries as well. The AICC standards focus on the interoperability of computer-based training (CBT) content and LMSs. AICC guidelines specify how eLearning content should be structured and how it should communicate with an LMS. While AICC standards have largely been replaced by SCORM and other modern specifications, some legacy systems may still use AICC. The primary purpose of AICC was to provide a standardized method for creating, launching, and tracking eLearning content across different platforms, similar to SCORM.

AICC content is typically provided as a set of files, including an AICC Course Structure file (CRS), which is an INI-like formatted file, and content files such as HTML, CSS, JavaScript, and media files. The CRS file defines the structure, organization, and metadata of the course. AICC content is usually not packaged as a ZIP file like SCORM or CMI5, but rather, the AICC files are often hosted on a separate web server and integrated with the LMS using the AICC HACP (HTTP AICC Communication Protocol) standard.

## **Tin Can (xAPI)**

Tin Can API, also known as the Experience API (xAPI), is another eLearning standard like SCORM, cmi5, and AICC. However, unlike those standards, Tin Can doesn't rely on a specific file format or structure for packaging content. Instead, it focuses on tracking and reporting learning experiences through a Learning Record Store (LRS).

In Tin Can, learning activities generate statements in the form of "Actor, Verb, Object" (e.g., "John completed a course"). These statements are then sent to an LRS, which stores and manages the data.

While Tin Can content can be delivered in various formats, it often uses standard web technologies like HTML, CSS, and JavaScript. This makes it more flexible than SCORM or AICC content, which requires specific file structures and manifests.

BrainCert comes with Learning Record Store (LRS) integration to track and manage learning data. The LRS is a data storage system designed to collect, store, and manage learning experience data generated by learners engaging with online content. xAPI, also known as Experience API or Tin Can API, is a standard specification for tracking and analyzing learning experiences across various platforms and devices. Click on the following links to learn more about LRS integration in BrainCert: [SCORM Cloud](https://support.braincert.com/kb/article/160/scorm-cloud-learning-record-store-lrs-integration-to-send-xapi-experience-api-or-tin-can-api-statements "https://support.braincert.com/kb/article/160/scorm-cloud-learning-record-store-lrs-integration-to-send-xapi-experience-api-or-tin-can-api-statements"), [Veracity](https://support.braincert.com/kb/article/162/veracity-learning-record-store-lrs-integration-to-send-xapi-experience-api-or-tin-can-api-statements "https://support.braincert.com/kb/article/162/veracity-learning-record-store-lrs-integration-to-send-xapi-experience-api-or-tin-can-api-statements"), and [Watershed](https://support.braincert.com/kb/article/161/watershed-learning-record-store-lrs-integration-to-send-xapi-experience-api-or-tin-can-api-statements "https://support.braincert.com/kb/article/161/watershed-learning-record-store-lrs-integration-to-send-xapi-experience-api-or-tin-can-api-statements").

To conclude, the eLearning standards, including SCORM, CMI5, AICC, and Tin Can (xAPI), play an integral role in shaping the online learning landscape. By adhering to these standards, you can ensure that your eLearning content is compatible, interoperable, and easily accessible across various platforms, including BrainCert LMS. These standards facilitate the exchange of data, tracking of learner progress, and integration of learning materials, which ultimately leads to a more effective and engaging online learning experience.

We encourage you to explore and implement these eLearning standards within your BrainCert courses to enhance the online learning experience for your users. By leveraging these standards, you can create dynamic, interactive, and trackable content that not only engages learners but also allows you to monitor their progress and adjust your teaching methods accordingly. Don't hesitate to make the most of these powerful eLearning standards to elevate your online learning offerings in the BrainCert Unified Training Platform.

# Creating a Google Slides Embed URL: A Detailed Step-by-Step Guide

BrainCert provides users with the option to create IFrame content, which offers enhanced flexibility and customization in embedding various types of content within their courses and learning environments.

IFrame is an HTML element used to embed another document within the current HTML document. This feature allows users to display external content, such as web pages, videos, interactive elements, and applications, seamlessly within their BrainCert platform.

##   

## **Purpose of Google Slides**

- Embedding Google Slides allows users to seamlessly integrate presentations created in Google Slides directly into the LMS platforms.
- This feature enables viewers to access and interact with the slides without leaving the webpage, enhancing the overall user experience.
- Embedding Google Slides also facilitates real-time updates, ensuring that any changes made to the original presentation are automatically reflected in the embedded version.

**Embed as a slideshow only:**

- "Embed as a slideshow only" refers to the option of embedding a presentation or document solely as a slideshow, without additional interactive elements or features.

## 

**Steps to Embed Google Slides**

## **Step 1:**

Open Your Google Slides presentation and click on the '**File**' option from the menu.

## **![8737f36b-b44a-4e7f-b198-995b3e9d7c66.png](https://support.braincert.com/kb/attachment/article/198/inline?token=eyJhbGciOiJodHRwOi8vd3d3LnczLm9yZy8yMDAxLzA0L3htbGRzaWctbW9yZSNobWFjLXNoYTI1NiIsInR5cCI6IkpXVCJ9.eyJpZCI6IjU2NjYiLCJvcmdpZCI6IjE2MDMiLCJpc3MiOiJzdXBwb3J0LmJyYWluY2VydC5jb20ifQ.FXlGvZcCqF4lknF4pQSz3e0zfvijY0SrI9Dxwodl8k0)**

##   

## **Step 2:**

Click the '**Share**' option and select '**Publish** **to** **web**'.

**![2.png](https://support.braincert.com/kb/attachment/article/198/inline?token=eyJhbGciOiJodHRwOi8vd3d3LnczLm9yZy8yMDAxLzA0L3htbGRzaWctbW9yZSNobWFjLXNoYTI1NiIsInR5cCI6IkpXVCJ9.eyJpZCI6IjU2NjciLCJvcmdpZCI6IjE2MDMiLCJpc3MiOiJzdXBwb3J0LmJyYWluY2VydC5jb20ifQ.7ZnC7hYVwz8h5VMHTq35jk-VwQ2xjCoDeo4oe-edjj0)**
##   

## **Step 3:**

Click on the '**Embed**' tab from the 'Publish to the web' page.

Choose your desired settings for how the slideshow will play.

You can set it to start the slideshow as soon as the player loads and/or to restart the slideshow after the last slide.

**![3.png](https://support.braincert.com/kb/attachment/article/198/inline?token=eyJhbGciOiJodHRwOi8vd3d3LnczLm9yZy8yMDAxLzA0L3htbGRzaWctbW9yZSNobWFjLXNoYTI1NiIsInR5cCI6IkpXVCJ9.eyJpZCI6IjU2NjgiLCJvcmdpZCI6IjE2MDMiLCJpc3MiOiJzdXBwb3J0LmJyYWluY2VydC5jb20ifQ.leDP4zaM1WErNkdVR3DMR8L9NKrsx2-kdbUWGlllAds)**

## 
##   

## **Step 4:**

Next, click the '**Publish**' button to get the embed URL.

![4.png](https://support.braincert.com/kb/attachment/article/198/inline?token=eyJhbGciOiJodHRwOi8vd3d3LnczLm9yZy8yMDAxLzA0L3htbGRzaWctbW9yZSNobWFjLXNoYTI1NiIsInR5cCI6IkpXVCJ9.eyJpZCI6IjU2NjkiLCJvcmdpZCI6IjE2MDMiLCJpc3MiOiJzdXBwb3J0LmJyYWluY2VydC5jb20ifQ.bhWIb5DhHCewvyDvrIOMEplJ6XpuiZe_h8MrwAaxH1U)

##   

## **Step 5:**

Now, confirm by clicking '**OK**' when the dialog appears.

![5.png](https://support.braincert.com/kb/attachment/article/198/inline?token=eyJhbGciOiJodHRwOi8vd3d3LnczLm9yZy8yMDAxLzA0L3htbGRzaWctbW9yZSNobWFjLXNoYTI1NiIsInR5cCI6IkpXVCJ9.eyJpZCI6IjU2NzAiLCJvcmdpZCI6IjE2MDMiLCJpc3MiOiJzdXBwb3J0LmJyYWluY2VydC5jb20ifQ.5V_q8A_-r8UmurOPDW31-Wza9x2a0lcGBXBTiqftEAM)

## **Step 6:**

After clicking '**Publish**', you'll see an HTML embed code.

## **Embed as Slideshow Only​**

To ensure it's displayed as a slideshow only without the Google Slides interface, ensure the embed link you copied contains '**/embed**' in the path.

The URL in the embed code should look something like this: [https://docs.google.com/presentation/d/e/\[YourPresentationID\]/embed.](https://docs.google.com/presentation/d/e/[YourPresentationID]/embed.)

![6.png](https://support.braincert.com/kb/attachment/article/198/inline?token=eyJhbGciOiJodHRwOi8vd3d3LnczLm9yZy8yMDAxLzA0L3htbGRzaWctbW9yZSNobWFjLXNoYTI1NiIsInR5cCI6IkpXVCJ9.eyJpZCI6IjU2NzEiLCJvcmdpZCI6IjE2MDMiLCJpc3MiOiJzdXBwb3J0LmJyYWluY2VydC5jb20ifQ.wur3yswFhG9Ar4HejZZlWUrBEtyL4gDxekzbHVy_jRk)  

## **Step 7:**

Navigate to the LMS and open '**Content**' under '**Products**'. Go to '**IFrame Content**' and click '**+Add iFrame**'.

## ![7.png](https://support.braincert.com/kb/attachment/article/198/inline?token=eyJhbGciOiJodHRwOi8vd3d3LnczLm9yZy8yMDAxLzA0L3htbGRzaWctbW9yZSNobWFjLXNoYTI1NiIsInR5cCI6IkpXVCJ9.eyJpZCI6IjU2NzMiLCJvcmdpZCI6IjE2MDMiLCJpc3MiOiJzdXBwb3J0LmJyYWluY2VydC5jb20ifQ.UO5UbWDiU9574j0y8sYOlehR2G6Mh4mTpr8E_GLUUg0)

##   

## **Step 8:**

Paste the embed code in the '**IFrame URL**' space. Set the '**IFrame Height**' and give a '**Title**' for the URL.

![8.png](https://support.braincert.com/kb/attachment/article/198/inline?token=eyJhbGciOiJodHRwOi8vd3d3LnczLm9yZy8yMDAxLzA0L3htbGRzaWctbW9yZSNobWFjLXNoYTI1NiIsInR5cCI6IkpXVCJ9.eyJpZCI6IjU2NzUiLCJvcmdpZCI6IjE2MDMiLCJpc3MiOiJzdXBwb3J0LmJyYWluY2VydC5jb20ifQ.ISpRaDZ8FBAYKspPBRAOsUP95oSK9kVkWX6EMd87HHw)

## **Step 9:**

Now, the created file will be seen under the title.

![8.png](https://support.braincert.com/kb/attachment/article/198/inline?token=eyJhbGciOiJodHRwOi8vd3d3LnczLm9yZy8yMDAxLzA0L3htbGRzaWctbW9yZSNobWFjLXNoYTI1NiIsInR5cCI6IkpXVCJ9.eyJpZCI6IjU2NzQiLCJvcmdpZCI6IjE2MDMiLCJpc3MiOiJzdXBwb3J0LmJyYWluY2VydC5jb20ifQ.A_2mwk2y_pEi8ccZvcSbmj8UG5Wr8gI7U9bSZ4aIulI)

##   
**Step 10:**

**For learners, it will appear as a slideshow only, without the Google Slides editor interface.**

**![10.png](https://support.braincert.com/kb/attachment/article/198/inline?token=eyJhbGciOiJodHRwOi8vd3d3LnczLm9yZy8yMDAxLzA0L3htbGRzaWctbW9yZSNobWFjLXNoYTI1NiIsInR5cCI6IkpXVCJ9.eyJpZCI6IjU2NzYiLCJvcmdpZCI6IjE2MDMiLCJpc3MiOiJzdXBwb3J0LmJyYWluY2VydC5jb20ifQ.QbHO4gi1IdiNhLXGrATlEOx1TKl1n59jgMMGM9U-lTw)**

By adhering to these steps, you can effectively embed your Google Slides presentation into your LMS, transforming it into a seamless and user-friendly slideshow experience. Now learners can focus solely on the engaging and informative slides that are crafted, enhancing their overall experience and maximizing the impact of your presentation.**​**

# How to Enable TAWK Extension

This article will guide you through the steps to enable the TAWK extension, a chat feature that lets you chat with the visitors on your website, respond to support tickets, and create a help center on the BrainCert Unified Training Platform.

## **Step 1:**

Create a free account with [tawk.to](https://dashboard.tawk.to/login "https://dashboard.tawk.to/login"). After you create an account, navigate to the dashboard and select '**AI Assist**' on the bottom left.

![3.png](https://support.braincert.com/kb/attachment/article/11/inline?token=eyJhbGciOiJodHRwOi8vd3d3LnczLm9yZy8yMDAxLzA0L3htbGRzaWctbW9yZSNobWFjLXNoYTI1NiIsInR5cCI6IkpXVCJ9.eyJpZCI6IjU0NjAiLCJvcmdpZCI6IjE2MDMiLCJpc3MiOiJzdXBwb3J0LmJyYWluY2VydC5jb20ifQ.5xe8dc_dsKDbt6Pew4RPDhF_eN5dmqVN2WMKC37VVww)

## **Step 2:**

Copy the '**Property ID**' from the '**Overview**" tab to a clipboard.

![4.png](https://support.braincert.com/kb/attachment/article/11/inline?token=eyJhbGciOiJodHRwOi8vd3d3LnczLm9yZy8yMDAxLzA0L3htbGRzaWctbW9yZSNobWFjLXNoYTI1NiIsInR5cCI6IkpXVCJ9.eyJpZCI6IjU0NjEiLCJvcmdpZCI6IjE2MDMiLCJpc3MiOiJzdXBwb3J0LmJyYWluY2VydC5jb20ifQ.8IaQe3fXIEosMUaK0MozvUkSo34B_ND6npTscf5PRzI)

## **Step 3:**

Similarly, from the '**Chat Widget**' module copy the last 9 characters from the '**Direct Chat Link'** to a clipboard.

![5.png](https://support.braincert.com/kb/attachment/article/11/inline?token=eyJhbGciOiJodHRwOi8vd3d3LnczLm9yZy8yMDAxLzA0L3htbGRzaWctbW9yZSNobWFjLXNoYTI1NiIsInR5cCI6IkpXVCJ9.eyJpZCI6IjU0NjMiLCJvcmdpZCI6IjE2MDMiLCJpc3MiOiJzdXBwb3J0LmJyYWluY2VydC5jb20ifQ.VvNYQ8qwv2hvTHFLk6BUxYFCMjp2qZEbY-Pf4-jx5I4)

## **Step 4:**

Login to your BrainCert admin account and navigate to '**Extensions**' in '**Global Settings**'.

![1.png](https://support.braincert.com/kb/attachment/article/11/inline?token=eyJhbGciOiJodHRwOi8vd3d3LnczLm9yZy8yMDAxLzA0L3htbGRzaWctbW9yZSNobWFjLXNoYTI1NiIsInR5cCI6IkpXVCJ9.eyJpZCI6IjUwNzMiLCJvcmdpZCI6IjE2MDMiLCJpc3MiOiJzdXBwb3J0LmJyYWluY2VydC5jb20ifQ.Z9hGzD0TxlK743ECI_9b75Qd-_mYab30RaBuT9dXMl4)

##   

## **Step 5:**

Paste the **Property ID** & the 9-character **Widget ID** you previously copied from TWAK in the respective fields. Enable the extension using the toggle and click '**Save**'.

![2.png](https://support.braincert.com/kb/attachment/article/11/inline?token=eyJhbGciOiJodHRwOi8vd3d3LnczLm9yZy8yMDAxLzA0L3htbGRzaWctbW9yZSNobWFjLXNoYTI1NiIsInR5cCI6IkpXVCJ9.eyJpZCI6IjUwNzQiLCJvcmdpZCI6IjE2MDMiLCJpc3MiOiJzdXBwb3J0LmJyYWluY2VydC5jb20ifQ.7P52WeUKNCHpCQ2j9I_sQzQuFaZeaokDlL2a5Z2snG8)

We hope you found this article helpful.

# Boost Learner Engagement and Focus with Synchronized Lecture and Video Timers

Here is a way to enhance the learning experience that reduces distractions and improves the learners' progress.

A new feature has been proposed that enables synchronizing the lecture timer with the video timer. Whenever the tab is switched, both timers will pause simultaneously, making the learners watch the entire video to complete the course. Let's begin!

​

## **Step 1:**

Navigate to '**Manage** **Courses**' under '**Courses**'.

![1.png](https://support.braincert.com/kb/attachment/article/165/inline?token=eyJhbGciOiJodHRwOi8vd3d3LnczLm9yZy8yMDAxLzA0L3htbGRzaWctbW9yZSNobWFjLXNoYTI1NiIsInR5cCI6IkpXVCJ9.eyJpZCI6IjUyMzAiLCJvcmdpZCI6IjE2MDMiLCJpc3MiOiJzdXBwb3J0LmJyYWluY2VydC5jb20ifQ.N0y4Zf4CY-xyduZH6h8PUOLqkHAW-uN869O2IzaQDb0)

##   

## **Step 2:**  

On the required course click on '**Options**' and select '**Curriculum**'.

![2.png](https://support.braincert.com/kb/attachment/article/165/inline?token=eyJhbGciOiJodHRwOi8vd3d3LnczLm9yZy8yMDAxLzA0L3htbGRzaWctbW9yZSNobWFjLXNoYTI1NiIsInR5cCI6IkpXVCJ9.eyJpZCI6IjUyMzEiLCJvcmdpZCI6IjE2MDMiLCJpc3MiOiJzdXBwb3J0LmJyYWluY2VydC5jb20ifQ.B379F6edsSg3uiaurKoWJR0c_yYPpVDHbk6Fkjo7ebM)

## **Step 3:**

Make sure to add the course video and then click on '**Lecture Completion Rule**'.

![3.png](https://support.braincert.com/kb/attachment/article/165/inline?token=eyJhbGciOiJodHRwOi8vd3d3LnczLm9yZy8yMDAxLzA0L3htbGRzaWctbW9yZSNobWFjLXNoYTI1NiIsInR5cCI6IkpXVCJ9.eyJpZCI6IjUyMzIiLCJvcmdpZCI6IjE2MDMiLCJpc3MiOiJzdXBwb3J0LmJyYWluY2VydC5jb20ifQ.0RNTZBov-DMbD32dSvJuBue793KeXvjpjzwRQSdicJk)

## **Step 4:**

Enable '**After a specific time period on this lecture page**' and set the '**Time Limit**' in seconds according to the length of the video. Finally, click on '**Save**'.

**Note**: The 'Time Limit' and the 'Time Length of the video' should be the same.

Enabling '**Auto-pause video**' will pause the video when the learner switches the tab.

![4.png](https://support.braincert.com/kb/attachment/article/165/inline?token=eyJhbGciOiJodHRwOi8vd3d3LnczLm9yZy8yMDAxLzA0L3htbGRzaWctbW9yZSNobWFjLXNoYTI1NiIsInR5cCI6IkpXVCJ9.eyJpZCI6IjUyMzMiLCJvcmdpZCI6IjE2MDMiLCJpc3MiOiJzdXBwb3J0LmJyYWluY2VydC5jb20ifQ.aTC5JfDQS_4jQOt-FEORQP0m_R5NAyT8SpqpbzN4D10)

When the tab is switched, the '**timer**' pauses and it shows the time left to complete the course. So, the learner should resume the video to complete the course.

![download (1).png](https://support.braincert.com/kb/attachment/article/165/inline?token=eyJhbGciOiJodHRwOi8vd3d3LnczLm9yZy8yMDAxLzA0L3htbGRzaWctbW9yZSNobWFjLXNoYTI1NiIsInR5cCI6IkpXVCJ9.eyJpZCI6IjQ3MTQiLCJvcmdpZCI6IjE2MDMiLCJpc3MiOiJzdXBwb3J0LmJyYWluY2VydC5jb20ifQ.mX3VHtcqabEqEVzPBxeBULpuvbf4koxBsC47BfKIMN0)

After the learner watches the full video, the display shows '**the course is completed**' and the timer turns into '**Learned**'.

<font color="#374151" face="Söhne, ui-sans-serif, system-ui, -apple-system, Segoe UI, Roboto, Ubuntu, Cantarell, Noto Sans, sans-serif, Helvetica Neue, Arial, Apple Color Emoji, Segoe UI Emoji, Segoe UI Symbol, Noto Color Emoji"><span style="white-space: pre-wrap; background-color: rgb(247, 247, 248);"><br></span></font>

<font color="#374151" face="Söhne, ui-sans-serif, system-ui, -apple-system, Segoe UI, Roboto, Ubuntu, Cantarell, Noto Sans, sans-serif, Helvetica Neue, Arial, Apple Color Emoji, Segoe UI Emoji, Segoe UI Symbol, Noto Color Emoji"><span style="white-space: pre-wrap; background-color: rgb(247, 247, 248);"><img src="https://support.braincert.com/kb/attachment/article/165/inline?token=eyJhbGciOiJodHRwOi8vd3d3LnczLm9yZy8yMDAxLzA0L3htbGRzaWctbW9yZSNobWFjLXNoYTI1NiIsInR5cCI6IkpXVCJ9.eyJpZCI6IjQ3MTMiLCJvcmdpZCI6IjE2MDMiLCJpc3MiOiJzdXBwb3J0LmJyYWluY2VydC5jb20ifQ.zICIdWqiGQXics-dsSN0AJZtkQEHTdsjs0EapE-1PIE" class="e-rte-image e-imginline e-resize e-rte-drag-image" alt="7b14f4d5-155b-4e29-882f-761d6802e2eb.png" width="auto" height="auto" style="min-width: 0px; max-width: 1408px; min-height: 0px; outline: rgb(74, 144, 226) solid 2px;" data-name="7b14f4d5-155b-4e29-882f-761d6802e2eb.png" data-size="119 KB" loading="lazy"></span></font>

Hope this article is useful.

# How to Create One-Time and Recurring Subscriptions in Shopping Cart for Courses

This article guides you through the process of setting pricing for '**Courses**' using one-time and recurring subscriptions in the shopping cart.

**One-Time Subscription:** Single payment and non-renewing access.

**Recurring Subscription:** Periodic payments and auto-renewing.

<iframe src="https://player.vimeo.com/video/958317432?badge=0&amp;autopause=0&amp;player_id=0&amp;app_id=58479/embed" allow="autoplay; fullscreen; picture-in-picture" allowfullscreen="" frameborder="0" style="position:absolute;top:0;left:0;width:100%;height:100%;">&ZeroWidthSpace;</iframe>

##   
**Step 1:﻿﻿**

Navigate to '**Global Settings**' and Open **'E-commerce**'. Choose a payment gateway under '**Payment gateway settings**' and click on the **'Save Settings**' button.

**Note**: PayPal, Stripe, and Paystack support both One-Time Purchase and Recurring Subscription while PayUmoney supports only One-Time Purchase.

![1.png](https://support.braincert.com/kb/attachment/article/168/inline?token=eyJhbGciOiJodHRwOi8vd3d3LnczLm9yZy8yMDAxLzA0L3htbGRzaWctbW9yZSNobWFjLXNoYTI1NiIsInR5cCI6IkpXVCJ9.eyJpZCI6IjQ5ODQiLCJvcmdpZCI6IjE2MDMiLCJpc3MiOiJzdXBwb3J0LmJyYWluY2VydC5jb20ifQ.778JiqPmQptAMV-mwwWxhlrG-5FFRgQbZ-xBmzWlen8)

## **Step 2:**

To edit the shopping cart for a paid test, go to the '**Products**', choose '**Courses**' from the dropdown box, and open '**Manage Courses**'. Now select the desired test. Click on the '**More**' option and choose '**Shopping Cart**' from the dropdown list.

## ![2.png](https://support.braincert.com/kb/attachment/article/168/inline?token=eyJhbGciOiJodHRwOi8vd3d3LnczLm9yZy8yMDAxLzA0L3htbGRzaWctbW9yZSNobWFjLXNoYTI1NiIsInR5cCI6IkpXVCJ9.eyJpZCI6IjQ5ODUiLCJvcmdpZCI6IjE2MDMiLCJpc3MiOiJzdXBwb3J0LmJyYWluY2VydC5jb20ifQ.zjjfTwZerEJ1o-PR_hzWo8Zq0px6IGmQ-dLgaza5Goo)  
**Step 3:**

To add a new price, click on '**Add Pricing Scheme**' or click on the '**Edit**' option to edit the existing price.

## ![3.png](https://support.braincert.com/kb/attachment/article/168/inline?token=eyJhbGciOiJodHRwOi8vd3d3LnczLm9yZy8yMDAxLzA0L3htbGRzaWctbW9yZSNobWFjLXNoYTI1NiIsInR5cCI6IkpXVCJ9.eyJpZCI6IjQ5ODYiLCJvcmdpZCI6IjE2MDMiLCJpc3MiOiJzdXBwb3J0LmJyYWluY2VydC5jb20ifQ.AwPPNOI4lBC0w0RrnY80eni_YhXPjS6Fm1NsJZggY00)  
  
﻿**Step 4:﻿**

To edit the settings for a '**One-Time Purchase**', enter the price details and specify the duration (in days or a lifetime). Click the '**Submit**' button to save your modifications.

## ![4.png](https://support.braincert.com/kb/attachment/article/168/inline?token=eyJhbGciOiJodHRwOi8vd3d3LnczLm9yZy8yMDAxLzA0L3htbGRzaWctbW9yZSNobWFjLXNoYTI1NiIsInR5cCI6IkpXVCJ9.eyJpZCI6IjQ5OTUiLCJvcmdpZCI6IjE2MDMiLCJpc3MiOiJzdXBwb3J0LmJyYWluY2VydC5jb20ifQ.RCsNaQ-EPJGjoNxYuItWVYUOiUZS4ZS-fufhaQM7vfE)  
  
**Step 5:**

To modify a '**Recurring Subscription**', enter the '**Price**' details and select the subscription frequency (monthly/annual) from the dropdown menu. Now, click the '**Submit**' button to save your changes.

![5.png](https://support.braincert.com/kb/attachment/article/168/inline?token=eyJhbGciOiJodHRwOi8vd3d3LnczLm9yZy8yMDAxLzA0L3htbGRzaWctbW9yZSNobWFjLXNoYTI1NiIsInR5cCI6IkpXVCJ9.eyJpZCI6IjQ5ODgiLCJvcmdpZCI6IjE2MDMiLCJpc3MiOiJzdXBwb3J0LmJyYWluY2VydC5jb20ifQ.t3DiX9dmKZ5A1dbsH2cRr2B9fEQ8oez8QbTIzzgxn0k)

Increase profits by implementing a versatile pricing strategy for courses, incorporating both single and recurring subscriptions within the shopping cart.

# Step-by-Step Guide to Add iFrame Content

An iFrame (**Inline Frame**) is an HTML element that allows the embedding of external content, such as web pages or multimedia, within a webpage, providing a seamless integration of content from different sources.

##   

## **Step 1:﻿﻿**

To add an IFrame content, go to '**Contents**' under '**Products**'.

**![1.png](https://support.braincert.com/kb/attachment/article/189/inline?token=eyJhbGciOiJodHRwOi8vd3d3LnczLm9yZy8yMDAxLzA0L3htbGRzaWctbW9yZSNobWFjLXNoYTI1NiIsInR5cCI6IkpXVCJ9.eyJpZCI6IjU1NjEiLCJvcmdpZCI6IjE2MDMiLCJpc3MiOiJzdXBwb3J0LmJyYWluY2VydC5jb20ifQ.NZB-8YNLzpO0yszQAdlYcl4zmE0YObbS04hS6djciOE)**

##   

## **Step 2:﻿﻿**

Click on the '**&lt;/&gt; IFrame Content**' in the content page and open '**+Add iFrame**'.

**![2.png](https://support.braincert.com/kb/attachment/article/189/inline?token=eyJhbGciOiJodHRwOi8vd3d3LnczLm9yZy8yMDAxLzA0L3htbGRzaWctbW9yZSNobWFjLXNoYTI1NiIsInR5cCI6IkpXVCJ9.eyJpZCI6IjU1NjIiLCJvcmdpZCI6IjE2MDMiLCJpc3MiOiJzdXBwb3J0LmJyYWluY2VydC5jb20ifQ.2_GiIRIg9P_izAaVEbwAaMNNkNWOlviFvY4rcAv8Py0)**

##   

## **Step 3:﻿﻿**

Enter the '**iFrame URL**,' set the '**Height**,' type a '**Title**,' and finally, click '**Save**' to apply the changes.

- **iFrame URL** - The iFrame URL is the web address of the external content you want to embed.

- **iFrame Height** -  Height specifies the vertical dimension, determining how much space the content occupies on the webpage.

## **![3.png](https://support.braincert.com/kb/attachment/article/189/inline?token=eyJhbGciOiJodHRwOi8vd3d3LnczLm9yZy8yMDAxLzA0L3htbGRzaWctbW9yZSNobWFjLXNoYTI1NiIsInR5cCI6IkpXVCJ9.eyJpZCI6IjU1NjMiLCJvcmdpZCI6IjE2MDMiLCJpc3MiOiJzdXBwb3J0LmJyYWluY2VydC5jb20ifQ.FMoJL4YyUqh980c5EhUWoBVx8OLyProh2U20LputAFw)﻿﻿**

## **Step 4:**

After adding it, you will be able to see it under '**iFrame Content**'. Click **'Options'** Section to replace iframe URL in the Existing title.

**![KB - 4 iframe url](https://support.braincert.com/kb/attachment/article/189/inline?token=eyJhbGciOiJodHRwOi8vd3d3LnczLm9yZy8yMDAxLzA0L3htbGRzaWctbW9yZSNobWFjLXNoYTI1NiIsInR5cCI6IkpXVCJ9.eyJpZCI6IjY2MTEiLCJvcmdpZCI6IjE2MDMiLCJpc3MiOiJzdXBwb3J0LmJyYWluY2VydC5jb20ifQ.2tgAeTvmSFIxkow1XNG93M0kn-TJIJJky95U_7HqGPw)**

## Step 5:

Then Popup appears, Select **'Edit Content'.**

![KB 5 - iframe url](https://support.braincert.com/kb/attachment/article/189/inline?token=eyJhbGciOiJodHRwOi8vd3d3LnczLm9yZy8yMDAxLzA0L3htbGRzaWctbW9yZSNobWFjLXNoYTI1NiIsInR5cCI6IkpXVCJ9.eyJpZCI6IjY2MTIiLCJvcmdpZCI6IjE2MDMiLCJpc3MiOiJzdXBwb3J0LmJyYWluY2VydC5jb20ifQ.f23D2sTmzOKew5DmQkn29orVOAclIkyiUswpzV_X8dc)

## Step 6:

Add the iframe URL in the reputed area to replace the Existing iframe Contents and Click **'Save Changes'**.

![Changelog - iFrame URL](https://support.braincert.com/kb/attachment/article/189/inline?token=eyJhbGciOiJodHRwOi8vd3d3LnczLm9yZy8yMDAxLzA0L3htbGRzaWctbW9yZSNobWFjLXNoYTI1NiIsInR5cCI6IkpXVCJ9.eyJpZCI6IjY2MTUiLCJvcmdpZCI6IjE2MDMiLCJpc3MiOiJzdXBwb3J0LmJyYWluY2VydC5jb20ifQ.mEEyRgKU2aZq2Ybixrn83-G1MQm9-lBdZhFO-qNHr6c)

When the iFrame content is uploaded under courses, it automatically converts the link to the material.

Learn how to upload content using the link [Create a Course Curriculum from a Centralized Content Library.](https://support.braincert.com/kb/article/71/steps-to-easily-create-a-course-curriculum-from-a-centralized-content-library "https://support.braincert.com/kb/article/71/steps-to-easily-create-a-course-curriculum-from-a-centralized-content-library")

****

****

# Steps to Setup Facebook Pixel Analytics Tool Extension

The Facebook pixel is an analytics tool that helps you measure the effectiveness of your advertising. You can use the Facebook pixel to understand the actions people are taking on your LMS website and reach audiences you care about.

### **How to find Facebook pixel ID?**

Go to the Facebook Pixel page in your Ads Manager. Your pixel's status will also be set to Active. Click on the "**Setup**" button on the right side of your dashboard.![](https://support.braincert.com/kb/attachment/article/26/inline?token=eyJhbGciOiJodHRwOi8vd3d3LnczLm9yZy8yMDAxLzA0L3htbGRzaWctbW9yZSNobWFjLXNoYTI1NiIsInR5cCI6IkpXVCJ9.eyJpZCI6IjQxMzkiLCJvcmdpZCI6IjE2MDMiLCJpc3MiOiJzdXBwb3J0LmJyYWluY2VydC5jb20ifQ.p6eiWS7kZXjr1u3m-6pH13EoPfavSD-VBS-pycegVmk)

In the popup, select the "**Manually Install the Code Yourself**" option.

![](https://support.braincert.com/kb/attachment/article/26/inline?token=eyJhbGciOiJodHRwOi8vd3d3LnczLm9yZy8yMDAxLzA0L3htbGRzaWctbW9yZSNobWFjLXNoYTI1NiIsInR5cCI6IkpXVCJ9.eyJpZCI6IjQxNDAiLCJvcmdpZCI6IjE2MDMiLCJpc3MiOiJzdXBwb3J0LmJyYWluY2VydC5jb20ifQ.HodYuBMQKyAXhYY__qitBZVr7OabrhPiN4_qNxnyipc)

Copy the numeric ID from the JavaScript code from Step 2 of the popup.

![](https://support.braincert.com/kb/attachment/article/26/inline?token=eyJhbGciOiJodHRwOi8vd3d3LnczLm9yZy8yMDAxLzA0L3htbGRzaWctbW9yZSNobWFjLXNoYTI1NiIsInR5cCI6IkpXVCJ9.eyJpZCI6IjQxNDEiLCJvcmdpZCI6IjE2MDMiLCJpc3MiOiJzdXBwb3J0LmJyYWluY2VydC5jb20ifQ.1dlwE3VgA4-CoD3d730JIfowLbhD0e6ZYo3Zmdj7Ii8)

### **Installing Facebook Pixel in your LMS**

In LMS, go to '**Global Settings**' and open '**Extensions**'.

Enter the numeric pixel ID in the text field and turn on the slider. Finally, '**Save**' your settings and reload the page to take effect.

![1.png](https://support.braincert.com/kb/attachment/article/26/inline?token=eyJhbGciOiJodHRwOi8vd3d3LnczLm9yZy8yMDAxLzA0L3htbGRzaWctbW9yZSNobWFjLXNoYTI1NiIsInR5cCI6IkpXVCJ9.eyJpZCI6IjUwNjEiLCJvcmdpZCI6IjE2MDMiLCJpc3MiOiJzdXBwb3J0LmJyYWluY2VydC5jb20ifQ.jfX1AU1WDxaPWnOjrCXQ7rGm64r7LPgeepZB14vlYzA)

### **Check the Facebook Pixel installation status**

Check the status of your pixel code by visiting a few pages in your LMS.

Now, go to the Facebook Pixel page, repeat the "**How to find Facebook pixel ID**" steps above, check step 4 in the popup and confirm it is marked as '**Active**' with a green marker.

![](https://support.braincert.com/kb/attachment/article/26/inline?token=eyJhbGciOiJodHRwOi8vd3d3LnczLm9yZy8yMDAxLzA0L3htbGRzaWctbW9yZSNobWFjLXNoYTI1NiIsInR5cCI6IkpXVCJ9.eyJpZCI6IjQxNjYiLCJvcmdpZCI6IjE2MDMiLCJpc3MiOiJzdXBwb3J0LmJyYWluY2VydC5jb20ifQ.8XNHm_G-Mj3NZElICEfbx6g7OUI2N_waBmfLx5L4Be4)

# How to Enable 'Public' and 'Private' Catalog Pages for Courses, Tests, Products, and Live Classes, Including Exclusive 'Invite-Only' Content

Catalog pages, designed to encapsulate courses, bundles, tests, online store, and live classes, serve as an effective tool for structuring your diverse educational materials. They function as a centralized hub where all your course offerings coalesce, thereby providing a one-stop destination for all your educational resources.

The brilliance of BrainCert's catalog feature lies in its dual functionality. It not only simplifies the process for learners to find and navigate through your diverse offerings in the LMS but also creates a public marketplace setup that's optimized for search engine indexing. This powerful combination aids in increasing your online visibility, ensuring your courses, assessments, and live classes reach a broader audience. Further, guest users are offered the ability to peruse through your course offerings before committing to a sign-up, offering a preview that facilitates informed decision-making for potential learners.

## **Optimizing Catalog Visibility for Guest Users**

**To activate the catalog for Courses, Assessments, Live Classes (Virtual Classroom), and Online Store products, navigate to the 'Global Settings'. Next, open the 'Catalog Settings'. Here, you can enable the catalog feature for the '**​**Guest Users****'.**

**![image (1).png](https://support.braincert.com/kb/attachment/article/93/inline?token=eyJhbGciOiJodHRwOi8vd3d3LnczLm9yZy8yMDAxLzA0L3htbGRzaWctbW9yZSNobWFjLXNoYTI1NiIsInR5cCI6IkpXVCJ9.eyJpZCI6IjU2MDIiLCJvcmdpZCI6IjE2MDMiLCJpc3MiOiJzdXBwb3J0LmJyYWluY2VydC5jb20ifQ.MhSMxxPOFB68lNcCM8NOECA0B0OFhsRnNfgb0xrekLo) ​**

Whenever you initiate the creation of a course, an assessment, a product, or a live class, BrainCert presents you with the opportunity to include it in the catalog. The inclusion of at least one item activates the respective top-level link. For instance, during course creation, an option titled '**List in Course Catalog**' will be available, enabling you to add the course to the public catalog.

![1.png](https://support.braincert.com/kb/attachment/article/93/inline?token=eyJhbGciOiJodHRwOi8vd3d3LnczLm9yZy8yMDAxLzA0L3htbGRzaWctbW9yZSNobWFjLXNoYTI1NiIsInR5cCI6IkpXVCJ9.eyJpZCI6IjUzODQiLCJvcmdpZCI6IjE2MDMiLCJpc3MiOiJzdXBwb3J0LmJyYWluY2VydC5jb20ifQ.B6Rsl_TYQAoRxkjGwH-q5iDbhN0mMKZnKdz8_YTu19Y)

Once you have done so, launching your LMS site via a private or incognito browser window will display the '**Courses**' top-level menu, now active and showcasing your listed course. This not only enhances the discoverability of your courses by enabling search engines to index them, but it also allows you to share your courses on social media platforms for increased traction.

![2.png](https://support.braincert.com/kb/attachment/article/93/inline?token=eyJhbGciOiJodHRwOi8vd3d3LnczLm9yZy8yMDAxLzA0L3htbGRzaWctbW9yZSNobWFjLXNoYTI1NiIsInR5cCI6IkpXVCJ9.eyJpZCI6IjUzODUiLCJvcmdpZCI6IjE2MDMiLCJpc3MiOiJzdXBwb3J0LmJyYWluY2VydC5jb20ifQ.ks1x0Ogxb5Uvc5n6FTTu0O5a2sWrrK2ZuGHMb43mOvE)

For learners, they will be required to create an account on your LMS to gain access to 'free' courses. To access paid courses, learners will need to complete the purchase process, hence driving the conversion from a guest user to a registered one. Utilize these tools effectively to maximize your course visibility and reach.

> Keep in mind that any physical products created using the Online Store are automatically listed in the public catalog and you'll not see the 'List in catalog' option similar to the course example above.

## **Optimizing Catalog Accessibility for Registered Users**

BrainCert provides you with the ability to enable catalog visibility for users who are logged in. This powerful feature empowers learners to conveniently browse through and discover the full range of courses, assessments, live classes, and products offered on your LMS domain. Furthermore, it allows them the autonomy to self-enroll in their preferred educational resources.

Access to the various contents is contingent on successful payment for 'paid' content, ensuring a secure transaction process before course accessibility is granted. For 'free' content, learners can gain immediate access, thereby providing an efficient and frictionless learning journey. This feature enhances the user experience by offering a seamless, self-guided exploration of the educational materials available to them.

> To activate the catalog for Courses, Assessments, Live Classes (Virtual Classroom), and Online Store products, first navigate to the '**Global Settings**'. From there, proceed to the '**Catalog Settings**'. Here, you can enable the catalog feature for the '**Logged in users**'.

![image (2).png](https://support.braincert.com/kb/attachment/article/93/inline?token=eyJhbGciOiJodHRwOi8vd3d3LnczLm9yZy8yMDAxLzA0L3htbGRzaWctbW9yZSNobWFjLXNoYTI1NiIsInR5cCI6IkpXVCJ9.eyJpZCI6IjU2MDMiLCJvcmdpZCI6IjE2MDMiLCJpc3MiOiJzdXBwb3J0LmJyYWluY2VydC5jb20ifQ.LtiXG0gO9Sw08-TpJK1KrABrsEzaBKpjKIExnP19DIM)

## Maintaining Exclusive Access through 'Invite-Only' for Private Content

At times, you might wish to keep a course exclusive, not listed in the public or private catalog for a more focused distribution. BrainCert caters to this need by offering functionalities such as '***Enroll Individual Students***' and '***Assign User Group***'. These features allow you to selectively grant access to specific learners for a course, test, or live class. You can envision this as providing a unique access key, tailored to unlock the specific course for the assigned learner. Once the learner logs in, the course unveils itself, creating a customized and exclusive learning experience.

![2.png](https://support.braincert.com/kb/attachment/article/93/inline?token=eyJhbGciOiJodHRwOi8vd3d3LnczLm9yZy8yMDAxLzA0L3htbGRzaWctbW9yZSNobWFjLXNoYTI1NiIsInR5cCI6IkpXVCJ9.eyJpZCI6IjU1OTYiLCJvcmdpZCI6IjE2MDMiLCJpc3MiOiJzdXBwb3J0LmJyYWluY2VydC5jb20ifQ.S_02CxYz1Mr3NqZ5sKvCAVNh1unCD2N79XTHCDUszSA)

![3.png](https://support.braincert.com/kb/attachment/article/93/inline?token=eyJhbGciOiJodHRwOi8vd3d3LnczLm9yZy8yMDAxLzA0L3htbGRzaWctbW9yZSNobWFjLXNoYTI1NiIsInR5cCI6IkpXVCJ9.eyJpZCI6IjU1OTciLCJvcmdpZCI6IjE2MDMiLCJpc3MiOiJzdXBwb3J0LmJyYWluY2VydC5jb20ifQ.8snAsXurIl_vqwunqlBT9uTHdxMHkkmr7FtpDsnP1Ag)

Enrollment for the learner depends on the course type. If it's a paid course, the learner can enroll following a successful payment. Conversely, if it's a free course, the learner can access it immediately.

> Keep in mind that sharing the course link with other users might not grant them access if the course isn't listed in a public or private catalog. This is because access is controlled based on the backend enrollment managed by the instructor or the admin, ensuring the exclusivity and restricted availability of your course content.

# Recording Notification and Webhook

Virtual Classroom API customers can set up an email notification template to notify when the recording is available and enable webhook to ping your website URL when the recorded file becomes available. This feature is available in your [API dashboard](https://app.braincert.com/app/virtualclassroom "https://app.braincert.com/app/virtualclassroom").

###   

### **Webhook:**

Once the recording is available, you may want to post-process this information at your end for analytics or dashboard data. For this specific reason, we've also introduced webhooks.

## **Step 1:**

Navigate to the [API dashboard](https://app.braincert.com/app/virtualclassroom "https://app.braincert.com/app/virtualclassroom").

![](https://support.braincert.com/kb/attachment/article/136/inline?token=eyJhbGciOiJodHRwOi8vd3d3LnczLm9yZy8yMDAxLzA0L3htbGRzaWctbW9yZSNobWFjLXNoYTI1NiIsInR5cCI6IkpXVCJ9.eyJpZCI6IjQzNDUiLCJvcmdpZCI6IjE2MDMiLCJpc3MiOiJzdXBwb3J0LmJyYWluY2VydC5jb20ifQ.Xg2UYR_cQoH__KmDlSUk5zvUAOjVVgG4V5JzPkx9COU)

## **Step 2:**

Click on '**More**' at the option of the domain which you had created before, and click on '**Recording** **notification**'.

![](https://support.braincert.com/kb/attachment/article/136/inline?token=eyJhbGciOiJodHRwOi8vd3d3LnczLm9yZy8yMDAxLzA0L3htbGRzaWctbW9yZSNobWFjLXNoYTI1NiIsInR5cCI6IkpXVCJ9.eyJpZCI6IjQzNDYiLCJvcmdpZCI6IjE2MDMiLCJpc3MiOiJzdXBwb3J0LmJyYWluY2VydC5jb20ifQ.Y0Esq421ckYPmsNLUBxAQ1xAl-FstzUrZ-rEhDLrs6s)

## **Step 3:** 

Select the default tab '**Recording** **Webhook**'. Now, type the target URL for receiving webhooks and save changes.

![](https://support.braincert.com/kb/attachment/article/136/inline?token=eyJhbGciOiJodHRwOi8vd3d3LnczLm9yZy8yMDAxLzA0L3htbGRzaWctbW9yZSNobWFjLXNoYTI1NiIsInR5cCI6IkpXVCJ9.eyJpZCI6IjQzNDciLCJvcmdpZCI6IjE2MDMiLCJpc3MiOiJzdXBwb3J0LmJyYWluY2VydC5jb20ifQ.yj3M8rFV4cNo-irkX5iLtJgptwPWXphpuqtpaUf1UtM)

**Note**: Make sure that the URL you have set up is capable of receiving and parsing the posted parameters.

For example, PHP files may use filegetcontents('php://input'); to receive parameters posted.

###   

### **Notification:**

## **Step 1:**

Select the tab '**Notification**' to set up your email notification template. Turn the slide to '**Yes**' and save your changes. You can turn off email notifications anytime by turning it back to '**No**' and '**Save**' the changes.

![](https://support.braincert.com/kb/attachment/article/136/inline?token=eyJhbGciOiJodHRwOi8vd3d3LnczLm9yZy8yMDAxLzA0L3htbGRzaWctbW9yZSNobWFjLXNoYTI1NiIsInR5cCI6IkpXVCJ9.eyJpZCI6IjQzNDgiLCJvcmdpZCI6IjE2MDMiLCJpc3MiOiJzdXBwb3J0LmJyYWluY2VydC5jb20ifQ.Ojd-NFguDZKjeWa41OWqltW3KmAEN8aqBAEIkMBPCIc)

## **Step 2:**

When you edit the email template, you can see that your account email is populated as the default '**To**' address. You can change this anytime to a different email address. The template can be easily customized with variables or input your custom text.

Recording webhooks lets you register a URL that we will notify you anytime a recorded video is available in your account. API endpoint automatically posts parameters such as '**&roomId=123&recordId**' as part of the URL so you can process this data further at your end.

# An Overview of the Platform and FAQs

BrainCert is a SaaS all-in-one *Unified Training Platform*™ designed to deliver any type of training online such as delivering self-paced blended courses, video conferencing, assessments, proctored exams, compliance training, skills development, customer & partner training, and real-time collaboration using an integrated virtual classroom.

​

### **Frequently Asked Questions:**

Reference URL:  [https://www.braincert.com/pricing](https://www.braincert.com/pricing "https://www.braincert.com/pricing")

#### Are there Transaction Fees for accepting credit card payments?

BrainCert does not charge any processing fee. However, Payment gateways such as Stripe and PayPal usually charge a fee when your customers pay you (for example Stripe currently charges 2.9% + $0.30 per transaction). For details check out the pricing of the payment gateway of your choice.

#### What about security?

- Data security is of utmost importance to us - all our traffic is done over TLS 1.3, the web standard for secure data transmission, and files are stored with top-grade secured infrastructure.
- Read our Security & Compliance page for more details.
- All customer data is encrypted in transit and at rest. Our cloud architecture leverages three layered Web Application Firewall (WAF) at the CDN, Load balancer, and at host-level to protect customer data.
- Similarly, we protect your audio and video files using signed URLs which are time-based tokens that are only valid for a limited period of time. Once that time window has expired, the access token contained in the link will no longer work.

#### What is the difference between “Most business” and “Very Small business” plans?

- Our “**very small business**” plans are designed for individual instructors, entrepreneurs, coaches, startups, and smaller teams with few educators.
- If you are a small to large business looking for a comprehensive platform to deliver partner, customer, employee, and custom training programs with role-based access control, and other enterprise-grade features such as SAML 2.0 SSO and SOC 2 Type 2 compliance, then our “**most business**” plans would be the best fit for you.  
​

#### Are there any limitations on cloud storage and file uploads?

There is no storage limitation. We provide unlimited cloud storage for all your digital content.

File upload limits are as follows:

- Presentations: ppt, pps, pptx, ppsx, pot, potx, odp (Max file size: 300MB)
- Documents: pdf, doc, docx, txt, xls, xlsx, rtf, odt, ods (Max file size: 300MB)
- Video: mp4, m4v, webm (Max file size: 1GB)
- Audio: aac, m4a, f4a, mp3, ogg, oga (Max file size: 600MB)
- Images: jpeg, jpg, png, svg, gif (Max file size: 30MB)

#### Can I switch plans or cancel at any time?

- You can upgrade or downgrade your plan at any time or cancel prior to renewal of your selected subscription i.e. ahead of the next billing term.
- If you switch from monthly to annual billing for the same plan, you will be charged immediately and your new billing cycle will start on the day you change.
- We’ll take into account what you’ve already paid from your current month and credit it towards your purchase.
- The price difference when changing plans will be automatically prorated, for example from monthly to annual subscription change.
- If you switch from annual to monthly billing for the same plan, your monthly billing will not start until the end of your current annual plan.
- For questions or concerns, please contact support@braincert.com.

#### What is a white-label LMS solution?

- "White label" refers to a fully supported product or service that's made by BrainCert but re-branded under your company name, hence the term "white label".
- You can customize the LMS platform with your own logo, theme, domain, and identity, allowing customers to associate the product with your brand.
- You can focus on your business’s core competency and leave the technology stack to BrainCert. It saves you time and money and keeps your customers happier.

#### Do you offer a changelog service?

Yes, we do. You can track LMS changes and new features at [https://changelog-lms.braincert.com/](https://changelog-lms.braincert.com/ "https://changelog-lms.braincert.com/")

#### Can I create multiple learning domains?

- Absolutely! Most often this is used to separate internal (employee) training from external (customer/partner) training, or for multiple product brands.
- Training organizations may also want to set up completely separate training portals for their teams or clients.
- For example, lms.yours,ite.com, client1.yoursite.com and client2.yoursite.com.

#### Who owns the content I upload?

You retain full ownership of the rights to your content and intellectual property. Furthermore, we will never use your learners’ data to market to them.

#### Do I need a web host?

No. All BrainCert plans include unlimited hosting and bandwidth. Our infrastructure is highly reliable, scalable, and secure. All customer data is backed up in real-time to alternative locations to avoid disaster.

# How to Create Forms and Add Them to Course Curriculum

The Form Builder is a powerful no-code tool that helps you to create beautiful, responsive forms without writing a single line of code. From collecting learner feedback, assignments, onboarding details, event registrations, or e-signatures, this intuitive builder makes it easy to design, deploy, and track your forms from one place.

You can also embed forms into landing pages to turn them into high-converting funnels. Every submission can be tracked, routed to your CRM, and used to trigger follow-up actions like emails, tagging users, or internal notifications.

This feature is perfect for:

- **Sales & Marketing Teams** – Capture and qualify leads from landing pages
- **Instructors & Course Creators** – Collect course feedback, surveys, and assignments
- **HR & Compliance Teams** – Run onboarding and internal surveys
- **Event Managers** – Register attendees and send confirmations

In this guide, you’ll learn how to create a form, customize it, collect responses inside courses, and view submissions.

## Step 1: Create a New Form

Navigate to '**Sales & Marketing**' → '**Forms**'. Click '**+** **Create Form**' at the top-right to start building a new form.*![1](https://support.braincert.com/kb/attachment/article/301/inline?token=eyJhbGciOiJodHRwOi8vd3d3LnczLm9yZy8yMDAxLzA0L3htbGRzaWctbW9yZSNobWFjLXNoYTI1NiIsInR5cCI6IkpXVCJ9.eyJpZCI6IjcyMzAiLCJvcmdpZCI6IjE2MDMiLCJpc3MiOiJzdXBwb3J0LmJyYWluY2VydC5jb20ifQ.Eblrw5orKHgBFzdxFrM7hS5zowgH9XR4Q3gszT5tV7E)*

## Step 2: Set Up Your Form

Fill in the basic details, such as '**Form Name**' and select the appropriate '**Form Type**' from the dropdown menu.

| Field Type | What It Does | Best Used For | Example |
| --- | --- | --- | --- |
| **Short Text (single line input)** | Allows users to enter a short, single-line response | First name, last name, company, job title | First Name |
| **Email (input field for email)** | Accepts only valid email addresses and validates format | Lead capture, feedback contact, registrations | [you@example.com](mailto:you@example.com) |
| **Long Text (multi-line input)** | Allows users to enter longer responses across multiple lines | Feedback, comments, suggestions, assignments | “What did you like about this course?” |
| **Dropdown (select input)** | Lets users select one option from a dropdown list | Department, country, category | Marketing, Sales, HR |
| **Single Choice (accept a single option)** | Displays multiple options but allows only one selection | Yes/No, Likert scale questions, MCQs | Strongly Agree → Strongly Disagree |
| **Multiple Choice (accept multiple options)** | Allows users to select more than one option | Preferences, topics of interest, features | UI Design, UX Research |
| **Toggle Switch (On/Off)** | Simple switch for yes/no or enable/disable choices | Consent, subscriptions, permissions | Subscribe to updates |
| **URL (expects a URL)** | Validates that the input is a proper web link | Portfolio links, website URLs | [https://example.com](https://example.com/) |
| **Phone (with country code)** | Collects phone numbers with country code validation | Event registration, sales follow-up | +91 00000000000 |
| **Number (numbers only)** | Restricts input to numeric values only | Age, quantity, years of experience | 5 |
| **Country & State (dynamic options)** | Shows state options based on selected country | Address collection, registrations | India → Tamil Nadu |
| **Signature (electronic signature)** | Allows users to sign digitally | Agreements, consent forms | Sign to confirm |

![2](https://support.braincert.com/kb/attachment/article/301/inline?token=eyJhbGciOiJodHRwOi8vd3d3LnczLm9yZy8yMDAxLzA0L3htbGRzaWctbW9yZSNobWFjLXNoYTI1NiIsInR5cCI6IkpXVCJ9.eyJpZCI6IjcyMzEiLCJvcmdpZCI6IjE2MDMiLCJpc3MiOiJzdXBwb3J0LmJyYWluY2VydC5jb20ifQ.NLM1lEi3OQYP4YmK2t_FOHh-5n61AfqcW1mcTUjSKaY)

## Step 3: Fill in the Details

Configure other available options like '**Label**', '**Placeholder**' as needed, and check the '**Required**' box if you want to make the field mandatory.

![3](https://support.braincert.com/kb/attachment/article/301/inline?token=eyJhbGciOiJodHRwOi8vd3d3LnczLm9yZy8yMDAxLzA0L3htbGRzaWctbW9yZSNobWFjLXNoYTI1NiIsInR5cCI6IkpXVCJ9.eyJpZCI6IjcyMzIiLCJvcmdpZCI6IjE2MDMiLCJpc3MiOiJzdXBwb3J0LmJyYWluY2VydC5jb20ifQ.auD71LFj-i_WWNUh1Tl1GdVfJyBkcV5f9TyeE2eMRR0)

## Step 4: Add New Field

Click '**+ Add new field'** to add more inputs such as Email, Long Text (for feedback), Dropdowns, Single Choice / Multiple Choice, or Signature (for approvals or consent).

![4](https://support.braincert.com/kb/attachment/article/301/inline?token=eyJhbGciOiJodHRwOi8vd3d3LnczLm9yZy8yMDAxLzA0L3htbGRzaWctbW9yZSNobWFjLXNoYTI1NiIsInR5cCI6IkpXVCJ9.eyJpZCI6IjcyMzMiLCJvcmdpZCI6IjE2MDMiLCJpc3MiOiJzdXBwb3J0LmJyYWluY2VydC5jb20ifQ.K4WjT-DUYDaeWvvFtD87TrYaCESoiYEkW-kFM3CDSk4)

## Step 5: Manage Field Layout

Use the options on each field to '**Move Up / Move Down'**, insert fields '**Above or Below'**, or '**Delete'** fields you don’t need.

![5](https://support.braincert.com/kb/attachment/article/301/inline?token=eyJhbGciOiJodHRwOi8vd3d3LnczLm9yZy8yMDAxLzA0L3htbGRzaWctbW9yZSNobWFjLXNoYTI1NiIsInR5cCI6IkpXVCJ9.eyJpZCI6IjcyMzQiLCJvcmdpZCI6IjE2MDMiLCJpc3MiOiJzdXBwb3J0LmJyYWluY2VydC5jb20ifQ.c8s299sd52Jy6cKx0pNRxnGr5e67gGwl8a-HTMx2vFo)

## Step 6: Customize Form Settings

Switch to the '**Settings'** tab to customize the submit button text and style, label orientation, optional CAPTCHA, success message, redirect URL, signature instructions, and tracking codes, then click '**Save Form'** to apply your changes.

![6](https://support.braincert.com/kb/attachment/article/301/inline?token=eyJhbGciOiJodHRwOi8vd3d3LnczLm9yZy8yMDAxLzA0L3htbGRzaWctbW9yZSNobWFjLXNoYTI1NiIsInR5cCI6IkpXVCJ9.eyJpZCI6IjcyMzUiLCJvcmdpZCI6IjE2MDMiLCJpc3MiOiJzdXBwb3J0LmJyYWluY2VydC5jb20ifQ._5og45ZEurE07vHkTjeebPqhm19KmgJQfM9tSlyDs1Y)

## Step 7: Configure Post-Submission Actions

Under '**After Submission'**, set what should happen when a form is submitted by adding '**Team email addresses**' for notifications and choosing '**Actions**' like sending emails, creating tasks, or triggering internal workflows so your team never misses a response.

![7](https://support.braincert.com/kb/attachment/article/301/inline?token=eyJhbGciOiJodHRwOi8vd3d3LnczLm9yZy8yMDAxLzA0L3htbGRzaWctbW9yZSNobWFjLXNoYTI1NiIsInR5cCI6IkpXVCJ9.eyJpZCI6IjcyMzYiLCJvcmdpZCI6IjE2MDMiLCJpc3MiOiJzdXBwb3J0LmJyYWluY2VydC5jb20ifQ.v9-GfcmAy23RCdSquDPQpxSNhdDIaenSBo62zSN4zms)

## Step 8: Preview Your Form

Use the '**Form Preview'** panel to see how learners or users will experience your form before publishing.

![8](https://support.braincert.com/kb/attachment/article/301/inline?token=eyJhbGciOiJodHRwOi8vd3d3LnczLm9yZy8yMDAxLzA0L3htbGRzaWctbW9yZSNobWFjLXNoYTI1NiIsInR5cCI6IkpXVCJ9.eyJpZCI6IjcyMzciLCJvcmdpZCI6IjE2MDMiLCJpc3MiOiJzdXBwb3J0LmJyYWluY2VydC5jb20ifQ.NGaLOrSBMqdcF12Zhd79UtlTQbAvAQqyJSP1OCnw49M)

## Add the Form to a Course

## Step 9: Open Curriculum

Go to **Courses → Manage Course → Curriculum.**

**![9](https://support.braincert.com/kb/attachment/article/301/inline?token=eyJhbGciOiJodHRwOi8vd3d3LnczLm9yZy8yMDAxLzA0L3htbGRzaWctbW9yZSNobWFjLXNoYTI1NiIsInR5cCI6IkpXVCJ9.eyJpZCI6IjcyMzgiLCJvcmdpZCI6IjE2MDMiLCJpc3MiOiJzdXBwb3J0LmJyYWluY2VydC5jb20ifQ.FCqx8SgRBg4gwkiGvQC__qjNRWSmARXsVZl_H17o4w4)**

## Step 10: Add the Form as a Lecture

Click the arrow to view '**Lectures'**, then click '**Add'** and select '**Add Forms'**.

![10](https://support.braincert.com/kb/attachment/article/301/inline?token=eyJhbGciOiJodHRwOi8vd3d3LnczLm9yZy8yMDAxLzA0L3htbGRzaWctbW9yZSNobWFjLXNoYTI1NiIsInR5cCI6IkpXVCJ9.eyJpZCI6IjcyMzkiLCJvcmdpZCI6IjE2MDMiLCJpc3MiOiJzdXBwb3J0LmJyYWluY2VydC5jb20ifQ.0GtTpelLwtBSejfQK1vaZTA_LAX6rFqv3CbHzwmpiXg)

## Step 11: Select Your Form

Choose the form you created and click '**Add to Lecture'**.

![11](https://support.braincert.com/kb/attachment/article/301/inline?token=eyJhbGciOiJodHRwOi8vd3d3LnczLm9yZy8yMDAxLzA0L3htbGRzaWctbW9yZSNobWFjLXNoYTI1NiIsInR5cCI6IkpXVCJ9.eyJpZCI6IjcyNDAiLCJvcmdpZCI6IjE2MDMiLCJpc3MiOiJzdXBwb3J0LmJyYWluY2VydC5jb20ifQ.i8-Ni8Lc-1M7pZodIr2mV5_TPBLHg4PWOEjbEX-o25E)

## Learner View

Now learners will see the form in the course and can submit their responses directly from the course player.

![12](https://support.braincert.com/kb/attachment/article/301/inline?token=eyJhbGciOiJodHRwOi8vd3d3LnczLm9yZy8yMDAxLzA0L3htbGRzaWctbW9yZSNobWFjLXNoYTI1NiIsInR5cCI6IkpXVCJ9.eyJpZCI6IjcyNDEiLCJvcmdpZCI6IjE2MDMiLCJpc3MiOiJzdXBwb3J0LmJyYWluY2VydC5jb20ifQ.UwS9mkhf2GmaxT8sHVswfI-Ro600FATGm1FG3-W0IZE)

## Example: Creating a Likert Scale Survey (Course Feedback)

You can easily build a Likert scale survey using **Single Choice** or **Multiple Choice** fields.

### Example: Course Feedback Likert Question

**Field Type:** Single Choice  
**Label:** How satisfied are you with this course?  
**Options:**

- Strongly Agree
- Agree
- Neutral
- Disagree
- Strongly Disagree

### Example: Instructor Feedback

**Field Type:** Single Choice  
**Label:** The instructor explained concepts clearly  
**Options:**

- Strongly Agree
- Agree
- Neutral
- Disagree
- Strongly Disagree

### Example: Open Feedback

**Field Type:** Long Text  
**Label:** What can we improve in this course?  
**Placeholder:** Share your suggestions here...

You can add multiple Likert questions to create a complete feedback survey and place it as the final lecture in your course.

Form Builder makes it easy to create powerful forms without code, from collecting leads, onboarding users, or gathering course feedback. With drag-and-drop fields, team notifications, post-submission actions, and built-in analytics, you can manage every response from one dashboard.

# How to Access and Use the Revenue Graph Report

The **Revenue Report** offers a clear, visual representation of your LMS tenant's earnings, helping you easily identify high-performing areas and uncover opportunities for growth.

This guide will walk you through the process of tracking **purchase reports** for various revenue streams, including **courses, bundles, assessments, online stores,** and **live classes**—giving you a comprehensive view of your financial performance.
<section class="info-box"><p><span><strong>Note</strong>: Only results for paid products will be visible in the Revenue Graph Report.</span></p></section>
## **Step 1: Navigate to 'Revenue Reports' under 'Reports & Analytics'**

Navigate to '**Reports & Analytics**' and open '**Revenue Graph**'.

![1](https://support.braincert.com/kb/attachment/article/186/inline?token=eyJhbGciOiJodHRwOi8vd3d3LnczLm9yZy8yMDAxLzA0L3htbGRzaWctbW9yZSNobWFjLXNoYTI1NiIsInR5cCI6IkpXVCJ9.eyJpZCI6IjYwMzIiLCJvcmdpZCI6IjE2MDMiLCJpc3MiOiJzdXBwb3J0LmJyYWluY2VydC5jb20ifQ.j64QGqblc6xJz1kMfCrHB7hmh5lRhTD3hQjVjIQtUbE)

## **Step 2: Generate a Custom Report**
The page will open, allowing you to filter by date range and product type to generate reports.
![](https://support.braincert.com/kb/attachment/article/186/inline?token=eyJhbGciOiJodHRwOi8vd3d3LnczLm9yZy8yMDAxLzA0L3htbGRzaWctbW9yZSNobWFjLXNoYTI1NiIsInR5cCI6IkpXVCJ9.eyJpZCI6IjY2MTciLCJvcmdpZCI6IjE2MDMiLCJpc3MiOiJzdXBwb3J0LmJyYWluY2VydC5jb20ifQ.4FCC_Q-TYV72jHbhz934ZQu6v0y_5DZmjOlb4ZmejsQ)

##   

## **Step 3: Select Specific Products**

Instead of selecting **"All Products"**, filter by a specific product category such as **Courses, Assessments,** etc. You can further refine your selection by choosing **"All Courses"** or a **specific course**. Select the options that best align with your reporting needs.

![4](https://support.braincert.com/kb/attachment/article/186/inline?token=eyJhbGciOiJodHRwOi8vd3d3LnczLm9yZy8yMDAxLzA0L3htbGRzaWctbW9yZSNobWFjLXNoYTI1NiIsInR5cCI6IkpXVCJ9.eyJpZCI6IjYwMzYiLCJvcmdpZCI6IjE2MDMiLCJpc3MiOiJzdXBwb3J0LmJyYWluY2VydC5jb20ifQ.VEOyaz6l3xSzSmJWcdSsTrr1bgSjOO6g2YKMyOWnlCY)

## 

## **Step 4: Filter by Specific Time Period**

Look for the **Time Period** option on the report settings. Select the desired duration from the dropdown list.

![5](https://support.braincert.com/kb/attachment/article/186/inline?token=eyJhbGciOiJodHRwOi8vd3d3LnczLm9yZy8yMDAxLzA0L3htbGRzaWctbW9yZSNobWFjLXNoYTI1NiIsInR5cCI6IkpXVCJ9.eyJpZCI6IjYwMzgiLCJvcmdpZCI6IjE2MDMiLCJpc3MiOiJzdXBwb3J0LmJyYWluY2VydC5jb20ifQ.8h1H4HxWy1LP4ZAQtPd3WftJVPaT5UD8j6Wbtk4YvxU)

## 

## **Step 5: Filter by Date Range**
The date will be automatically set based on the selected duration, or you can manually choose a specific date using the date picker for your report.
![6](https://support.braincert.com/kb/attachment/article/186/inline?token=eyJhbGciOiJodHRwOi8vd3d3LnczLm9yZy8yMDAxLzA0L3htbGRzaWctbW9yZSNobWFjLXNoYTI1NiIsInR5cCI6IkpXVCJ9.eyJpZCI6IjYwNDIiLCJvcmdpZCI6IjE2MDMiLCJpc3MiOiJzdXBwb3J0LmJyYWluY2VydC5jb20ifQ.jquJSct_2iyJCelxdo6oOjn35NUlXkI3tnro9E9bj_E)

## **Step 6: Search for Result**

Finally, click the '**Search**' button to generate the Revenue Graph Report based on your selections.

![7](https://support.braincert.com/kb/attachment/article/186/inline?token=eyJhbGciOiJodHRwOi8vd3d3LnczLm9yZy8yMDAxLzA0L3htbGRzaWctbW9yZSNobWFjLXNoYTI1NiIsInR5cCI6IkpXVCJ9.eyJpZCI6IjYwNDAiLCJvcmdpZCI6IjE2MDMiLCJpc3MiOiJzdXBwb3J0LmJyYWluY2VydC5jb20ifQ.80GstR44DoJx7VaUiNysbcjhjBFOd4WEaOk9N7f8Z6g)

You'll be able to see the Total revenue and Units Sold for the field you have selected.

Click on the **"Units Sold"** number in the generated report to view the customer table below.

## ![](https://support.braincert.com/kb/attachment/article/186/inline?token=eyJhbGciOiJodHRwOi8vd3d3LnczLm9yZy8yMDAxLzA0L3htbGRzaWctbW9yZSNobWFjLXNoYTI1NiIsInR5cCI6IkpXVCJ9.eyJpZCI6IjY2MTYiLCJvcmdpZCI6IjE2MDMiLCJpc3MiOiJzdXBwb3J0LmJyYWluY2VydC5jb20ifQ.lEiE_71SU7HbAyd-2aniWeXaIhDJzvrcLT1wE_KDG-g)

## **Step 7: Detailed Customer Report**
The generated data table displays customer information in a structured **table format**, allowing you to **view** and **export** the data as needed.
To download the data, click **'Export'** and choose your preferred file format (**CSV** or **XLSX**).

![KB 7 - REPORTS](https://support.braincert.com/kb/attachment/article/186/inline?token=eyJhbGciOiJodHRwOi8vd3d3LnczLm9yZy8yMDAxLzA0L3htbGRzaWctbW9yZSNobWFjLXNoYTI1NiIsInR5cCI6IkpXVCJ9.eyJpZCI6IjY2MzciLCJvcmdpZCI6IjE2MDMiLCJpc3MiOiJzdXBwb3J0LmJyYWluY2VydC5jb20ifQ.w7dsyWq95p761UtVLslOi7O1_wYOH3zuSkJpEYbrXqg)
By following these steps, you will successfully access the **Revenue Graph Report** and gain valuable insights into your organization's **revenue performance**.

# How to Set Up BrainCert Trigger Events with Pabbly Connect

Integrating BrainCert with Pabbly Connect allows you to automate tasks between your LMS and third-party apps like Google Sheets, CRMs, email tools, and more. This guide walks you through connecting BrainCert to Pabbly using a webhook and triggering an action (like adding a new row in Google Sheets).

##   

## What You Need

- A [**Pabbly Connect**](https://www.pabbly.com/connect/) account
- Admin access to your BrainCert LMS
- A Google account (for the Google Sheets example)
- At least one event trigger set up in BrainCert (e.g., course enrollment, test completed, etc.)

##   

## Example Use Cases

- Add a new row in Google Sheets every time a user enrolls in a course
- Send a welcome email via Gmail when a new test is completed
- Add leads to Mailchimp when someone attends a webinar
- Notify your sales team in Slack when a payment is received

##   

## **BrainCert – Pabbly Triggers List**

These triggers help automate workflows by instantly sending real-time data from BrainCert to Pabbly whenever key actions happen, like user creation, enrollments, or course updates. This reduces manual work and keeps your connected apps (like CRMs, spreadsheets, or email tools) always up to date.

| **#** | **Topics** | **Triggers** |
| --- | --- | --- |
| 1 | User Created | Triggers when a new user account is created. |
| 2 | Group Created | Triggers when a new group is created. |
| 3 | Course Created | Triggers when a new course is created. |
| 4 | Course Bundle Created | Triggers when a new course bundle is created. |
| 5 | Test Created | Triggers when a new test is created. |
| 6 | Live Class Created | Triggers when a new live class is created. |
| 7 | User Updated | Triggers when a user profile is updated. |
| 8 | Course Updated | Triggers when a course is updated. |
| 9 | Course Bundle Updated | Triggers when a course bundle is updated. |
| 10 | Test Updated | Triggers when a test is updated. |
| 11 | Live Class Updated | Triggers when a new product is created. |
| 12 | Product Created | Triggers when a new product is created. |
| 13 | User Deleted | Triggers when a user account is deleted. |
| 14 | Course Deleted | Triggers when a course is deleted. |
| 15 | Course Bundle Deleted | Triggers when a course bundle is deleted. |
| 16 | Test Deleted | Triggers when a test is deleted. |
| 17 | Live Class Deleted | Triggers when a live class is deleted. |
| 18 | Product Deleted | Triggers when a product is deleted. |
| 19 | Course Enrollment | Triggers when a user enrolls in a course. |
| 20 | Test Enrollment | Triggers when a user enrolls in a test. |
| 21 | Live Class Enrollment | Triggers when a user enrolls in a live class. |
| 22 | Course Completed | Triggers when a user completes a course. |
| 23 | Test Completed | Triggers when a user completes a test. |
| 24 | New Sale | Triggers when a new sale is made. |

### 

##   

## Step-by-Step BrainCert Trigger Event Integration

## Step 1: Create a Workflow in Pabbly

- **Log in** to your [Pabbly Connect account](https://connect.pabbly.com/).
- Click **Create Workflow**.
- Enter a **workflow name** (e.g., *User Created*).
- Choose or create a **folder** for organization.
- Click **Create** to launch the workflow editor.

![image_143](https://support.braincert.com/kb/attachment/article/256/inline?token=eyJhbGciOiJodHRwOi8vd3d3LnczLm9yZy8yMDAxLzA0L3htbGRzaWctbW9yZSNobWFjLXNoYTI1NiIsInR5cCI6IkpXVCJ9.eyJpZCI6IjY4MjIiLCJvcmdpZCI6IjE2MDMiLCJpc3MiOiJzdXBwb3J0LmJyYWluY2VydC5jb20ifQ.CSI7KhBi06ufAYZAi_ZbywZHvNqsV8rmU5AG20tJBAs)

###   

## Step 2: Set Up the Trigger

- In the **"Trigger"** section, select the app as BrainCert.
- Choose the **"Trigger Event"** from the dropdown list.
- Copy the **"** **Webhook URL"** generated by Pabbly.

> 
> 
> This is the URL that will receive data from BrainCert whenever a trigger event occurs.

![2](https://support.braincert.com/kb/attachment/article/256/inline?token=eyJhbGciOiJodHRwOi8vd3d3LnczLm9yZy8yMDAxLzA0L3htbGRzaWctbW9yZSNobWFjLXNoYTI1NiIsInR5cCI6IkpXVCJ9.eyJpZCI6IjY3ODYiLCJvcmdpZCI6IjE2MDMiLCJpc3MiOiJzdXBwb3J0LmJyYWluY2VydC5jb20ifQ.NuWYPPMl8ubVfuEWBxn6UdZnoqdDtXxpRT1U3ELYk44)

###   

## Step 3: Create a Webhook in BrainCert

- Log in to your **"** **BrainCert LMS"** admin panel.
- Go to **"** **Global Settings &gt; Webhooks."**
- Click **"** **Create Webhook**.**"![3](https://support.braincert.com/kb/attachment/article/256/inline?token=eyJhbGciOiJodHRwOi8vd3d3LnczLm9yZy8yMDAxLzA0L3htbGRzaWctbW9yZSNobWFjLXNoYTI1NiIsInR5cCI6IkpXVCJ9.eyJpZCI6IjY3ODciLCJvcmdpZCI6IjE2MDMiLCJpc3MiOiJzdXBwb3J0LmJyYWluY2VydC5jb20ifQ.kRavxaGEsNrw95g-g6pM9q7HcVDDVn7I_B9HYefBcuE)**

###   

## Step 4: Enter the Details

1. Enter a **"** **Webhook Name"** (e.g., *Pabbly - Create User*).
2. Paste the **"** **Webhook URL"** copied from Pabbly into the URL field.
3. Select a **"T** **opic/Event"** from the dropdown (e.g., *Course Enrolled*, *Test Completed*, etc.).
4. Click **"** **Send Test"** to send sample data to Pabbly and validate the connection.
5. Once the test is successful, click **"** **Save**.**"**

![4](https://support.braincert.com/kb/attachment/article/256/inline?token=eyJhbGciOiJodHRwOi8vd3d3LnczLm9yZy8yMDAxLzA0L3htbGRzaWctbW9yZSNobWFjLXNoYTI1NiIsInR5cCI6IkpXVCJ9.eyJpZCI6IjY3ODgiLCJvcmdpZCI6IjE2MDMiLCJpc3MiOiJzdXBwb3J0LmJyYWluY2VydC5jb20ifQ.25nQVNWRvPnN4WLmVUi3jc27gk-NNT8VXR8NNCUgguo)

You'll receive a '**Response**' in Pabbly once you click '**Send Test.**'

![6](https://support.braincert.com/kb/attachment/article/256/inline?token=eyJhbGciOiJodHRwOi8vd3d3LnczLm9yZy8yMDAxLzA0L3htbGRzaWctbW9yZSNobWFjLXNoYTI1NiIsInR5cCI6IkpXVCJ9.eyJpZCI6IjY4NzciLCJvcmdpZCI6IjE2MDMiLCJpc3MiOiJzdXBwb3J0LmJyYWluY2VydC5jb20ifQ.whXmSmmJ0TSW8AfKS7WQcG-34nHq-SZxjFHKtg05eSI)

###   

## Step 5: Add an Action (Example: Google Sheets)

1. In Pabbly, under the **"Action"** section, click **+** to add an action step.
2. Choose your app: **"** **Google Sheets**.**"**
3. Select an **"** **Action Event"** (e.g., *Add New Row*).
4. Click **"** **Connect,"** then sign in with your **"** **Google account**.**"**
5. Choose the spreadsheet and worksheet where you want to send the BrainCert data.
6. Map the incoming data fields (like Name, Email, Course Name, etc.) to the sheet columns.
7. Click **"** **Save and Send Test Request**.**"**
8. Check Google Sheets to confirm a new row is added.

![5](https://support.braincert.com/kb/attachment/article/256/inline?token=eyJhbGciOiJodHRwOi8vd3d3LnczLm9yZy8yMDAxLzA0L3htbGRzaWctbW9yZSNobWFjLXNoYTI1NiIsInR5cCI6IkpXVCJ9.eyJpZCI6IjY3ODkiLCJvcmdpZCI6IjE2MDMiLCJpc3MiOiJzdXBwb3J0LmJyYWluY2VydC5jb20ifQ.gIvlKehpcue9nzWAwxftFzfY8lO24LNUaujt4YkU25A)

<section class="info-box"><p style=" margin: 0px 0px 10px; font-family: Inter; font-size: 14px; font-style: normal; font-weight: 400; text-align: start; text-indent: 0px; white-space: normal;">Always test your webhook after setup to ensure data is passing correctly.</p><p style=" margin: 0px 0px 10px; font-family: Inter; font-size: 14px; font-style: normal; font-weight: 400; text-align: start; text-indent: 0px; white-space: normal;">You can add<span> </span><strong style=" font-weight: 700;">multiple actions</strong><span> </span>in Pabbly for a single trigger.</p><p style=" margin: 0px 0px 10px; font-family: Inter; font-size: 14px; font-style: normal; font-weight: 400; text-align: start; text-indent: 0px; white-space: normal;">Use<span> </span><strong style=" font-weight: 700;">filters</strong><span> </span>in Pabbly to route actions based on conditions (e.g., only for paid courses).</p></section>
With this integration in place, you can streamline your workflows, reduce manual effort, and create a seamless learning experience automatically.

Check out the KB article **'**[**How to Set Up BrainCert Action Events Using Pabbly Connect**](https://support.braincert.com/kb/article/260/how-to-set-up-braincert-action-events-using-pabbly-connect "https://support.braincert.com/kb/article/260/how-to-set-up-braincert-action-events-using-pabbly-connect")**'** to learn how to configure Action Events.

# How to Set Up BrainCert Trigger Events with Flowmattic

Flowmattic makes it easy to automate your training workflows by connecting **BrainCert** with external tools like **Google Sheets**.

In this article, you’ll learn how to integrate BrainCert with Flowmattic and automate your workflows using **triggers**.
<section class="info-box">Follow this guide to set up <a class="e-rte-anchor" href="https://support.braincert.com/kb/article/264/how-to-set-up-braincert-actions-with-flowmattic" title="https://support.braincert.com/kb/article/264/how-to-set-up-braincert-actions-with-flowmattic" target="_blank" aria-label="Open in new window" rel="noopener noreferrer">Flowmattic actions</a></section>
For our example, we’ll connect BrainCert with Google Sheets so that every new course enrollment automatically gets logged in a spreadsheet.

##   

## Example Use Case:

**Automatically send new BrainCert course enrollment data to Google Sheets.**

Whenever a student enrolls in a course in BrainCert, Flowmattic will instantly log their details (Name, Email, Course Title) into your Google Sheet.  

This helps you keep an up-to-date list of enrollments without any manual work.

## **BrainCert – Flowmattic Triggers List**

These triggers help automate workflows by instantly sending real-time data from BrainCert to Flowmattic whenever key actions happen, like user creation, enrollments, or course updates. This reduces manual work and keeps your connected apps (like CRMs, spreadsheets, or email tools) always up to date.

| **#** | **Topics** | **Triggers** |
| --- | --- | --- |
| 1 | User Created | Triggers when a new user account is created. |
| 2 | Group Created | Triggers when a new group is created. |
| 3 | Course Created | Triggers when a new course is created. |
| 4 | Course Bundle Created | Triggers when a new course bundle is created. |
| 5 | Test Created | Triggers when a new test is created. |
| 6 | Live Class Created | Triggers when a new live class is created. |
| 7 | User Updated | Triggers when a user profile is updated. |
| 8 | Course Updated | Triggers when a course is updated. |
| 9 | Course Bundle Updated | Triggers when a course bundle is updated. |
| 10 | Test Updated | Triggers when a test is updated. |
| 11 | Live Class Updated | Triggers when a new product is created. |
| 12 | Product Created | Triggers when a new product is created. |
| 13 | User Deleted | Triggers when a user account is deleted. |
| 14 | Course Deleted | Triggers when a course is deleted. |
| 15 | Course Bundle Deleted | Triggers when a course bundle is deleted. |
| 16 | Test Deleted | Triggers when a test is deleted. |
| 17 | Live Class Deleted | Triggers when a live class is deleted. |
| 18 | Product Deleted | Triggers when a product is deleted. |
| 19 | Course Enrollment | Triggers when a user enrolls in a course. |
| 20 | Test Enrollment | Triggers when a user enrolls in a test. |
| 21 | Live Class Enrollment | Triggers when a user enrolls in a live class. |
| 22 | Course Completed | Triggers when a user completes a course. |
| 23 | Test Completed | Triggers when a user completes a test. |
| 24 | New Sale | Triggers when a new sale is made. |

##   

## Part 1: Connect Flowmattic with BrainCert

## Step 1: Open Flowmattic Dashboard

Go to [**Flowmattic Dashboard**](https://tryflowmattic.work/1Wz4xnrX/wp-admin/). Click on Flowmatic --&gt; Connects and then click '**Connect Integration**'.

![1](https://support.braincert.com/kb/attachment/article/263/inline?token=eyJhbGciOiJodHRwOi8vd3d3LnczLm9yZy8yMDAxLzA0L3htbGRzaWctbW9yZSNobWFjLXNoYTI1NiIsInR5cCI6IkpXVCJ9.eyJpZCI6IjY5NDUiLCJvcmdpZCI6IjE2MDMiLCJpc3MiOiJzdXBwb3J0LmJyYWluY2VydC5jb20ifQ.RqVYfz8-ZhmY5_Te-WSXOM5SgBIRH0BvbbxbxzhQ0AQ)

##   

## Step 2: Select BrainCert

In the search field, type '**BrainCert'** and click on the BrainCert logo.

![2](https://support.braincert.com/kb/attachment/article/263/inline?token=eyJhbGciOiJodHRwOi8vd3d3LnczLm9yZy8yMDAxLzA0L3htbGRzaWctbW9yZSNobWFjLXNoYTI1NiIsInR5cCI6IkpXVCJ9.eyJpZCI6IjY5NDQiLCJvcmdpZCI6IjE2MDMiLCJpc3MiOiJzdXBwb3J0LmJyYWluY2VydC5jb20ifQ.mA5S1-munA_AHmcaErQQSbwhiRRcW93A7sVAXdEpL08)

##   

## Step 3: Enter API Key

Enter your '**BrainCert API Key'** (found in your BrainCert account under API settings).

![3](https://support.braincert.com/kb/attachment/article/263/inline?token=eyJhbGciOiJodHRwOi8vd3d3LnczLm9yZy8yMDAxLzA0L3htbGRzaWctbW9yZSNobWFjLXNoYTI1NiIsInR5cCI6IkpXVCJ9.eyJpZCI6IjY5NjIiLCJvcmdpZCI6IjE2MDMiLCJpc3MiOiJzdXBwb3J0LmJyYWluY2VydC5jb20ifQ.BF3G0hO7cKyZLJ3BNRta2dDG-6DrNAMlp-hE2l3-_es)

##   

## Step 4: Get API Key from BrainCert

Go to your BrainCert Dashboard → **Global Settings** → **Extensions.** Scroll to '**Flowmattic**'. Toggle the button '**ON**' and click '**Save**'. Now, copy the '**API Key**' from this field.

![5](https://support.braincert.com/kb/attachment/article/263/inline?token=eyJhbGciOiJodHRwOi8vd3d3LnczLm9yZy8yMDAxLzA0L3htbGRzaWctbW9yZSNobWFjLXNoYTI1NiIsInR5cCI6IkpXVCJ9.eyJpZCI6IjY5NjMiLCJvcmdpZCI6IjE2MDMiLCJpc3MiOiJzdXBwb3J0LmJyYWluY2VydC5jb20ifQ.XhWLw00wquQIxs3j6tI2xTT9Nxc2geMZIc8BuvjtuVc)

##   

## Step 5: Paste API Key in Flowmattic

Return to Flowmattic, paste the '**API key**' into the BrainCert connection field, and click '**Save Connect'**.

![6](https://support.braincert.com/kb/attachment/article/263/inline?token=eyJhbGciOiJodHRwOi8vd3d3LnczLm9yZy8yMDAxLzA0L3htbGRzaWctbW9yZSNobWFjLXNoYTI1NiIsInR5cCI6IkpXVCJ9.eyJpZCI6IjY5NjUiLCJvcmdpZCI6IjE2MDMiLCJpc3MiOiJzdXBwb3J0LmJyYWluY2VydC5jb20ifQ.m1TFaeYxO7CAHd2EBOATOtK8GJrBe5I9-2dgb3dwtEY)

##   

## Step 6: Verify Connection

Once saved, BrainCert will appear under **Active Connections** in Flowmattic.

![7](https://support.braincert.com/kb/attachment/article/263/inline?token=eyJhbGciOiJodHRwOi8vd3d3LnczLm9yZy8yMDAxLzA0L3htbGRzaWctbW9yZSNobWFjLXNoYTI1NiIsInR5cCI6IkpXVCJ9.eyJpZCI6IjY5NjYiLCJvcmdpZCI6IjE2MDMiLCJpc3MiOiJzdXBwb3J0LmJyYWluY2VydC5jb20ifQ.1Qr-IghK7Re1JttgHF0h-hn2nSn0hM2p28gGPFbknPQ)

##   

## Part 2: Connect Flowmattic with Google Sheets  

## Step 7: Start Google Sheets Connection

In Flowmattic, go to **Connects** → Search for **Google Sheets** → Click **Connect**.

![10](https://support.braincert.com/kb/attachment/article/263/inline?token=eyJhbGciOiJodHRwOi8vd3d3LnczLm9yZy8yMDAxLzA0L3htbGRzaWctbW9yZSNobWFjLXNoYTI1NiIsInR5cCI6IkpXVCJ9.eyJpZCI6IjY5NjciLCJvcmdpZCI6IjE2MDMiLCJpc3MiOiJzdXBwb3J0LmJyYWluY2VydC5jb20ifQ.lNPJCExG9MAvYi2Oahk71rOeaGU-Ddl7wkQrIHk7Ebo)

##   

## Step 8: Create Google Cloud Project

1. **Go to Google Cloud Console**

    - Visit: [https://console.cloud.google.com/](https://console.cloud.google.com/)
    - Sign in with the same Google account you’ll use for Sheets.
2. **Create a New Project**

    - Click the project dropdown at the top → **New Project**.
    - Give it a name (e.g., *Flowmattic Sheets Integration*).
    - Click **Create**.
3. **Enable Google Sheets API**

Inside your new project, go to **APIs & Services**

![11](https://support.braincert.com/kb/attachment/article/263/inline?token=eyJhbGciOiJodHRwOi8vd3d3LnczLm9yZy8yMDAxLzA0L3htbGRzaWctbW9yZSNobWFjLXNoYTI1NiIsInR5cCI6IkpXVCJ9.eyJpZCI6IjY5NDgiLCJvcmdpZCI6IjE2MDMiLCJpc3MiOiJzdXBwb3J0LmJyYWluY2VydC5jb20ifQ.mhAAEsveR_P-zaoNkTF7G7rf2uIJ9DuJ9vQFEPgs-gw)

##   

## Step 9: Get Client ID & Client Secret

- Once created, Google will show you the Client ID and Client Secret.
- Copy them and paste into Flowmattic’s Google Sheets connection screen.

![13](https://support.braincert.com/kb/attachment/article/263/inline?token=eyJhbGciOiJodHRwOi8vd3d3LnczLm9yZy8yMDAxLzA0L3htbGRzaWctbW9yZSNobWFjLXNoYTI1NiIsInR5cCI6IkpXVCJ9.eyJpZCI6IjY5NDkiLCJvcmdpZCI6IjE2MDMiLCJpc3MiOiJzdXBwb3J0LmJyYWluY2VydC5jb20ifQ.wQB_k9VbUwOcSroRcf6sxA0n2aZGdk2nCH4ZPB97D_s)

##   

## Step 10: Authenticate Connection

After pasting, click '**Save Connect & Authenticate**' in Flowmattic.
<section class="info-box" style="text-align: start;"><span style=" font-family: Inter; font-size: 14px; font-style: normal; font-weight: 400; text-align: start; text-indent: 0px; white-space: normal; display: inline !important; float: none;">Your Google Sheets connection is now live.</span></section>
![14](https://support.braincert.com/kb/attachment/article/263/inline?token=eyJhbGciOiJodHRwOi8vd3d3LnczLm9yZy8yMDAxLzA0L3htbGRzaWctbW9yZSNobWFjLXNoYTI1NiIsInR5cCI6IkpXVCJ9.eyJpZCI6IjY5NTAiLCJvcmdpZCI6IjE2MDMiLCJpc3MiOiJzdXBwb3J0LmJyYWluY2VydC5jb20ifQ.s_3Ik62H0Rr8NIznJNWiXUQm6ueUnBw5EHt56KYpj1g)

##   

## Part 3: Create Automation in Flowmattic  

## Step 11: Add Webhook Trigger

In Flowmattic, go to **Automations** → Click **Create New Automation**.

Click on the '**Webhooks by Flowmattic**'

![17](https://support.braincert.com/kb/attachment/article/263/inline?token=eyJhbGciOiJodHRwOi8vd3d3LnczLm9yZy8yMDAxLzA0L3htbGRzaWctbW9yZSNobWFjLXNoYTI1NiIsInR5cCI6IkpXVCJ9.eyJpZCI6IjY5NTIiLCJvcmdpZCI6IjE2MDMiLCJpc3MiOiJzdXBwb3J0LmJyYWluY2VydC5jb20ifQ.GSywnJd3ebdkHr-89BUryGrQruvlE7y8w49dy9evRi0)

##   

## Step 12: Switch Trigger App to BrainCert

Click the Change button → Search for '**BrainCert**' → Select it.

![18](https://support.braincert.com/kb/attachment/article/263/inline?token=eyJhbGciOiJodHRwOi8vd3d3LnczLm9yZy8yMDAxLzA0L3htbGRzaWctbW9yZSNobWFjLXNoYTI1NiIsInR5cCI6IkpXVCJ9.eyJpZCI6IjY5NTMiLCJvcmdpZCI6IjE2MDMiLCJpc3MiOiJzdXBwb3J0LmJyYWluY2VydC5jb20ifQ.q-XQiTaS_LZio9szrpPlKZMGZkvnc6xYYYJRcbte8-4)

##   

## Step 13: Select Trigger Event

Choose '**Course Enrollment'** as the trigger event → Click '**Continue'**.

![19](https://support.braincert.com/kb/attachment/article/263/inline?token=eyJhbGciOiJodHRwOi8vd3d3LnczLm9yZy8yMDAxLzA0L3htbGRzaWctbW9yZSNobWFjLXNoYTI1NiIsInR5cCI6IkpXVCJ9.eyJpZCI6IjY5NTQiLCJvcmdpZCI6IjE2MDMiLCJpc3MiOiJzdXBwb3J0LmJyYWluY2VydC5jb20ifQ.1DQcm0S03jvsdHwy-T1SSWySQN3Dk-BVePvNKsNoe1o)

##   

## Step 14: Copy Webhook URL

Flowmattic will generate a '**Webhook URL'**. Copy it.

![20](https://support.braincert.com/kb/attachment/article/263/inline?token=eyJhbGciOiJodHRwOi8vd3d3LnczLm9yZy8yMDAxLzA0L3htbGRzaWctbW9yZSNobWFjLXNoYTI1NiIsInR5cCI6IkpXVCJ9.eyJpZCI6IjY5NTUiLCJvcmdpZCI6IjE2MDMiLCJpc3MiOiJzdXBwb3J0LmJyYWluY2VydC5jb20ifQ.tUZXefGnlhmBpjxW5GPfJUYvLukgGS5US3QHnZTk9es)

##   

## Step 15: Add Webhook in BrainCert

- Go to BrainCert Dashboard → **Global Settings** → **Webhooks**.
- Paste the copied '**Webhook URL**' into the required field and click '**Send Test**'.

![21](https://support.braincert.com/kb/attachment/article/263/inline?token=eyJhbGciOiJodHRwOi8vd3d3LnczLm9yZy8yMDAxLzA0L3htbGRzaWctbW9yZSNobWFjLXNoYTI1NiIsInR5cCI6IkpXVCJ9.eyJpZCI6IjY5NTYiLCJvcmdpZCI6IjE2MDMiLCJpc3MiOiJzdXBwb3J0LmJyYWluY2VydC5jb20ifQ.rJMujJZegacu1cXs41umkbay3AzTzg3xAglRMCtO24w)

##   

## Step 16: Confirm Trigger in Flowmattic

Return to Flowmattic → Click '**Use Selected Response'** → Click '**Continue'**.

![23](https://support.braincert.com/kb/attachment/article/263/inline?token=eyJhbGciOiJodHRwOi8vd3d3LnczLm9yZy8yMDAxLzA0L3htbGRzaWctbW9yZSNobWFjLXNoYTI1NiIsInR5cCI6IkpXVCJ9.eyJpZCI6IjY5NTciLCJvcmdpZCI6IjE2MDMiLCJpc3MiOiJzdXBwb3J0LmJyYWluY2VydC5jb20ifQ.nw3R-5YreoAivs4tUH4TfbRV-xC4K82JVZOBUCXZSz0)

##   

## Part 4: Add Action to Send Data to Google Sheets  

## Step 17: Add Google Sheets Action

Click the '**+'** icon → Choose '**Google Sheets'** → Select '**Add a Row'**.

![26](https://support.braincert.com/kb/attachment/article/263/inline?token=eyJhbGciOiJodHRwOi8vd3d3LnczLm9yZy8yMDAxLzA0L3htbGRzaWctbW9yZSNobWFjLXNoYTI1NiIsInR5cCI6IkpXVCJ9.eyJpZCI6IjY5NTgiLCJvcmdpZCI6IjE2MDMiLCJpc3MiOiJzdXBwb3J0LmJyYWluY2VydC5jb20ifQ.4PNxxrx0FTo6V680krdBJHfT9FUeQ5cryAjfkR8F43U)

##   

## Step 18: Map BrainCert Fields to Sheet

Map BrainCert fields → Google Sheets columns, such as:

- - **Name** → Column A
    - **Email** → Column B
    - **Course Title** → Column C

and click '**Continue**'

![28](https://support.braincert.com/kb/attachment/article/263/inline?token=eyJhbGciOiJodHRwOi8vd3d3LnczLm9yZy8yMDAxLzA0L3htbGRzaWctbW9yZSNobWFjLXNoYTI1NiIsInR5cCI6IkpXVCJ9.eyJpZCI6IjY5NTkiLCJvcmdpZCI6IjE2MDMiLCJpc3MiOiJzdXBwb3J0LmJyYWluY2VydC5jb20ifQ.8epbGu2uGpwL3YAcaVLXaVkP1IfHNj0wUkTKpL6-1mc)

##   

## Part 5: Test & Activate Automation  

## Step 19: Run a Test

Run a test by enrolling a dummy user in BrainCert. Check your Google Sheet → the new enrollment should appear automatically.

If successful, click Save Automation and switch it ON.

![30](https://support.braincert.com/kb/attachment/article/263/inline?token=eyJhbGciOiJodHRwOi8vd3d3LnczLm9yZy8yMDAxLzA0L3htbGRzaWctbW9yZSNobWFjLXNoYTI1NiIsInR5cCI6IkpXVCJ9.eyJpZCI6IjY5NjAiLCJvcmdpZCI6IjE2MDMiLCJpc3MiOiJzdXBwb3J0LmJyYWluY2VydC5jb20ifQ.J0rdE36Csxd4f6kUkIYIo2KbeQkxAxJ95gDqElHC5GA)

<section class="info-box"><span style=" font-family: Inter; font-size: 14px; font-style: normal; font-weight: 400; text-align: start; text-indent: 0px; white-space: normal; display: inline !important; float: none;">Your<span> </span></span><strong data-start="2835" data-end="2871" style=" font-weight: 700; font-family: Inter; font-size: 14px; font-style: normal; text-align: start; text-indent: 0px; white-space: normal;">BrainCert–Flowmattic integration</strong><span style=" font-family: Inter; font-size: 14px; font-style: normal; font-weight: 400; text-align: start; text-indent: 0px; white-space: normal; display: inline !important; float: none;"><span> </span>is now active.</span><br></section>
From now on, every new course enrollment in BrainCert will automatically update your Google Sheet, helping you track learners in real time.

## Notes & Recommendations

- Make sure the **redirect URI** in Google Cloud matches Flowmattic exactly.
- If your Google Sheets test fails, re-check your API credentials and authentication.
- Use **Conditions** in Flowmattic to filter enrollments (e.g., by course name, payment status).

# A Guide to Use Media Player to Stream Audio and Video Files in Virtual Classroom

This article will guide you through the steps to use the built-in media player to stream video and audio in a Virtual Classroom.

##   

## **Step 1:** 

Start your classroom session and select the '**Video Tool**' option from the bottom right.

![](https://support.braincert.com/kb/attachment/article/101/inline?token=eyJhbGciOiJodHRwOi8vd3d3LnczLm9yZy8yMDAxLzA0L3htbGRzaWctbW9yZSNobWFjLXNoYTI1NiIsInR5cCI6IkpXVCJ9.eyJpZCI6IjQ0MTAiLCJvcmdpZCI6IjE2MDMiLCJpc3MiOiJzdXBwb3J0LmJyYWluY2VydC5jb20ifQ.-MklqCbSyfy5d0qGKDfMFCQM65Ab9MJdbtbZi4Hnxxw)

##   

## **Step 2:**

You can either choose a video/audio from the ones in your content library or choose to play a video from YouTube or Vimeo.

In this example we've shown playing a video from YouTube. To play the video copy the video link & paste it in the media player to play it.

![](https://support.braincert.com/kb/attachment/article/101/inline?token=eyJhbGciOiJodHRwOi8vd3d3LnczLm9yZy8yMDAxLzA0L3htbGRzaWctbW9yZSNobWFjLXNoYTI1NiIsInR5cCI6IkpXVCJ9.eyJpZCI6IjQ0MTEiLCJvcmdpZCI6IjE2MDMiLCJpc3MiOiJzdXBwb3J0LmJyYWluY2VydC5jb20ifQ.aRDto1B5fMtHGLiTM4uSvhkEgMAO9qCIufWmN3WmDCU)

![](https://support.braincert.com/kb/attachment/article/101/inline?token=eyJhbGciOiJodHRwOi8vd3d3LnczLm9yZy8yMDAxLzA0L3htbGRzaWctbW9yZSNobWFjLXNoYTI1NiIsInR5cCI6IkpXVCJ9.eyJpZCI6IjQ0MTIiLCJvcmdpZCI6IjE2MDMiLCJpc3MiOiJzdXBwb3J0LmJyYWluY2VydC5jb20ifQ.t5uGI35JZr2HXjs5eQ9NRvFalpbtYk5gv1MXj955uIw)

We hope you found this article helpful.

# Tracking Learner Progress in Course Reports

With the Course Report feature in BrainCert, instructors can access complete information to track learner progress. Instructors with admin access can also get information about their courses including the number of learners who have enrolled, number of learners who have completed a course, the last date they accessed the course, and other relevant information.

This article outlines how instructors can access course reports and track learner progress.

##   
  
**Step 1:**

Log in to your BrainCert account, navigate to '**Reports and Analytics**' and open '**Courses**'.

![1.png](https://support.braincert.com/kb/attachment/article/75/inline?token=eyJhbGciOiJodHRwOi8vd3d3LnczLm9yZy8yMDAxLzA0L3htbGRzaWctbW9yZSNobWFjLXNoYTI1NiIsInR5cCI6IkpXVCJ9.eyJpZCI6IjUxMTciLCJvcmdpZCI6IjE2MDMiLCJpc3MiOiJzdXBwb3J0LmJyYWluY2VydC5jb20ifQ.XAnAFHu6YVwoPuf_OQlDVU6OpQ_SrjjTqYKNCRlEdlc)

## **Step 2:**

Once you click Reports, you will be redirected to the course '**Report**' page.

**i**. By default, the Course Report page will show you complete information of All user groups.

![3.png](https://support.braincert.com/kb/attachment/article/75/inline?token=eyJhbGciOiJodHRwOi8vd3d3LnczLm9yZy8yMDAxLzA0L3htbGRzaWctbW9yZSNobWFjLXNoYTI1NiIsInR5cCI6IkpXVCJ9.eyJpZCI6IjUxMTgiLCJvcmdpZCI6IjE2MDMiLCJpc3MiOiJzdXBwb3J0LmJyYWluY2VydC5jb20ifQ.xl1VLa-64ccg9WrW7d_p8i-FzuiXABuKKM-pMOEUSHg)

**ii**. To generate reports based on groups, click on the '**All user groups**', and choose the group from the dropdown menu.

![3.png](https://support.braincert.com/kb/attachment/article/75/inline?token=eyJhbGciOiJodHRwOi8vd3d3LnczLm9yZy8yMDAxLzA0L3htbGRzaWctbW9yZSNobWFjLXNoYTI1NiIsInR5cCI6IkpXVCJ9.eyJpZCI6IjUxMTkiLCJvcmdpZCI6IjE2MDMiLCJpc3MiOiJzdXBwb3J0LmJyYWluY2VydC5jb20ifQ.3OWTZunBQG2vefAUg3-KnXmEc1FAJUipog0-HCvBRy0)

For instructors who wish to generate custom reports, we also have a “Custom Report” feature on BrainCert.

Still have doubts? Feel free to reach out to us at support@braincert.com

Open the link to learn the '[Steps to Generate Custom Course Report](https://support.braincert.com/agent/kb/106 "https://support.braincert.com/agent/kb/106")'.

# Onboarding Users to the Unified Training Platform

BrainCert uses a powerful user management engine to manage users. This article will guide you through the steps to create and onboard new users on the BrainCert training platform.

<iframe src="https://player.vimeo.com/video/977861405?title=0&amp;byline=0&amp;portrait=0&amp;badge=0&amp;autopause=0&amp;player_id=0&amp;app_id=58479" frameborder="0" allow="autoplay; fullscreen; picture-in-picture; clipboard-write" style="position:absolute;top:0;left:0;width:100%;height:100%;" title="Onboarding Users to the Unified Training Platform">&ZeroWidthSpace;</iframe>

## **Step 1:**

Login to your BrainCert training platform admin account with respective account credentials. Navigate to the '**People**' and choose '**Users**' from the dropdown menu.

## ![1.png](https://support.braincert.com/kb/attachment/article/61/inline?token=eyJhbGciOiJodHRwOi8vd3d3LnczLm9yZy8yMDAxLzA0L3htbGRzaWctbW9yZSNobWFjLXNoYTI1NiIsInR5cCI6IkpXVCJ9.eyJpZCI6IjUxMDYiLCJvcmdpZCI6IjE2MDMiLCJpc3MiOiJzdXBwb3J0LmJyYWluY2VydC5jb20ifQ.slEeP2rRuLF6_o5HGzta3KUCB-jBGy1MJDnOrrWNgY0)**Step 2:**

Click on '**Create New User'** to onboard users.

![2.png](https://support.braincert.com/kb/attachment/article/61/inline?token=eyJhbGciOiJodHRwOi8vd3d3LnczLm9yZy8yMDAxLzA0L3htbGRzaWctbW9yZSNobWFjLXNoYTI1NiIsInR5cCI6IkpXVCJ9.eyJpZCI6IjUxMDciLCJvcmdpZCI6IjE2MDMiLCJpc3MiOiJzdXBwb3J0LmJyYWluY2VydC5jb20ifQ.clbWsPaXneZWetnYa1F3l15gmelvQBMqdItZkVyzIiE)

## **Step 3:** 

Add the User details, Password & User Type and click '**Save'**.

![3.png](https://support.braincert.com/kb/attachment/article/61/inline?token=eyJhbGciOiJodHRwOi8vd3d3LnczLm9yZy8yMDAxLzA0L3htbGRzaWctbW9yZSNobWFjLXNoYTI1NiIsInR5cCI6IkpXVCJ9.eyJpZCI6IjUxMDgiLCJvcmdpZCI6IjE2MDMiLCJpc3MiOiJzdXBwb3J0LmJyYWluY2VydC5jb20ifQ.rEn5P29o3yrLjNeWqbHwyzjaPprEkHdbWMDwzX2OZ3E)

## **Step 4:**

An Email invitation will be sent to the user's email. Guide the user to click on the invite link to accept the invitation.

## **Step 5:** 

The user has been successfully onboarded.

![4.png](https://support.braincert.com/kb/attachment/article/61/inline?token=eyJhbGciOiJodHRwOi8vd3d3LnczLm9yZy8yMDAxLzA0L3htbGRzaWctbW9yZSNobWFjLXNoYTI1NiIsInR5cCI6IkpXVCJ9.eyJpZCI6IjUxMTAiLCJvcmdpZCI6IjE2MDMiLCJpc3MiOiJzdXBwb3J0LmJyYWluY2VydC5jb20ifQ.f48tacF1IqlISuwXV0HWJkUSZsd0eXQJR24lWbXj_es)

Hope this article is useful.

# How to Setup your LMS Online Shop

An online shop lets you set your address, customize shipping rates, and more. This article will guide you in using our LMS platform's online store, where you can easily find various items organized neatly.

<iframe src="https://player.vimeo.com/video/1004466301?h=f1313021cc&amp;title=0&amp;byline=0&amp;portrait=0&amp;badge=0&amp;autopause=0&amp;player_id=0&amp;app_id=58479" frameborder="0" allow="autoplay; fullscreen; picture-in-picture; clipboard-write" style="position:absolute;top:0;left:0;width:100%;height:100%;" title="How to Setup your LMS Online Shop">&ZeroWidthSpace;</iframe>

##   
﻿﻿**Step 1:**

Log in to the platform and click on '**Global Settings**'. Open '**Online Shop'** to customize.

**![1.png](https://support.braincert.com/kb/attachment/article/178/inline?token=eyJhbGciOiJodHRwOi8vd3d3LnczLm9yZy8yMDAxLzA0L3htbGRzaWctbW9yZSNobWFjLXNoYTI1NiIsInR5cCI6IkpXVCJ9.eyJpZCI6IjQ5NTUiLCJvcmdpZCI6IjE2MDMiLCJpc3MiOiJzdXBwb3J0LmJyYWluY2VydC5jb20ifQ.2yputGtPgNAn1i5vg20K57GLVexzOC_DXZoruF4sV5g)**

## **﻿﻿Step 2:**

To configure the '**General**' settings, click on the '**Edit**' option found below.

![2.png](https://support.braincert.com/kb/attachment/article/178/inline?token=eyJhbGciOiJodHRwOi8vd3d3LnczLm9yZy8yMDAxLzA0L3htbGRzaWctbW9yZSNobWFjLXNoYTI1NiIsInR5cCI6IkpXVCJ9.eyJpZCI6IjQ5NTciLCJvcmdpZCI6IjE2MDMiLCJpc3MiOiJzdXBwb3J0LmJyYWluY2VydC5jb20ifQ.z5JpuLGQU58mi7I1HDEW_iJGm4bX6jvdIGkQsh2Fths)

## **Step 3:﻿**
Enter your company's general information, including name, address, contact number, etc., and click '**Save**' to confirm the changes.

**![3.png](https://support.braincert.com/kb/attachment/article/178/inline?token=eyJhbGciOiJodHRwOi8vd3d3LnczLm9yZy8yMDAxLzA0L3htbGRzaWctbW9yZSNobWFjLXNoYTI1NiIsInR5cCI6IkpXVCJ9.eyJpZCI6IjQ5NTgiLCJvcmdpZCI6IjE2MDMiLCJpc3MiOiJzdXBwb3J0LmJyYWluY2VydC5jb20ifQ.0YoeZ4855cXn1tfnWuPj0OvC1kFCis7DoPRPliqDFc0)**

****

****

## **Step 4:﻿﻿**

To edit the '**Pickup**' details, click on the '**Edit**' icon and provide the necessary information.

**![4.png](https://support.braincert.com/kb/attachment/article/178/inline?token=eyJhbGciOiJodHRwOi8vd3d3LnczLm9yZy8yMDAxLzA0L3htbGRzaWctbW9yZSNobWFjLXNoYTI1NiIsInR5cCI6IkpXVCJ9.eyJpZCI6IjQ5NjAiLCJvcmdpZCI6IjE2MDMiLCJpc3MiOiJzdXBwb3J0LmJyYWluY2VydC5jb20ifQ.POPda3P_JDHKiPMiH4WXrzc-R9MRCB_u7EIQfeOdGy4)**

****

****

## **Step 5:**

Choose the Shipping Rate between **'Flat rate**' and '**Charge per product**'. If Flat Rate is selected, use the '**Edit**' option to set the shipping rate.

**![5.png](https://support.braincert.com/kb/attachment/article/178/inline?token=eyJhbGciOiJodHRwOi8vd3d3LnczLm9yZy8yMDAxLzA0L3htbGRzaWctbW9yZSNobWFjLXNoYTI1NiIsInR5cCI6IkpXVCJ9.eyJpZCI6IjQ5NjQiLCJvcmdpZCI6IjE2MDMiLCJpc3MiOiJzdXBwb3J0LmJyYWluY2VydC5jb20ifQ.VW1rZdZqFHy5BhJd65ev1snS9ROd2KBBG0HVGNyar-Q)**

**﻿﻿**

## **Step 6:**

**Discount Coupons** - Toggle the switch on if you want to create discount coupons or offer special promotional sales.

**Product Categories** - Toggle the switch on if you want to organize and categorize your products.

**![6.png](https://support.braincert.com/kb/attachment/article/178/inline?token=eyJhbGciOiJodHRwOi8vd3d3LnczLm9yZy8yMDAxLzA0L3htbGRzaWctbW9yZSNobWFjLXNoYTI1NiIsInR5cCI6IkpXVCJ9.eyJpZCI6IjQ5NjMiLCJvcmdpZCI6IjE2MDMiLCJpc3MiOiJzdXBwb3J0LmJyYWluY2VydC5jb20ifQ.p8fST0cE6kMkeFToHthaw5TSqam6YorDBKna6si5Dgc)**

Your online shop is all set to use.

# Enhancing Compliance and Learning Outcomes in LMS with Auto-Pause Video

With switching tabs constantly, learners may quickly lose focus on the video.

To deal with it, an '**auto-pause video**' feature is introduced, that stops the video playback when learners switch to a different tab. The learners must resume and watch the entire video to complete the course. Here we go!                                                                                                                                                                                                                                                                                                       ****

## **Step 1:**

Navigate to '**Products**' and select '**Courses**'. Now, open '**Manage Courses**' from the dropdown menu.

![1.png](https://support.braincert.com/kb/attachment/article/164/inline?token=eyJhbGciOiJodHRwOi8vd3d3LnczLm9yZy8yMDAxLzA0L3htbGRzaWctbW9yZSNobWFjLXNoYTI1NiIsInR5cCI6IkpXVCJ9.eyJpZCI6IjUyMzciLCJvcmdpZCI6IjE2MDMiLCJpc3MiOiJzdXBwb3J0LmJyYWluY2VydC5jb20ifQ.CWIEVowYZhE1cazstoy8K3zclff3fRAjFlNMJ1a4aqg)

##   

## **Step 2:**

In the required course, click '**Options**,' and then select '**Curriculum**'.![2.png](https://support.braincert.com/kb/attachment/article/164/inline?token=eyJhbGciOiJodHRwOi8vd3d3LnczLm9yZy8yMDAxLzA0L3htbGRzaWctbW9yZSNobWFjLXNoYTI1NiIsInR5cCI6IkpXVCJ9.eyJpZCI6IjUyMzgiLCJvcmdpZCI6IjE2MDMiLCJpc3MiOiJzdXBwb3J0LmJyYWluY2VydC5jb20ifQ.PonMXiolK7rP6R9pvpia2sBCAgTpgLdEX7fEzMuAJ9A)

## **Step 3:**

Make sure to add the course video and then click on '**Lecture Completion Rule**'.

![Lecture.png](https://support.braincert.com/kb/attachment/article/164/inline?token=eyJhbGciOiJodHRwOi8vd3d3LnczLm9yZy8yMDAxLzA0L3htbGRzaWctbW9yZSNobWFjLXNoYTI1NiIsInR5cCI6IkpXVCJ9.eyJpZCI6IjU2NjQiLCJvcmdpZCI6IjE2MDMiLCJpc3MiOiJzdXBwb3J0LmJyYWluY2VydC5jb20ifQ.35hzhF-dRG2sIDSEee7rVLbP8epwIogclhrpduPhxfY)

## **Step 4:**

Enable '**Auto-pause video when changing tab**' and click on '**Save**'.

![4.png](https://support.braincert.com/kb/attachment/article/164/inline?token=eyJhbGciOiJodHRwOi8vd3d3LnczLm9yZy8yMDAxLzA0L3htbGRzaWctbW9yZSNobWFjLXNoYTI1NiIsInR5cCI6IkpXVCJ9.eyJpZCI6IjUyNDAiLCJvcmdpZCI6IjE2MDMiLCJpc3MiOiJzdXBwb3J0LmJyYWluY2VydC5jb20ifQ.9dsM3CtM5HOHE8JuiL7wxPvEFAqJ6uv_Jp4CklMjxmY)

##   
**Step 5:**

The video stops playing when the tab is switched. Remember to '**Resume**' the video to continue with the course video.

![5.jpg](https://support.braincert.com/kb/attachment/article/164/inline?token=eyJhbGciOiJodHRwOi8vd3d3LnczLm9yZy8yMDAxLzA0L3htbGRzaWctbW9yZSNobWFjLXNoYTI1NiIsInR5cCI6IkpXVCJ9.eyJpZCI6IjQ3MDkiLCJvcmdpZCI6IjE2MDMiLCJpc3MiOiJzdXBwb3J0LmJyYWluY2VydC5jb20ifQ.MzePVmz2rmzJ-jLYZeOkDYFuQXLSz7qL4WUhx-lDwcY)

## **Step 6:**

Next, to enable the sound, click on '**View sight information**' and select '**Site settings**'

![5.png](https://support.braincert.com/kb/attachment/article/164/inline?token=eyJhbGciOiJodHRwOi8vd3d3LnczLm9yZy8yMDAxLzA0L3htbGRzaWctbW9yZSNobWFjLXNoYTI1NiIsInR5cCI6IkpXVCJ9.eyJpZCI6IjUyNDEiLCJvcmdpZCI6IjE2MDMiLCJpc3MiOiJzdXBwb3J0LmJyYWluY2VydC5jb20ifQ.ApxAsJPVf69Tpac0AlBNyM1cMYEB6cxzter8Ts8fnB4)

## **Step 7:**

Click on the dropdown box parallel to '**Sound**' and choose '**Allow**'

![Screenshot_7.png](https://support.braincert.com/kb/attachment/article/164/inline?token=eyJhbGciOiJodHRwOi8vd3d3LnczLm9yZy8yMDAxLzA0L3htbGRzaWctbW9yZSNobWFjLXNoYTI1NiIsInR5cCI6IkpXVCJ9.eyJpZCI6IjQ3MTUiLCJvcmdpZCI6IjE2MDMiLCJpc3MiOiJzdXBwb3J0LmJyYWluY2VydC5jb20ifQ.SDPHRj8adLTSt_bPQaAfCGybFT8AYSs8R669ZY5qNJ8)

Hope this article is helpful.

# Using SAML 2.0 with Microsoft Active Directory in Azure: A Step-by-Step Guide

SAML 2.0 is a widely adopted standard for secure single sign-on (SSO) authentication and authorization. Integrating SAML 2.0 with Azure AD enables organizations to streamline access management and enhance security for their applications and services.

In this article, we will explore how to configure and use SAML 2.0 (Security Assertion Markup Language) with Microsoft Active Directory (AD) in Azure.

<section class="info-box">
  <span>
    <strong>Note</strong>: Single Sign-On (SSO) with SAML 2.0 is accessible in LMS Enterprise plans, including Silver, Gold, Premium, and Enterprise tiers. </span>
</section>

## 
  **Configure Azure Active Directory (AD) for SAML Integration**

## 
  **Step 1:**

Sign in to the Azure portal ( [https://portal.azure.com](https://portal.azure.com "https://portal.azure.com")) using your administrator account. Navigate to ' 
    **Enterprise applications**'.

![1.png](https://support.braincert.com/kb/attachment/article/206/inline?token=eyJhbGciOiJodHRwOi8vd3d3LnczLm9yZy8yMDAxLzA0L3htbGRzaWctbW9yZSNobWFjLXNoYTI1NiIsInR5cCI6IkpXVCJ9.eyJpZCI6IjU3NjMiLCJvcmdpZCI6IjE2MDMiLCJpc3MiOiJzdXBwb3J0LmJyYWluY2VydC5jb20ifQ.wX2j8j_dpdSSa9qvcRqF1OnZVfUYG6rVkCedLnn2l7c)

## 
  **Step 2:** 

Click on the ' **New Application**' button.

![2.png](https://support.braincert.com/kb/attachment/article/206/inline?token=eyJhbGciOiJodHRwOi8vd3d3LnczLm9yZy8yMDAxLzA0L3htbGRzaWctbW9yZSNobWFjLXNoYTI1NiIsInR5cCI6IkpXVCJ9.eyJpZCI6IjU3NjYiLCJvcmdpZCI6IjE2MDMiLCJpc3MiOiJzdXBwb3J0LmJyYWluY2VydC5jb20ifQ.I--OFPW6mx1RaXMvdtF7AozITXXjmKvpSYDuVmt5dQQ)

## 
  **Step 3:** 

Search for BrainCert in the gallery. If it is unavailable, you can create an application by clicking on ' **Create your Own Application**' to create a custom SAML 2.0 integration.

![3.png](https://support.braincert.com/kb/attachment/article/206/inline?token=eyJhbGciOiJodHRwOi8vd3d3LnczLm9yZy8yMDAxLzA0L3htbGRzaWctbW9yZSNobWFjLXNoYTI1NiIsInR5cCI6IkpXVCJ9.eyJpZCI6IjU3NjUiLCJvcmdpZCI6IjE2MDMiLCJpc3MiOiJzdXBwb3J0LmJyYWluY2VydC5jb20ifQ.SrgAxRuPNIhJ2adISva74eY0MlpOe3zS25IOlRyO9hA)

## 
  **Step 4:**

Enter ' **BrainCert**' in the field and click the ' **Create**' button.

![4.png](https://support.braincert.com/kb/attachment/article/206/inline?token=eyJhbGciOiJodHRwOi8vd3d3LnczLm9yZy8yMDAxLzA0L3htbGRzaWctbW9yZSNobWFjLXNoYTI1NiIsInR5cCI6IkpXVCJ9.eyJpZCI6IjU3NjciLCJvcmdpZCI6IjE2MDMiLCJpc3MiOiJzdXBwb3J0LmJyYWluY2VydC5jb20ifQ.Nwa0IvfZnBYYdyvJtO-Zemq3FH7IQ8QCJv7t16tQ2Z0)

## 
  **Set Up SAML Integration in Azure AD**

**##       Step 5:**

The application is now created.

<section class="info-box">
    <div>
      <span>
        <strong>Note</strong>: Add an Icon for BrainCert (optional) </span>
    </div>
    <div>To make it easier for users to identify the BrainCert application, you can upload a custom icon in the Properties section of the BrainCert application setup in Azure AD.</div>
  </section>

![5.png](https://support.braincert.com/kb/attachment/article/206/inline?token=eyJhbGciOiJodHRwOi8vd3d3LnczLm9yZy8yMDAxLzA0L3htbGRzaWctbW9yZSNobWFjLXNoYTI1NiIsInR5cCI6IkpXVCJ9.eyJpZCI6IjU3NjgiLCJvcmdpZCI6IjE2MDMiLCJpc3MiOiJzdXBwb3J0LmJyYWluY2VydC5jb20ifQ.ZINu2LZr66UHgcJDMXyu0UEcKpAlVxnwtFp5-NkNHys)

## 

## 
  **Step 6:**

**In the newly created application, go to**  
  
    **Single sign-on**
  
  **.**

## 
  **![10.png](https://support.braincert.com/kb/attachment/article/206/inline?token=eyJhbGciOiJodHRwOi8vd3d3LnczLm9yZy8yMDAxLzA0L3htbGRzaWctbW9yZSNobWFjLXNoYTI1NiIsInR5cCI6IkpXVCJ9.eyJpZCI6IjU3NzAiLCJvcmdpZCI6IjE2MDMiLCJpc3MiOiJzdXBwb3J0LmJyYWluY2VydC5jb20ifQ.uW6yTaLmgIL-39N1yAdQy9qQtsdt-U8tjMin2NUFEkw)**  

  **Step 7:**

Select ' **SAML**' as a Single sign-on method.

![11.png](https://support.braincert.com/kb/attachment/article/206/inline?token=eyJhbGciOiJodHRwOi8vd3d3LnczLm9yZy8yMDAxLzA0L3htbGRzaWctbW9yZSNobWFjLXNoYTI1NiIsInR5cCI6IkpXVCJ9.eyJpZCI6IjU3NzEiLCJvcmdpZCI6IjE2MDMiLCJpc3MiOiJzdXBwb3J0LmJyYWluY2VydC5jb20ifQ.k7rCd0e7qMA87VMEfggeg_S6qCm8CFCmhKZlELfPGVo)

## 
  **Step 8:** 

Click on the ' **Edit**' option to edit the Basic SAML Configuration.

**![12.png](https://support.braincert.com/kb/attachment/article/206/inline?token=eyJhbGciOiJodHRwOi8vd3d3LnczLm9yZy8yMDAxLzA0L3htbGRzaWctbW9yZSNobWFjLXNoYTI1NiIsInR5cCI6IkpXVCJ9.eyJpZCI6IjU3NzIiLCJvcmdpZCI6IjE2MDMiLCJpc3MiOiJzdXBwb3J0LmJyYWluY2VydC5jb20ifQ.QPSZwKN7YPMDKU8NbmRymfnK_psyUXEtHRSQIfLjuk4)**

<section class="info-box">
    <span style=" font-family: Söhne, ui-sans-serif, system-ui, -apple-system, &quot;Segoe UI&quot;, Roboto, Ubuntu, Cantarell, &quot;Noto Sans&quot;, sans-serif, &quot;Helvetica Neue&quot;, Arial, &quot;Apple Color Emoji&quot;, &quot;Segoe UI Emoji&quot;, &quot;Segoe UI Symbol&quot;, &quot;Noto Color Emoji&quot;; font-size: 16px; font-style: normal; font-weight: 400; text-align: start; text-indent: 0px; white-space: pre-wrap; display: inline !important; float: none;">Obtain the SAML metadata file from BrainCert LMS, and then upload it to Azure AD. Also, map the necessary attributes (such as NameID and email) between Azure AD and BrainCert LMS.</span>
  </section>

## 
  **Configure Microsoft Active Directory for SAML Authentication**

## 
  **Step 9:**

Login to your BrainCert account and open ' **Extensions**' in ' **Global Settings**'.

**![6.png](https://support.braincert.com/kb/attachment/article/206/inline?token=eyJhbGciOiJodHRwOi8vd3d3LnczLm9yZy8yMDAxLzA0L3htbGRzaWctbW9yZSNobWFjLXNoYTI1NiIsInR5cCI6IkpXVCJ9.eyJpZCI6IjU3NzMiLCJvcmdpZCI6IjE2MDMiLCJpc3MiOiJzdXBwb3J0LmJyYWluY2VydC5jb20ifQ.F93_8m7voYBxIINPgfp90Cuip53QISnpma5X1yPNl3g)**

## 
  **Step 10:** 

Make sure to toggle the ' **SAML 2.0**' extension and click on the ' **Save**' button.

**![7.png](https://support.braincert.com/kb/attachment/article/206/inline?token=eyJhbGciOiJodHRwOi8vd3d3LnczLm9yZy8yMDAxLzA0L3htbGRzaWctbW9yZSNobWFjLXNoYTI1NiIsInR5cCI6IkpXVCJ9.eyJpZCI6IjU3NzQiLCJvcmdpZCI6IjE2MDMiLCJpc3MiOiJzdXBwb3J0LmJyYWluY2VydC5jb20ifQ.wc-pMOo94S6_pT1TJDVqgcjcUFDonp63l3LrdtqMpZ4)**

## 
  **Step 11:** 

**Now, open '    User Registration    ' in '    Global Settings    '.**

**![8.png](https://support.braincert.com/kb/attachment/article/206/inline?token=eyJhbGciOiJodHRwOi8vd3d3LnczLm9yZy8yMDAxLzA0L3htbGRzaWctbW9yZSNobWFjLXNoYTI1NiIsInR5cCI6IkpXVCJ9.eyJpZCI6IjU3NzUiLCJvcmdpZCI6IjE2MDMiLCJpc3MiOiJzdXBwb3J0LmJyYWluY2VydC5jb20ifQ.3D3JZzbKC5SdWBjpNAwuFRkqRR2-4cLVrzn64mEYrSs)**

## 

  **Step 12:**

Go to Single Sign-On (SSO) and copy the ' **Entity ID**', ' **Recipient**', ' **ACS Url'**, and ' **Logout URL**' from the Service Provider page.

**![9.png](https://support.braincert.com/kb/attachment/article/206/inline?token=eyJhbGciOiJodHRwOi8vd3d3LnczLm9yZy8yMDAxLzA0L3htbGRzaWctbW9yZSNobWFjLXNoYTI1NiIsInR5cCI6IkpXVCJ9.eyJpZCI6IjU3NzYiLCJvcmdpZCI6IjE2MDMiLCJpc3MiOiJzdXBwb3J0LmJyYWluY2VydC5jb20ifQ.RDCO6TrEpzLilO1MBdOhDqGElFuoPeSWFupAlSofoUU)**

## 
  **Step 13:** 

Return to Azure Active Directory, then navigate to Basic SAML Configuration. Paste the URL and ID copied from BrainCert LMS, and finally, click on the ' **Save**' icon.

**![13.png](https://support.braincert.com/kb/attachment/article/206/inline?token=eyJhbGciOiJodHRwOi8vd3d3LnczLm9yZy8yMDAxLzA0L3htbGRzaWctbW9yZSNobWFjLXNoYTI1NiIsInR5cCI6IkpXVCJ9.eyJpZCI6IjU3NzciLCJvcmdpZCI6IjE2MDMiLCJpc3MiOiJzdXBwb3J0LmJyYWluY2VydC5jb20ifQ.vVWDwDI40qhykgRmOfDBbNVOaczRlG6qUXTmf4krrJ0)**

## 

  **Test and Verify SAML Integration**

**##       Step 14:**

Navigate to 'Test Single Sign-On with Braincert' and click the ' **Test**' button.

![14.png](https://support.braincert.com/kb/attachment/article/206/inline?token=eyJhbGciOiJodHRwOi8vd3d3LnczLm9yZy8yMDAxLzA0L3htbGRzaWctbW9yZSNobWFjLXNoYTI1NiIsInR5cCI6IkpXVCJ9.eyJpZCI6IjU3NzgiLCJvcmdpZCI6IjE2MDMiLCJpc3MiOiJzdXBwb3J0LmJyYWluY2VydC5jb20ifQ.k4ZPTeg8BpmWfUDrDyOJbeQ01fomYqUgRkBUkami8iY)

## 
    **Step 15:** 

Click on the ' **Test Sign in**' button.

**![15.png](https://support.braincert.com/kb/attachment/article/206/inline?token=eyJhbGciOiJodHRwOi8vd3d3LnczLm9yZy8yMDAxLzA0L3htbGRzaWctbW9yZSNobWFjLXNoYTI1NiIsInR5cCI6IkpXVCJ9.eyJpZCI6IjU3NzkiLCJvcmdpZCI6IjE2MDMiLCJpc3MiOiJzdXBwb3J0LmJyYWluY2VydC5jb20ifQ.27UfxxQtrtnxXj9AnRDa2cZC7g8qB9H9bjDMfi-fZ40)**

Once authenticated, Azure AD will issue a SAML assertion to the application, granting access based on the user's identity and attributes. 

    ![16.png](https://support.braincert.com/kb/attachment/article/206/inline?token=eyJhbGciOiJodHRwOi8vd3d3LnczLm9yZy8yMDAxLzA0L3htbGRzaWctbW9yZSNobWFjLXNoYTI1NiIsInR5cCI6IkpXVCJ9.eyJpZCI6IjU3ODAiLCJvcmdpZCI6IjE2MDMiLCJpc3MiOiJzdXBwb3J0LmJyYWluY2VydC5jb20ifQ.ldTSDFGZQXoAmYLZtE1VzfTLlj1LcIVksw7RcWqsD0E)
  Integrating SAML 2.0 with Microsoft Active Directory in Azure provides a secure and seamless SSO experience for users accessing applications and services. This configuration enhances security by centralizing access management and simplifies user provisioning and authentication across your organization's cloud infrastructure.

# Enrolling Students in a Course or Test by Bypassing Payment Gateways

#### **Bypass the Payment Gateway**  

Bypassing the payment gateway involves accessing courses or tests by evading the payment process.

Bypassing the payment gateway can also be seen as useful in scenarios where users want to evaluate the quality and content of the courses or tests before committing to a payment.

This article will guide you to enroll students in a course or test by bypassing the payment gateway.

<iframe src="https://player.vimeo.com/video/1004425011?h=eb2b3e8308&amp;title=0&amp;byline=0&amp;portrait=0&amp;badge=0&amp;autopause=0&amp;player_id=0&amp;app_id=58479" frameborder="0" allow="autoplay; fullscreen; picture-in-picture; clipboard-write" style="position:absolute;top:0;left:0;width:100%;height:100%;" title="Enrolling Students in a Course by Bypassing Payment Gateways-">&ZeroWidthSpace;</iframe>

##   

## <u style="box-sizing: border-box;"><strong style="box-sizing: border-box; font-weight: 700;">Enrolling Students in a Course without Payment</strong></u>

## **Step 1:**

Log into your BrainCert  UTP and navigate to '**Products**', choose '**Courses**' from the dropdown menu. Then, click on '**Manage Courses**' to open it.

Click on the respective paid course to enroll and select '**Enroll Individual Students**' from the dropdown menu.

**Note:**

For free courses, you can't see the '**Full access after payment**' and '**Full access without payment**' options on enrolling new students page.

![1.png](https://support.braincert.com/kb/attachment/article/63/inline?token=eyJhbGciOiJodHRwOi8vd3d3LnczLm9yZy8yMDAxLzA0L3htbGRzaWctbW9yZSNobWFjLXNoYTI1NiIsInR5cCI6IkpXVCJ9.eyJpZCI6IjUzNjkiLCJvcmdpZCI6IjE2MDMiLCJpc3MiOiJzdXBwb3J0LmJyYWluY2VydC5jb20ifQ.xJCEEKF9lKPs7h3lAsX4ohSohHonwUSCq4At3gWO-lg)

## 

## **Step 2:**

On the '**Enroll Students**' page, selecting '**Full Access Without Payment**' allows you to grant temporary access to the course by specifying the number of days, or you can grant lifetime access by checking the corresponding box.

![2.png](https://support.braincert.com/kb/attachment/article/63/inline?token=eyJhbGciOiJodHRwOi8vd3d3LnczLm9yZy8yMDAxLzA0L3htbGRzaWctbW9yZSNobWFjLXNoYTI1NiIsInR5cCI6IkpXVCJ9.eyJpZCI6IjUzNzAiLCJvcmdpZCI6IjE2MDMiLCJpc3MiOiJzdXBwb3J0LmJyYWluY2VydC5jb20ifQ.jmUzA06rNqU_RePwhz0KwmLDCf9wCypwo832SyzD_W4)

##   

## **Step 3:**

Enter the email address in the '**To**' address box (one email address per line) or click '**Choose File**' to import email addresses from a CSV file.

Then, click the '**Send**' button to invite students to enroll in the course.

![3.png](https://support.braincert.com/kb/attachment/article/63/inline?token=eyJhbGciOiJodHRwOi8vd3d3LnczLm9yZy8yMDAxLzA0L3htbGRzaWctbW9yZSNobWFjLXNoYTI1NiIsInR5cCI6IkpXVCJ9.eyJpZCI6IjUzNzEiLCJvcmdpZCI6IjE2MDMiLCJpc3MiOiJzdXBwb3J0LmJyYWluY2VydC5jb20ifQ.tnV3yg4nSnTd4mEVm6CBRf0HmAXQD58YW0V1HUOrQkA)

##   

## <u style="box-sizing: border-box;"><strong style="box-sizing: border-box; font-weight: 700;">Enrolling Students in Tests without Payment</strong></u>

## **Step 1:**

Log into your BrainCert UTP and navigate to '**Assessments**' under '**Products**'.

Click on the desired paid test to enroll, then select **'Enroll Individual Students**' from the options.

**Note:**

For the free test, you can't see the '**Full access after payment**' and '**Full access without payment**' options on the enrolling new students page.
![4.png](https://support.braincert.com/kb/attachment/article/63/inline?token=eyJhbGciOiJodHRwOi8vd3d3LnczLm9yZy8yMDAxLzA0L3htbGRzaWctbW9yZSNobWFjLXNoYTI1NiIsInR5cCI6IkpXVCJ9.eyJpZCI6IjUzNzIiLCJvcmdpZCI6IjE2MDMiLCJpc3MiOiJzdXBwb3J0LmJyYWluY2VydC5jb20ifQ.ZBssfAs2AESH2pcxHhVGM6I96sPZjs736MRIDnWTfk8)

##   

## **Step 2:**

On the '**Enroll Students**' page, selecting '**Full Access Without Payment**' allows you to grant temporary access to the test by specifying the number of days, or you can grant lifetime access by checking the corresponding box.

## **![5.png](https://support.braincert.com/kb/attachment/article/63/inline?token=eyJhbGciOiJodHRwOi8vd3d3LnczLm9yZy8yMDAxLzA0L3htbGRzaWctbW9yZSNobWFjLXNoYTI1NiIsInR5cCI6IkpXVCJ9.eyJpZCI6IjUzNzQiLCJvcmdpZCI6IjE2MDMiLCJpc3MiOiJzdXBwb3J0LmJyYWluY2VydC5jb20ifQ.CbkS-TsYOwaVgb0myZ_Z2fme3XEUKC11-JEe83R9bbw)Step 3:**

Enter the email address in the '**To**' address box (one email address per line) or click '**Choose File**' to import email addresses from a CSV file.

Then, click the '**Send**' button to invite students to enroll in the course.

![6.png](https://support.braincert.com/kb/attachment/article/63/inline?token=eyJhbGciOiJodHRwOi8vd3d3LnczLm9yZy8yMDAxLzA0L3htbGRzaWctbW9yZSNobWFjLXNoYTI1NiIsInR5cCI6IkpXVCJ9.eyJpZCI6IjUzNzUiLCJvcmdpZCI6IjE2MDMiLCJpc3MiOiJzdXBwb3J0LmJyYWluY2VydC5jb20ifQ.QTqNtXm3Dvvb4mXOiUxvfw7aqpwVUr4Le-f8myrv3xg)

Hope this article assists you in enrolling students in a course or test without relying on a payment gateway.

# Steps to Add HTML5 (H5P.org) Contents to Your Course

This article is designed to guide you through the process of creating HTML5 content using resources from [H5P.org](https://h5p.org/ "https://h5p.org/") and seamlessly integrating it into your BrainCert courses. H5P.org is a renowned platform for producing interactive web content, and its compatibility with HTML5 ensures that your educational materials are not only engaging but also accessible and responsive across all devices and browsers.

Integrating H5P content into your BrainCert courses brings several benefits, enhancing both the teaching experience and the learning outcomes.

## **Step 1:**

Login to [h5p.com](https://h5p.com/ "https://h5p.com/")

## **Step 2:**

Click on '**Add Content**'.

![1.png](https://support.braincert.com/kb/attachment/article/13/inline?token=eyJhbGciOiJodHRwOi8vd3d3LnczLm9yZy8yMDAxLzA0L3htbGRzaWctbW9yZSNobWFjLXNoYTI1NiIsInR5cCI6IkpXVCJ9.eyJpZCI6IjUyMDMiLCJvcmdpZCI6IjE2MDMiLCJpc3MiOiJzdXBwb3J0LmJyYWluY2VydC5jb20ifQ.k1Z9UQIhT-bQOcDPwQzIiD-Dmih5J2q0ffGfwBxoj1E)

#####   

## **Step 3:**

Choose the content type that you want to convert to an HTML package. Note that h5p supports converting Video/Images/GIFs etc., to HTML5 Packages.

For the sake of understanding, we are selecting the content type '**Interactive Video'**.

![2.png](https://support.braincert.com/kb/attachment/article/13/inline?token=eyJhbGciOiJodHRwOi8vd3d3LnczLm9yZy8yMDAxLzA0L3htbGRzaWctbW9yZSNobWFjLXNoYTI1NiIsInR5cCI6IkpXVCJ9.eyJpZCI6IjUyMDUiLCJvcmdpZCI6IjE2MDMiLCJpc3MiOiJzdXBwb3J0LmJyYWluY2VydC5jb20ifQ.HhuWEQ5sf5CAjX-PquqGgcEUm1P9LadVQuS656enVbM)

## **Step 4:**

Add the video that you need to convert to an HTML package. To add a video click the '**Add a video**' option and upload the video from your local storage or paste the link to the video source.

In this example, we are using a video from YouTube. Once you are done uploading the video select '**Insert**'.

![3.png](https://support.braincert.com/kb/attachment/article/13/inline?token=eyJhbGciOiJodHRwOi8vd3d3LnczLm9yZy8yMDAxLzA0L3htbGRzaWctbW9yZSNobWFjLXNoYTI1NiIsInR5cCI6IkpXVCJ9.eyJpZCI6IjUyMDYiLCJvcmdpZCI6IjE2MDMiLCJpc3MiOiJzdXBwb3J0LmJyYWluY2VydC5jb20ifQ.IdWky722YuY83qpDRRHSP4YWE9pMvM_z7wzhZX3VSPM)

![4.png](https://support.braincert.com/kb/attachment/article/13/inline?token=eyJhbGciOiJodHRwOi8vd3d3LnczLm9yZy8yMDAxLzA0L3htbGRzaWctbW9yZSNobWFjLXNoYTI1NiIsInR5cCI6IkpXVCJ9.eyJpZCI6IjUyMDciLCJvcmdpZCI6IjE2MDMiLCJpc3MiOiJzdXBwb3J0LmJyYWluY2VydC5jb20ifQ.D2go8qVVj9cUVzy4umUPFaf-vRZJcBd3tEjeuRvJtLU)

## **Step 5:**

Now that you have added the video, navigate to '**Add Interactions**' and select the type of interaction you need.

In this example, we are selecting fill-in-the-blank questions. Once you are done with this step, navigate to '**Summary Task**', enter relevant information, and click '**Save**'.

![5.png](https://support.braincert.com/kb/attachment/article/13/inline?token=eyJhbGciOiJodHRwOi8vd3d3LnczLm9yZy8yMDAxLzA0L3htbGRzaWctbW9yZSNobWFjLXNoYTI1NiIsInR5cCI6IkpXVCJ9.eyJpZCI6IjUyMDgiLCJvcmdpZCI6IjE2MDMiLCJpc3MiOiJzdXBwb3J0LmJyYWluY2VydC5jb20ifQ.Kkt1dP11DtydWAnqijgFWQHk4dtLiLPs1exxtOvkXhA)

## **Step 6:**

Navigate to '**My Content**' and select '**Publish**' from the dropdown menu corresponding to the course you created.

![6.png](https://support.braincert.com/kb/attachment/article/13/inline?token=eyJhbGciOiJodHRwOi8vd3d3LnczLm9yZy8yMDAxLzA0L3htbGRzaWctbW9yZSNobWFjLXNoYTI1NiIsInR5cCI6IkpXVCJ9.eyJpZCI6IjUyMDkiLCJvcmdpZCI6IjE2MDMiLCJpc3MiOiJzdXBwb3J0LmJyYWluY2VydC5jb20ifQ.ZamSRczbupGkVhlMrjN2GH4Vn7GNNmSpz4iNsCEc30c)

## **Step 7:**

Publish the content as public and copy the '**Embedded URL**'.

![7.png](https://support.braincert.com/kb/attachment/article/13/inline?token=eyJhbGciOiJodHRwOi8vd3d3LnczLm9yZy8yMDAxLzA0L3htbGRzaWctbW9yZSNobWFjLXNoYTI1NiIsInR5cCI6IkpXVCJ9.eyJpZCI6IjUyMTAiLCJvcmdpZCI6IjE2MDMiLCJpc3MiOiJzdXBwb3J0LmJyYWluY2VydC5jb20ifQ.P3-DQi-PRrIc3RF8grDDUMAhTkYn3dW_6rapiqgtIxI)

#####   

## **Step 8:**

Now, log in to your BrainCert account, navigate to '**Contents**,' and click '**+Create HTML Content**' under '**Web Content'**.

![a9a58b18-9ec1-4b78-bd21-103e41f70316](https://support.braincert.com/kb/attachment/article/13/inline?token=eyJhbGciOiJodHRwOi8vd3d3LnczLm9yZy8yMDAxLzA0L3htbGRzaWctbW9yZSNobWFjLXNoYTI1NiIsInR5cCI6IkpXVCJ9.eyJpZCI6IjU5ODIiLCJvcmdpZCI6IjE2MDMiLCJpc3MiOiJzdXBwb3J0LmJyYWluY2VydC5jb20ifQ.S2Aa_l-fLun4lq731tylOi7__YiLKzgs3GSj5ZBV0MM)

#####   

## **Step 9:**

Enter the '**Title**' paste the copied code in the HTML content box and click on save.

![9.png](https://support.braincert.com/kb/attachment/article/13/inline?token=eyJhbGciOiJodHRwOi8vd3d3LnczLm9yZy8yMDAxLzA0L3htbGRzaWctbW9yZSNobWFjLXNoYTI1NiIsInR5cCI6IkpXVCJ9.eyJpZCI6IjUyMTIiLCJvcmdpZCI6IjE2MDMiLCJpc3MiOiJzdXBwb3J0LmJyYWluY2VydC5jb20ifQ.pCeiUrAjzbE-rdDMD1B03CZLFJhLPkmka1cxD9JBKno)

#####   

## **Step 10:**

To add the HTML5 content to course lectures navigate to the '**Manage Courses**' and click '**Curriculum**'  under course options corresponding to the course to which you want to add the HTML5 content.

![10.png](https://support.braincert.com/kb/attachment/article/13/inline?token=eyJhbGciOiJodHRwOi8vd3d3LnczLm9yZy8yMDAxLzA0L3htbGRzaWctbW9yZSNobWFjLXNoYTI1NiIsInR5cCI6IkpXVCJ9.eyJpZCI6IjUyMTMiLCJvcmdpZCI6IjE2MDMiLCJpc3MiOiJzdXBwb3J0LmJyYWluY2VydC5jb20ifQ.bBxZMxUMya7hisDH6yWi6y0Tv9vu0Dvl7I2oS6iVdcc)

#####   

## **Step 11:**

Once the Chapters and the Lectures are added, click on the '**Add Content**' option in the Lecture select the HTML5 content to be added to the course, and click on '**Add**'.

![11.png](https://support.braincert.com/kb/attachment/article/13/inline?token=eyJhbGciOiJodHRwOi8vd3d3LnczLm9yZy8yMDAxLzA0L3htbGRzaWctbW9yZSNobWFjLXNoYTI1NiIsInR5cCI6IkpXVCJ9.eyJpZCI6IjUyMTYiLCJvcmdpZCI6IjE2MDMiLCJpc3MiOiJzdXBwb3J0LmJyYWluY2VydC5jb20ifQ.IVLhjCz5LItzUpIMkWMYe2M3MYuKisL5Xk8HSGTX39Q)

![12.png](https://support.braincert.com/kb/attachment/article/13/inline?token=eyJhbGciOiJodHRwOi8vd3d3LnczLm9yZy8yMDAxLzA0L3htbGRzaWctbW9yZSNobWFjLXNoYTI1NiIsInR5cCI6IkpXVCJ9.eyJpZCI6IjUyMTciLCJvcmdpZCI6IjE2MDMiLCJpc3MiOiJzdXBwb3J0LmJyYWluY2VydC5jb20ifQ.IG-lPeP7bYQ5ORtIhst11hn0Wi9-kUAGqKl2I2NUUOs)

We hope you found this article helpful.

# Managing Multiple LMS Domain Subscriptions as a Reseller

This article helps in managing multiple LMS domain subscriptions as a reseller.

## **Step 1:**

By selecting Resellers, log in to your '**LMS Platform**' with your admin credentials.

![1.png](https://support.braincert.com/kb/attachment/article/34/inline?token=eyJhbGciOiJodHRwOi8vd3d3LnczLm9yZy8yMDAxLzA0L3htbGRzaWctbW9yZSNobWFjLXNoYTI1NiIsInR5cCI6IkpXVCJ9.eyJpZCI6IjU2OTEiLCJvcmdpZCI6IjE2MDMiLCJpc3MiOiJzdXBwb3J0LmJyYWluY2VydC5jb20ifQ.2AazIRzXV-m__U8Il4kKaSKJOHq1mGK5pj5jgF7HRrE)

## **Step 2:**

Click on the '**More**' option, then select "**Upgrade/Downgrade**" to manage your LMS subscription for the respective domain.

![2.png](https://support.braincert.com/kb/attachment/article/34/inline?token=eyJhbGciOiJodHRwOi8vd3d3LnczLm9yZy8yMDAxLzA0L3htbGRzaWctbW9yZSNobWFjLXNoYTI1NiIsInR5cCI6IkpXVCJ9.eyJpZCI6IjU2OTIiLCJvcmdpZCI6IjE2MDMiLCJpc3MiOiJzdXBwb3J0LmJyYWluY2VydC5jb20ifQ.qeuhBvARbSuiQOu3cBQp_WL7CsH9BYeGNdq36AgqDX4)

﻿﻿You will be directed to this box where you can click on the link to change your plan. ![3.png](https://support.braincert.com/kb/attachment/article/34/inline?token=eyJhbGciOiJodHRwOi8vd3d3LnczLm9yZy8yMDAxLzA0L3htbGRzaWctbW9yZSNobWFjLXNoYTI1NiIsInR5cCI6IkpXVCJ9.eyJpZCI6IjU2OTMiLCJvcmdpZCI6IjE2MDMiLCJpc3MiOiJzdXBwb3J0LmJyYWluY2VydC5jb20ifQ.jMN1NHZrTxc2__CMLXaKv7aMc1B7Cq38JCWNa5m44QI)

Hope this article helps you.

# A Guide to Enable or Disable Student Dashboard Widgets

This article will guide you through the steps to turn **“ON”** or **“OFF”** the widgets in the student dashboard in the training platform.

<iframe src="https://player.vimeo.com/video/958317740?badge=0&amp;autopause=0&amp;player_id=0&amp;app_id=58479" frameborder="0" allow="autoplay; fullscreen; picture-in-picture; clipboard-write" style="position:absolute;top:0;left:0;width:100%;height:100%;" title="A Guide to Enable or Disable Student Dashboard Widgets">&ZeroWidthSpace;</iframe>

## **Step 1:**

Log in to your LMS Domain Open '**Global Settings**' and click on '**Basic Settings**'.

![1.png](https://support.braincert.com/kb/attachment/article/98/inline?token=eyJhbGciOiJodHRwOi8vd3d3LnczLm9yZy8yMDAxLzA0L3htbGRzaWctbW9yZSNobWFjLXNoYTI1NiIsInR5cCI6IkpXVCJ9.eyJpZCI6IjQ5OTYiLCJvcmdpZCI6IjE2MDMiLCJpc3MiOiJzdXBwb3J0LmJyYWluY2VydC5jb20ifQ.Z6Ac7hsqHOvTfhB1lI5RrF_GTTOa8ZMii8Ijo1O3GnU)

##  **Step 2:**

Now, click on '**Student Dashboard**' to enable or disable the student dashboard widgets.

![2.png](https://support.braincert.com/kb/attachment/article/98/inline?token=eyJhbGciOiJodHRwOi8vd3d3LnczLm9yZy8yMDAxLzA0L3htbGRzaWctbW9yZSNobWFjLXNoYTI1NiIsInR5cCI6IkpXVCJ9.eyJpZCI6IjQ5OTciLCJvcmdpZCI6IjE2MDMiLCJpc3MiOiJzdXBwb3J0LmJyYWluY2VydC5jb20ifQ._QzjKR4PP4RSmZjAmq3li4_iGrBKsTtnBlDcj_skZJU)

Toggle the switch to enable or disable student widgets and click '**Save**' to confirm the changes.

# How to Create an Online Course

The primary purpose of any LMS platform is to help instructors better create, deliver & manage online courses. After you create your BrainCert account and activate your LMS domain, you can create & allocate courses in the platform.

This article will guide you through the complete steps involved in creating an online course in the BrainCert LMS.

<iframe src="https://player.vimeo.com/video/1010204100?h=d6177e54c5&amp;title=0&amp;byline=0&amp;portrait=0&amp;badge=0&amp;autopause=0&amp;player_id=0&amp;app_id=58479" frameborder="0" allow="autoplay; fullscreen; picture-in-picture; clipboard-write" style="position:absolute;top:0;left:0;width:100%;height:100%;" title="How to Create an Online Course">&ZeroWidthSpace;</iframe>

##   

## **Step 1: Basic Information**

Navigate to the '**Products**' and Choose '**Course**' from the dropdown menu. Then click on '**Create a Course**' as shown in the image.![KB - 1 COURSE CREATION](https://support.braincert.com/kb/attachment/article/67/inline?token=eyJhbGciOiJodHRwOi8vd3d3LnczLm9yZy8yMDAxLzA0L3htbGRzaWctbW9yZSNobWFjLXNoYTI1NiIsInR5cCI6IkpXVCJ9.eyJpZCI6IjY1MDEiLCJvcmdpZCI6IjE2MDMiLCJpc3MiOiJzdXBwb3J0LmJyYWluY2VydC5jb20ifQ.4H0CRNbnBFcTL8h3sQmiGLU8CB57z8lQpbqPusi84SA)

## **Step 2:**  

Once You have Clicked the ‘**Create a course**’ it redirects to the New Course Creation window.

1. Navigate to ‘**General (Basic Information)**’ about the course. In the ‘**course Title**’ provide your Course Name under 80 Characters.
2. Click **'AI Suggest'** Button to start create your courses in a short span of time with the help of AI Course Wizard.

![KB 2 - COURSE CREATION](https://support.braincert.com/kb/attachment/article/67/inline?token=eyJhbGciOiJodHRwOi8vd3d3LnczLm9yZy8yMDAxLzA0L3htbGRzaWctbW9yZSNobWFjLXNoYTI1NiIsInR5cCI6IkpXVCJ9.eyJpZCI6IjY1MDIiLCJvcmdpZCI6IjE2MDMiLCJpc3MiOiJzdXBwb3J0LmJyYWluY2VydC5jb20ifQ.iRaIUES_jaNp_SRfObkJhAmPsABn0HkFmzsxzFm7ZZA)

## **Step 3:**

What is Slug in your Course Creation?

Slug is a URL-friendly version of the course name. It's used in the course's web address to make it easier for both users and search engines to understand.

- Go to **‘slug’**. By default, It’s automatically generated from the course title, but you can customize it to better describe your course.

<section class="info-box" style="text-align: left;"><span style=" font-family: Inter; font-size: 14px; font-style: normal; font-weight: 400; text-align: left; text-indent: 0px; white-space: normal; display: inline !important; float: none;">For best results, use lowercase letters, numbers, and hyphens only. Avoid using special characters, spaces, or capital letters.</span></section>
- By Enable the **‘Course Catalog’** option. List this in the course catalog on the logon page.

<section class="warning-box"><p dir="ltr" style="line-height:1.38;margin-top:0pt;margin-bottom:0pt;"><b style="font-weight:normal;"><span style="font-size:11pt;font-family:Arial,sans-serif;font-weight:400;font-style:normal;text-decoration:none;vertical-align:baseline;white-space:pre;white-space:pre-wrap;"><span style=" font-family: Inter; font-size: 14px; font-style: normal; font-weight: 400; text-align: left; text-indent: 0px; white-space: normal; display: inline !important; float: none;">Users can view the course details. </span>But still would need an user account in your LMS to enroll in the</span></b></p><p dir="ltr" style="line-height:1.38;margin-top:0pt;margin-bottom:0pt;"><b style="font-weight:normal;"><span style="font-size:11pt;font-family:Arial,sans-serif;font-weight:400;font-style:normal;text-decoration:none;vertical-align:baseline;white-space:pre;white-space:pre-wrap;">Course.</span></b></p></section>
To understand the full structure to enable course catalog.

Read this Full Article: [How to enable basic or advanced course Catalog](https://support.braincert.com/kb/article/94/how-to-enable-basic-or-advanced-course-catalog?highlight=catalog "https://support.braincert.com/kb/article/94/how-to-enable-basic-or-advanced-course-catalog?highlight=catalog")

![KB 3 - COURSE CREATION](https://support.braincert.com/kb/attachment/article/67/inline?token=eyJhbGciOiJodHRwOi8vd3d3LnczLm9yZy8yMDAxLzA0L3htbGRzaWctbW9yZSNobWFjLXNoYTI1NiIsInR5cCI6IkpXVCJ9.eyJpZCI6IjY1MDMiLCJvcmdpZCI6IjE2MDMiLCJpc3MiOiJzdXBwb3J0LmJyYWluY2VydC5jb20ifQ.Pp4QDFaA9T6ALBxo-cdMIFzXLTG5B5H2J2bB8Ujkink)

## **Step 4:**

**Write a ‘Course Subtitle’** up to 70 Character**s** **that Connects with the ‘Course Title’**
<section class="info-box"><b style="font-weight:normal;"><span style="font-size:11pt;font-family:Arial,sans-serif;font-weight:400;font-style:normal;text-decoration:none;vertical-align:baseline;white-space:pre;white-space:pre-wrap;">A subtitle should not only be descriptive, but it helps support the title by telling students what they will learn if they take the course. For example: Learn SAP in 2 weeks!</span></b><br></section>
**![kb 4 - COURSE CREATION](https://support.braincert.com/kb/attachment/article/67/inline?token=eyJhbGciOiJodHRwOi8vd3d3LnczLm9yZy8yMDAxLzA0L3htbGRzaWctbW9yZSNobWFjLXNoYTI1NiIsInR5cCI6IkpXVCJ9.eyJpZCI6IjY1MDQiLCJvcmdpZCI6IjE2MDMiLCJpc3MiOiJzdXBwb3J0LmJyYWluY2VydC5jb20ifQ.wix0mHLvGlrnZF-jeNJF9dwsrjg-cSk2lPcUNqmU5N8)**

## **Step 5:**

- To Upload Course Thumbnail, select **'Choose File'** you can access your file explorer, or by clicking **'Choose From Library'** a pop-up will appear allowing you to select an image from categories including Business & People, Education & Language, Food & Drink, Healthcare, Kids, Religion & Spirituality, Science & Technology, Sports & Leisure, Travel, and Vector Illustrations.
- By Default, the Cover Image is uploaded, Click **'Edit'** and Select **'Upload Photo'** from the File explorer (or) **'Choose From Library'** for the available Images.

<section class="info-box"><b style="font-weight:normal;"><span style="font-size:11pt;font-family:Arial,sans-serif;font-weight:400;font-style:normal;text-decoration:none;vertical-align:baseline;white-space:pre;white-space:pre-wrap;"> <span> Recommended Image: aspect ratio 16:9, Size 640*360 or greater; File Format: PNG or JPG</span></span></b><br></section>
![KB 5 - COURSE CREATION](https://support.braincert.com/kb/attachment/article/67/inline?token=eyJhbGciOiJodHRwOi8vd3d3LnczLm9yZy8yMDAxLzA0L3htbGRzaWctbW9yZSNobWFjLXNoYTI1NiIsInR5cCI6IkpXVCJ9.eyJpZCI6IjY1MDUiLCJvcmdpZCI6IjE2MDMiLCJpc3MiOiJzdXBwb3J0LmJyYWluY2VydC5jb20ifQ.fjRZ11RwfLeNMSskkgZ7Jzhd3NUsOvGT_udcJsbjy4c)

## **Step 6:**

- **Click the Dropdown and select the** **'category'** **of your course.**

To Know How to create a Course Category (Read this Article): [Steps to create and manage custom course Categories](https://support.braincert.com/kb/article/60/steps-to-create-and-manage-custom-course-categories?highlight=Course%20Category "https://support.braincert.com/kb/article/60/steps-to-create-and-manage-custom-course-categories?highlight=Course%20Category")

- **Choose the** '**Instructional Level'** for your course. It denotes the difficulties for specific Courses.

To Know more about the **'Creating Instructional Level'** Refer to this Link: [Creating Course Instructional Levels](https://support.braincert.com/kb/article/7/creating-course-instructional-levels?highlight=Creating%20Course%20Instructional%20Levels)

**![KB 6 - COURSE CREATION](https://support.braincert.com/kb/attachment/article/67/inline?token=eyJhbGciOiJodHRwOi8vd3d3LnczLm9yZy8yMDAxLzA0L3htbGRzaWctbW9yZSNobWFjLXNoYTI1NiIsInR5cCI6IkpXVCJ9.eyJpZCI6IjY1MDYiLCJvcmdpZCI6IjE2MDMiLCJpc3MiOiJzdXBwb3J0LmJyYWluY2VydC5jb20ifQ.XxmSiQUN1dPZIwccS3Jpdc73Vd7SPfIBwGsea3PjyuA)**

##   

## **Step 7:**

Write **'About the Course'** in that blank box as marked.

You can Access 9 Features when you have to write about the course. Choose the Numbered Icons from 1 - 9 to use these any Features for better visual and clarity.

1. HTML: Features to Improve your course content by incorporating formatting elements such as headings, lists, and links. For instance, use `<h1>` to `<h6>` for section titles, `<ul>` or `<ol>` for organized lists, and `<a>` for hyperlinks to relevant resources.
2. Format: Choose the Content Format as given: Normal Text, Quote, Code, H1 - H6 tags to write the detailed Information for this course.
3. Bold: Highlight Your Important Words and gives user-friendly interface for designing and interactive content.
4. Italic: Italics can convey tone or voice in instructional content, clarity and professionalism in course materials and nuanced learning experience.
5. Strikethrough: In course creation to indicate revisions or changes in content, allowing instructors to show updates or corrections transparently.
6. Lists: It is essential for organizing information in a clear and digestible manner, promoting better comprehension and retention. Unordered List, Ordered List, Oudent (moving list items or paragraphs back toward the left margin), Indent (moving list items or paragraphs inward from the left margin)
7. Image: Add the required Image in the **'About the Course'**  Section. Use of visual elements such as photographs, illustrations, and diagrams to enhance learning materials.
8. Table: Using table formats in course creation shows clarity, organization, and accessibility by providing structured overviews of course components, lesson plans, assessments, and resources. These are the options while creating a Table: Insert table, Insert Row - above, below, Insert Column - Left, Right, Add Head, Delete - Head, column, row, table.
9. Link: In course creation facilitate resource sharing and provide supplementary materials, interactive content and collaboration tools, and improve navigation while integrating multimedia. You can **'Insert Link'** & **'Unlink'** in your course creation.

**![KB 7 - COURSE CREATION](https://support.braincert.com/kb/attachment/article/67/inline?token=eyJhbGciOiJodHRwOi8vd3d3LnczLm9yZy8yMDAxLzA0L3htbGRzaWctbW9yZSNobWFjLXNoYTI1NiIsInR5cCI6IkpXVCJ9.eyJpZCI6IjY1MDciLCJvcmdpZCI6IjE2MDMiLCJpc3MiOiJzdXBwb3J0LmJyYWluY2VydC5jb20ifQ.kWGhIGQ9V30BgaLih3GBDARm8uHMiTLmQ0dPfDM1v_w)**

## **Step 8:**

**Add the Instructor Bio in that designated Box. Use the above Featured Icon if needed as we explained in (Step 7), Then click** **'Next'**
<section class="info-box">Make sure you filled all <strong>'options' </strong>in the <strong>'Basic Settings'</strong></section>
**![KB 8 - COURSE CREATION](https://support.braincert.com/kb/attachment/article/67/inline?token=eyJhbGciOiJodHRwOi8vd3d3LnczLm9yZy8yMDAxLzA0L3htbGRzaWctbW9yZSNobWFjLXNoYTI1NiIsInR5cCI6IkpXVCJ9.eyJpZCI6IjY1MDgiLCJvcmdpZCI6IjE2MDMiLCJpc3MiOiJzdXBwb3J0LmJyYWluY2VydC5jb20ifQ.386dDQ9GOkfR7u7J8gwNb92OPgNOpyYDrn4B0Q1HlNU)**

## **Step 9: Advanced Settings**

**Go to** '**Advanced Settings'** Click the dropdown bar, Select Either **'Unlimited'** or **'Limited'** For the number of Learners Enrollment Limit for your courses.

**![KB 9 - COURSE CREATION](https://support.braincert.com/kb/attachment/article/67/inline?token=eyJhbGciOiJodHRwOi8vd3d3LnczLm9yZy8yMDAxLzA0L3htbGRzaWctbW9yZSNobWFjLXNoYTI1NiIsInR5cCI6IkpXVCJ9.eyJpZCI6IjY1MDkiLCJvcmdpZCI6IjE2MDMiLCJpc3MiOiJzdXBwb3J0LmJyYWluY2VydC5jb20ifQ.HTMm7c_biTrEpsWIPnTUkRo-pYiYYWtO3ekO3m7bwMk)**

## **Step 10:**

**You can add links from YouTube or Vimeo as promotional videos for your course or choose to upload videos from your content library.**

**![KB 10 - COURSE CREATION](https://support.braincert.com/kb/attachment/article/67/inline?token=eyJhbGciOiJodHRwOi8vd3d3LnczLm9yZy8yMDAxLzA0L3htbGRzaWctbW9yZSNobWFjLXNoYTI1NiIsInR5cCI6IkpXVCJ9.eyJpZCI6IjY1MTAiLCJvcmdpZCI6IjE2MDMiLCJpc3MiOiJzdXBwb3J0LmJyYWluY2VydC5jb20ifQ.2_wajU7vn4AkY0tBBOcGyGVR4DPpJRr7Z51EWHh3qGc)**

## **Step 11:**

Add the course Highlights in the Provided box, Summarize your Course description or outline in up to **120 Characters.** Fill the Outline content in 5 box (optional). Now Click **'Next'.**

![KB 11 - COURSE CREATION](https://support.braincert.com/kb/attachment/article/67/inline?token=eyJhbGciOiJodHRwOi8vd3d3LnczLm9yZy8yMDAxLzA0L3htbGRzaWctbW9yZSNobWFjLXNoYTI1NiIsInR5cCI6IkpXVCJ9.eyJpZCI6IjY1MTEiLCJvcmdpZCI6IjE2MDMiLCJpc3MiOiJzdXBwb3J0LmJyYWluY2VydC5jb20ifQ.axweFSIg9FR2kdHwd116yXQOstNoJS-pQuNOK0x1Dpc)

## Step 12: Course Instructors

In Course Instructor, the Primary Instructor added in default, Click **'Change'** to replace other Instructor for this Course (or) Select **'Add'** in Top right to Assign Multiple Instructors. Then Click **'Next'.**

![KB 12 - COURSE CREATION](https://support.braincert.com/kb/attachment/article/67/inline?token=eyJhbGciOiJodHRwOi8vd3d3LnczLm9yZy8yMDAxLzA0L3htbGRzaWctbW9yZSNobWFjLXNoYTI1NiIsInR5cCI6IkpXVCJ9.eyJpZCI6IjY1MTIiLCJvcmdpZCI6IjE2MDMiLCJpc3MiOiJzdXBwb3J0LmJyYWluY2VydC5jb20ifQ.U-JIQPVd3KoN4vOya2qpj54xMdfy_VmVhPg8e97s4qw)

##   

## Step 13: Payment Settings

Payment Settings lets you set the course as a '**Paid**' or '**Free'** course.

By Default **'Free'** Course Payment were Selected to Change as Paid Course Enable **'Paid'** then Click **'Next'.**

Refer this Article to Know more: [Creating course and curriculum with AI integration in BrainCert](https://support.braincert.com/kb/article/203/creating-courses-and-curriculum-with-ai-integration-in-braincert?highlight=AI)

![KB 13 - COURSE CREATION](https://support.braincert.com/kb/attachment/article/67/inline?token=eyJhbGciOiJodHRwOi8vd3d3LnczLm9yZy8yMDAxLzA0L3htbGRzaWctbW9yZSNobWFjLXNoYTI1NiIsInR5cCI6IkpXVCJ9.eyJpZCI6IjY1MTMiLCJvcmdpZCI6IjE2MDMiLCJpc3MiOiJzdXBwb3J0LmJyYWluY2VydC5jb20ifQ.I3oDqvW38w7jiWJytcrsFwWF0lwkCY-ubAs5I3yeRMA)

##   

## Step 14: Course Settings

Enable this Following option will helps to:

- **Show Learners Count:** Allow Viewing the total learners count and learners taking this course.
- **Reviews & Rating:** Enable your students to write a review and rate your courses.
- **Comments & Discussions:** Use Options to enable, disable or even Lock your commenting system in your course.
- **Enable Social Sharing:** Turn this on to allow students and learners to share your courses on their social media Profiles, increase visibility and Potential Environment.

![KB 14 - COURSE CREATION](https://support.braincert.com/kb/attachment/article/67/inline?token=eyJhbGciOiJodHRwOi8vd3d3LnczLm9yZy8yMDAxLzA0L3htbGRzaWctbW9yZSNobWFjLXNoYTI1NiIsInR5cCI6IkpXVCJ9.eyJpZCI6IjY1MTQiLCJvcmdpZCI6IjE2MDMiLCJpc3MiOiJzdXBwb3J0LmJyYWluY2VydC5jb20ifQ.8w6RhQ3u2OMkPzuzxWQky76SZjrxKWgGjz2w-rw-GUU)

##   

## **Step 15:**

**Click the Dropdown bar in** '**Language'** options, Select the language you want to teach.
<section class="info-box lastNode">There are more than 100 Languages in this option to teach your courses.<br class="lastNode"></section>
**![KB 15 - COURSE CREATION](https://support.braincert.com/kb/attachment/article/67/inline?token=eyJhbGciOiJodHRwOi8vd3d3LnczLm9yZy8yMDAxLzA0L3htbGRzaWctbW9yZSNobWFjLXNoYTI1NiIsInR5cCI6IkpXVCJ9.eyJpZCI6IjY1MTUiLCJvcmdpZCI6IjE2MDMiLCJpc3MiOiJzdXBwb3J0LmJyYWluY2VydC5jb20ifQ.D_UHUXYG4VxSjJ9Ua5Zui-jz3ILtIRHt3oFh-g4uvQg)**

## **Step 16:**

**Click on the Provided box, Create your Own Custom tags to made as keyword of your courses. There is up to 4 Tags to create for each courses. Click** **'Next'**

**![KB 16 - COURSE CREATION](https://support.braincert.com/kb/attachment/article/67/inline?token=eyJhbGciOiJodHRwOi8vd3d3LnczLm9yZy8yMDAxLzA0L3htbGRzaWctbW9yZSNobWFjLXNoYTI1NiIsInR5cCI6IkpXVCJ9.eyJpZCI6IjY1MTYiLCJvcmdpZCI6IjE2MDMiLCJpc3MiOiJzdXBwb3J0LmJyYWluY2VydC5jb20ifQ.kz9yfjUMYCJpkLyvu_ozzKo1lckqbLR6KHdmlSEkHjs)**

We hope you found this article helpful.

# Disabling Concurrent Logins in the LMS Platform

This article will guide you through the process of disabling concurrent logins within the LMS platform to enhance security and user access management.

<iframe src="https://player.vimeo.com/video/1004438551?h=3b4548dbf0&amp;title=0&amp;byline=0&amp;portrait=0&amp;badge=0&amp;autopause=0&amp;player_id=0&amp;app_id=58479" frameborder="0" allow="autoplay; fullscreen; picture-in-picture; clipboard-write" style="position:absolute;top:0;left:0;width:100%;height:100%;" title="Disabling Concurrent Logins in the LMS Platform">&ZeroWidthSpace;</iframe>

## **Step 1:**

Login to the Training Platform with your account credentials.

Scroll over to the '**Global Settings**' and open '**Security**'.
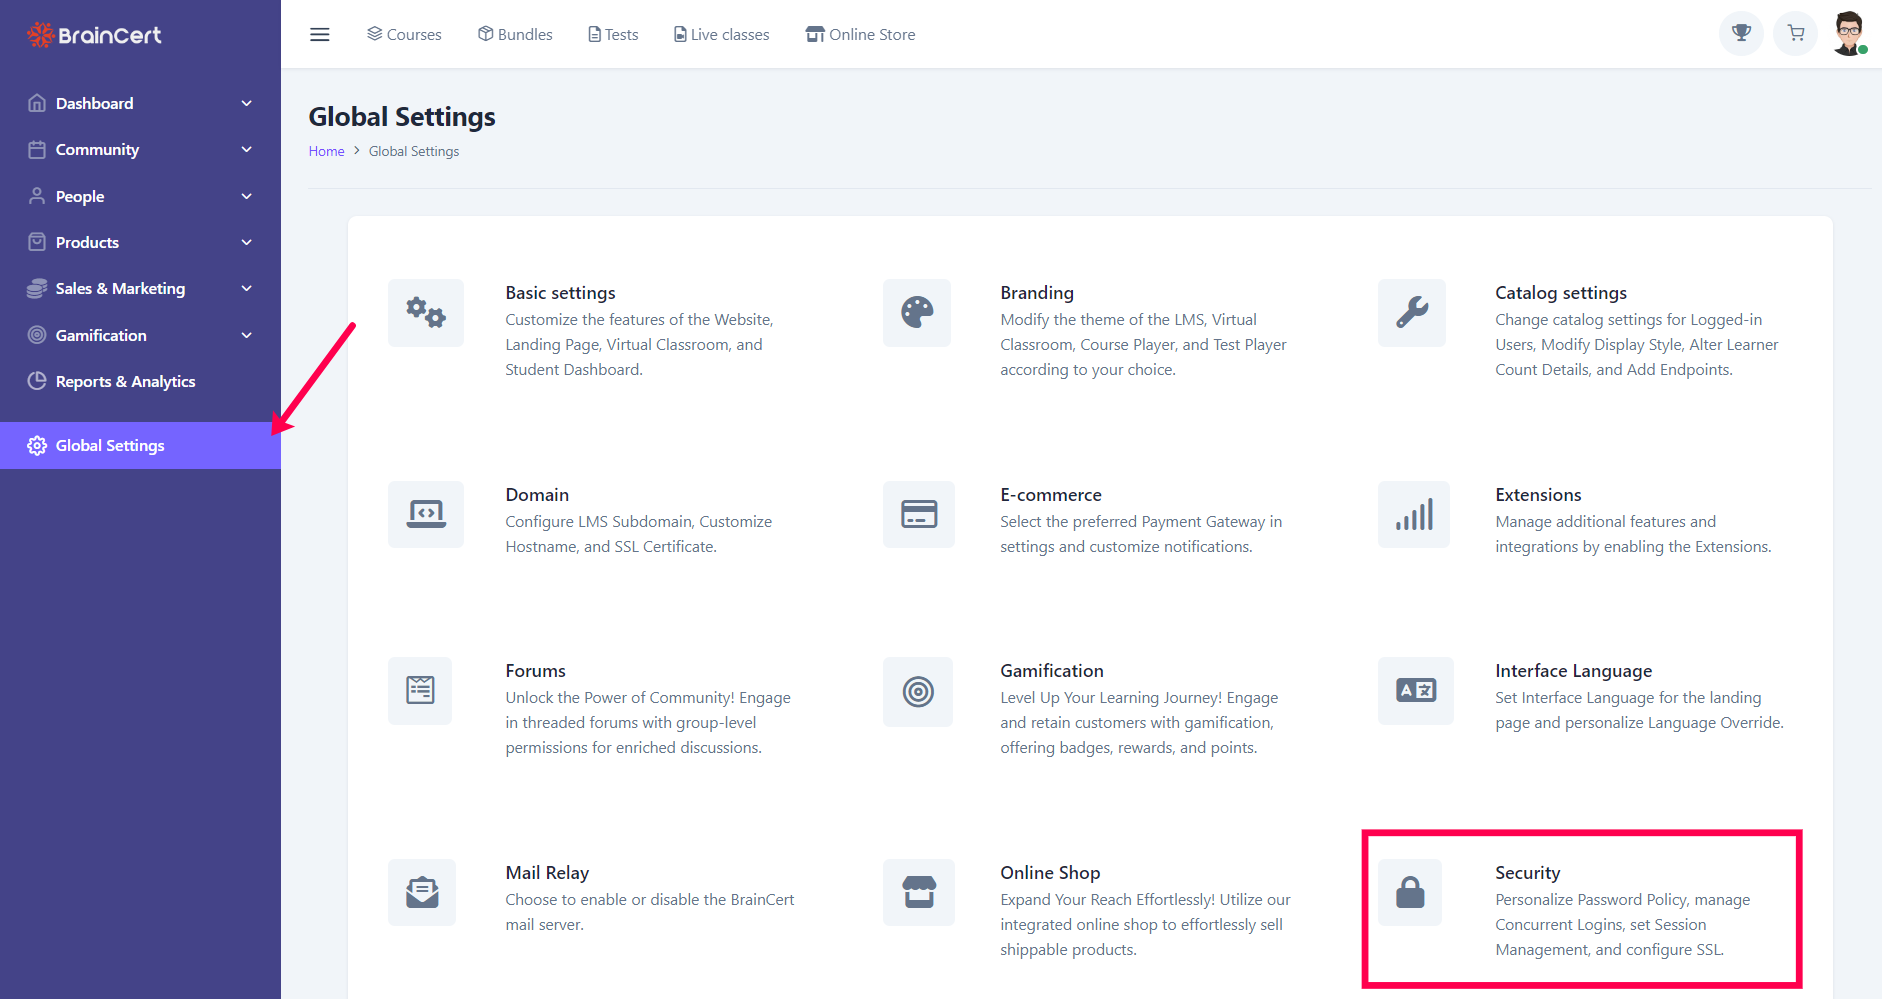

![1.png](https://support.braincert.com/kb/attachment/article/58/inline?token=eyJhbGciOiJodHRwOi8vd3d3LnczLm9yZy8yMDAxLzA0L3htbGRzaWctbW9yZSNobWFjLXNoYTI1NiIsInR5cCI6IkpXVCJ9.eyJpZCI6IjUzODIiLCJvcmdpZCI6IjE2MDMiLCJpc3MiOiJzdXBwb3J0LmJyYWluY2VydC5jb20ifQ.faupVK_E6gFA33imsmslvITAZ3ZZ5_OTSDtzSAfR0ec)

##   

## **Step 2:**

In the '**Security**' page, select '**Yes**' under '**Concurrent logins**' and click '**Save**'.
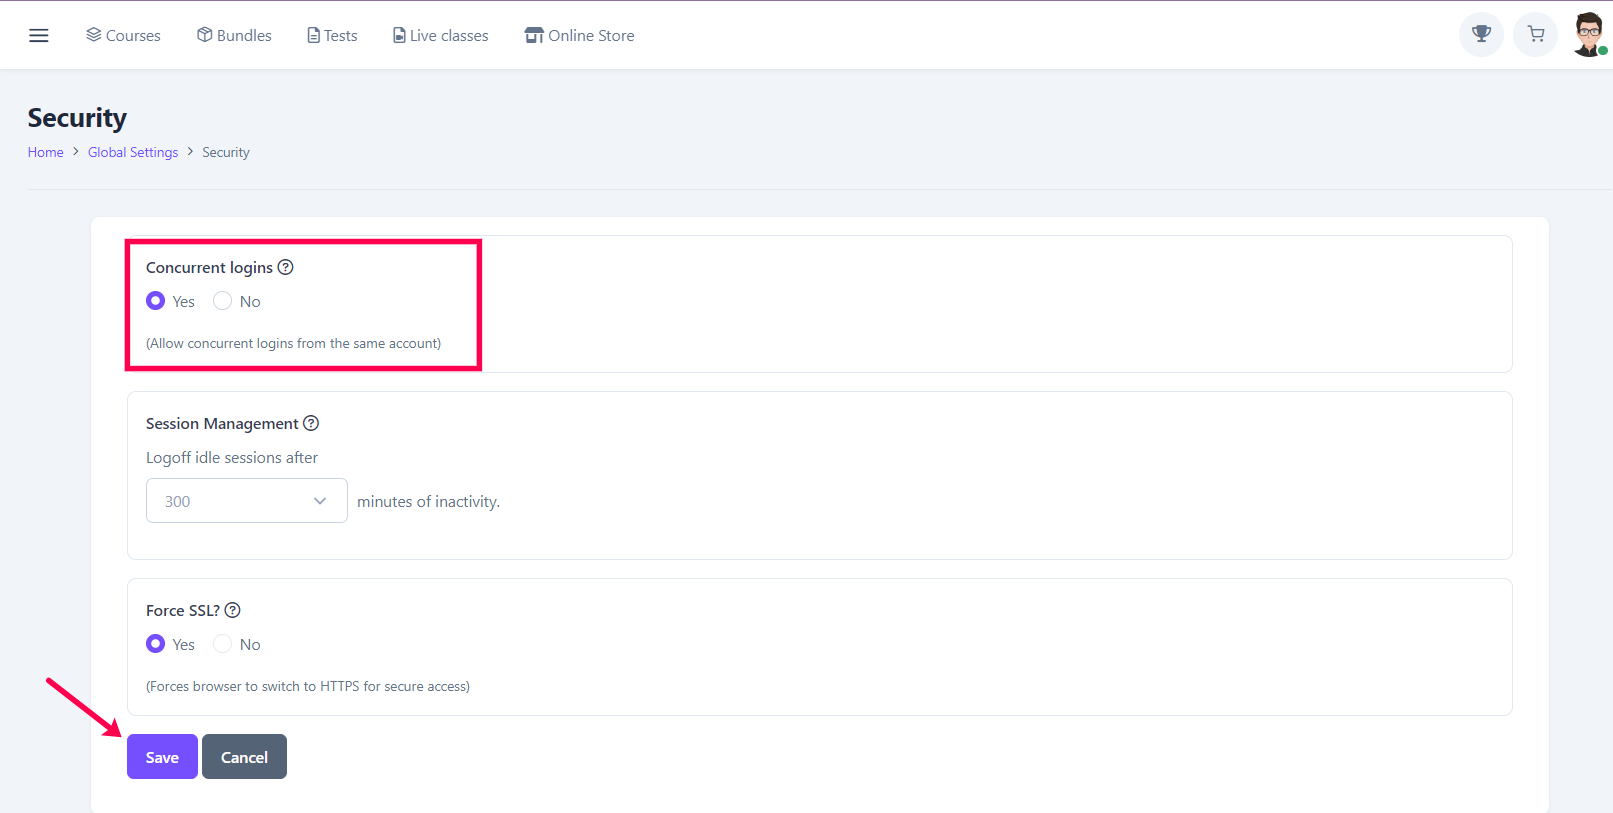

![2.png](https://support.braincert.com/kb/attachment/article/58/inline?token=eyJhbGciOiJodHRwOi8vd3d3LnczLm9yZy8yMDAxLzA0L3htbGRzaWctbW9yZSNobWFjLXNoYTI1NiIsInR5cCI6IkpXVCJ9.eyJpZCI6IjUzODMiLCJvcmdpZCI6IjE2MDMiLCJpc3MiOiJzdXBwb3J0LmJyYWluY2VydC5jb20ifQ.5SReFjfA2eF5NV1zmAEFO0LOzlma6NoqBlIJXqXkM4k)

Concurrent login is successfully disabled.

# How to Create Custom Dropdown Menu Items on Your Landing Pages

BrainCert offers flexible customization, giving you full access to the code editor for landing pages, allowing you to insert custom HTML. For example, if you're editing a landing page and want to transform the top navigation bar into a dropdown menu, follow these steps.
<section class="warning-box">These steps apply to the following landing pages: 'Limitless Learning', 'Education Trends', 'Knowledge Business', 'Online Tutor', and 'Smart Kids'.</section>Here’s how you can create a dropdown menu once you complete this step-by-step guide.
![](https://support.braincert.com/kb/attachment/article/228/inline?token=eyJhbGciOiJodHRwOi8vd3d3LnczLm9yZy8yMDAxLzA0L3htbGRzaWctbW9yZSNobWFjLXNoYTI1NiIsInR5cCI6IkpXVCJ9.eyJpZCI6IjYwNDQiLCJvcmdpZCI6IjE2MDMiLCJpc3MiOiJzdXBwb3J0LmJyYWluY2VydC5jb20ifQ.z6Ra_3YdCxv2hCT_-Ky32T6i-38qb_igjZHyjGlR0rI)

## **Step 1** 

Open your landing page in **Edit Mode**.

##   
**Step 2**

Select the top navbar block, and click the **"View Source"** icon.

![](https://support.braincert.com/kb/attachment/article/228/inline?token=eyJhbGciOiJodHRwOi8vd3d3LnczLm9yZy8yMDAxLzA0L3htbGRzaWctbW9yZSNobWFjLXNoYTI1NiIsInR5cCI6IkpXVCJ9.eyJpZCI6IjYwNDUiLCJvcmdpZCI6IjE2MDMiLCJpc3MiOiJzdXBwb3J0LmJyYWluY2VydC5jb20ifQ.Tgi0XebdIaLz0UObOp9mluqTEFdhRf0IUpnC_XD9klw)

##   
  
**Step 3**

Find the menu item you want to convert into a dropdown. For instance, let's use the "Courses" menu item.

![](https://support.braincert.com/kb/attachment/article/228/inline?token=eyJhbGciOiJodHRwOi8vd3d3LnczLm9yZy8yMDAxLzA0L3htbGRzaWctbW9yZSNobWFjLXNoYTI1NiIsInR5cCI6IkpXVCJ9.eyJpZCI6IjYwNDYiLCJvcmdpZCI6IjE2MDMiLCJpc3MiOiJzdXBwb3J0LmJyYWluY2VydC5jb20ifQ.lhpELV9L8kYVej4SPRWo2icNl7r1bsJVm9xPSp3agus)

## **Step 4**

Locate the HTML code between the `<li>` and `</li>` tags.

![](https://support.braincert.com/kb/attachment/article/228/inline?token=eyJhbGciOiJodHRwOi8vd3d3LnczLm9yZy8yMDAxLzA0L3htbGRzaWctbW9yZSNobWFjLXNoYTI1NiIsInR5cCI6IkpXVCJ9.eyJpZCI6IjYwNDciLCJvcmdpZCI6IjE2MDMiLCJpc3MiOiJzdXBwb3J0LmJyYWluY2VydC5jb20ifQ.T64ed379ZYCJa8x4k0TwOrzSnLtMVdrPxr6nA6ca9JY)

And, replace it with the following code:

    <style>
    .dropdown-item.active, .dropdown-item:active, .dropdown-item:hover, .dropdown-item:focus {
        border-radius: 0.325rem;
    }
    .dropdown-item.active, .dropdown-item:active {
        color: #066ac9;
        text-decoration: none;
        background-color: #f5f7f9;
    }
    .dropdown-item:hover, .dropdown-item:focus {
        color: #066ac9;
        background-color: #f5f7f9;
    }
    .dropdown-item {
        display: block;
        color: #747579;
        width: 100%;
        padding: 5px;
        clear: both;
        font-weight: 500;
        font-size: 16px; 
        text-align: inherit;
        white-space: nowrap;
        background-color: transparent;
        border: 0;
        border-radius: 2px;
    }
    </style>
    
    <li class="nav-item dropdown">
    <a class="nav-link dropdown-toggle active" href="#" id="demoMenu" data-bs-toggle="dropdown" aria-haspopup="true" aria-expanded="false">Products</a>
    <ul class="dropdown-menu" aria-labelledby="demoMenu">
    <li> <a class="dropdown-item active" href="/courses">Courses</a></li>
    <li> <a class="dropdown-item" href="/tests">Tests</a></li>
    <li> <a class="dropdown-item" href="/classes">Live Classes</a></li>
    <li> <a class="dropdown-item" href="/listproducts">Online Store</a></li>
    </ul>
    </li>

## **Step 5**

Once the code is updated, click **"Save Changes"** to apply your changes.

![](https://support.braincert.com/kb/attachment/article/228/inline?token=eyJhbGciOiJodHRwOi8vd3d3LnczLm9yZy8yMDAxLzA0L3htbGRzaWctbW9yZSNobWFjLXNoYTI1NiIsInR5cCI6IkpXVCJ9.eyJpZCI6IjYwNDgiLCJvcmdpZCI6IjE2MDMiLCJpc3MiOiJzdXBwb3J0LmJyYWluY2VydC5jb20ifQ.f8Fcf0fss-RYbOsXZ3ghum1qRg7dtug6S792JrRUk9Y)

## **Step 6**

Switch to **"Preview Mode"** to view your updated dropdown menu.

![](https://support.braincert.com/kb/attachment/article/228/inline?token=eyJhbGciOiJodHRwOi8vd3d3LnczLm9yZy8yMDAxLzA0L3htbGRzaWctbW9yZSNobWFjLXNoYTI1NiIsInR5cCI6IkpXVCJ9.eyJpZCI6IjYwNDkiLCJvcmdpZCI6IjE2MDMiLCJpc3MiOiJzdXBwb3J0LmJyYWluY2VydC5jb20ifQ.Uk3CrwlzVuVn0xgzJ-6IclVB_ZvIuSquD9l00Cz97Q0)

Feel free to customize the menu text and links to match your BrainCert content pages or link to any external pages as needed.

<section class="info-box"><strong>Pro Tip:</strong><br><br>For cleaner HTML, it's best to move the <code>&lt;style&gt;..&lt;/style&gt;</code> block to just above the <code>&lt;/head&gt;</code> tag.<br><br></section>
Alternatively, advanced users can directly modify the code in the editor at any time. Just remember to back up your code before making any changes or use the "Undo" option if needed.

![](https://support.braincert.com/kb/attachment/article/228/inline?token=eyJhbGciOiJodHRwOi8vd3d3LnczLm9yZy8yMDAxLzA0L3htbGRzaWctbW9yZSNobWFjLXNoYTI1NiIsInR5cCI6IkpXVCJ9.eyJpZCI6IjYwNTAiLCJvcmdpZCI6IjE2MDMiLCJpc3MiOiJzdXBwb3J0LmJyYWluY2VydC5jb20ifQ.6h4wLIgBIlRF-TXVkZOh2Jf3q6uHDryJfUWHWG0iBE0)

In just a few simple steps, you can easily customize your landing page navigation with dropdown menus to enhance user experience. Take full advantage of BrainCert’s flexibility by adjusting the menu to fit your content or external links. Remember, always preview your changes to ensure everything looks just right!

# Steps to Reward Global Discounts using Gamification Points

This article will guide you through the steps to reward global discounts using the gamification points on BrainCert.

## **Step 1:**

Login to the training platform with your admin credentials and navigate to '**Rewards**' under '**Gamification**'.
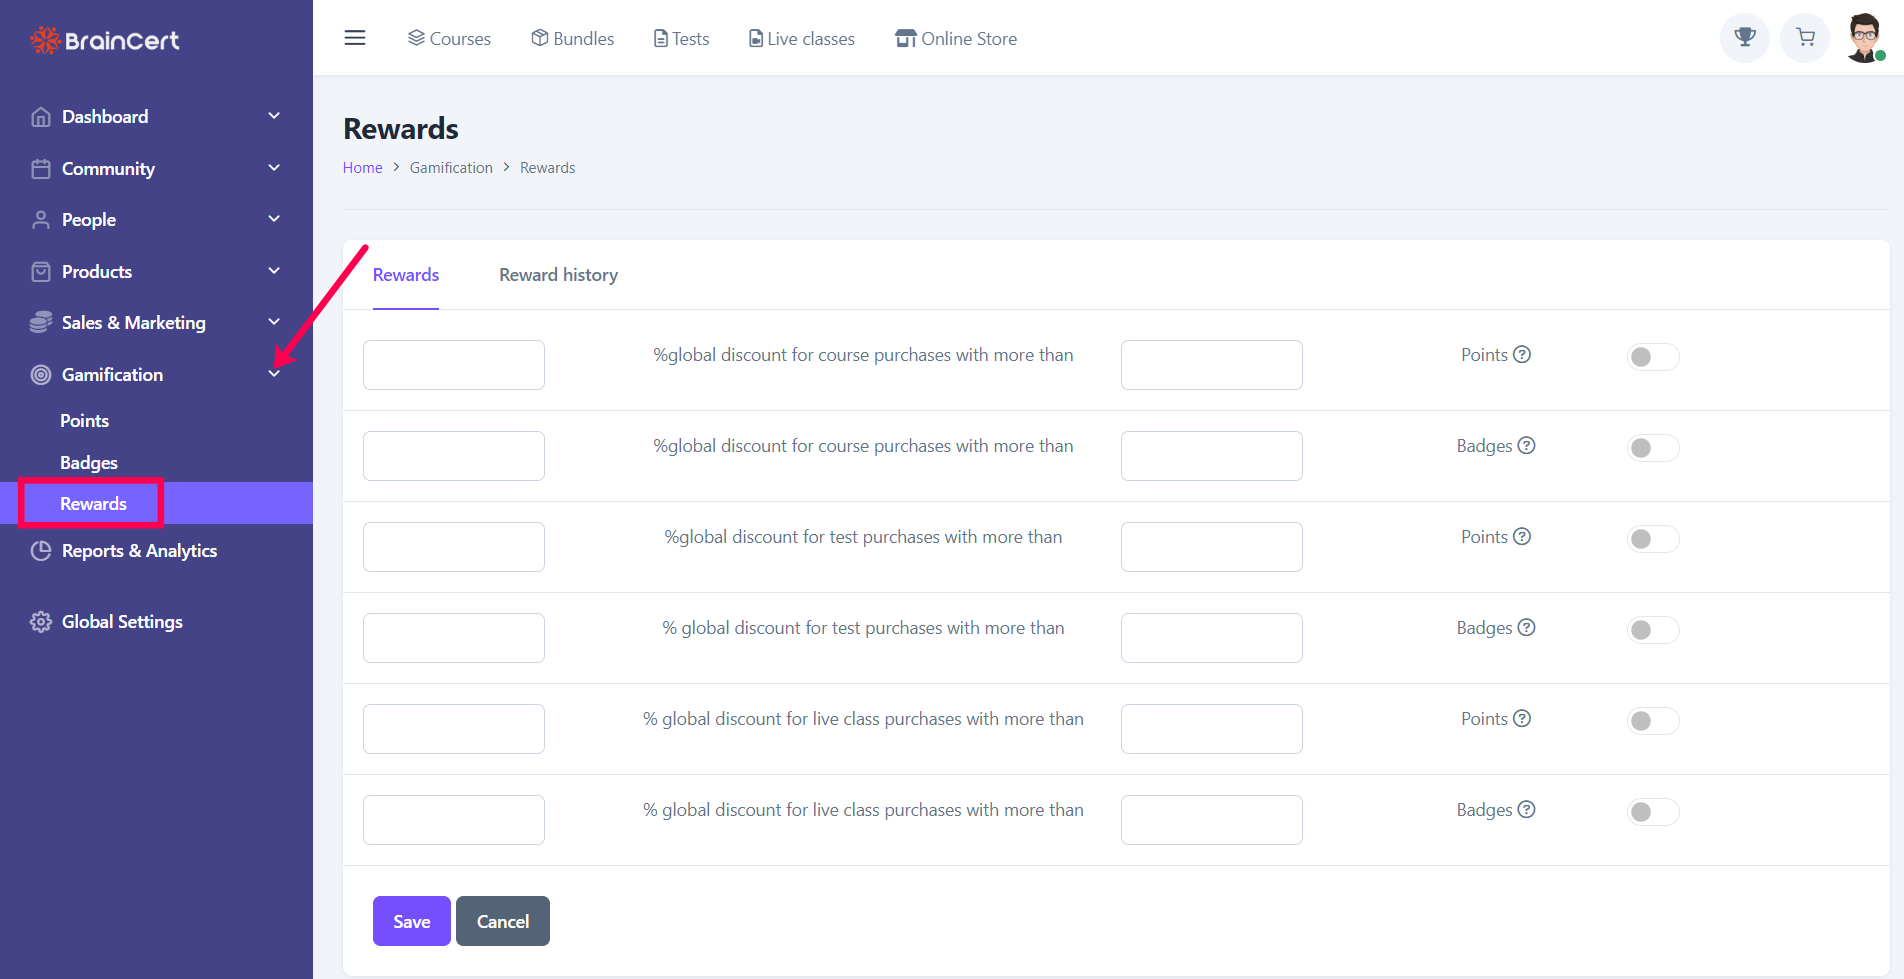

![1.png](https://support.braincert.com/kb/attachment/article/95/inline?token=eyJhbGciOiJodHRwOi8vd3d3LnczLm9yZy8yMDAxLzA0L3htbGRzaWctbW9yZSNobWFjLXNoYTI1NiIsInR5cCI6IkpXVCJ9.eyJpZCI6IjUzODkiLCJvcmdpZCI6IjE2MDMiLCJpc3MiOiJzdXBwb3J0LmJyYWluY2VydC5jb20ifQ.kHqgG-Bm8KdYa5ORWYjy2psEmVfdHB_RpJY20QgPe5Y)

##   

## **Step 2:**

Enter the percentage of discount you need to award for courses, tests & live classes, and activate the discounts using the toggle switch.
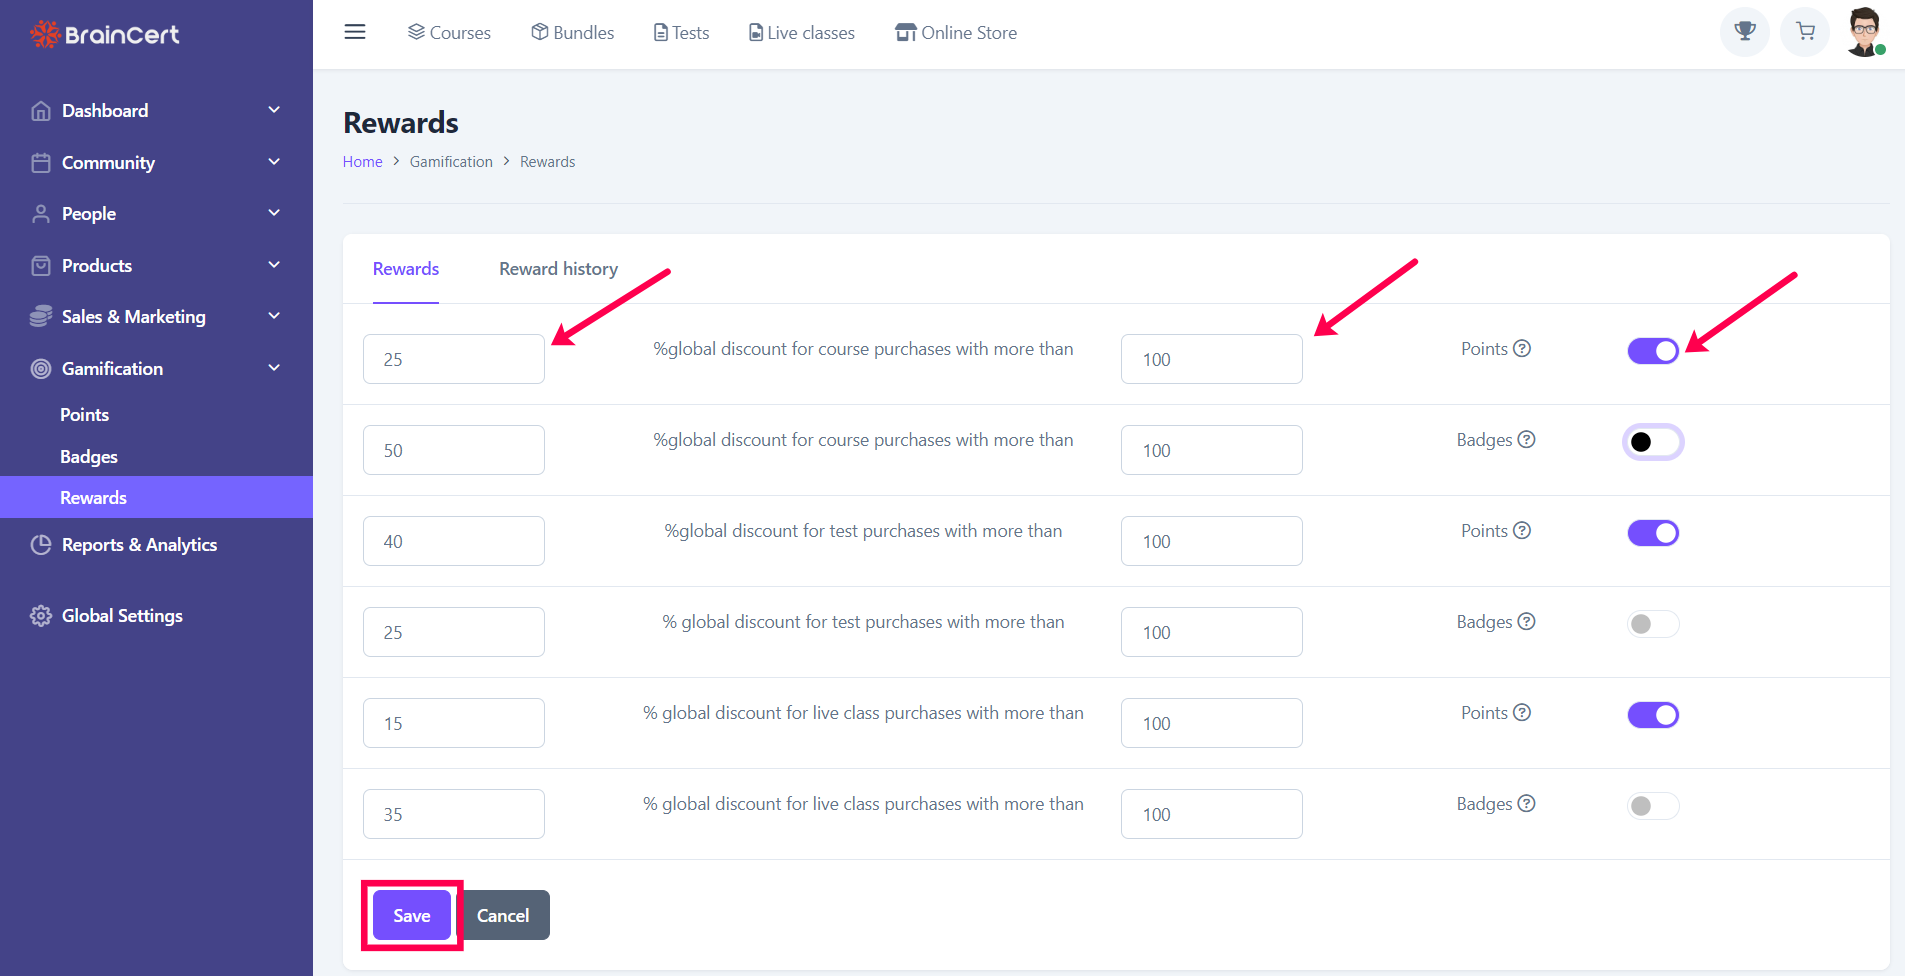

![2.png](https://support.braincert.com/kb/attachment/article/95/inline?token=eyJhbGciOiJodHRwOi8vd3d3LnczLm9yZy8yMDAxLzA0L3htbGRzaWctbW9yZSNobWFjLXNoYTI1NiIsInR5cCI6IkpXVCJ9.eyJpZCI6IjUzOTEiLCJvcmdpZCI6IjE2MDMiLCJpc3MiOiJzdXBwb3J0LmJyYWluY2VydC5jb20ifQ.OallCpgxGGOu_Dz64GWwLm2RDxUEqq7gh0CdIoQ3Me4)

Click '**S** **ave**' after you specify the discounts.

# Creating Dynamic Content Pages for Any Landing Page Template

The dynamic content page feature is a game-changer for your webpage customization, facilitating the creation of aesthetically pleasing, professionally crafted, and continually current pages.

One of the outstanding aspects of the Dynamic Content Page is its flexibility. Create essential inner pages for any landing page template such as "About Us," "Contact Us," "Privacy Policy," "Terms of Use," and more, and seamlessly link them in your top-level menu or footer. The beauty of this dynamic content feature is its adaptability – create the content once, and it can be efficiently integrated and run on any landing page template.

﻿﻿

## Step 1:

Navigate to '**Sales &** **Marketing**', '**Website**', and select '**Content Pages**'.

![](https://support.braincert.com/kb/attachment/article/38/inline?token=eyJhbGciOiJodHRwOi8vd3d3LnczLm9yZy8yMDAxLzA0L3htbGRzaWctbW9yZSNobWFjLXNoYTI1NiIsInR5cCI6IkpXVCJ9.eyJpZCI6IjU2MDQiLCJvcmdpZCI6IjE2MDMiLCJpc3MiOiJzdXBwb3J0LmJyYWluY2VydC5jb20ifQ.vvlzxGMuibiOldy9VhFcBTVTlXlmUzCv1trJcYUErzY)

## Step 2:

The first four titles are the '**Default Pages**'. Click on the '**Add New Content Page**' button to create a new page or click on the '**Edit**' icon under the options to edit the existing page.

## ![](https://support.braincert.com/kb/attachment/article/38/inline?token=eyJhbGciOiJodHRwOi8vd3d3LnczLm9yZy8yMDAxLzA0L3htbGRzaWctbW9yZSNobWFjLXNoYTI1NiIsInR5cCI6IkpXVCJ9.eyJpZCI6IjU2MDUiLCJvcmdpZCI6IjE2MDMiLCJpc3MiOiJzdXBwb3J0LmJyYWluY2VydC5jb20ifQ.SURrJhwrbffPJIkoomF5xMnQAQYpbqiYvCSdzjPixrM)

## Step 3:

Select '**Basic page using HTML editor**' to edit on the same page. Fill in the '**Title**' and its page description like Privacy Policy, About Us, or Contact Us and click on the '**Save**' button.

![](https://support.braincert.com/kb/attachment/article/38/inline?token=eyJhbGciOiJodHRwOi8vd3d3LnczLm9yZy8yMDAxLzA0L3htbGRzaWctbW9yZSNobWFjLXNoYTI1NiIsInR5cCI6IkpXVCJ9.eyJpZCI6IjU2MDYiLCJvcmdpZCI6IjE2MDMiLCJpc3MiOiJzdXBwb3J0LmJyYWluY2VydC5jb20ifQ.Trk5IFoN3LQq0LEefOhaqMnFhsO1SvbRwGKCkOjoGF4)

## Step 4:

Select '**Advanced page using Builder**' to edit with the Site Builder and click on '**Save & Edit with Site Builder**' icon.

![](https://support.braincert.com/kb/attachment/article/38/inline?token=eyJhbGciOiJodHRwOi8vd3d3LnczLm9yZy8yMDAxLzA0L3htbGRzaWctbW9yZSNobWFjLXNoYTI1NiIsInR5cCI6IkpXVCJ9.eyJpZCI6IjU2MDciLCJvcmdpZCI6IjE2MDMiLCJpc3MiOiJzdXBwb3J0LmJyYWluY2VydC5jb20ifQ.T1OZ-QfxYm4GjMiQ_LukVDhzgbeOk8SOxaFtupcI6eo)

## Step 5:

After being redirected to the '**Site Builder**' page, create the content page and click on the '**Publish**' icon.  

![CP2.png](https://support.braincert.com/kb/attachment/article/38/inline?token=eyJhbGciOiJodHRwOi8vd3d3LnczLm9yZy8yMDAxLzA0L3htbGRzaWctbW9yZSNobWFjLXNoYTI1NiIsInR5cCI6IkpXVCJ9.eyJpZCI6IjQ3ODQiLCJvcmdpZCI6IjE2MDMiLCJpc3MiOiJzdXBwb3J0LmJyYWluY2VydC5jb20ifQ.ceKRpC0t3_H4B-tHboowoAIGw6Wfq9wJqj8CMKn8Igo)

##   

##   

##   

##   

##   
Step 6:﻿﻿

Now, navigate to the '**Content Pages**', click on the '**Edit**' button under **'Options**' to edit the text, or click on the '**Copy Content URL**' icon to paste the URL on the Landing Page.

![](https://support.braincert.com/kb/attachment/article/38/inline?token=eyJhbGciOiJodHRwOi8vd3d3LnczLm9yZy8yMDAxLzA0L3htbGRzaWctbW9yZSNobWFjLXNoYTI1NiIsInR5cCI6IkpXVCJ9.eyJpZCI6IjU2MDgiLCJvcmdpZCI6IjE2MDMiLCJpc3MiOiJzdXBwb3J0LmJyYWluY2VydC5jb20ifQ.ubLFxX4aXL5YQlxZBIwayn_IJogpdddiJirNGJjTeN4)

##   
﻿﻿Step 7:

Next, open the '**Landing Page'** and select the preferred page and click on the '**Edit**' button.

![](https://support.braincert.com/kb/attachment/article/38/inline?token=eyJhbGciOiJodHRwOi8vd3d3LnczLm9yZy8yMDAxLzA0L3htbGRzaWctbW9yZSNobWFjLXNoYTI1NiIsInR5cCI6IkpXVCJ9.eyJpZCI6IjU2MTEiLCJvcmdpZCI6IjE2MDMiLCJpc3MiOiJzdXBwb3J0LmJyYWluY2VydC5jb20ifQ.VFTnO2fr6rNZSoiLM-EapyiXvOhMMaBu6gu7ZxIfF0A)

## ﻿Step 8:

﻿Scroll to the bottom page and click on the template (**Ex: Contact Us**) that has to be edited. On the right top corner of the page, find the '**URL**' column under '**Content**' and paste the URL. Click on the '**Publish**' icon, once it is done.![Paste URL.png](https://support.braincert.com/kb/attachment/article/38/inline?token=eyJhbGciOiJodHRwOi8vd3d3LnczLm9yZy8yMDAxLzA0L3htbGRzaWctbW9yZSNobWFjLXNoYTI1NiIsInR5cCI6IkpXVCJ9.eyJpZCI6IjQ3ODAiLCJvcmdpZCI6IjE2MDMiLCJpc3MiOiJzdXBwb3J0LmJyYWluY2VydC5jb20ifQ.QqLr6aIdaqcURyth5R6NJpcpSiWwp_5B3u5OTaKWXK4)
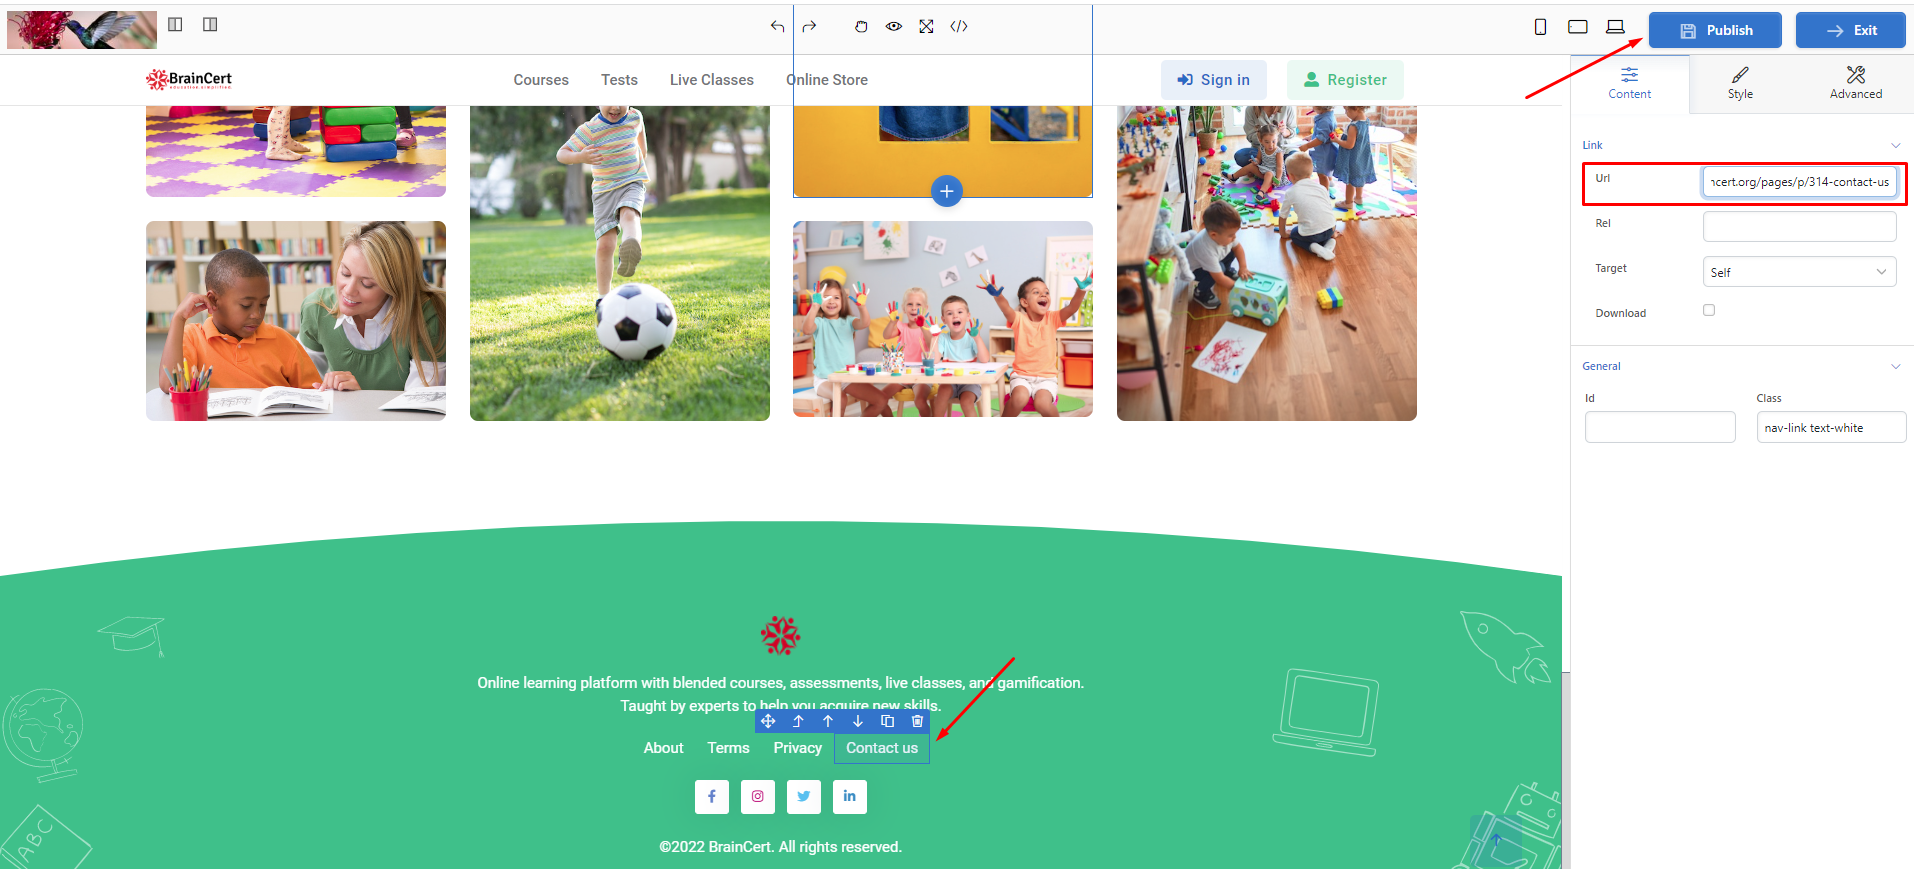

##    
Step 9:

To view the changes, navigate to **'Landing Page**' and click on the '**Preview Landing Page**' icon.

![](https://support.braincert.com/kb/attachment/article/38/inline?token=eyJhbGciOiJodHRwOi8vd3d3LnczLm9yZy8yMDAxLzA0L3htbGRzaWctbW9yZSNobWFjLXNoYTI1NiIsInR5cCI6IkpXVCJ9.eyJpZCI6IjU2MTIiLCJvcmdpZCI6IjE2MDMiLCJpc3MiOiJzdXBwb3J0LmJyYWluY2VydC5jb20ifQ.v71DsYe9zxnh2GluhOIe0RsK-MgsyYMtjRdmUK_uq2k)

Here is the preview of the page.

![Preview FInal.png](https://support.braincert.com/kb/attachment/article/38/inline?token=eyJhbGciOiJodHRwOi8vd3d3LnczLm9yZy8yMDAxLzA0L3htbGRzaWctbW9yZSNobWFjLXNoYTI1NiIsInR5cCI6IkpXVCJ9.eyJpZCI6IjQ3ODIiLCJvcmdpZCI6IjE2MDMiLCJpc3MiOiJzdXBwb3J0LmJyYWluY2VydC5jb20ifQ.GT513FESuHYzpgQC9DNpgeJHWxjlT_8rMcNj_KLvPh8)    
﻿﻿

In conclusion, the Dynamic Content Page feature is an invaluable tool for customizing and enhancing your landing pages. By creating pages like 'About Us', 'Contact Us', 'Privacy Policy', 'Terms of Use', and more, you're taking a significant step towards making your website more comprehensive and user-friendly. Remember, you have two editing options at your disposal – the 'Basic Page using HTML Editor' and 'Advanced Page using Site Builder'. Depending on your familiarity and comfort with the systems, you can choose the one that best suits your needs. With these easy steps, you are well on your way to creating a more dynamic and engaging online presence.

# Veracity Learning Record Store (LRS) integration to send xAPI (Experience API or Tin Can API) statements

In this article, we explore the integration of your BrainCert LMS tenant with Veracity's Learning Record Store (LRS) to track and manage learning data. This integration empowers organizations to centralize their learning data, gain valuable insights into learner performance, and improve the overall learning experience.  
  
The LRS is a data storage system designed to collect, store, and manage learning experience data generated by learners engaging with online content. xAPI, also known as Experience API or Tin Can API, is a standard specification for tracking and analyzing learning experiences across various platforms and devices.

In addition to showcasing all LMS activities in a comprehensive audit trail, BrainCert provides a seamless integration with external Learning Record Stores (LRS), enabling the automatic transmission of your recorded learning data without any modifications. This streamlined connectivity ensures a centralized repository for learning data, allowing organizations to efficiently track, analyze, and optimize their learning experiences.

****

## **Step 1:**

Login to Veracity Learning, make a click on **Create an LRS.**

## ![a1.png](https://support.braincert.com/kb/attachment/article/162/inline?token=eyJhbGciOiJodHRwOi8vd3d3LnczLm9yZy8yMDAxLzA0L3htbGRzaWctbW9yZSNobWFjLXNoYTI1NiIsInR5cCI6IkpXVCJ9.eyJpZCI6IjQ2NzAiLCJvcmdpZCI6IjE2MDMiLCJpc3MiOiJzdXBwb3J0LmJyYWluY2VydC5jb20ifQ.WJxpJgKECxbuXR2YnoQ9WgTQUHsA8YSsqU3MMH5kXu0)  
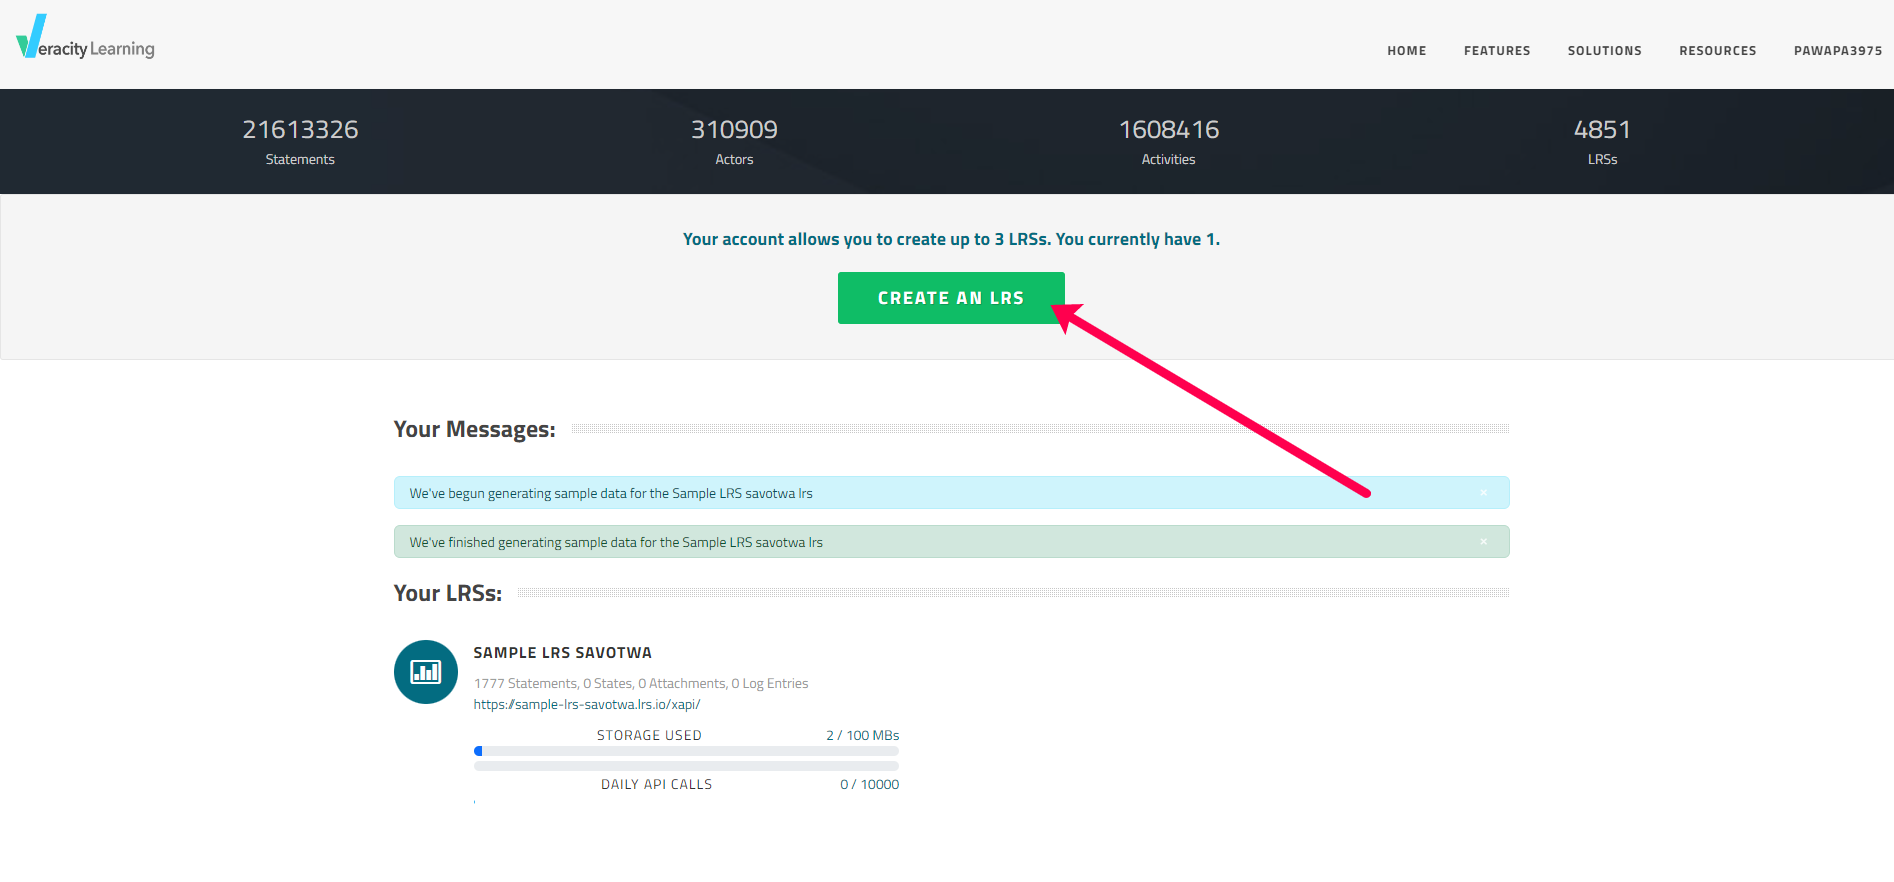
**Step 2:**

Enter the LRS name, and select **Create** button.

![a2.png](https://support.braincert.com/kb/attachment/article/162/inline?token=eyJhbGciOiJodHRwOi8vd3d3LnczLm9yZy8yMDAxLzA0L3htbGRzaWctbW9yZSNobWFjLXNoYTI1NiIsInR5cCI6IkpXVCJ9.eyJpZCI6IjQ2NzEiLCJvcmdpZCI6IjE2MDMiLCJpc3MiOiJzdXBwb3J0LmJyYWluY2VydC5jb20ifQ.MfcVZAQqHp5YaGd4bWp4pfxywYJPCYGmzWugWAf0huI)

## **Step 3:**

Created LRS will be displayed here. Make a click on that.

## ![a3.png](https://support.braincert.com/kb/attachment/article/162/inline?token=eyJhbGciOiJodHRwOi8vd3d3LnczLm9yZy8yMDAxLzA0L3htbGRzaWctbW9yZSNobWFjLXNoYTI1NiIsInR5cCI6IkpXVCJ9.eyJpZCI6IjQ2NzIiLCJvcmdpZCI6IjE2MDMiLCJpc3MiOiJzdXBwb3J0LmJyYWluY2VydC5jb20ifQ.oHewf3OPgH6MNlze0QkeB7lj6IdEnHN6rRX9uQo9x8g)  
  
Step 4:

Select the **No Access Keys!**

**![a4.png](https://support.braincert.com/kb/attachment/article/162/inline?token=eyJhbGciOiJodHRwOi8vd3d3LnczLm9yZy8yMDAxLzA0L3htbGRzaWctbW9yZSNobWFjLXNoYTI1NiIsInR5cCI6IkpXVCJ9.eyJpZCI6IjQ2NzMiLCJvcmdpZCI6IjE2MDMiLCJpc3MiOiJzdXBwb3J0LmJyYWluY2VydC5jb20ifQ.cynxtDv4EZuoTR_3ZhOGgQefm-jlrBJzZlaZmUzsG0c)**

## **Step 5:**

Enter the Key name, do basic pieces of information, and click on **Create.**

## **![a5.png](https://support.braincert.com/kb/attachment/article/162/inline?token=eyJhbGciOiJodHRwOi8vd3d3LnczLm9yZy8yMDAxLzA0L3htbGRzaWctbW9yZSNobWFjLXNoYTI1NiIsInR5cCI6IkpXVCJ9.eyJpZCI6IjQ2NzQiLCJvcmdpZCI6IjE2MDMiLCJpc3MiOiJzdXBwb3J0LmJyYWluY2VydC5jb20ifQ.bfunQf3Ani0MBkZRlUsjhIKfnVmNTrP-pPXdLR8tFpA)Step 6:**

Navigate to **Access Keys** under **Management**, it lists the created Access key.

![a7.png](https://support.braincert.com/kb/attachment/article/162/inline?token=eyJhbGciOiJodHRwOi8vd3d3LnczLm9yZy8yMDAxLzA0L3htbGRzaWctbW9yZSNobWFjLXNoYTI1NiIsInR5cCI6IkpXVCJ9.eyJpZCI6IjQ2NzciLCJvcmdpZCI6IjE2MDMiLCJpc3MiOiJzdXBwb3J0LmJyYWluY2VydC5jb20ifQ.yU6mXCvoombp6q_QVLG2rfMQ9Vo3XyKnOdnoNSbx-TE)

## **Step 7:**

Navigate to Statements under xAPI Data, where the sign-in action are listed.

![a8.png](https://support.braincert.com/kb/attachment/article/162/inline?token=eyJhbGciOiJodHRwOi8vd3d3LnczLm9yZy8yMDAxLzA0L3htbGRzaWctbW9yZSNobWFjLXNoYTI1NiIsInR5cCI6IkpXVCJ9.eyJpZCI6IjQ2NzYiLCJvcmdpZCI6IjE2MDMiLCJpc3MiOiJzdXBwb3J0LmJyYWluY2VydC5jb20ifQ.-fm9_u-9MqPz1hG3ExCj3nG3RfYwcOAfwbujCedM28A)

## **Step 8:**

In the BrainCert platform, sign-in actions can be seen under Activity Stream in the Dashboard area.

![i7.png](https://support.braincert.com/kb/attachment/article/161/inline?token=eyJhbGciOiJodHRwOi8vd3d3LnczLm9yZy8yMDAxLzA0L3htbGRzaWctbW9yZSNobWFjLXNoYTI1NiIsInR5cCI6IkpXVCJ9.eyJpZCI6IjQ2NjIiLCJvcmdpZCI6IjE2MDMiLCJpc3MiOiJzdXBwb3J0LmJyYWluY2VydC5jb20ifQ.SgIpTwygSVidT6Wgxh_X1XxcBi9ib85oR9m0NCh5Rzk)

Hope you find this article helpful.

# Setup Intercom Extension for all Student Communications and Support

Intercom helps businesses connect personally with consumers and offers customer messaging products for sales, marketing, and support teams, connected on one platform.

The intercom extension for BrainCert lets you interact with your customers/students either by email or live chat on your LMS when they are browsing it. This is also a great way to offer technical and customer support to your students and answer their questions.

###   
Integrating Intercom with your LMS

## **Step 1:**

Create an account and log in to Intercom [https://www.intercom.com/](https://www.intercom.com/).

##   
**Step 2:**

Follow the [link](https://www.intercom.com/help/en/articles/168-install-intercom-in-your-product-for-logged-in-users "https://www.intercom.com/help/en/articles/168-install-intercom-in-your-product-for-logged-in-users")to install Intercom on your web app.

## **Step 3:**

Note your '**App ID**' from the Intercom app settings. Now, go to your LMS and click on '**Global Settings**' --&gt; '**Extensions**'.

![1.png](https://support.braincert.com/kb/attachment/article/14/inline?token=eyJhbGciOiJodHRwOi8vd3d3LnczLm9yZy8yMDAxLzA0L3htbGRzaWctbW9yZSNobWFjLXNoYTI1NiIsInR5cCI6IkpXVCJ9.eyJpZCI6IjUxMjAiLCJvcmdpZCI6IjE2MDMiLCJpc3MiOiJzdXBwb3J0LmJyYWluY2VydC5jb20ifQ.eLNnQXIFHr7on98I2TnIaddxabzkKG68Oqn0ZFGE_-U)

## **Step 4:**

Scroll down to Intercom, add your Intercom '**App ID**', and enable the extension by using the toggle. Now, click on the '**Save**' button to save your changes.
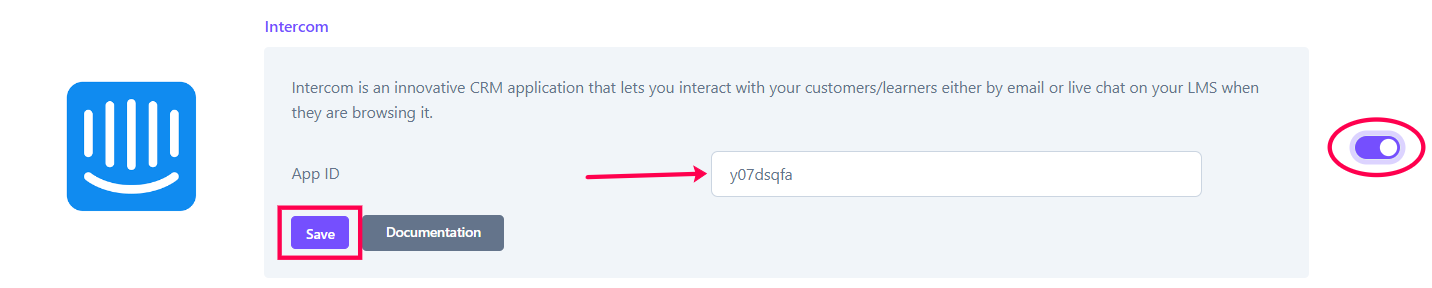

![1.png](https://support.braincert.com/kb/attachment/article/14/inline?token=eyJhbGciOiJodHRwOi8vd3d3LnczLm9yZy8yMDAxLzA0L3htbGRzaWctbW9yZSNobWFjLXNoYTI1NiIsInR5cCI6IkpXVCJ9.eyJpZCI6IjUwNDkiLCJvcmdpZCI6IjE2MDMiLCJpc3MiOiJzdXBwb3J0LmJyYWluY2VydC5jb20ifQ.dVlVivO9SlnyfsFzAW6aE-RMSSY18nVXYgF8kJksTGI)

## **Step 5:**

Now, go to your Intercom App settings page click on the "**Intercom for web**" link in the left menu, and confirm that the success message is displayed as shown below.

![](https://support.braincert.com/kb/attachment/article/14/inline?token=eyJhbGciOiJodHRwOi8vd3d3LnczLm9yZy8yMDAxLzA0L3htbGRzaWctbW9yZSNobWFjLXNoYTI1NiIsInR5cCI6IkpXVCJ9.eyJpZCI6IjQxNjgiLCJvcmdpZCI6IjE2MDMiLCJpc3MiOiJzdXBwb3J0LmJyYWluY2VydC5jb20ifQ.EdNJihCAqguS8gvWFsdBROeOZWkpbUWSNarb3AJy_w8)

## **Step 6:**

To further customize your intercom messenger theme, click on "**Messenger appearance**" under your '**App Settings**'.

![2.png](https://support.braincert.com/kb/attachment/article/14/inline?token=eyJhbGciOiJodHRwOi8vd3d3LnczLm9yZy8yMDAxLzA0L3htbGRzaWctbW9yZSNobWFjLXNoYTI1NiIsInR5cCI6IkpXVCJ9.eyJpZCI6IjUwNTAiLCJvcmdpZCI6IjE2MDMiLCJpc3MiOiJzdXBwb3J0LmJyYWluY2VydC5jb20ifQ.RrRVoIot-eZBTOt85zRMxvFghq0ZQxF5-MrAXo937Z4)

## **Step 7:** 

Customize the colors to set the messenger's theme. Make sure the '**Users**' checkbox is checked.

![3.png](https://support.braincert.com/kb/attachment/article/14/inline?token=eyJhbGciOiJodHRwOi8vd3d3LnczLm9yZy8yMDAxLzA0L3htbGRzaWctbW9yZSNobWFjLXNoYTI1NiIsInR5cCI6IkpXVCJ9.eyJpZCI6IjUwNTEiLCJvcmdpZCI6IjE2MDMiLCJpc3MiOiJzdXBwb3J0LmJyYWluY2VydC5jb20ifQ.qPlR7ygsO-rSE78YUBQcX5kvkmssXU7ibiyEWsl2lG8)

## **Step 8:**

Finally, refresh your LMS and confirm the intercom messenger icon is visible at the right bottom of the page.

![4.png](https://support.braincert.com/kb/attachment/article/14/inline?token=eyJhbGciOiJodHRwOi8vd3d3LnczLm9yZy8yMDAxLzA0L3htbGRzaWctbW9yZSNobWFjLXNoYTI1NiIsInR5cCI6IkpXVCJ9.eyJpZCI6IjUwNTIiLCJvcmdpZCI6IjE2MDMiLCJpc3MiOiJzdXBwb3J0LmJyYWluY2VydC5jb20ifQ.Nid0AfzikfLx9AorJgFZ0XBqR6-kjnxn3K25GAg1_JU)

## **Step 9:**

BrainCert automatically tracks all your LMS users' data in Intercom along with additional details as shown below.

![5.png](https://support.braincert.com/kb/attachment/article/14/inline?token=eyJhbGciOiJodHRwOi8vd3d3LnczLm9yZy8yMDAxLzA0L3htbGRzaWctbW9yZSNobWFjLXNoYTI1NiIsInR5cCI6IkpXVCJ9.eyJpZCI6IjUwNTMiLCJvcmdpZCI6IjE2MDMiLCJpc3MiOiJzdXBwb3J0LmJyYWluY2VydC5jb20ifQ.r6leiTmn4KSn4BzYjEOZsx82D9x7dbxWhuEQF_WgMBg)

We believe Intercom's messaging solution is a great way to communicate with your LMS users in real time and use customer data to deeply personalize your messages.

# Customizing User Types: A Guide to Implementing Tailored User Permissions in Your LMS

Customizing user roles and permissions is essential in managing systems or platforms efficiently. The 'User Type' feature meets this need by allowing administrators to define and assign unique roles with specific permissions, providing more flexibility than standard roles. This is ideal for various settings like educational platforms and corporate systems, ensuring users have access rights that match their roles and needs.

<iframe src="https://player.vimeo.com/video/977855138?title=0&amp;byline=0&amp;portrait=0&amp;badge=0&amp;autopause=0&amp;player_id=0&amp;app_id=58479" frameborder="0" allow="autoplay; fullscreen; picture-in-picture; clipboard-write" style="position:absolute;top:0;left:0;width:100%;height:100%;" title="Customizing User Type">&ZeroWidthSpace;</iframe>

## **How to Implement User Types**

**It is crucial to select the appropriate user type when either adding a new user or modifying the details of an existing one.**

## **Step 1:﻿﻿**

Navigate to '**Users**' under '**People**'.

Edit the existing user or add a new user by clicking on '**Create New User**'. Fill in the details under '**Add/Edit User**'.

## **![1.png](https://support.braincert.com/kb/attachment/article/185/inline?token=eyJhbGciOiJodHRwOi8vd3d3LnczLm9yZy8yMDAxLzA0L3htbGRzaWctbW9yZSNobWFjLXNoYTI1NiIsInR5cCI6IkpXVCJ9.eyJpZCI6IjU1MDciLCJvcmdpZCI6IjE2MDMiLCJpc3MiOiJzdXBwb3J0LmJyYWluY2VydC5jb20ifQ._pdXbGOOlWZitvtzMnW2-9i0ZIOJFhtwUt_706gHi5k)﻿**
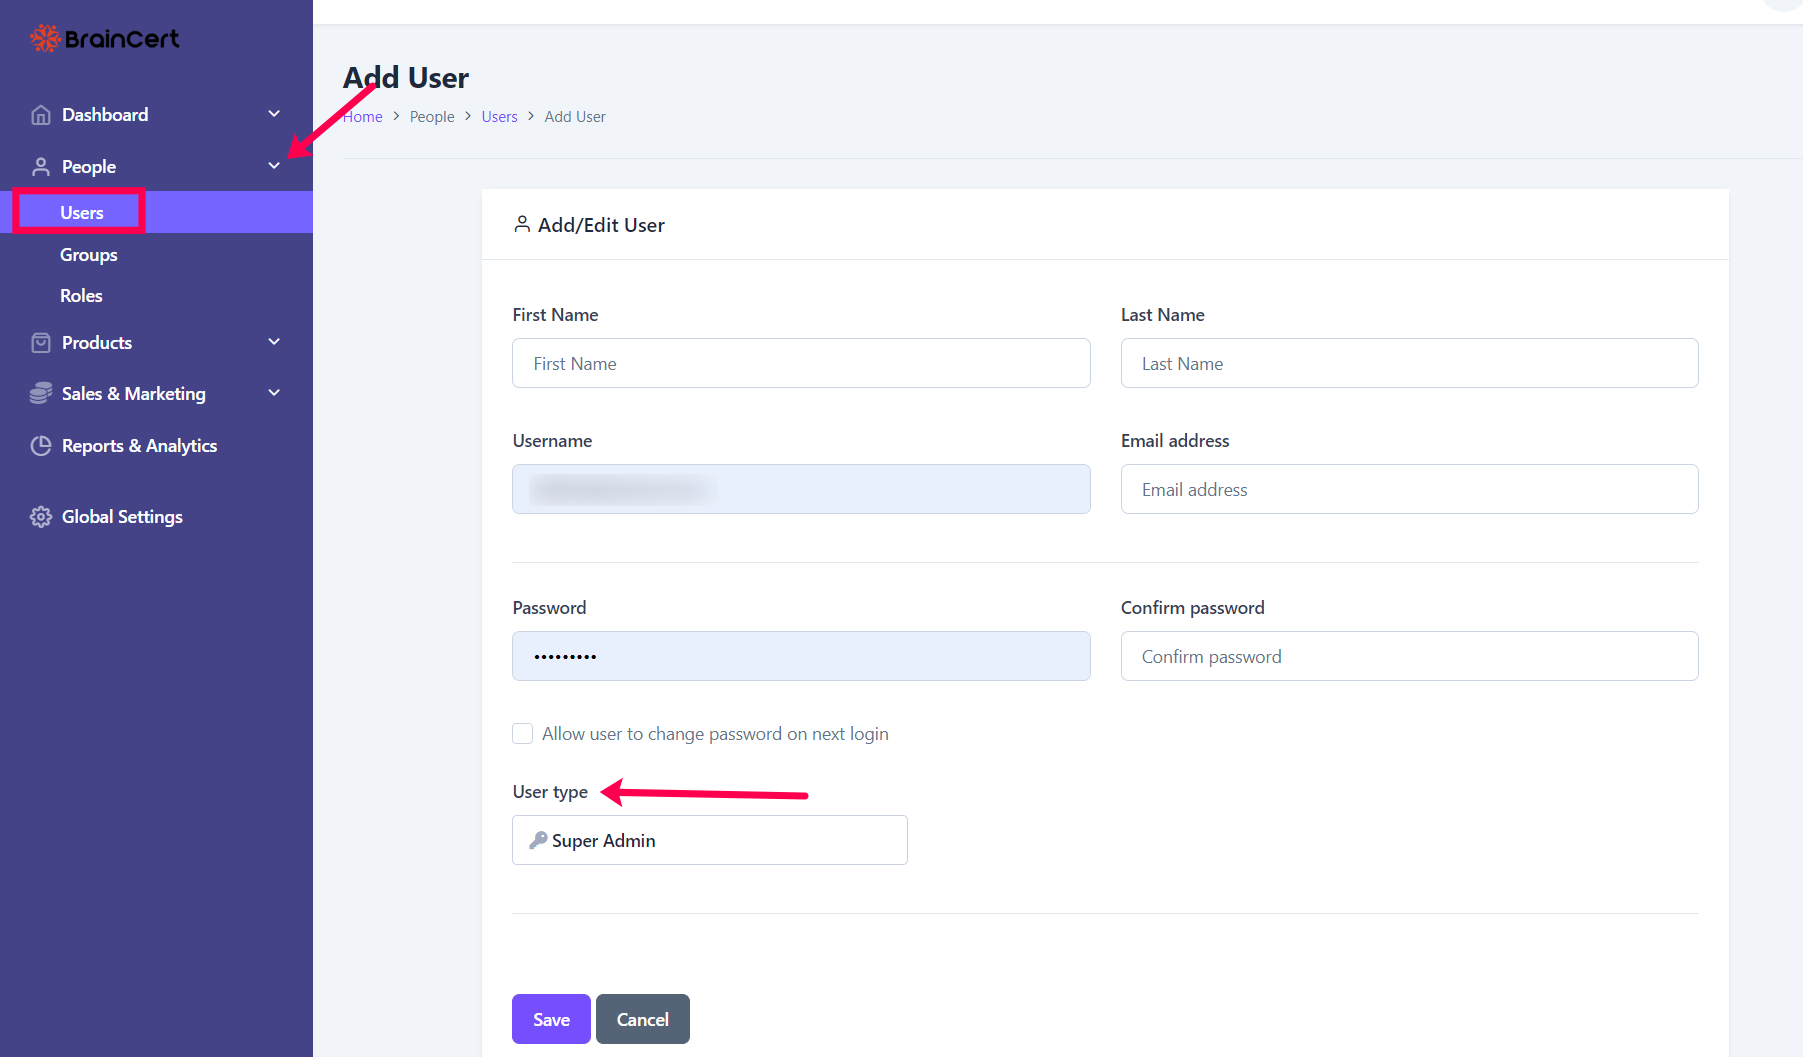

## **Step 2:**

Click on the '**User Type**' and select the required option from the dropdown menu.

**![2.png](https://support.braincert.com/kb/attachment/article/185/inline?token=eyJhbGciOiJodHRwOi8vd3d3LnczLm9yZy8yMDAxLzA0L3htbGRzaWctbW9yZSNobWFjLXNoYTI1NiIsInR5cCI6IkpXVCJ9.eyJpZCI6IjU1MDgiLCJvcmdpZCI6IjE2MDMiLCJpc3MiOiJzdXBwb3J0LmJyYWluY2VydC5jb20ifQ.z_sZMXPD24cR7Iz0H9vU0wq8OoEUJPX31z_YCVdyqE4)**
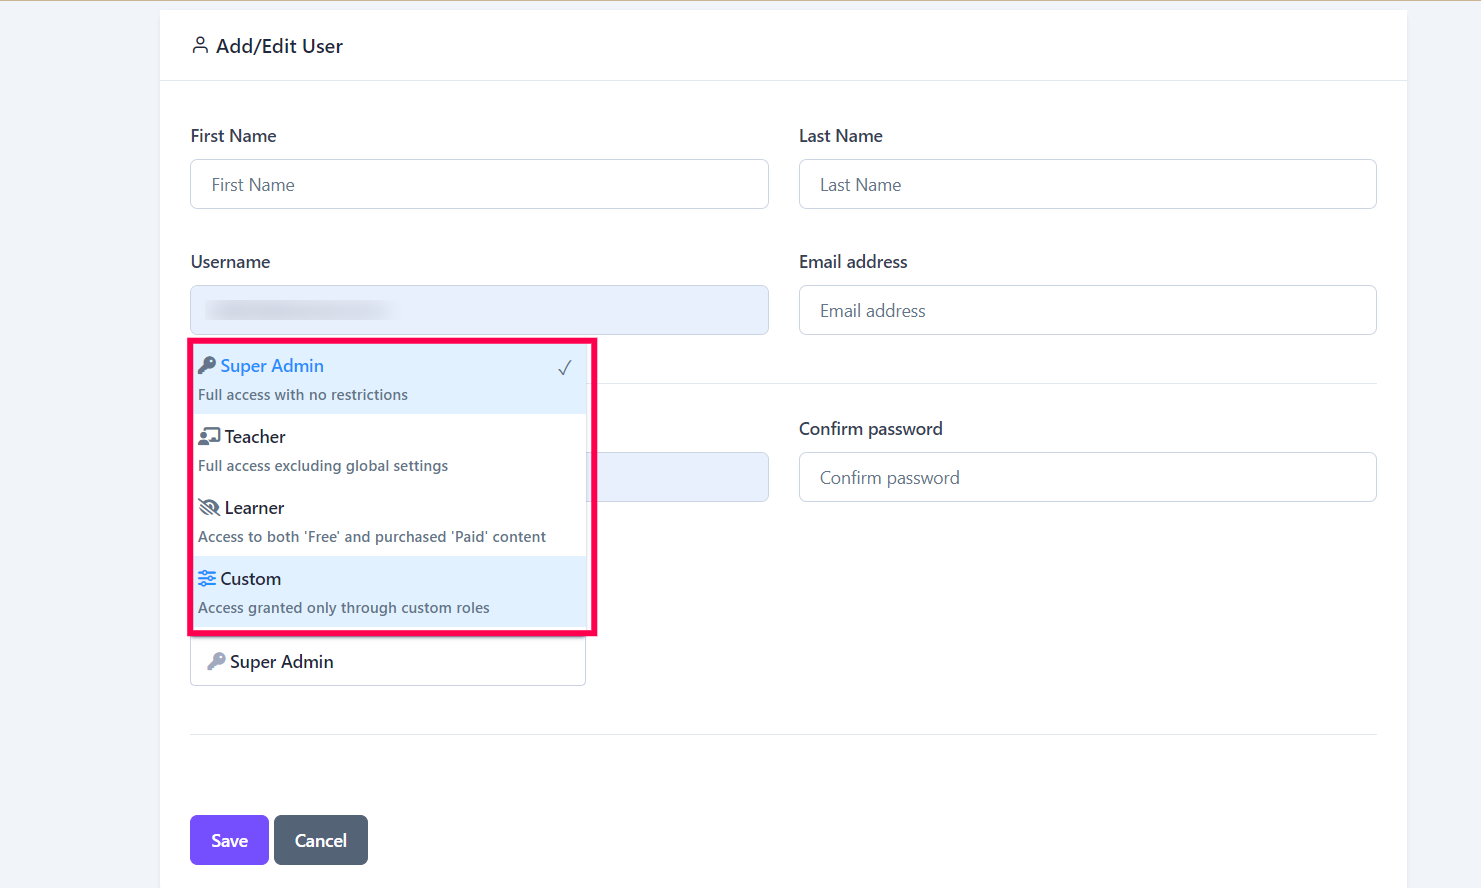
- **Super Admin:** Unrestricted access to all platform features, including courses, content, settings, and reports.
- **Teacher:** Access to most pages, excluding global settings, and full access to content.
- **Learner:** Access is limited to content assigned to their group memberships or personal invitations. Students may independently enroll in additional content through catalog pages. A Learner must purchase 'Paid' content in order to gain access to that course, test, and live class.
- **Custom:** Access is role-based, limited to specific groups. Courses and other content are not automatically assigned. Like students, they can enroll in additional content as needed.
    **<u><br></u>**

**﻿﻿Note:** Super Admins and Teachers enjoy free access to everything on the Catalog Pages, such as courses, tests, and live classes, thanks to their extensive access privileges. If you need to limit their access, change their user type to 'Custom' and manage permissions through Roles and Groups.

By implementing user types, organizations and educational institutions can significantly enhance their operational efficiency and user experience. This feature not only streamlines user management but also aligns system access with the unique roles and requirements of different users.

# How to Enable Point & Pay Payment Gateway

Point & Pay Payment Gateway is a secure online payment solution that enables businesses to accept payments from customers electronically. This guide takes you through each step, offering clear instructions and explanations to ensure a smooth setup process.

## **﻿Step 1:**

To enable the '**Point & Pay**' Payment Gateway, start by activating the extension.   
Access your UTP account, click '**Global Settings**', and select **'Extensions'**.

## ![1.png](https://support.braincert.com/kb/attachment/article/170/inline?token=eyJhbGciOiJodHRwOi8vd3d3LnczLm9yZy8yMDAxLzA0L3htbGRzaWctbW9yZSNobWFjLXNoYTI1NiIsInR5cCI6IkpXVCJ9.eyJpZCI6IjQ5OTgiLCJvcmdpZCI6IjE2MDMiLCJpc3MiOiJzdXBwb3J0LmJyYWluY2VydC5jb20ifQ.9ZjMNRg6Mks8fYlTOIWZ4OLBQEWuUmsTObA9BU3xyGg)  
**Step 2﻿﻿:** 

Scroll down to locate '**Point & Pay**', toggle the button to enable it, and click '**Save**' to confirm the changes.

## ![2.png](https://support.braincert.com/kb/attachment/article/170/inline?token=eyJhbGciOiJodHRwOi8vd3d3LnczLm9yZy8yMDAxLzA0L3htbGRzaWctbW9yZSNobWFjLXNoYTI1NiIsInR5cCI6IkpXVCJ9.eyJpZCI6IjUwMDUiLCJvcmdpZCI6IjE2MDMiLCJpc3MiOiJzdXBwb3J0LmJyYWluY2VydC5jb20ifQ.JFEeKjmgFAmOY9j2AZwAcTvpRu9gjLP4zjIDAS--rs8)  
  
**Step 3:﻿**  

Next, navigate to **'E-commerce**' in Global Settings. Enter the Product ID, Partner ID, and other required information.

Specify the Transaction fee for '**Credit Card**' payments and '**eChecks**'. Finally, click '**Save Settings**' to save the changes.

​**Note:**​

**'Credit Card' payments:** Card-based transactions.

**'eChecks':** ​Digital version of paper checks.

![3.png](https://support.braincert.com/kb/attachment/article/170/inline?token=eyJhbGciOiJodHRwOi8vd3d3LnczLm9yZy8yMDAxLzA0L3htbGRzaWctbW9yZSNobWFjLXNoYTI1NiIsInR5cCI6IkpXVCJ9.eyJpZCI6IjUwMDAiLCJvcmdpZCI6IjE2MDMiLCJpc3MiOiJzdXBwb3J0LmJyYWluY2VydC5jb20ifQ.LizdWTK_fdL05AuA0-8GdqtBP7GD0dNZW3BkheEicTk)

## **Step 4:﻿**

Proceed to '**Checkout**' by navigating to the Cart.

![4.png](https://support.braincert.com/kb/attachment/article/170/inline?token=eyJhbGciOiJodHRwOi8vd3d3LnczLm9yZy8yMDAxLzA0L3htbGRzaWctbW9yZSNobWFjLXNoYTI1NiIsInR5cCI6IkpXVCJ9.eyJpZCI6IjUwMDYiLCJvcmdpZCI6IjE2MDMiLCJpc3MiOiJzdXBwb3J0LmJyYWluY2VydC5jb20ifQ.faUShdGABB_g0uXkZ1wWbSPD8owuxvQcN4RD5Hu1pf0)

## **Step 5:**

After proceeding with the payment, you will see the **'Transaction fee**' displayed. Enter the necessary details and click '**Make Payment**'.  
![5.png](https://support.braincert.com/kb/attachment/article/170/inline?token=eyJhbGciOiJodHRwOi8vd3d3LnczLm9yZy8yMDAxLzA0L3htbGRzaWctbW9yZSNobWFjLXNoYTI1NiIsInR5cCI6IkpXVCJ9.eyJpZCI6IjUwMDMiLCJvcmdpZCI6IjE2MDMiLCJpc3MiOiJzdXBwb3J0LmJyYWluY2VydC5jb20ifQ.RoUy-GIC9x-LwNYPFA6x0fI8Re5crzIpOiUTb59Wllc)The "**Point & Pay Payment Gateway**" is user-friendly as it simplifies the payment process for customers, allowing them to make payments easily and securely with minimal effort and complexity.

# How to Enroll in a Course via Email as a Learner

Getting started with your course is easier than you might think. In this guide, we'll walk you through the simple steps to enroll in your course through email and access the learning materials.

##   
**Enroll in a Course via Email**

## **Step 1:** 

Check your inbox for the enrollment email from your learning platform. This email contains a link to your course. Click on the '**Enroll Now**' button.

![1](https://support.braincert.com/kb/attachment/article/224/inline?token=eyJhbGciOiJodHRwOi8vd3d3LnczLm9yZy8yMDAxLzA0L3htbGRzaWctbW9yZSNobWFjLXNoYTI1NiIsInR5cCI6IkpXVCJ9.eyJpZCI6IjU5OTAiLCJvcmdpZCI6IjE2MDMiLCJpc3MiOiJzdXBwb3J0LmJyYWluY2VydC5jb20ifQ.I2qma4-mblvNtxspJP4cIuhXfsxA-58D0n5Y9-90xQI)

##   

## **Step 2:** 

You will be redirected to the login page. Enter your credentials to log in.

![2](https://support.braincert.com/kb/attachment/article/224/inline?token=eyJhbGciOiJodHRwOi8vd3d3LnczLm9yZy8yMDAxLzA0L3htbGRzaWctbW9yZSNobWFjLXNoYTI1NiIsInR5cCI6IkpXVCJ9.eyJpZCI6IjU5ODQiLCJvcmdpZCI6IjE2MDMiLCJpc3MiOiJzdXBwb3J0LmJyYWluY2VydC5jb20ifQ.3AeKVkcxaJ1rkSfmGXAXiPDVfQl5i1uul4fbWhB4Biw)

##   

## **Step 3:** 

Once logged in, you will be taken to the course enrollment page. Click on the '**Enroll Now**' button to register for the course.

![3](https://support.braincert.com/kb/attachment/article/224/inline?token=eyJhbGciOiJodHRwOi8vd3d3LnczLm9yZy8yMDAxLzA0L3htbGRzaWctbW9yZSNobWFjLXNoYTI1NiIsInR5cCI6IkpXVCJ9.eyJpZCI6IjU5ODYiLCJvcmdpZCI6IjE2MDMiLCJpc3MiOiJzdXBwb3J0LmJyYWluY2VydC5jb20ifQ.S4UZRFX7SE80t_Tx9B01uZpdITmPJRkBit_ebi5xI7M)

##   

## **Step 4:** 

After enrolling, you will be able to access the course immediately by clicking on the '**Take this Course**' button.

![4](https://support.braincert.com/kb/attachment/article/224/inline?token=eyJhbGciOiJodHRwOi8vd3d3LnczLm9yZy8yMDAxLzA0L3htbGRzaWctbW9yZSNobWFjLXNoYTI1NiIsInR5cCI6IkpXVCJ9.eyJpZCI6IjU5ODciLCJvcmdpZCI6IjE2MDMiLCJpc3MiOiJzdXBwb3J0LmJyYWluY2VydC5jb20ifQ.nlg6lye6wBPnEljZe9Fi9MX9_Q7TX08AwCxXlqmbTvw)

##   

## **Step 5:** 

Now, you'll get full access to the course.

![5](https://support.braincert.com/kb/attachment/article/224/inline?token=eyJhbGciOiJodHRwOi8vd3d3LnczLm9yZy8yMDAxLzA0L3htbGRzaWctbW9yZSNobWFjLXNoYTI1NiIsInR5cCI6IkpXVCJ9.eyJpZCI6IjU5ODgiLCJvcmdpZCI6IjE2MDMiLCJpc3MiOiJzdXBwb3J0LmJyYWluY2VydC5jb20ifQ.gjq0uOhcz7QCI5BLBXNZvzKsLmfYddHaQOZX3nFz-6k)

##   

## **Step 6:** 

Your enrolled course will appear on the left menu bar under '**Courses**'. Click on it to begin your learning journey.

![6](https://support.braincert.com/kb/attachment/article/224/inline?token=eyJhbGciOiJodHRwOi8vd3d3LnczLm9yZy8yMDAxLzA0L3htbGRzaWctbW9yZSNobWFjLXNoYTI1NiIsInR5cCI6IkpXVCJ9.eyJpZCI6IjU5ODkiLCJvcmdpZCI6IjE2MDMiLCJpc3MiOiJzdXBwb3J0LmJyYWluY2VydC5jb20ifQ.J_3KMqZuKZ4QROmTyJXlD-rdbHQXI2l96FDLEeU74NU)

You're now all set to get started with your course and begin learning.

# How to Request SSL Certificate for Meeting Rooms

In this guide, you will learn how to request an SSL certificate for your meeting rooms. Follow the steps below to ensure a secure and personalized setup for your meeting environment:

You can easily map your external domain to the BrainCert sub-domain using a CNAME entry in your DNS server in order to receive the performance and security benefits of BrainCert. CNAME stands for 'canonical name' and is a redirection to the zone file of the entered target domain.

After you have added the CNAME entry in your DNS server, click the 'Hostname & SSL Certificate' button in the Meeting rooms area and BrainCert will attempt to issue an SSL certificate for the custom hostname without any other validation or private key requirements. It's that simple!

Meeting rooms relies on SSL (HTTPS) to function and it will not work with external domains. BrainCert recommends using our native enterprise SSL feature for this service.

**Step 1: Go to Meeting Rooms**

Login to [app.braincert.com](https://app.braincert.org/index.php?option=com_membershipstatus&amp;view=dashboard&amp;Itemid=2600 "https://app.braincert.org/index.php?option=com_membershipstatus&amp;view=dashboard&amp;Itemid=2600"). Then, Select [**'Explore Meeting Rooms'**](https://app.braincert.com/component/classroomengine/permanent_room) as shown in the displayed Image.

![KB 3 - SSL Meeting Rooms](https://support.braincert.com/kb/attachment/article/235/inline?token=eyJhbGciOiJodHRwOi8vd3d3LnczLm9yZy8yMDAxLzA0L3htbGRzaWctbW9yZSNobWFjLXNoYTI1NiIsInR5cCI6IkpXVCJ9.eyJpZCI6IjYyMzIiLCJvcmdpZCI6IjE2MDMiLCJpc3MiOiJzdXBwb3J0LmJyYWluY2VydC5jb20ifQ.AekspS6WpSATWKQbbM9wqibCJdvXuJbbi2L9msudAqE)

**Step 2: Get Hostname & SSL Certificate**

Go to '**Hostname & SSL Certificate'** in the Right Column of Meeting rooms.
<section class="info-box"><p style=" margin: 0px 0px 10px; font-family: Inter; font-size: 14px; font-style: normal; font-weight: 400; text-align: left; text-indent: 0px; white-space: normal;"><span>SSL certificates are available only to paid subscribers. If you're on a free plan, please upgrade your Virtual Classroom API plan to obtain an SSL certificate for your custom hostname.</span></p><p style=" margin: 0px 0px 10px; font-family: Inter; font-size: 14px; font-style: normal; font-weight: 400; text-align: left; text-indent: 0px; white-space: normal;">If you have a premium subscription, click on the Hostname and SSL certificate.</p></section>

![KB 1 - SSL Meeting Rooms](https://support.braincert.com/kb/attachment/article/235/inline?token=eyJhbGciOiJodHRwOi8vd3d3LnczLm9yZy8yMDAxLzA0L3htbGRzaWctbW9yZSNobWFjLXNoYTI1NiIsInR5cCI6IkpXVCJ9.eyJpZCI6IjYyMjEiLCJvcmdpZCI6IjE2MDMiLCJpc3MiOiJzdXBwb3J0LmJyYWluY2VydC5jb20ifQ.y0I7ydiR7VMAcc2UrvZQixLL_Te56JEM2d8aXCIG1zc)

**Step 3: Create CNAME Record in Your DNS Server**

You can easily CNAME your domain to the API endpoint api.braincert.com in order to receive the performance and security benefits of BrainCert. After you add the CNAME entry to your DNS server, click the **'Request SSL Certificate'** button above. Once you click the button, BrainCert will attempt to issue an SSL certificate for the custom hostname without any other validation or private key requirements.

Log in to your domain registrar's site and locate the Zone File Settings, DNS Manager, or similar area of your control panel. Here you will create a CNAME record that points your domain to api.braincert.com. You'll generally see three fields:

Alias - For example, www or live(indicating that the [www.yourdomain.com](www.yourdomain.com)or **live.yourdomain.com** record should point to **api.braincert.com**)

Record Type- Should be CNAME(indicating that you would like to point to BrainCert by using its name)

Points To - Should be **api.braincert.com**
<section class="info-box"><span style=" font-family: Inter; font-size: 14px; font-style: normal; font-weight: 400; text-align: left; text-indent: 0px; white-space: normal; display: inline !important; float: none;">Depending on your provider you may already have a CNAME set up with your domain Alias. If so, you will need to edit this existing CNAME so that 'Points To' is api.braincert.com</span><br></section>

**Step 4: Enter Hostname and Request SSL**

Enter the custom hostname that you would like to use and click **"Set custom hostname"**.
<section class="info-box"><span style=" font-family: Inter; font-size: 14px; font-style: normal; font-weight: 400; text-align: left; text-indent: 0px; white-space: normal; display: inline !important; float: none;">You don't need to type http:// or https:// as a part of the hostname.</span><br></section>
In this example, we have used example.braincert.com as the custom hostname.

Then, Click on the **"Request SSL Certificate"** Button to Proceed.

![KB 3 - SSL Meeting Rooms](https://support.braincert.com/kb/attachment/article/235/inline?token=eyJhbGciOiJodHRwOi8vd3d3LnczLm9yZy8yMDAxLzA0L3htbGRzaWctbW9yZSNobWFjLXNoYTI1NiIsInR5cCI6IkpXVCJ9.eyJpZCI6IjYyMzAiLCJvcmdpZCI6IjE2MDMiLCJpc3MiOiJzdXBwb3J0LmJyYWluY2VydC5jb20ifQ.AdpBDHaXOQtE0ZH-onyC0DAR4NrOU7U9sEHXCl0XPOU)

**Step 5: Get Your SSL Certificate**

Then, Pop up will appears. Click the **'Finish'** to Order your SSL Certificate.

**![KB - 6 SSL Meeting Rooms](https://support.braincert.com/kb/attachment/article/235/inline?token=eyJhbGciOiJodHRwOi8vd3d3LnczLm9yZy8yMDAxLzA0L3htbGRzaWctbW9yZSNobWFjLXNoYTI1NiIsInR5cCI6IkpXVCJ9.eyJpZCI6IjYyMzMiLCJvcmdpZCI6IjE2MDMiLCJpc3MiOiJzdXBwb3J0LmJyYWluY2VydC5jb20ifQ.GF4V-ORyAxVsvSvWAlC2escZuLIzmGX9AUJXBH8CQEI)**

**Step 6: Turn Off CloudFlare Orange Cloud**

If you currently use CloudFlare for SSL proxying, we recommend you turn off the orange cloud to the grey cloud to receive the performance and security benefits of BrainCert. Please note that this is required only for the CNAME record that is pointing to api.braincert.com. You may continue to use CloudFlare for all your other records if needed.

![mig_4c1a9549-f0ac-4a93-bf09-962f2d7bd9d7-638131931087852516](https://support.braincert.com/kb/attachment/article/235/inline?token=eyJhbGciOiJodHRwOi8vd3d3LnczLm9yZy8yMDAxLzA0L3htbGRzaWctbW9yZSNobWFjLXNoYTI1NiIsInR5cCI6IkpXVCJ9.eyJpZCI6IjYyMzUiLCJvcmdpZCI6IjE2MDMiLCJpc3MiOiJzdXBwb3J0LmJyYWluY2VydC5jb20ifQ.GJuR1ZpN52pyTb4i-X7afPRtjqIR3BnqNejw1C_VoCQ)

**Step 7: Testing Your SSL Certificate**

Congratulations! Now that you have completed all the steps, it is now time to verify the CNAME mapping and SSL certificate.

You can use the dig tool by using your command prompt in Windows or Mac terminal to check the CNAME mapping. You should see your hostname with the correct CNAME mapping to your API hostname api.braincert.com.

![](https://support.braincert.com/kb/attachment/article/235/inline?token=eyJhbGciOiJodHRwOi8vd3d3LnczLm9yZy8yMDAxLzA0L3htbGRzaWctbW9yZSNobWFjLXNoYTI1NiIsInR5cCI6IkpXVCJ9.eyJpZCI6IjYyNzAiLCJvcmdpZCI6IjE2MDMiLCJpc3MiOiJzdXBwb3J0LmJyYWluY2VydC5jb20ifQ.-DJBnH--3sptfptM0GzQeGsvhoYRRjEiIXf3NDJwi4M)

****  ****

# Inviting Learners to Live Classes and Various Options to Join

Inviting learners to your live class is an important step that ensures smooth participation. The BrainCert LMS provides several methods to invite students and allows them to join live classes easily. This guide will walk you through different ways to invite learners and showcase how they can join your live sessions.

## **Invite Users Individually**

## **Step 1:**

Navigate to '**Users**' under people and select the individual student you wish to invite.

![1](https://support.braincert.com/kb/attachment/article/225/inline?token=eyJhbGciOiJodHRwOi8vd3d3LnczLm9yZy8yMDAxLzA0L3htbGRzaWctbW9yZSNobWFjLXNoYTI1NiIsInR5cCI6IkpXVCJ9.eyJpZCI6IjYwMTUiLCJvcmdpZCI6IjE2MDMiLCJpc3MiOiJzdXBwb3J0LmJyYWluY2VydC5jb20ifQ.2gAkEZaAyKmfJD8LYs0wYMjNWK-Y1x9lBCcdTo-bSgo)

## **Step 2:**

Now, click the '**+Assign Live Classes**' button in the '**Live Classes**' section to send the invitation through the platform.

![2](https://support.braincert.com/kb/attachment/article/225/inline?token=eyJhbGciOiJodHRwOi8vd3d3LnczLm9yZy8yMDAxLzA0L3htbGRzaWctbW9yZSNobWFjLXNoYTI1NiIsInR5cCI6IkpXVCJ9.eyJpZCI6IjYwMTYiLCJvcmdpZCI6IjE2MDMiLCJpc3MiOiJzdXBwb3J0LmJyYWluY2VydC5jb20ifQ.oxhB8mDQ8FUY7EkAZ44DXt0HN5qSGzFTEuHQvdRngpI)

## **Step 3:**

Select the classes you wish to assign from the list and click the '**Save**' button.

**![3](https://support.braincert.com/kb/attachment/article/225/inline?token=eyJhbGciOiJodHRwOi8vd3d3LnczLm9yZy8yMDAxLzA0L3htbGRzaWctbW9yZSNobWFjLXNoYTI1NiIsInR5cCI6IkpXVCJ9.eyJpZCI6IjYwMTciLCJvcmdpZCI6IjE2MDMiLCJpc3MiOiJzdXBwb3J0LmJyYWluY2VydC5jb20ifQ.0BjsRmHRsGE2kaRBLqdvqP0hn-2AIUgbNQ-Xi7HBlJU)**

## **Step 4:**

Once saved, you'll see a confirmation message: '**Class assigned successfully**'.

**![4](https://support.braincert.com/kb/attachment/article/225/inline?token=eyJhbGciOiJodHRwOi8vd3d3LnczLm9yZy8yMDAxLzA0L3htbGRzaWctbW9yZSNobWFjLXNoYTI1NiIsInR5cCI6IkpXVCJ9.eyJpZCI6IjYwMTgiLCJvcmdpZCI6IjE2MDMiLCJpc3MiOiJzdXBwb3J0LmJyYWluY2VydC5jb20ifQ.OWuUHK2h8mYyUGGvYjEcHA_uHha_zy7iQ0jlsog7Ws0)**

## **Invite Groups of Learners**

## **Step 1:**

Go to the '**Groups**' section under '**People**', where you can view and select a group of learners. Select the group to which you want to add the Live Class.

![5](https://support.braincert.com/kb/attachment/article/225/inline?token=eyJhbGciOiJodHRwOi8vd3d3LnczLm9yZy8yMDAxLzA0L3htbGRzaWctbW9yZSNobWFjLXNoYTI1NiIsInR5cCI6IkpXVCJ9.eyJpZCI6IjYwMjEiLCJvcmdpZCI6IjE2MDMiLCJpc3MiOiJzdXBwb3J0LmJyYWluY2VydC5jb20ifQ.ZKPGnhdIH4DvU9NhfnuhmtZ2sLKaWmqbnlFznyLuIa8)

## **Step 2:**

Head to the '**Live Classes**' field and click the '**+Assign Live Classes**' button.

![6](https://support.braincert.com/kb/attachment/article/225/inline?token=eyJhbGciOiJodHRwOi8vd3d3LnczLm9yZy8yMDAxLzA0L3htbGRzaWctbW9yZSNobWFjLXNoYTI1NiIsInR5cCI6IkpXVCJ9.eyJpZCI6IjYwMjAiLCJvcmdpZCI6IjE2MDMiLCJpc3MiOiJzdXBwb3J0LmJyYWluY2VydC5jb20ifQ.FuFhimVe8knvZWcnG9Sg4bry0iG59c0O--HGS8gaIr0)

## **Step 3:**

Select the live classes to assign to the group.

**![7](https://support.braincert.com/kb/attachment/article/225/inline?token=eyJhbGciOiJodHRwOi8vd3d3LnczLm9yZy8yMDAxLzA0L3htbGRzaWctbW9yZSNobWFjLXNoYTI1NiIsInR5cCI6IkpXVCJ9.eyJpZCI6IjYwMjIiLCJvcmdpZCI6IjE2MDMiLCJpc3MiOiJzdXBwb3J0LmJyYWluY2VydC5jb20ifQ.AMSiliVwzAb3azAOVg8Y_uA46T-eXSMYzB4t4s4KGpU)**

## **Step 4:**

Once saved, you'll see the confirmation message: '**User classes added successfully.**'

**![8](https://support.braincert.com/kb/attachment/article/225/inline?token=eyJhbGciOiJodHRwOi8vd3d3LnczLm9yZy8yMDAxLzA0L3htbGRzaWctbW9yZSNobWFjLXNoYTI1NiIsInR5cCI6IkpXVCJ9.eyJpZCI6IjYwMjMiLCJvcmdpZCI6IjE2MDMiLCJpc3MiOiJzdXBwb3J0LmJyYWluY2VydC5jb20ifQ.ez86e5ywPlCS7r_R2ii4Rf_t3c1Y1diMQcDy1ilyp0w)**

## 

## **Invite By Email**

Manually invite learners by sending an invitation directly to their email.

## **Step 1:**

Choose '**Manage Classes**' under '**Virtual Classroom**'. Open the '**Options**' for the live class to which you wish to invite the user, and click on '**Invite by Email**.'

**![9](https://support.braincert.com/kb/attachment/article/225/inline?token=eyJhbGciOiJodHRwOi8vd3d3LnczLm9yZy8yMDAxLzA0L3htbGRzaWctbW9yZSNobWFjLXNoYTI1NiIsInR5cCI6IkpXVCJ9.eyJpZCI6IjYwMjQiLCJvcmdpZCI6IjE2MDMiLCJpc3MiOiJzdXBwb3J0LmJyYWluY2VydC5jb20ifQ.H3lQED6kde287OxYFr7rNgerkR5vz-pMYD9vMPQq2hQ)**

## **Step 2:**

Enter the email ID in the '**To:**' field, type the message, and click the '**Send**' button.

![10](https://support.braincert.com/kb/attachment/article/225/inline?token=eyJhbGciOiJodHRwOi8vd3d3LnczLm9yZy8yMDAxLzA0L3htbGRzaWctbW9yZSNobWFjLXNoYTI1NiIsInR5cCI6IkpXVCJ9.eyJpZCI6IjYwMjUiLCJvcmdpZCI6IjE2MDMiLCJpc3MiOiJzdXBwb3J0LmJyYWluY2VydC5jb20ifQ.xxVMiJ0xQlIjrocWTqRq0_JFABxwOQC3qYmgneUpa8E)

## **Enroll Individual Students**

Enroll specific students directly into the live class without waiting for them to join manually.

## **Step 1:**

Choose '**Manage Classes**' under '**Virtual Classroom**'. Open the '**Options**' for the live class to which you wish to invite the user, and click on '**Enroll Individual Students**'.

## ![11](https://support.braincert.com/kb/attachment/article/225/inline?token=eyJhbGciOiJodHRwOi8vd3d3LnczLm9yZy8yMDAxLzA0L3htbGRzaWctbW9yZSNobWFjLXNoYTI1NiIsInR5cCI6IkpXVCJ9.eyJpZCI6IjYwMjYiLCJvcmdpZCI6IjE2MDMiLCJpc3MiOiJzdXBwb3J0LmJyYWluY2VydC5jb20ifQ.wUS7ewuh-s_6QkF179qtStoDI8FOb665UgRLSeAZrYc)  
**Step 2:**

Select the students from the list and click 'Send Notification'.

**![12](https://support.braincert.com/kb/attachment/article/225/inline?token=eyJhbGciOiJodHRwOi8vd3d3LnczLm9yZy8yMDAxLzA0L3htbGRzaWctbW9yZSNobWFjLXNoYTI1NiIsInR5cCI6IkpXVCJ9.eyJpZCI6IjYwMjciLCJvcmdpZCI6IjE2MDMiLCJpc3MiOiJzdXBwb3J0LmJyYWluY2VydC5jb20ifQ.vqXfb_6WHAY83sV-2gRsw0IHijGUCQv0meOcQ9e7u6E)**

## **Invite User Group**

Select entire groups of learners to be invited to the live class in one step, saving time.

## **Step 1:**  

Choose '**Manage Classes**' under '**Virtual Classroom**'. Open the '**Options**' for the live class to which you wish to invite the user, and click on '**Invite User Group**'.

![13](https://support.braincert.com/kb/attachment/article/225/inline?token=eyJhbGciOiJodHRwOi8vd3d3LnczLm9yZy8yMDAxLzA0L3htbGRzaWctbW9yZSNobWFjLXNoYTI1NiIsInR5cCI6IkpXVCJ9.eyJpZCI6IjYwMjgiLCJvcmdpZCI6IjE2MDMiLCJpc3MiOiJzdXBwb3J0LmJyYWluY2VydC5jb20ifQ.by_3j-QA4ddHwQc8j25aqqBMg4lrawMRWSFzLSA9yiQ)

## **Step 2:**

Select the group you want to invite from the list and click the '**Invite**' button.

![14](https://support.braincert.com/kb/attachment/article/225/inline?token=eyJhbGciOiJodHRwOi8vd3d3LnczLm9yZy8yMDAxLzA0L3htbGRzaWctbW9yZSNobWFjLXNoYTI1NiIsInR5cCI6IkpXVCJ9.eyJpZCI6IjYwMzAiLCJvcmdpZCI6IjE2MDMiLCJpc3MiOiJzdXBwb3J0LmJyYWluY2VydC5jb20ifQ.UtEVGYsAOgu4EaI1P8E9Q_JFx7TSTltF03dHgFfWRpo)

Inviting learners to your live class is simple with the various options provided by the BrainCert LMS. Whether you’re inviting individuals or groups,  you have the flexibility to manage the process easily. Learners can join through email, dashboard, or group links, ensuring a smooth experience. Make sure to explore all the options available for the best engagement in your live classes.

# How to Set the Interface Language in the Business Plans

In the business plan, language settings are managed at the group level. This means the interface language can be configured differently for various user groups, allowing for a more localized experience.

Regardless of the group language settings, each individual user has the option to set their own preferred interface language from their account settings. This personalized setting will override the group language without affecting others.

The platform dynamically loads the correct font for each language, ensuring beautiful, readable typography across all scripts (including Arabic, Chinese, and Devanagari).
<section class="info-box"><strong data-start="511" data-end="520">Note:</strong> This article applies to the <strong data-start="549" data-end="566">Business Plan</strong>. For more details on our plans and features, visit our <a data-start="622" data-end="639" rel="noopener noreferrer" href="https://www.braincert.com/pricing/for-business" title="" target="_blank" aria-label="Open in new window">Pricing Page</a>.</section>
##### **What Are the Benefits of Switching Languages Based on Groups?**

This functionality is particularly advantageous for organizations with diverse teams, as it enables administrators to designate a default language for specific groups while still granting individual users the flexibility to customize their personal settings.

<iframe src="https://player.vimeo.com/video/958317833?badge=0&amp;autopause=0&amp;player_id=0&amp;app_id=58479" frameborder="0" allow="autoplay; fullscreen; picture-in-picture; clipboard-write" style="position:absolute;top:0;left:0;width:100%;height:100%;" title="How to Set up Interface Language for Site Admin Plans" bis_size="{&quot;x&quot;:104,&quot;y&quot;:452,&quot;w&quot;:1062,&quot;h&quot;:597,&quot;abs_x&quot;:104,&quot;abs_y&quot;:452}">&ZeroWidthSpace;</iframe>

## **Step 1: Access the Interface Language Settings**

Navigate to the '**Interface Language**' option in the '**Global Settings**' menu.

![1](https://support.braincert.com/kb/attachment/article/251/inline?token=eyJhbGciOiJodHRwOi8vd3d3LnczLm9yZy8yMDAxLzA0L3htbGRzaWctbW9yZSNobWFjLXNoYTI1NiIsInR5cCI6IkpXVCJ9.eyJpZCI6IjY2NjgiLCJvcmdpZCI6IjE2MDMiLCJpc3MiOiJzdXBwb3J0LmJyYWluY2VydC5jb20ifQ.qWr3sR2f3nG4qyeXwE9e_X3tPmQcgG2ALzaiEUdkXFE)

##   

## **Step 2: Change Language for Group Users**

To change the language for '**Group Users**,' select the group and choose the language from the drop-down box.

![2](https://support.braincert.com/kb/attachment/article/251/inline?token=eyJhbGciOiJodHRwOi8vd3d3LnczLm9yZy8yMDAxLzA0L3htbGRzaWctbW9yZSNobWFjLXNoYTI1NiIsInR5cCI6IkpXVCJ9.eyJpZCI6IjY2NjkiLCJvcmdpZCI6IjE2MDMiLCJpc3MiOiJzdXBwb3J0LmJyYWluY2VydC5jb20ifQ.x9PAzb92xK7ZL5yRdefNq-7zHrwUdOkOkTuufRhATPk)

##   

## **Step 3: Update Language for Guests**

To set the language for guests, navigate to '**Guests**' and select your preferred language from the list.

![3](https://support.braincert.com/kb/attachment/article/251/inline?token=eyJhbGciOiJodHRwOi8vd3d3LnczLm9yZy8yMDAxLzA0L3htbGRzaWctbW9yZSNobWFjLXNoYTI1NiIsInR5cCI6IkpXVCJ9.eyJpZCI6IjY2NzAiLCJvcmdpZCI6IjE2MDMiLCJpc3MiOiJzdXBwb3J0LmJyYWluY2VydC5jb20ifQ.2_YWYU-rnioKMTymY4ljofL1pF4a7Ck50TgK3dYI59g)

## **Step 4: Save Your Settings**

Once you have made your selection, click '**Save**' to confirm.

![4](https://support.braincert.com/kb/attachment/article/251/inline?token=eyJhbGciOiJodHRwOi8vd3d3LnczLm9yZy8yMDAxLzA0L3htbGRzaWctbW9yZSNobWFjLXNoYTI1NiIsInR5cCI6IkpXVCJ9.eyJpZCI6IjY2NzEiLCJvcmdpZCI6IjE2MDMiLCJpc3MiOiJzdXBwb3J0LmJyYWluY2VydC5jb20ifQ.Yt2AQs3W8W1e1go3kg81EdSHaWuAD-8yrIfXJqZMDxg)

##   

## **Personalized Interface Language**

Every user can now personalize their learning experience by selecting their preferred interface language directly from their account settings, overriding the default language set by the super admin. This ensures a more flexible and tailored experience for each learner.

## **Step 1: Navigate to Profile**

﻿﻿Log in to your LMS account and navigate to your '**Profile**' in the top-right corner.

![5](https://support.braincert.com/kb/attachment/article/251/inline?token=eyJhbGciOiJodHRwOi8vd3d3LnczLm9yZy8yMDAxLzA0L3htbGRzaWctbW9yZSNobWFjLXNoYTI1NiIsInR5cCI6IkpXVCJ9.eyJpZCI6IjY2NzIiLCJvcmdpZCI6IjE2MDMiLCJpc3MiOiJzdXBwb3J0LmJyYWluY2VydC5jb20ifQ.ELQVhvl445qtuAUc9qmlzdy1XJR2MColLiTsDU2E5Xg)

##   

## **Step 2: Select Account Details**

Click on '**Account**  **Details**' from the dropdown menu.

![6](https://support.braincert.com/kb/attachment/article/251/inline?token=eyJhbGciOiJodHRwOi8vd3d3LnczLm9yZy8yMDAxLzA0L3htbGRzaWctbW9yZSNobWFjLXNoYTI1NiIsInR5cCI6IkpXVCJ9.eyJpZCI6IjY2NzMiLCJvcmdpZCI6IjE2MDMiLCJpc3MiOiJzdXBwb3J0LmJyYWluY2VydC5jb20ifQ.icxAVGzFyQFQ3gjF_Fq7SH-xMUkVjJ3Q_KmEiZ79a9A)

##   

## Step 3: Find Interface Language

Locate the '**Interface Language**' section.

![7](https://support.braincert.com/kb/attachment/article/251/inline?token=eyJhbGciOiJodHRwOi8vd3d3LnczLm9yZy8yMDAxLzA0L3htbGRzaWctbW9yZSNobWFjLXNoYTI1NiIsInR5cCI6IkpXVCJ9.eyJpZCI6IjY2NzQiLCJvcmdpZCI6IjE2MDMiLCJpc3MiOiJzdXBwb3J0LmJyYWluY2VydC5jb20ifQ.HH2d7iQ184CBVhDLZ_XsQk7McAQYMLH0yscZNhBDYY0)

##   

## Step 4: Click More Option

Click the more options icon to choose your preferred language.

![8](https://support.braincert.com/kb/attachment/article/251/inline?token=eyJhbGciOiJodHRwOi8vd3d3LnczLm9yZy8yMDAxLzA0L3htbGRzaWctbW9yZSNobWFjLXNoYTI1NiIsInR5cCI6IkpXVCJ9.eyJpZCI6IjY2NzYiLCJvcmdpZCI6IjE2MDMiLCJpc3MiOiJzdXBwb3J0LmJyYWluY2VydC5jb20ifQ.mS4xLkTgb8rSsWGbW8grAh03MngU6WlcJ2LGIGe0_78)

##   

## **Step 5: Select the Language**

Select your preferred language from the dropdown menu. Click '**Save**' to confirm the changes.

![9](https://support.braincert.com/kb/attachment/article/251/inline?token=eyJhbGciOiJodHRwOi8vd3d3LnczLm9yZy8yMDAxLzA0L3htbGRzaWctbW9yZSNobWFjLXNoYTI1NiIsInR5cCI6IkpXVCJ9.eyJpZCI6IjY2ODAiLCJvcmdpZCI6IjE2MDMiLCJpc3MiOiJzdXBwb3J0LmJyYWluY2VydC5jb20ifQ.KiIEb1qSANEIcu0z3VgUGdp4-pag8Z_i4oTw5BegSOo)

Once updated, your interface will instantly reflect the selected language.

![10](https://support.braincert.com/kb/attachment/article/251/inline?token=eyJhbGciOiJodHRwOi8vd3d3LnczLm9yZy8yMDAxLzA0L3htbGRzaWctbW9yZSNobWFjLXNoYTI1NiIsInR5cCI6IkpXVCJ9.eyJpZCI6IjY2ODEiLCJvcmdpZCI6IjE2MDMiLCJpc3MiOiJzdXBwb3J0LmJyYWluY2VydC5jb20ifQ.a15_1TI74kj6_b0zc_jDBr6cDSRg6fYGG5AiNvhQ2xA)

##   

## **How to Change the Language for an Assessment**

## **Step 1: Access the Assessment**

Go to the Assessments section and select the assessment you want to update.

![11](https://support.braincert.com/kb/attachment/article/251/inline?token=eyJhbGciOiJodHRwOi8vd3d3LnczLm9yZy8yMDAxLzA0L3htbGRzaWctbW9yZSNobWFjLXNoYTI1NiIsInR5cCI6IkpXVCJ9.eyJpZCI6IjY2ODIiLCJvcmdpZCI6IjE2MDMiLCJpc3MiOiJzdXBwb3J0LmJyYWluY2VydC5jb20ifQ.hoykIqK_Oyp0LdVYRygyQcsKyKfgVqQ_I2RuWu35nqE)

##   

## **Step 2: Choose Your Language**

Select your preferred language from the dropdown menu.

![12](https://support.braincert.com/kb/attachment/article/251/inline?token=eyJhbGciOiJodHRwOi8vd3d3LnczLm9yZy8yMDAxLzA0L3htbGRzaWctbW9yZSNobWFjLXNoYTI1NiIsInR5cCI6IkpXVCJ9.eyJpZCI6IjY2ODMiLCJvcmdpZCI6IjE2MDMiLCJpc3MiOiJzdXBwb3J0LmJyYWluY2VydC5jb20ifQ.NQwUdfAOBzeXhViPLQYM4WBjjV8AoEEmyUwJN-L6ea8)

Once selected, the language will be updated immediately. Use the dropdown icon to change the language anytime.

![13](https://support.braincert.com/kb/attachment/article/251/inline?token=eyJhbGciOiJodHRwOi8vd3d3LnczLm9yZy8yMDAxLzA0L3htbGRzaWctbW9yZSNobWFjLXNoYTI1NiIsInR5cCI6IkpXVCJ9.eyJpZCI6IjY3MDIiLCJvcmdpZCI6IjE2MDMiLCJpc3MiOiJzdXBwb3J0LmJyYWluY2VydC5jb20ifQ._DfBnlDwB92ENd1xw-xfzREJ-38IgUJaYf-GpzuOBLs)

![14](https://support.braincert.com/kb/attachment/article/251/inline?token=eyJhbGciOiJodHRwOi8vd3d3LnczLm9yZy8yMDAxLzA0L3htbGRzaWctbW9yZSNobWFjLXNoYTI1NiIsInR5cCI6IkpXVCJ9.eyJpZCI6IjY3MDMiLCJvcmdpZCI6IjE2MDMiLCJpc3MiOiJzdXBwb3J0LmJyYWluY2VydC5jb20ifQ.8vHyp-mEuftt5TfPCma_S-GeioAYUeiSnZbwg0zdNok)

By allowing users to personalize their interface language, the LMS ensures a more flexible and inclusive experience for everyone.

# OpenVerse Search in Site Builder

With our updated site builder and image library, OpenVerse's search functionality makes it possible to find royalty-free images easily for your landing pages. Your landing page should reflect your brand identity to enhance your customers' experience. You can search OpenVerse by following the steps below.

## **Step 1:** 

Access your account using your login credentials and navigate to the '**Landing Page**' under '**Sales & Marketing**'.
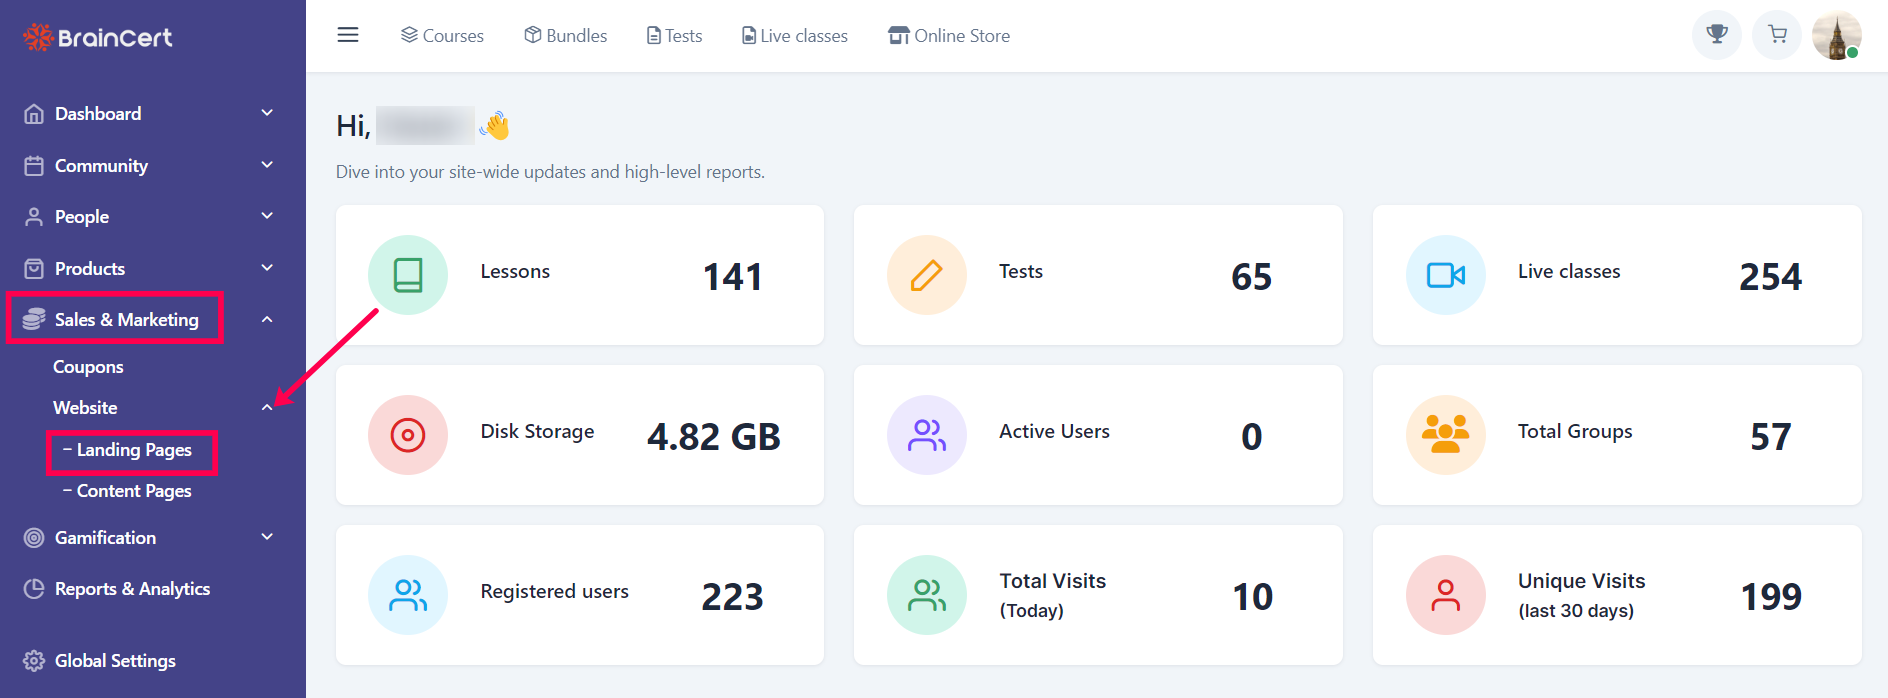

![1.png](https://support.braincert.com/kb/attachment/article/49/inline?token=eyJhbGciOiJodHRwOi8vd3d3LnczLm9yZy8yMDAxLzA0L3htbGRzaWctbW9yZSNobWFjLXNoYTI1NiIsInR5cCI6IkpXVCJ9.eyJpZCI6IjUzNTciLCJvcmdpZCI6IjE2MDMiLCJpc3MiOiJzdXBwb3J0LmJyYWluY2VydC5jb20ifQ.e6B5eis-9SWdNuLvjFkttTaHtGezWOxTcUfbPuMkrZM)

##   

## **Step 2:** 

By clicking on '**Create New Landing Page**', you can make your new landing page or edit an existing landing page by selecting '**Edit**' on More.
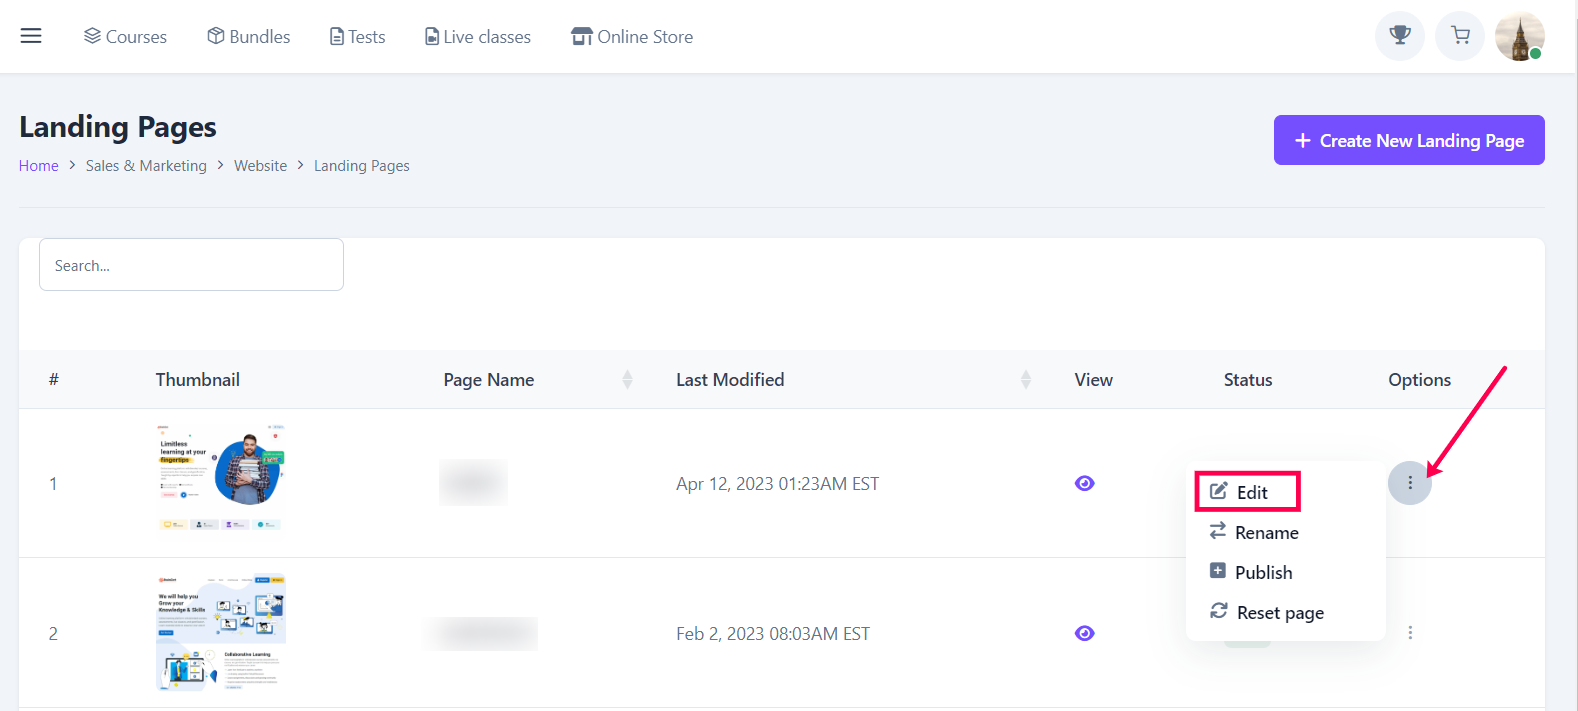

![2.png](https://support.braincert.com/kb/attachment/article/49/inline?token=eyJhbGciOiJodHRwOi8vd3d3LnczLm9yZy8yMDAxLzA0L3htbGRzaWctbW9yZSNobWFjLXNoYTI1NiIsInR5cCI6IkpXVCJ9.eyJpZCI6IjUzNTgiLCJvcmdpZCI6IjE2MDMiLCJpc3MiOiJzdXBwb3J0LmJyYWluY2VydC5jb20ifQ.6LexoyYW8MxXbzU8BxAPsUz_3XcVkjGxqZg2zBxUpog)

##   

## **Step 3:**

Click the '**Set Image**' option in the left column under Settings after selecting the layer of the image.

## **![](https://support.braincert.com/kb/attachment/article/49/inline?token=eyJhbGciOiJodHRwOi8vd3d3LnczLm9yZy8yMDAxLzA0L3htbGRzaWctbW9yZSNobWFjLXNoYTI1NiIsInR5cCI6IkpXVCJ9.eyJpZCI6IjM3MDciLCJvcmdpZCI6IjE2MDMiLCJpc3MiOiJzdXBwb3J0LmJyYWluY2VydC5jb20ifQ.gyu-hybK_9TXUeRGWPbLKw6Rsa5Uzz3eGI4x96_oGzk)** **Step 4:**
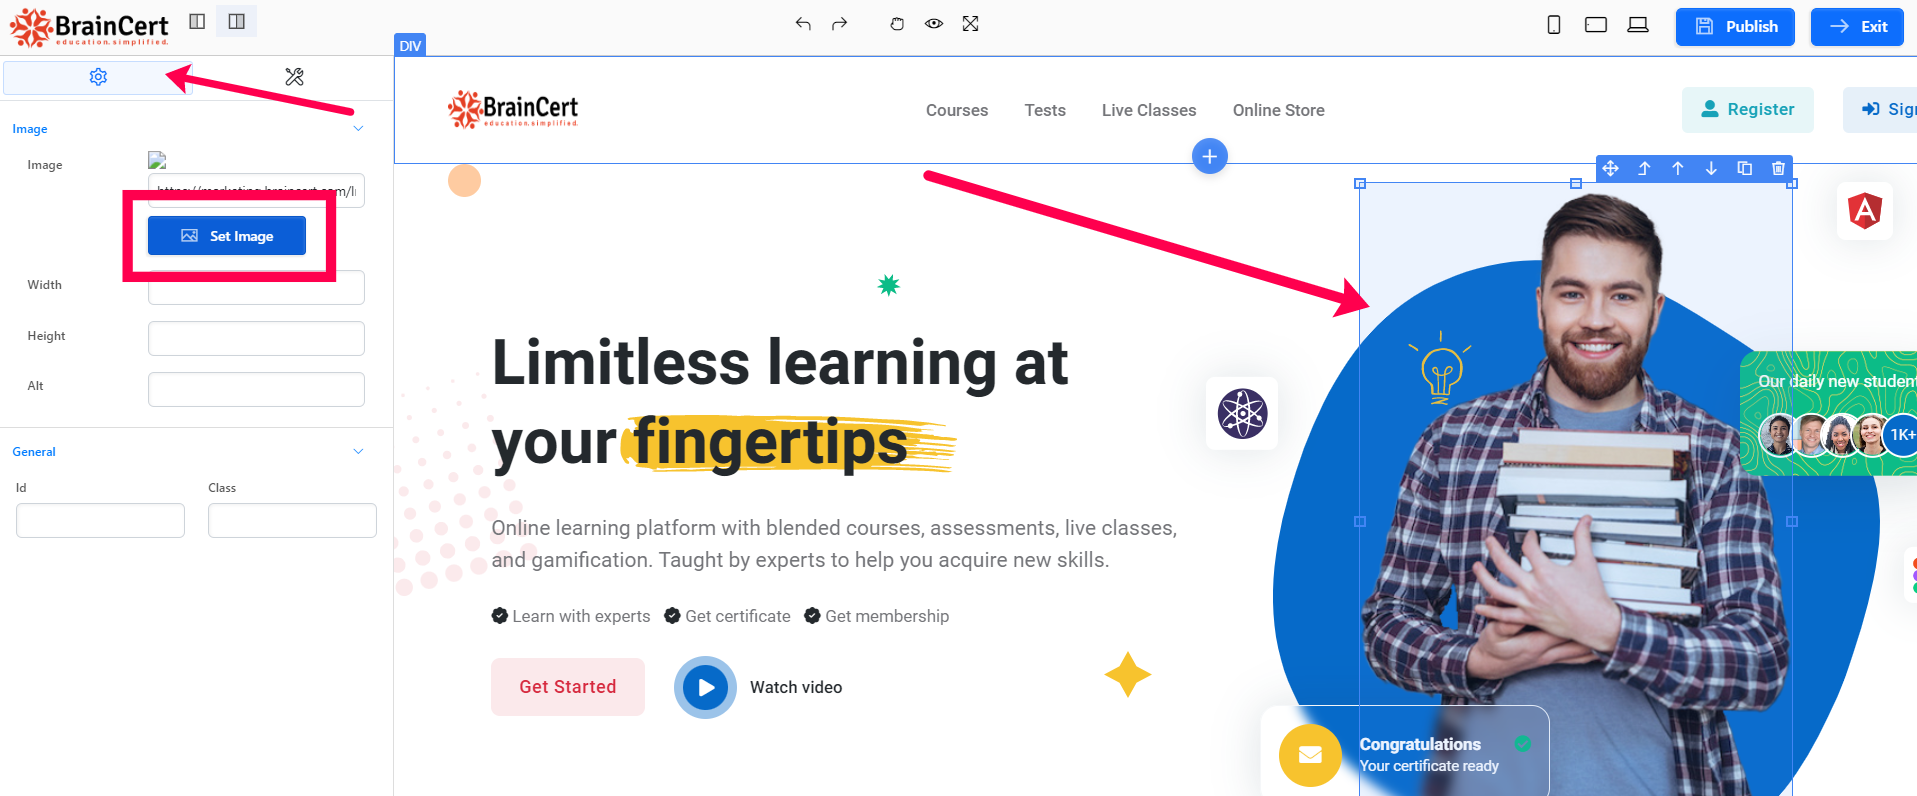

If you click on the '**OpenVerse Search**' button, you will be able to find royalty-free images.

## **![](https://support.braincert.com/kb/attachment/article/49/inline?token=eyJhbGciOiJodHRwOi8vd3d3LnczLm9yZy8yMDAxLzA0L3htbGRzaWctbW9yZSNobWFjLXNoYTI1NiIsInR5cCI6IkpXVCJ9.eyJpZCI6IjM3MDYiLCJvcmdpZCI6IjE2MDMiLCJpc3MiOiJzdXBwb3J0LmJyYWluY2VydC5jb20ifQ.cF-hS8XzGD1ZoaYvKIy6tFULVqWgmtBh06L6CERNfUg)** **Step 5:**
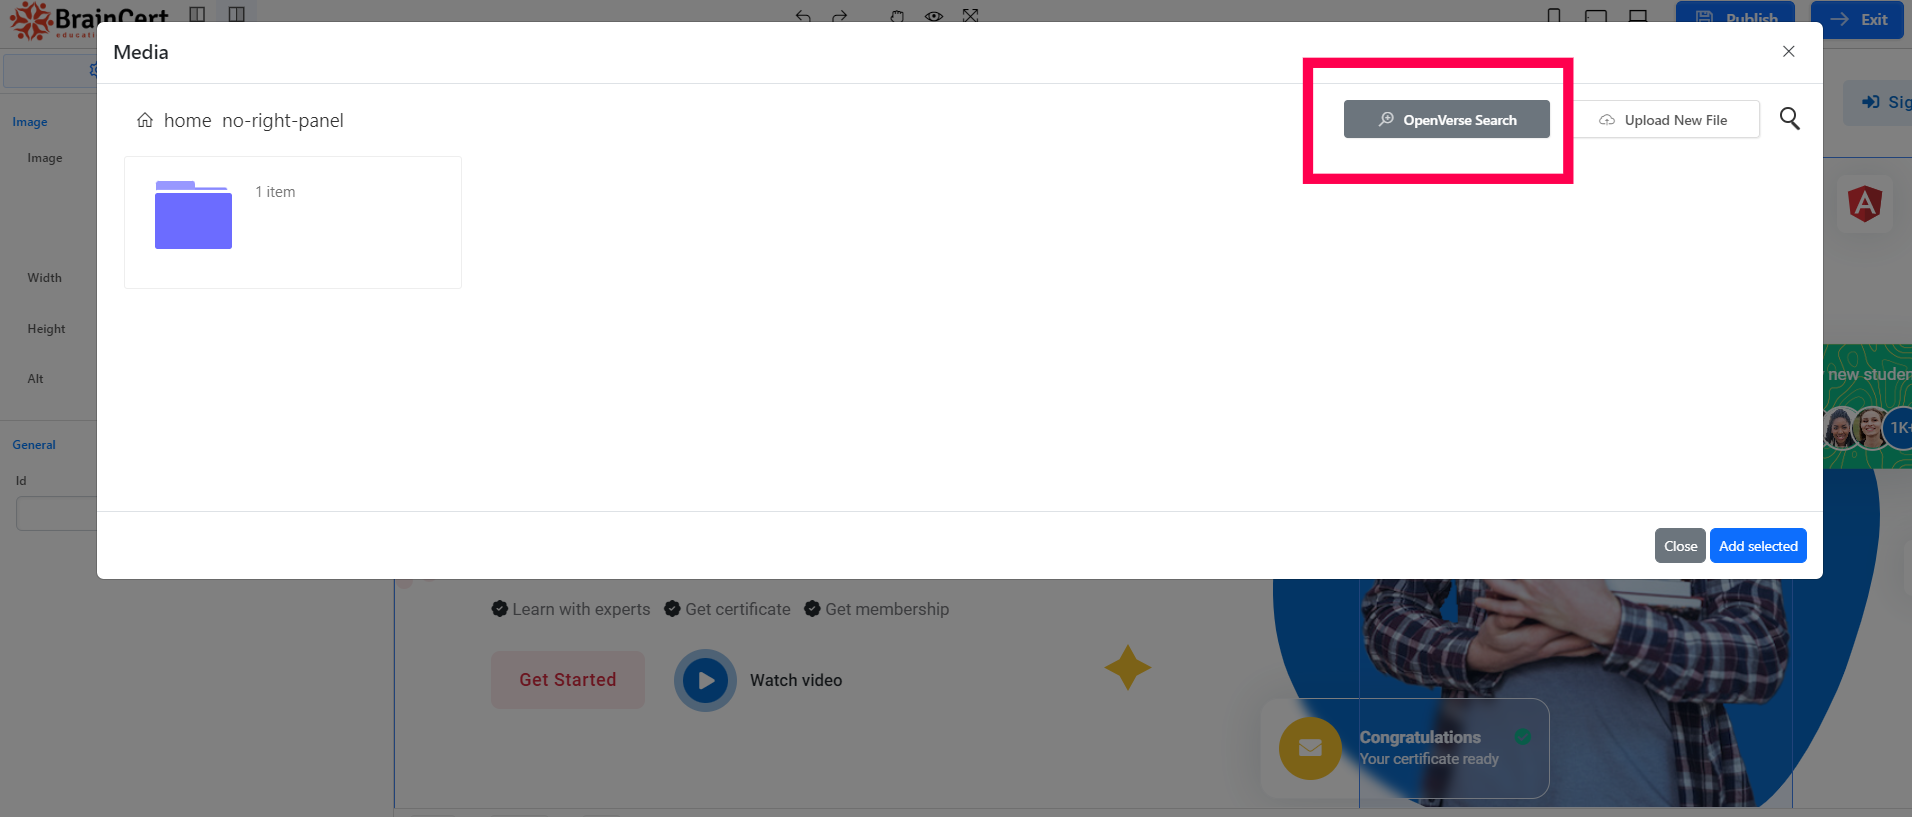

To add an image, you have to search for the required image, select the image, and then click the '**Add Selected**' button.**![](https://support.braincert.com/kb/attachment/article/49/inline?token=eyJhbGciOiJodHRwOi8vd3d3LnczLm9yZy8yMDAxLzA0L3htbGRzaWctbW9yZSNobWFjLXNoYTI1NiIsInR5cCI6IkpXVCJ9.eyJpZCI6IjM3MTQiLCJvcmdpZCI6IjE2MDMiLCJpc3MiOiJzdXBwb3J0LmJyYWluY2VydC5jb20ifQ.S2opa6gY1RvId4OSN76e3rUGJfP6AdpmQT0NSLWFAyM)**
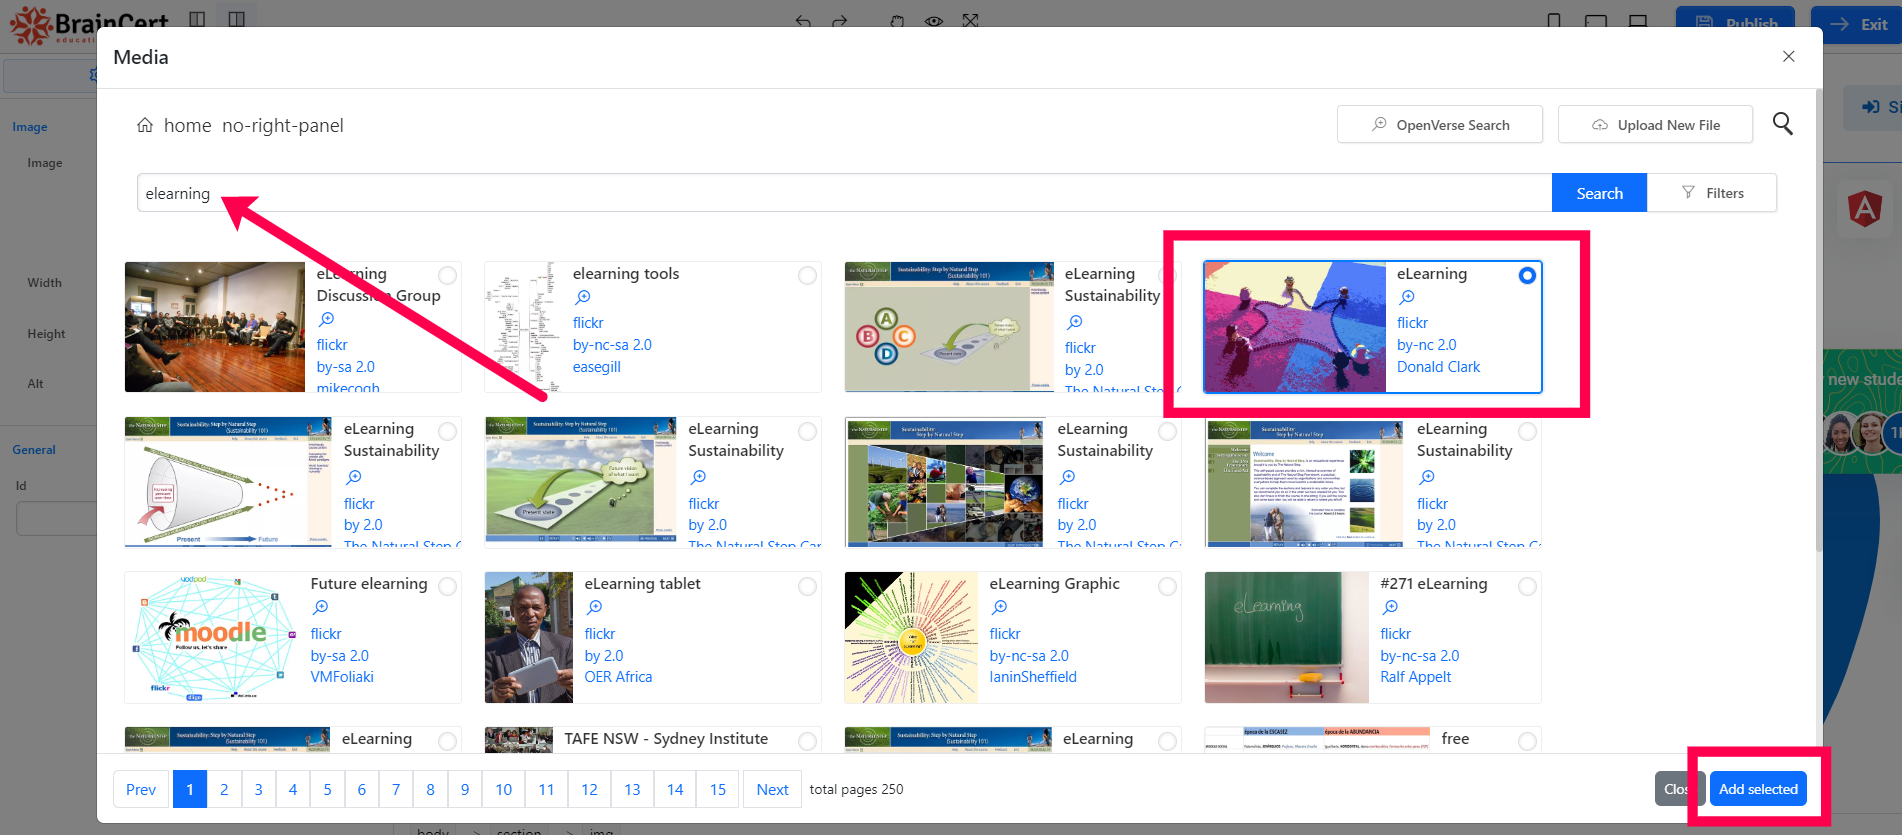

## **Step 6:**

The image is attached, you can even align it according to your needs using the options on the top right. Set up the required option as per your wish and save it.

![](https://support.braincert.com/kb/attachment/article/49/inline?token=eyJhbGciOiJodHRwOi8vd3d3LnczLm9yZy8yMDAxLzA0L3htbGRzaWctbW9yZSNobWFjLXNoYTI1NiIsInR5cCI6IkpXVCJ9.eyJpZCI6IjM3MDUiLCJvcmdpZCI6IjE2MDMiLCJpc3MiOiJzdXBwb3J0LmJyYWluY2VydC5jb20ifQ.PnRGfVTBgy2rlOzn_lBtye0kelAUoHYa3zKX84I57xQ)For the best customer experience, ensure that your landing page content reflects your brand identity.

# BrainCert LMS API: Developer Guide

The **BrainCert LMS API** allows you to integrate, automate, and extend the capabilities of your BrainCert LMS instance. With this API, you can programmatically manage users, groups, courses, live classes, bundles, tests, products, discounts, and more.

This guide focuses on two essentials:

1. **How to generate and use your API key** (with Domain ID).
2. **The complete list of supported API calls** across all LMS resources.

<section class="info-box"><strong data-start="577" data-end="602" style=" font-weight: 700; font-family: Inter; font-size: 14px; font-style: normal; text-align: start; text-indent: 0px; white-space: normal;">Looking for Triggers?</strong><br data-start="602" data-end="605" style=" font-family: Inter; font-size: 14px; font-style: normal; font-weight: 400; text-align: start; text-indent: 0px; white-space: normal;"><span style=" font-family: Inter; font-size: 14px; font-style: normal; font-weight: 400; text-align: start; text-indent: 0px; white-space: normal; display: inline !important; float: none;">For event-driven triggers, see our<span> </span></span><a data-start="642" data-end="668" class="decorated-link" rel="noopener noreferrer" href="https://support.braincert.com/kb/article/202/understanding-webhooks-an-easy-way-to-automate-tasks" target="_blank" aria-label="Open in new window" style=" text-decoration: none; font-family: Inter; font-size: 14px; font-style: normal; font-weight: 400; text-align: start; text-indent: 0px; white-space: normal;" title="">Webhook Documentation</a><strong style=" font-weight: 700; font-family: Inter; font-size: 14px; font-style: normal; text-align: start; text-indent: 0px; white-space: normal;">.</strong></section>
##   

## Generating an API Key

Log in to your BrainCert LMS Admin Dashboard. Go to **Global Settings** → **Basic Settings**→ **Create API Keys**.

Copy the API Key and your Domain ID, and keep them secure.

![1](https://support.braincert.com/kb/attachment/article/266/inline?token=eyJhbGciOiJodHRwOi8vd3d3LnczLm9yZy8yMDAxLzA0L3htbGRzaWctbW9yZSNobWFjLXNoYTI1NiIsInR5cCI6IkpXVCJ9.eyJpZCI6IjY5ODciLCJvcmdpZCI6IjE2MDMiLCJpc3MiOiJzdXBwb3J0LmJyYWluY2VydC5jb20ifQ.Lrina-op2OLgOmpXmgaqQGEvSBzLSxMchrc9_iDORLI)
<section class="info-box" style="text-align: start;"><span style=" font-family: Inter; font-size: 14px; font-style: normal; font-weight: 400; text-align: start; text-indent: 0px; white-space: normal; display: inline !important; float: none;">Note: Both `Authorization: API_KEY` and `x-domain-id: DOMAIN_ID` must be included in all requests.</span></section>
##   

## API Endpoints (Supported Calls)

The BrainCert LMS API v1 provides a wide range of endpoints to manage your LMS resources. To make navigation easier, the endpoints are grouped into categories. Each category represents a type of resource (such as users, courses, or tests) and contains the common actions you can perform.
<section class="info-box">Refer to the <a class="e-rte-anchor" href="https://www.braincert.com/docs/api/lms/#introduction" title="https://www.braincert.com/docs/api/lms/#introduction" target="_blank" aria-label="Open in new window" rel="noopener noreferrer">LMS API documentation</a> for supported actions.</section>

**Users**

| Method | Endpoint | Action |
| --- | --- | --- |
| POST | `/users/create` | Create user |
| DELETE | `/users/delete` | Delete user |
| POST | `/users/list` | List users |
| POST | `/users/getuser` | Get user by ID |
| GET | `/users/getuserbyEmail/{email}` | Get user by email |
| POST | `/users/listUsersenrolledincourse` | Enrollment count in courses |
| POST | `/users/listUsersenrolledintest` | Enrollment count in tests |
| POST | `/users/listUsersenrolledinclass` | Enrollment count in classes |

**Groups**

| Method | Endpoint | Action |
| --- | --- | --- |
| POST | `/groups/create` | Create group |
| POST | `/groups/addUser` | Add user to group |
| POST | `/groups/list` | List groups |
| POST | `/groups/listallusers` | List all users in group |

**Courses**

| Method | Endpoint | Action |
| --- | --- | --- |
| POST | `/courses/create` | Create course |
| PUT | `/courses/update` | Update course |
| DELETE | `/courses/delete/{courseId}` | Delete course |
| POST | `/courses/list` | List courses |
| GET | `/courses/get/{courseId}` | Get course |
| POST | `/courses/enroll` | Enroll user |
| POST | `/courses/unenroll` | Unenroll user |
| POST | `/courses/publish/{courseId}` | Publish course |
| POST | `/courses/unpublish/{courseId}` | Unpublish course |

**Live Classes**

| Method | Endpoint | Action |
| --- | --- | --- |
| POST | `/liveClasses/create` | Create live class |
| POST | `/liveClasses/enroll` | Enroll user in live class |
| POST | `/liveClasses/unenroll` | Unenroll user from live class |
| POST | `/liveClasses/list` | List live classes |

**Bundles**

| Method | Endpoint | Action |
| --- | --- | --- |
| POST | `/bundles/enroll` | Enroll user in bundle |
| POST | `/bundles/unenroll` | Unenroll user from bundle |
| POST | `/bundles/list` | List bundles |

**Tests**

| Method | Endpoint | Action |
| --- | --- | --- |
| POST | `/tests/create` | Create test |
| PUT | `/tests/{testId}` | Update test |
| DELETE | `/tests/{testId}` | Delete test |
| POST | `/tests/list` | List tests |
| GET | `/tests/{testId}` | Get test |
| POST | `/tests/enroll` | Enroll user |
| POST | `/tests/unenroll` | Unenroll user |
| POST | `/tests/publish/{testId}` | Publish test |
| POST | `/tests/unpublish/{testId}` | Unpublish test |
| DELETE | `/tests/removeFromCatalog/{testId}` | Remove test from catalog |

**Products & Categories**

| Method | Endpoint | Action |
| --- | --- | --- |
| GET | `/products/list` | List products |
| GET | `/products/getproduct/{id}` | Get product by ID |
| POST | `/products/createProduct` | Create product |
| PUT | `/products/update/{id}` | Update product |
| DELETE | `/products/delete/{id}` | Delete product |
| POST | `/products/{id}/publish` | Publish product |
| POST | `/products/{id}/unpublish` | Unpublish product |
| POST | `/products/createProductCategory` | Create product category |
| PUT | `/products/product-categories/{id}` | Update product category |
| DELETE | `/products/product-categories/{id}` | Delete product category |
| PUT | `/products/{id}/price` | Update product price |
| PUT | `/products/{id}/shipping-charge` | Update shipping charge |

**Shopping Cart & Pricing**

| Method | Endpoint | Action |
| --- | --- | --- |
| POST | `/shoppingCart/courses/addpricing` | Add course pricing |
| POST | `/shoppingCart/tests/addpricing` | Add test pricing |
| POST | `/shoppingCart/live-classes/addpricing` | Add live class pricing |
| GET | `/shoppingCart/courses/pricing/{id}` | List course pricing |
| GET | `/shoppingCart/tests/pricing/{id}` | List test pricing |
| GET | `/shoppingCart/live-classes/pricing/{id}` | List live class pricing |
| DELETE | `/shoppingCart/courses/deletepricing` | Remove course pricing |
| DELETE | `/shoppingCart/tests/deletepricing` | Remove test pricing |
| DELETE | `/shoppingCart/live-classes/deletepricing` | Remove live class pricing |

**Discounts**

| Method | Endpoint | Action |
| --- | --- | --- |
| GET | `/discounts/globaldiscounts/list` | List global discounts |
| GET | `/discounts/courses/{id}` | List course discounts |
| GET | `/discounts/tests/{id}` | List test discounts |
| GET | `/discounts/live-classes/{id}` | List live class discounts |
| POST | `/discounts/addCourseDiscount` | Add course discount |
| POST | `/discounts/addTestDiscount` | Add test discount |
| POST | `/discounts/addLiveClassDiscount` | Add live class discount |
| DELETE | `/discounts/removeCourseDiscount/{id}` | Remove course discount |
| DELETE | `/discounts/removeTestDiscount/{id}` | Remove test discount |
| DELETE | `/discounts/removeLiveClassDiscount/{id}` | Remove live class discount |

**Gamification**

| Method | Endpoint | Action |
| --- | --- | --- |
| GET | `/gamification/leaderboard` | Get leaderboard |
| POST | `/gamification/user-points` | Get user points |
| POST | `/gamification/user-badges` | Get user badges |

###   

### Authentication Example

Every request to the BrainCert LMS API must include two authentication headers:

- `Authorization: API_KEY` → Your unique API key
- `x-domain-id: DOMAIN_ID` → The Domain ID of your LMS instance

Both must be sent with each request to ensure the API can verify **who you are** and **which LMS instance** you’re accessing.

#### Example: Create a User (cURL)

    curl -X POST "https://lms.braincert.com/api/v1/users/create" \
      -H "Authorization: API_KEY" \
      -H "x-domain-id: DOMAIN_ID" \
      -H "Content-Type: application/json" \
      -d '{"username":"testuser","email":"test@example.com"}'

**Response (JSON)**

    {
      "message": "User successfully created",
      "id": 12345
    }

**Notes:**

- Always send requests over **HTTPS** to keep credentials secure.
- Replace `API_KEY` and `DOMAIN_ID` with your actual values from the LMS admin dashboard.
- Use `Content-Type: application/json` when sending data in the request body.

##   

## Error Reference

*The API uses standard HTTP status codes with a JSON error body. The BrainCert LMS API uses the following error codes:*

| Error Code | Meaning |
| --- | --- |
| 400 | Bad Request -- Your request is invalid. |
| 401 | Unauthorized -- Your API key or Domain ID is incorrect. |
| 403 | Forbidden -- You do not have permission to access this. |
| 404 | Not Found -- The requested resource could not be found. |
| 405 | Method Not Allowed -- You tried to access a resource with an invalid method. |
| 406 | Not Acceptable -- You requested a format that isn't JSON. |
| 429 | Too Many Requests -- You have exceeded the rate limit. |
| 500 | Internal Server Error -- We had an issue on our server. |
| 503 | Service Unavailable -- We are temporarily offline for maintenance. |

**Example error**

    { "message": "Bad Request", "error": { "code": 400, "details": "<reason>" } }

##   

## API Basics: Getting Started

The BrainCert LMS API allows you to manage users, courses, tests, and more through simple REST endpoints. This section covers the fundamentals to help you quickly start building with the API.

### API (Application Programming Interface)

An **API** is like a waiter in a restaurant. You (the client) tell the waiter what you want, and they bring your request to the kitchen (the server) and return your food (the response).  
  
In software, an API lets different programs talk to each other. Instead of manually clicking in a web app, you send requests to the API, and it gives you structured data back.

###   

### Endpoint

An **endpoint** is a specific URL in the API that performs a certain function.  
For example:

- `/users/create` → Create a user
- `/courses/list` → Get a list of courses

Think of endpoints as doors leading to different services inside the LMS.

###   

### JSON (JavaScript Object Notation)

**JSON** is a lightweight format for sending data. It looks like a dictionary or a table, but written in a way computers can easily understand.

Example JSON:

    {
      "username": "alice",
      "email": "alice@example.com"
    }

This is easier for systems to exchange data than plain text.

###   

### HTTPS

**HTTPS** (HyperText Transfer Protocol Secure) is the secure way of sending requests over the internet. It encrypts your API calls so nobody can see your API key, Domain ID, or user data while it’s traveling between your app and BrainCert’s servers.

###   

### API Key

An **API Key** is like a secret password that proves you are allowed to use the API. Every request you send must include your key, or the API will reject you.

###   

### Domain ID

The **Domain ID** tells BrainCert which LMS instance you are working with (since BrainCert can host many). It’s like telling the post office which street your house is on, so they don’t deliver your mail to the wrong place.

###   

### Request vs. Response

- **Request** → What you send to the API (includes endpoint, headers, and JSON data).
- **Response** → What the API sends back (usually JSON).

**Example request:**

    POST /users/create
    { "username": "alice", "email": "alice@example.com" }

**Example response:**

    { "message": "User successfully created", "id": 12345 }

###   

### Headers

**Headers** are extra information sent with a request. For BrainCert APIs you must always include:

- `Authorization: API_KEY`
- `x-domain-id: DOMAIN_ID`

These tell the server who you are and which LMS you belong to.

###   

### Status Codes

Every API response comes with an **HTTP status code**:

- `200` → OK, success
- `400` → Bad request
- `401` → Unauthorized (wrong key/domain)
- `404` → Not found
- `500` → Server error

This helps you understand whether your request worked or failed.

###   

### Base URL

Most endpoints use the following base URL:
<section class="info-box">https://lms.braincert.com/api/v1</section>

> 
> Note: In the examples provided, the base URL is shown explicitly within each section.

###   

### Authentication

- **API Key**: Identify and authorize requests.
- **Domain ID**: Route the request to your LMS instance.
- Include both as headers on **every** request:

> 
> Authorization: &lt;API\_KEY&gt;
> 
> x-domain-id: &lt;DOMAIN\_ID&gt;

Generate an API key in **Global Settings → Basic Settings → API Key** in your LMS admin.

###   

### Request/Response Format

- **Requests**: JSON body unless noted.
- **Responses**: JSON by default.
- **Recommended method**: `POST` (even for reads) to protect secrets.

Canonical response envelope

    {
    "message": "Human-readable status",
    "data": { /* object or array, endpoint-specific */ }
    }

###   

### HTTP Status Codes

- 2xx on success; see Error Reference for failures.

###   

### Best Practices

- Use **Postman** for exploration and collections.
- Use a JSON formatter/extension when viewing responses in a browser.
- Never expose API keys publicly or in URLs.

##   

## Common Headers

| Header | Value | Required | Notes |
| --- | --- | --- | --- |
| Authorization | `<API_KEY>` | Yes | Your API key |
| x-domain-id | `<DOMAIN_ID>` | Yes | Your LMS instance/domain identifier |
| Content-Type | `application/json` | Yes\* | Required when sending a JSON payload |

**Response**

    curl -X POST "https://lms.braincert.com/api/v1/users/create" \
    -H "Authorization: $API_KEY" \
    -H "x-domain-id: $DOMAIN_ID" \
    -H "Content-Type: application/json" \
    -d '{"username":"testuser","email":"test@example.com"}'

<section class="info-box">Please see the <a class="e-rte-anchor" href="https://www.braincert.com/docs/api/lms/#introduction" title="https://www.braincert.com/docs/api/lms/#introduction" target="_blank" aria-label="Open in new window" rel="noopener noreferrer">LMS API documentation </a> for details on the supported actions.</section>

# How to Enable Guest Checkout for Courses and Other Products

Providing a seamless guest checkout option can significantly enhance the buying experience, allowing learners and customers to access your courses and other products quickly and easily.

With guest checkout, users stay on the checkout page instead of being redirected to a login screen after adding items to their cart. This process allows them to choose between logging in, creating an account, or proceeding as a guest, keeping the journey smooth and straightforward.

In this guide, we’ll show you how to enable this feature, making it easy for guests and registered users alike to complete their purchases efficiently.
<section class="info-box"><strong>Note:</strong> Guest payment supports all payment methods except PayUmoney.</section><section class="warning-box"><p data-start="151" data-end="361">Guest checkout allows users to purchase without creating an account. However, during guest checkout, user details (like name, email, etc.) are automatically stored in the system, just like for registered users.<br>Guest checkout is allowed <strong>except when the registration method is set to</strong> '<strong>From Backend Admin</strong>'. This restriction ensures that user data is not automatically stored when manual control over user registration is required.<br></p></section>
###### **When is guest checkout allowed?**

Guest checkout is enabled only when the registration method is set to

"No approval from admin"

"Needs approval from admin"

These settings allow automatic account creation and storage of user details during checkout.

![1](https://support.braincert.com/kb/attachment/article/229/inline?token=eyJhbGciOiJodHRwOi8vd3d3LnczLm9yZy8yMDAxLzA0L3htbGRzaWctbW9yZSNobWFjLXNoYTI1NiIsInR5cCI6IkpXVCJ9.eyJpZCI6IjY3OTAiLCJvcmdpZCI6IjE2MDMiLCJpc3MiOiJzdXBwb3J0LmJyYWluY2VydC5jb20ifQ.q_tSmgMXgt4ZKOERubVWlkDgf6MuMKc51lgy0R2OdmA)

##   

## Step-by-Step Guide:

## **Step 1:**

Navigate to '**Courses**' from the login page.

![1](https://support.braincert.com/kb/attachment/article/229/inline?token=eyJhbGciOiJodHRwOi8vd3d3LnczLm9yZy8yMDAxLzA0L3htbGRzaWctbW9yZSNobWFjLXNoYTI1NiIsInR5cCI6IkpXVCJ9.eyJpZCI6IjYyMDAiLCJvcmdpZCI6IjE2MDMiLCJpc3MiOiJzdXBwb3J0LmJyYWluY2VydC5jb20ifQ.jDFlfnkU3jh-almQqiJuoTqmAlOXfMZDEckAdiwll9E)

## **Step 2:**

Now, click the course you want to purchase.

![2](https://support.braincert.com/kb/attachment/article/229/inline?token=eyJhbGciOiJodHRwOi8vd3d3LnczLm9yZy8yMDAxLzA0L3htbGRzaWctbW9yZSNobWFjLXNoYTI1NiIsInR5cCI6IkpXVCJ9.eyJpZCI6IjYyMDEiLCJvcmdpZCI6IjE2MDMiLCJpc3MiOiJzdXBwb3J0LmJyYWluY2VydC5jb20ifQ.lMZ5G7HnPqndf1l_U6ZCgva8vjRK37kZCMbGJ2_a0Ic)

## **Step 3:**

Once the course page is open, click on '**Add to Cart**' to proceed with the purchase.

![3](https://support.braincert.com/kb/attachment/article/229/inline?token=eyJhbGciOiJodHRwOi8vd3d3LnczLm9yZy8yMDAxLzA0L3htbGRzaWctbW9yZSNobWFjLXNoYTI1NiIsInR5cCI6IkpXVCJ9.eyJpZCI6IjYyMjAiLCJvcmdpZCI6IjE2MDMiLCJpc3MiOiJzdXBwb3J0LmJyYWluY2VydC5jb20ifQ.wdI_aEFn-Wdx5W538_bQfukTK3uOAzBXP7xx7oguN8g)

## **Step 4:**

After adding courses to your cart, you'll be redirected to the checkout page. Click the '**Checkout**' button to proceed.

![4](https://support.braincert.com/kb/attachment/article/229/inline?token=eyJhbGciOiJodHRwOi8vd3d3LnczLm9yZy8yMDAxLzA0L3htbGRzaWctbW9yZSNobWFjLXNoYTI1NiIsInR5cCI6IkpXVCJ9.eyJpZCI6IjYyMDMiLCJvcmdpZCI6IjE2MDMiLCJpc3MiOiJzdXBwb3J0LmJyYWluY2VydC5jb20ifQ.Um9sFcJ6FGESQwnqvp7w6GIBqPPMStI0i18ELrdz0Lo)

## **Step 5:**

On the checkout page, enter your email address in the '**Contact**' section.
<section class="info-box" style="text-align: left;"><span style=" font-family: Inter; font-size: 14px; font-style: normal; font-weight: 400; text-align: left; text-indent: 0px; white-space: normal; display: inline !important; float: none;">If you already have an account, log in directly from the checkout page using the email field (no page refresh is needed).</span></section>
![5](https://support.braincert.com/kb/attachment/article/229/inline?token=eyJhbGciOiJodHRwOi8vd3d3LnczLm9yZy8yMDAxLzA0L3htbGRzaWctbW9yZSNobWFjLXNoYTI1NiIsInR5cCI6IkpXVCJ9.eyJpZCI6IjYyMDQiLCJvcmdpZCI6IjE2MDMiLCJpc3MiOiJzdXBwb3J0LmJyYWluY2VydC5jb20ifQ.vVRA0h7VYfSb-agY1y9KMpN2sixwqp963hkFyxfkfSE)

## **Step 6:**

If the system does not recognize your email address, you’ll continue with the checkout process as a guest. Click the '**Checkout**' button to proceed.
<section class="info-box" style="text-align: left;"><span style=" font-family: Inter; font-size: 14px; font-style: normal; font-weight: 400; text-align: left; text-indent: 0px; white-space: normal; display: inline !important; float: none;">Once the order is placed, an account will automatically be created. An activation link will be sent to the provided email. Upon clicking it, you’ll be prompted to create a password for your new account.</span><br></section>
![6](https://support.braincert.com/kb/attachment/article/229/inline?token=eyJhbGciOiJodHRwOi8vd3d3LnczLm9yZy8yMDAxLzA0L3htbGRzaWctbW9yZSNobWFjLXNoYTI1NiIsInR5cCI6IkpXVCJ9.eyJpZCI6IjYyMDUiLCJvcmdpZCI6IjE2MDMiLCJpc3MiOiJzdXBwb3J0LmJyYWluY2VydC5jb20ifQ.QEijBaSqRrsrZFb4si9mUU_Pc1sAToeqWv6Y1NtKli8)

## **Step 7:**

Enter your contact number and click the '**Continue**' button to proceed with the payment.

![7](https://support.braincert.com/kb/attachment/article/229/inline?token=eyJhbGciOiJodHRwOi8vd3d3LnczLm9yZy8yMDAxLzA0L3htbGRzaWctbW9yZSNobWFjLXNoYTI1NiIsInR5cCI6IkpXVCJ9.eyJpZCI6IjYyMDYiLCJvcmdpZCI6IjE2MDMiLCJpc3MiOiJzdXBwb3J0LmJyYWluY2VydC5jb20ifQ.7TOZ29rHFgnfE0svXOpX55NB2R_TdIstOjTZaubN2cc)

## **Step 8:**

Choose the payment method and complete your payment.

**![8](https://support.braincert.com/kb/attachment/article/229/inline?token=eyJhbGciOiJodHRwOi8vd3d3LnczLm9yZy8yMDAxLzA0L3htbGRzaWctbW9yZSNobWFjLXNoYTI1NiIsInR5cCI6IkpXVCJ9.eyJpZCI6IjYyMDciLCJvcmdpZCI6IjE2MDMiLCJpc3MiOiJzdXBwb3J0LmJyYWluY2VydC5jb20ifQ.IqnyHsq1kH77WL3bwJ78I7sGMBe-JBsh80fYc5Bgg7Q)**
<section class="info-box" style="text-align: left;"><span style=" font-family: Inter; font-size: 14px; font-style: normal; font-weight: 400; text-align: left; text-indent: 0px; white-space: normal; display: inline !important; float: none;">After completing the purchase, you’ll receive a payment confirmation email and details about your shipment.</span></section>
## **Notification**

**'Notify new customers to complete account setup after purchase**' is enabled by default in the '**E-commerce**' page, notifying admins when a new customer joins.
<section class="info-box" style="text-align: left;"><span style=" font-family: Inter; font-size: 14px; font-style: normal; font-weight: 400; text-align: left; text-indent: 0px; white-space: normal; display: inline !important; float: none;">Notifications will be sent to admins about new sales, and new customers will be reminded to complete their account setup post-purchase.</span></section>
![9](https://support.braincert.com/kb/attachment/article/229/inline?token=eyJhbGciOiJodHRwOi8vd3d3LnczLm9yZy8yMDAxLzA0L3htbGRzaWctbW9yZSNobWFjLXNoYTI1NiIsInR5cCI6IkpXVCJ9.eyJpZCI6IjYyMTkiLCJvcmdpZCI6IjE2MDMiLCJpc3MiOiJzdXBwb3J0LmJyYWluY2VydC5jb20ifQ.t0Zx-MjE8l0WGGQYLP5FxV_V49u4S4S4qhT_6pSguAk)

By integrating this checkout process, your eCommerce platform ensures that customers experience minimal interruptions during the purchase process. Guests can easily check out and create post-purchase accounts without leaving the checkout page. Enabling notifications for admins and buyers ensures everyone stays informed about their orders and account status.

# How to Enable DRM Protection for Your Content

Digital Rights Management (DRM) is crucial for protecting your valuable audio and video content from unauthorized access and distribution. By enabling DRM protection on your files, you can ensure that only authorized users can view and use your content, safeguarding your intellectual property.

<iframe src="https://player.vimeo.com/video/1004448026?h=b3b7a6e499&amp;title=0&amp;byline=0&amp;portrait=0&amp;badge=0&amp;autopause=0&amp;player_id=0&amp;app_id=58479" frameborder="0" allow="autoplay; fullscreen; picture-in-picture; clipboard-write" style="position:absolute;top:0;left:0;width:100%;height:100%;" title="How to Enable DRM Protection for Your Content">&ZeroWidthSpace;</iframe>

This guide will walk you through the steps to enable DRM protection for your content in a few simple steps.

##   

## **Step 1:**

Go to '**Products**' in your dashboard and select '**Contents**' from the list. Next, click on the '**Upload Content**' button

**![1.png](https://support.braincert.com/kb/attachment/article/220/inline?token=eyJhbGciOiJodHRwOi8vd3d3LnczLm9yZy8yMDAxLzA0L3htbGRzaWctbW9yZSNobWFjLXNoYTI1NiIsInR5cCI6IkpXVCJ9.eyJpZCI6IjU4ODUiLCJvcmdpZCI6IjE2MDMiLCJpc3MiOiJzdXBwb3J0LmJyYWluY2VydC5jb20ifQ.xBvKnPlliQNVABIdgeMLS1vEQhnZ8EtVQtjMT1MMmbU)**

##   

## **Step 2:**

Now, click on '**Select files to upload**' and choose the files from your device.

**![2.png](https://support.braincert.com/kb/attachment/article/220/inline?token=eyJhbGciOiJodHRwOi8vd3d3LnczLm9yZy8yMDAxLzA0L3htbGRzaWctbW9yZSNobWFjLXNoYTI1NiIsInR5cCI6IkpXVCJ9.eyJpZCI6IjU4ODYiLCJvcmdpZCI6IjE2MDMiLCJpc3MiOiJzdXBwb3J0LmJyYWluY2VydC5jb20ifQ.DcA3jVaYNUHfn8gFxb9Iu_G1DAozTTkLFUosMLe_MxY)**

##   

## **Step 3:**

Select files to upload from your device.

![3.png](https://support.braincert.com/kb/attachment/article/220/inline?token=eyJhbGciOiJodHRwOi8vd3d3LnczLm9yZy8yMDAxLzA0L3htbGRzaWctbW9yZSNobWFjLXNoYTI1NiIsInR5cCI6IkpXVCJ9.eyJpZCI6IjU4OTUiLCJvcmdpZCI6IjE2MDMiLCJpc3MiOiJzdXBwb3J0LmJyYWluY2VydC5jb20ifQ.3DqT_WqHHk0ii-kV7mXQRguL5BQ91xcGxcQQcYi6XkY)

****

##   

## **Step 4:**

After uploading, enter the title and click '**Save**'.

**![4.png](https://support.braincert.com/kb/attachment/article/220/inline?token=eyJhbGciOiJodHRwOi8vd3d3LnczLm9yZy8yMDAxLzA0L3htbGRzaWctbW9yZSNobWFjLXNoYTI1NiIsInR5cCI6IkpXVCJ9.eyJpZCI6IjU4OTciLCJvcmdpZCI6IjE2MDMiLCJpc3MiOiJzdXBwb3J0LmJyYWluY2VydC5jb20ifQ.dTo9fAc3IsLRxfzHsIUYrhbsGmuyOoS2vlgBxUczS2s)**

##   

## **Step 5:**

To protect your audio/video file with DRM, click the link or '**Manage**' button.

**![5.png](https://support.braincert.com/kb/attachment/article/220/inline?token=eyJhbGciOiJodHRwOi8vd3d3LnczLm9yZy8yMDAxLzA0L3htbGRzaWctbW9yZSNobWFjLXNoYTI1NiIsInR5cCI6IkpXVCJ9.eyJpZCI6IjU4ODkiLCJvcmdpZCI6IjE2MDMiLCJpc3MiOiJzdXBwb3J0LmJyYWluY2VydC5jb20ifQ.fyRi5JTmA0MlPpg1ULwgGuOPW308TE-89hEX5vRkytU)**

##   

## **Step 6:**

Toggle the switch to enable DRM protection.

**![6.png](https://support.braincert.com/kb/attachment/article/220/inline?token=eyJhbGciOiJodHRwOi8vd3d3LnczLm9yZy8yMDAxLzA0L3htbGRzaWctbW9yZSNobWFjLXNoYTI1NiIsInR5cCI6IkpXVCJ9.eyJpZCI6IjU4OTAiLCJvcmdpZCI6IjE2MDMiLCJpc3MiOiJzdXBwb3J0LmJyYWluY2VydC5jb20ifQ.ZEJY5uL7Ohzfa0TIzCLmY_jTSMxV0xuyGlYtAjTofns)**

##   

## **Step 7:**

Returning to the content page, you'll see the **DRM-protected** icon indicating protection.

**![7.png](https://support.braincert.com/kb/attachment/article/220/inline?token=eyJhbGciOiJodHRwOi8vd3d3LnczLm9yZy8yMDAxLzA0L3htbGRzaWctbW9yZSNobWFjLXNoYTI1NiIsInR5cCI6IkpXVCJ9.eyJpZCI6IjU4OTEiLCJvcmdpZCI6IjE2MDMiLCJpc3MiOiJzdXBwb3J0LmJyYWluY2VydC5jb20ifQ.Lyx0BSY9lHc04H4XGDt9RCQI7qSFxPi4IkNXAnl-NYM)**

##   

## **Step 8:**

To protect an existing file, navigate to the content page and click on the file.

**![8.png](https://support.braincert.com/kb/attachment/article/220/inline?token=eyJhbGciOiJodHRwOi8vd3d3LnczLm9yZy8yMDAxLzA0L3htbGRzaWctbW9yZSNobWFjLXNoYTI1NiIsInR5cCI6IkpXVCJ9.eyJpZCI6IjU4OTIiLCJvcmdpZCI6IjE2MDMiLCJpc3MiOiJzdXBwb3J0LmJyYWluY2VydC5jb20ifQ.oolpWg7ujRmUeWJNOlBbMhBgjgQlmmVhuXZ7QGdPIJg)**

##   

## **Step 9:**

Toggle the switch to enable protection.

**![10.png](https://support.braincert.com/kb/attachment/article/220/inline?token=eyJhbGciOiJodHRwOi8vd3d3LnczLm9yZy8yMDAxLzA0L3htbGRzaWctbW9yZSNobWFjLXNoYTI1NiIsInR5cCI6IkpXVCJ9.eyJpZCI6IjU4OTQiLCJvcmdpZCI6IjE2MDMiLCJpc3MiOiJzdXBwb3J0LmJyYWluY2VydC5jb20ifQ.3q6nNXlJRIb80pan3KdGE846KtGQBbmWYvFims6jRFI)**

By following these steps, you can ensure your valuable content is protected with DRM, preventing unauthorized downloads and usage.

Always remember to Toggle the switch to enable DRM protection.

# How to Generate a Unique Permalink for Landing Pages

With the latest update, you can now generate unique permalinks for each landing page. This allows you to use your landing pages for various purposes beyond just the default domain page. Whether it’s for sales, lead generation, or event promotions, you can create customized URLs for specific goals.

Follow these simple steps to create and use a unique permalink for your landing page:

## **Step 1:**

Go to '**Website**' under 'Sales & Marketing' and select '**Landing Pages**'.**![1](https://support.braincert.com/kb/attachment/article/232/inline?token=eyJhbGciOiJodHRwOi8vd3d3LnczLm9yZy8yMDAxLzA0L3htbGRzaWctbW9yZSNobWFjLXNoYTI1NiIsInR5cCI6IkpXVCJ9.eyJpZCI6IjYxNDciLCJvcmdpZCI6IjE2MDMiLCJpc3MiOiJzdXBwb3J0LmJyYWluY2VydC5jb20ifQ.xeAzrwpCRcwBg7yIrqJRsHR9abCquBQ96g0B956y43o)**

## **Step 2:**

Click the '**Create a Landing Page'** button to create a new page or select an existing one.

Refer to the KB article '[**Steps to Set Up Your Site Builder**](https://support.braincert.com/kb/article/35/steps-to-set-up-your-site-builder "https://support.braincert.com/kb/article/35/steps-to-set-up-your-site-builder")' to learn more.**![2](https://support.braincert.com/kb/attachment/article/232/inline?token=eyJhbGciOiJodHRwOi8vd3d3LnczLm9yZy8yMDAxLzA0L3htbGRzaWctbW9yZSNobWFjLXNoYTI1NiIsInR5cCI6IkpXVCJ9.eyJpZCI6IjYxNDgiLCJvcmdpZCI6IjE2MDMiLCJpc3MiOiJzdXBwb3J0LmJyYWluY2VydC5jb20ifQ.FUz9QRNmgFG8jwgZNI-LI8Bz6Erj1cgxAJDzQm2_yX8)**

## **Step 3:**

A unique permalink for your landing page will be generated once you publish your landing page.**![3](https://support.braincert.com/kb/attachment/article/232/inline?token=eyJhbGciOiJodHRwOi8vd3d3LnczLm9yZy8yMDAxLzA0L3htbGRzaWctbW9yZSNobWFjLXNoYTI1NiIsInR5cCI6IkpXVCJ9.eyJpZCI6IjYxNDkiLCJvcmdpZCI6IjE2MDMiLCJpc3MiOiJzdXBwb3J0LmJyYWluY2VydC5jb20ifQ.Uniw-4ipFrDe4GSbGgyKyCySczjtWrvyrcmuy4VN5_I)**

## **Step 4:**

Copy the link using the '**Copy Content URL**' icon.

## **![4](https://support.braincert.com/kb/attachment/article/232/inline?token=eyJhbGciOiJodHRwOi8vd3d3LnczLm9yZy8yMDAxLzA0L3htbGRzaWctbW9yZSNobWFjLXNoYTI1NiIsInR5cCI6IkpXVCJ9.eyJpZCI6IjYxNTAiLCJvcmdpZCI6IjE2MDMiLCJpc3MiOiJzdXBwb3J0LmJyYWluY2VydC5jb20ifQ.M2APSrSTC7r-V2_qMztRNmdx4P7cJBh9p0i21VGEKoc)**

You will receive a '**Copied**!' notification once the link has been copied.**![5](https://support.braincert.com/kb/attachment/article/232/inline?token=eyJhbGciOiJodHRwOi8vd3d3LnczLm9yZy8yMDAxLzA0L3htbGRzaWctbW9yZSNobWFjLXNoYTI1NiIsInR5cCI6IkpXVCJ9.eyJpZCI6IjYxNTEiLCJvcmdpZCI6IjE2MDMiLCJpc3MiOiJzdXBwb3J0LmJyYWluY2VydC5jb20ifQ.BMzbqHbt3M6pTo59AUXWFaxcKVV6vz0z905kyrJLpUk)**

## **​** **Step 5:**

Paste the '**URL**' wherever you need it, whether it’s for marketing campaigns, emails, or social media posts.

![6](https://support.braincert.com/kb/attachment/article/232/inline?token=eyJhbGciOiJodHRwOi8vd3d3LnczLm9yZy8yMDAxLzA0L3htbGRzaWctbW9yZSNobWFjLXNoYTI1NiIsInR5cCI6IkpXVCJ9.eyJpZCI6IjYxNTIiLCJvcmdpZCI6IjE2MDMiLCJpc3MiOiJzdXBwb3J0LmJyYWluY2VydC5jb20ifQ.9oOOn2xACOWqYKoUe_BlQ3f6Dnhpi-414lJMmcwyi04)

Generating a unique permalink for your landing page gives you the flexibility to use these pages for multiple purposes. Follow the above steps to create your custom links and start sharing them to boost your campaigns!

This easy-to-use feature gives you more control and versatility over your landing page management.

# Delegating Administration Controls to other Moderators or Teachers in a Virtual Classroom

This article will guide you through the steps to delegate administration controls to other moderators or teachers in a Virtual Classroom.

## **Step 1:**

Login to the virtual classroom & launch your classroom session.

#####   

## **Step 2:**

Navigate to the bottom right and open '**Attendee Settings**' and you'll get a popup as shown in the figure.

![](https://support.braincert.com/kb/attachment/article/147/inline?token=eyJhbGciOiJodHRwOi8vd3d3LnczLm9yZy8yMDAxLzA0L3htbGRzaWctbW9yZSNobWFjLXNoYTI1NiIsInR5cCI6IkpXVCJ9.eyJpZCI6IjQyOTMiLCJvcmdpZCI6IjE2MDMiLCJpc3MiOiJzdXBwb3J0LmJyYWluY2VydC5jb20ifQ.Ys_T9L-RErBSbfYRhFSt_SUX4hw5eg36A0h5VOdT2Yg)

## **Step 3:**

Now, select '**Teacher Tools**' .

![](https://support.braincert.com/kb/attachment/article/147/inline?token=eyJhbGciOiJodHRwOi8vd3d3LnczLm9yZy8yMDAxLzA0L3htbGRzaWctbW9yZSNobWFjLXNoYTI1NiIsInR5cCI6IkpXVCJ9.eyJpZCI6IjQyODMiLCJvcmdpZCI6IjE2MDMiLCJpc3MiOiJzdXBwb3J0LmJyYWluY2VydC5jb20ifQ.ma96P-XAao0MtYUxYijhB7_At-35CmbWimKjYBNle14)

## **Step 4:**

Once you give Teachers Tools access to attendees, the attendees will receive a popup seeking confirmation. They have to click '**Yes**' to give confirmation.

![](https://support.braincert.com/kb/attachment/article/147/inline?token=eyJhbGciOiJodHRwOi8vd3d3LnczLm9yZy8yMDAxLzA0L3htbGRzaWctbW9yZSNobWFjLXNoYTI1NiIsInR5cCI6IkpXVCJ9.eyJpZCI6IjQzMDMiLCJvcmdpZCI6IjE2MDMiLCJpc3MiOiJzdXBwb3J0LmJyYWluY2VydC5jb20ifQ.k4VIM4lArWBTla4Yq4q1U2bLxhT5SMfACQNbg9pnBTk)

Likewise, you can share administration control access with other moderators or teachers in a Virtual Classroom.

# Virtual Classroom API - Frequently Asked Questions

### **Frequently Asked Questions**

###   

#### **1) Can I use the Virtual Classroom API to integrate courses and testing platforms into my website?**

Virtual Classroom API is best suitable for people who already have an existing website, LMS, CMS, or app. API integration within your website is available only for Virtual Classroom and NOT for courses, and tests.

#### **2) Do you offer a FREE trial?**

The [free plan](https://app.braincert.com/app/virtualclassroom#upgrade-plan "https://app.braincert.com/app/virtualclassroom#upgrade-plan") supports 2 connections (1 instructor + 1 attendee) with a maximum duration of 30 minutes per session. It supports 600 minutes of Free API usage. [Upgrade your API account](https://app.braincert.com/app/virtualclassroom#upgrade-plan "https://app.braincert.com/app/virtualclassroom#upgrade-plan") to use more attendees in a live session, and session duration. All paid API plans come with premium features such as more attendees in a live class, session recording feature with HD video encoding, etc.,

Generate API key here - [https://app.braincert.com/app/virtualclassroom](https://app.braincert.com/app/virtualclassroom "https://app.braincert.com/app/virtualclassroom")

#### **3) Why do I get an 'Invalid API Key' error?**

Please make sure you are using the right API key from [https://app.braincert.com/app/virtualclassroom](https://app.braincert.com/app/virtualclassroom "https://app.braincert.com/app/virtualclassroom"). A few things to check:

The launch URL should not contain spaces. For example, if you have a space after the API key, the browser adds %20 to the URL which will invalidate your API key.

The API parameters are separated by &, so make sure you not changing that separator.

|| EXAMPLE - roomId=682&apiKey=7UrWbMlO5sAx1fmVlPHK&userId=352

#### **4) Why do I get the 'Access Denied' error?**

When you launch a live class that is expired, you will get an '**Access Denied**' error message. This is because the class has ended, and you cannot launch classes from the past.

#### **5) Where is the Content Library?**

Virtual Classroom API shares the same content library as the E-Learning Platform. Upload all your document files such as PDF, DOC, PPT, and media files such as MP3 and MP4. These contents will be available to use from your content library within the Virtual Classroom session.

We do support unlimited cloud disk space to host all your files.

#### **6) Do I need to use CloudFlare to use Virtual Classroom API?**

By default, all the classes launched from your website will have the API endpoint [https://api.braincert.com](https://api.braincert.com/ "https://api.braincert.com/") in the URL. For branding purposes, you can map this API endpoint with your own domain such as (https://live.my-awesome-company.com). We do require SSL certificate mapping using CloudFlare to make your external domain work. Without SSL (https:// in the URL), a virtual classroom will not work.

#### **7) Is there a direct link for the Screen Sharing plugin in Chrome?**

If you have trouble installing the Chrome browser plugin for screen sharing from within the virtual classroom, open this [link](https://www.google.com/chrome/ "https://chrome.google.com/webstore/detail/html5-virtual-classroom-s/ihglikcoelelbbcpahhhfomehdeefmnc")directly and add (install) the extension in the Chrome browser.

#### **8) How do I download or play the recorded class videos?**

With API calls, you can record and download live classes directly from your website as a 720p HD MP4 file. You can use a video player like JW player, [video.js](https://videojs.com/ "https://videojs.com/"), or other players to play the video directly on your website or download and share it with your attendees.

#### **9) How do I integrate Virtual Classroom into my website? Do you offer example plugins for CMSs like Joomla or WordPress?**

Use Developer [API documentation](https://www.braincert.com/developer/virtualclassroom-api "https://www.braincert.com/developer/virtualclassroom-api") to integrate WebRTC-based HTML5 Virtual Classroom in your website which offers live audio/video conference, multiple interactive whiteboards, HTML5-based server-side session recording, multiple-language support, screen sharing, and so on. You would need to integrate it into your website by following the documentation and sample code provided in the API documentation. We do offer sample plugins for Joomla and WordPress-based websites which can be downloaded from here.

You can simply pass userID, username etc., as a parameter in the API call, and all your website user accounts can be maintained at your own website, and there is no need to create those user accounts at BrainCert.

You need to talk to a developer who understands RESTful API calls and is familiar with these types of integrations.

#### **10) How can I cut down development time? Do you offer other solutions?**

You may also want to look at  [Unified Training Platform](https://www.braincert.com/learning-management-system "https://www.braincert.com/learning-management-system") - a hosted SaaS white-label solution, which comes integrated with 4 core platforms in one unified solution - courses platform, online testing platform, award-winning virtual classroom, and content management system.

Use our Enterprise LMS to cut down the integration time and easily onboard users using Single-Sign-On.

Enterprise LMS is role-based, so you can create groups like "**Employees**", "**Customers**" etc., set up courses, tests, and live classes, and collaborate securely with granular permissions and access levels.

Your LMS will look something like this [https://learnems.braincert.com/](https://learnems.braincert.com/ "https://learnems.braincert.com/") and it also allows mapping your external domain such as (http://www.emslearningpath.com/) using a simple CNAME entry in your DNS server. Enterprise LMS blends with your corporate domain and theme, and you can also configure it to Single Sign-On (SSO) from your website to Enterprise LMS with a click of a button.

Activate your domain here. It comes with a free 15-day trial.

#### **11) Does it work on iOS and Android devices?**

Mobile browsers such as Opera and Chrome on Android are fully supported. iOS devices are also supported. See the browser compatibility guide here.

#### **12) What are the minimum requirements to use the HTML5 Virtual Classroom?**

Follow this KB note to check the minimum requirements [- https://www.braincert.com/braincert-support/kb/art.](https://support.braincert.com/ "https://support.braincert.com/")

#### **13) How do I allow my website users to test their browsers?**

You can have your website users use our browser check tool - [https://www.braincert.com/live/html5check.php](https://www.braincert.com/live/html5check.php "https://www.braincert.com/live/html5check.php") to check their browser automatically. You can also create an iFrame embed in your website using this link to hide the URL.

You may also want to use this free WebRTC troubleshooter tool - [https://test.webrtc.org/](https://test.webrtc.org/ "https://test.webrtc.org/").

# How to Enroll Students in Courses, Tests, Bundles, and Live Classes in the Enterprise Plan

Learn how to efficiently enroll students in courses or tests with our step-by-step guide. This article provides clear instructions for managing student enrollments with ease.

<section class="info-box"><span>We strongly recommend reviewing this <a class="e-rte-anchor" href="https://support.braincert.com/kb/article/93/how-to-enable-public-and-private-catalog-pages-for-courses-tests-products-and-live-classes-including-exclusive-invite-only-content" title="https://support.braincert.com/kb/article/93/how-to-enable-public-and-private-catalog-pages-for-courses-tests-products-and-live-classes-including-exclusive-invite-only-content" target="_blank" aria-label="Open in new window" rel="noopener noreferrer">KB article</a> on creating your own marketplace, which enables learners to enroll in courses and other products. The article also explains how to enroll learners in private courses without publishing them in the marketplace.</span></section>
<section class="warning-box"><span>Follow the steps below to explore the various ways you can onboard and enroll learners in courses, tests, and other products for the Enterprise plan. Please note that '<strong>Groups</strong>' and '<strong>Roles</strong>' are features exclusive to our <strong>Enterprise</strong> plans.</span></section>
###   

## **Enterprise Plan**

## **Self-Registration for Course Enrollment**

Students can easily enroll themselves in a course during the user account creation process through self-registration. Follow these steps to enable and configure self-registration in your LMS:

## **Step 1:**

Navigate to the '**Global Settings**' and open '**User Registration**'.

![1](https://support.braincert.com/kb/attachment/article/23/inline?token=eyJhbGciOiJodHRwOi8vd3d3LnczLm9yZy8yMDAxLzA0L3htbGRzaWctbW9yZSNobWFjLXNoYTI1NiIsInR5cCI6IkpXVCJ9.eyJpZCI6IjU5NjEiLCJvcmdpZCI6IjE2MDMiLCJpc3MiOiJzdXBwb3J0LmJyYWluY2VydC5jb20ifQ.QvJ_AVLwFaileIWlhlqvpCMhV6rMrMRQfsHUHrcX6Oc)

##   

## **Step 2:**

In the '**User Registration**' settings, you will find various options for user registration. Scroll down to '**Allow users to enroll in a Group during registration**' and set the option to '**Yes**'.
<section class="info-box"><span style=" font-family: Inter; font-size: 14px; font-style: normal; font-weight: 400; text-align: left; text-indent: 0px; white-space: normal; display: inline !important; float: none;">This allows users to select a group during the registration process.</span></section>
![2](https://support.braincert.com/kb/attachment/article/23/inline?token=eyJhbGciOiJodHRwOi8vd3d3LnczLm9yZy8yMDAxLzA0L3htbGRzaWctbW9yZSNobWFjLXNoYTI1NiIsInR5cCI6IkpXVCJ9.eyJpZCI6IjU5NjIiLCJvcmdpZCI6IjE2MDMiLCJpc3MiOiJzdXBwb3J0LmJyYWluY2VydC5jb20ifQ.8XtY8NZTzFl9YhEsvvJmFyLtQ3wB3Kjroq-z0R7nFY8)

If you want to force all users to register into a default user group, then select the '**Allow users to enroll in a Group during registration**' option to '**No**'. This gives you the option to select a group from the drop-down to force enroll all users to this specific group after registration.

<section class="warning-box">To facilitate this process, you need to create a <strong>'Group'</strong> in advance.<br></section>

![3](https://support.braincert.com/kb/attachment/article/23/inline?token=eyJhbGciOiJodHRwOi8vd3d3LnczLm9yZy8yMDAxLzA0L3htbGRzaWctbW9yZSNobWFjLXNoYTI1NiIsInR5cCI6IkpXVCJ9.eyJpZCI6IjU5NjQiLCJvcmdpZCI6IjE2MDMiLCJpc3MiOiJzdXBwb3J0LmJyYWluY2VydC5jb20ifQ.pj_-4GpQcfLD8jM2szaHkVJGBLwxTBkq7cYhq1YvAbA)

##   

## **Step 3:**

Next, click on the '**Default User Type**' setting and select '**Learner**' from the dropdown menu.

<section class="info-box"><span style=" font-family: Inter; font-size: 14px; font-style: normal; font-weight: 400; text-align: left; text-indent: 0px; white-space: normal; display: inline !important; float: none;">This ensures that newly registered users will have the Learner role by default. </span></section>

After configuring the settings, click on the '**Save**' button to save your changes.

![3](https://support.braincert.com/kb/attachment/article/23/inline?token=eyJhbGciOiJodHRwOi8vd3d3LnczLm9yZy8yMDAxLzA0L3htbGRzaWctbW9yZSNobWFjLXNoYTI1NiIsInR5cCI6IkpXVCJ9.eyJpZCI6IjU5NjMiLCJvcmdpZCI6IjE2MDMiLCJpc3MiOiJzdXBwb3J0LmJyYWluY2VydC5jb20ifQ.YMn02GPAhj-UZeeLeJcXWelb4wJ0LbRSnhFfm3_Y-i0)

##   

## **Assign User Group**

## **Step 1:**

Navigate to **'Courses'** and select **'Manage Courses'**. Click on the **'Options'** of a course and choose **'Assign User Group'** from the list.

![3.png](https://support.braincert.com/kb/attachment/article/23/inline?token=eyJhbGciOiJodHRwOi8vd3d3LnczLm9yZy8yMDAxLzA0L3htbGRzaWctbW9yZSNobWFjLXNoYTI1NiIsInR5cCI6IkpXVCJ9.eyJpZCI6IjUzNzgiLCJvcmdpZCI6IjE2MDMiLCJpc3MiOiJzdXBwb3J0LmJyYWluY2VydC5jb20ifQ.ga_4oPBFdAgZhX7MECIZhXCGjsXTjAR_HdfS3tVRwuk)

##   

## **Step 2:**

Select one or more groups and click the '**Save**' button.

When the students log in to the LMS after registration, all the courses, tests, and live classes assigned to the group that the student belongs to will be visible.

<section class="info-box"><p style=" margin: 0px 0px 10px;">If you're selling the courses, students would need to buy the course to get full access. Assigning courses to the group simply grants the '<strong style=" font-weight: 700;">view</strong>' permission to all the users in the group.</p></section>

![6](https://support.braincert.com/kb/attachment/article/23/inline?token=eyJhbGciOiJodHRwOi8vd3d3LnczLm9yZy8yMDAxLzA0L3htbGRzaWctbW9yZSNobWFjLXNoYTI1NiIsInR5cCI6IkpXVCJ9.eyJpZCI6IjU5NjUiLCJvcmdpZCI6IjE2MDMiLCJpc3MiOiJzdXBwb3J0LmJyYWluY2VydC5jb20ifQ.qkEfMbh4mX5mFJ9mWWgN0PZN6ynUMUqF2tNRZyuKhWc)

##   

## **Enroll Students Manually**

You can enroll students manually in a course by adding the user to the group that has the course assigned.

## **Enroll by Adding a User to the Group**

## **Step 1:**

Go to '**People**' and select '**Groups**' from the list. Click on '**Options**', of a group and open '**Add Users**'.

![5.png](https://support.braincert.com/kb/attachment/article/23/inline?token=eyJhbGciOiJodHRwOi8vd3d3LnczLm9yZy8yMDAxLzA0L3htbGRzaWctbW9yZSNobWFjLXNoYTI1NiIsInR5cCI6IkpXVCJ9.eyJpZCI6IjUzODAiLCJvcmdpZCI6IjE2MDMiLCJpc3MiOiJzdXBwb3J0LmJyYWluY2VydC5jb20ifQ.JopywkesKicRMdBS_PYMWNpd23GlKBQ7fDzSTbviGyA)

##   

## **Step 2:**

Select users from the list and click on '**Save Users**'.

**![8](https://support.braincert.com/kb/attachment/article/23/inline?token=eyJhbGciOiJodHRwOi8vd3d3LnczLm9yZy8yMDAxLzA0L3htbGRzaWctbW9yZSNobWFjLXNoYTI1NiIsInR5cCI6IkpXVCJ9.eyJpZCI6IjU5NjYiLCJvcmdpZCI6IjE2MDMiLCJpc3MiOiJzdXBwb3J0LmJyYWluY2VydC5jb20ifQ.KmB4g0Ike-VL8i_5Ne3Y7jtHv1IU-2IG1iIJx7WgrYE)**

##   

## **Enroll  Individual Students**  

If you do not want to add the student to a group, you can manually assign the student to a course.

## **Step 1:**

**​**Navigate to '**Courses**' and select '**Manage Courses**'. Click on the '**Options**' of a course and open '**Enroll Individual Students**'.![6.png](https://support.braincert.com/kb/attachment/article/23/inline?token=eyJhbGciOiJodHRwOi8vd3d3LnczLm9yZy8yMDAxLzA0L3htbGRzaWctbW9yZSNobWFjLXNoYTI1NiIsInR5cCI6IkpXVCJ9.eyJpZCI6IjUzODEiLCJvcmdpZCI6IjE2MDMiLCJpc3MiOiJzdXBwb3J0LmJyYWluY2VydC5jb20ifQ.cBf-YnGdU0dHvQZoR4E5fNd8Y6Cio-BfJE9VWzcXRLM)

##   

## **Step 2:**

**Enter the student's mail address, subject, and message on the given field and click on the 'Send' button.**

**![10](https://support.braincert.com/kb/attachment/article/23/inline?token=eyJhbGciOiJodHRwOi8vd3d3LnczLm9yZy8yMDAxLzA0L3htbGRzaWctbW9yZSNobWFjLXNoYTI1NiIsInR5cCI6IkpXVCJ9.eyJpZCI6IjU5NjciLCJvcmdpZCI6IjE2MDMiLCJpc3MiOiJzdXBwb3J0LmJyYWluY2VydC5jb20ifQ.IWc-0ZZ6dxZSnTPc_FDC07AeAgDYfEn4PwbnlyI9fxU)**

##   

## **Assign Courses with Users**

## **Step 1:**

Navigate to '**Users**' under '**People**' and click on the name of the person you want to assign a course to.

**![11](https://support.braincert.com/kb/attachment/article/23/inline?token=eyJhbGciOiJodHRwOi8vd3d3LnczLm9yZy8yMDAxLzA0L3htbGRzaWctbW9yZSNobWFjLXNoYTI1NiIsInR5cCI6IkpXVCJ9.eyJpZCI6IjU5NjgiLCJvcmdpZCI6IjE2MDMiLCJpc3MiOiJzdXBwb3J0LmJyYWluY2VydC5jb20ifQ.N9polJl0GjMsBSC24RWgD_dymXejimf4nttitOI4J_4)**

##   

## **Step 2:**

Go to '**Courses**' and click on the '**Assign Courses**' button.

**![12](https://support.braincert.com/kb/attachment/article/23/inline?token=eyJhbGciOiJodHRwOi8vd3d3LnczLm9yZy8yMDAxLzA0L3htbGRzaWctbW9yZSNobWFjLXNoYTI1NiIsInR5cCI6IkpXVCJ9.eyJpZCI6IjU5NjkiLCJvcmdpZCI6IjE2MDMiLCJpc3MiOiJzdXBwb3J0LmJyYWluY2VydC5jb20ifQ.hCaYSefLG9Qoh3i0fIL2xi-w0lhm9eT2ifOPhsFoav8)**

##   

## **Step 3:**

Select the courses you want to assign and save the changes.

**![13](https://support.braincert.com/kb/attachment/article/23/inline?token=eyJhbGciOiJodHRwOi8vd3d3LnczLm9yZy8yMDAxLzA0L3htbGRzaWctbW9yZSNobWFjLXNoYTI1NiIsInR5cCI6IkpXVCJ9.eyJpZCI6IjU5NzAiLCJvcmdpZCI6IjE2MDMiLCJpc3MiOiJzdXBwb3J0LmJyYWluY2VydC5jb20ifQ.IkdX0EtN_2xdaMK5Lz_-_egtAkSbHp5tkm9ZPhLQUSY)**

**<section class="info-box"><h2 style=" margin: 10px 0px; font-weight: 400; line-height: 1.2; font-size: 1.74em; font-family: var(--font-style); font-style: normal; text-align: left; text-indent: 0px; white-space: normal;"><span style=" font-family: Inter; font-size: 16px; font-style: normal; font-weight: 400; text-align: left; text-indent: 0px; white-space: normal; display: inline !important;">If you need to enroll students in a test, bundle, or live class, follow the same process, but refer to the steps in the specific product section instead of the 'Courses' section.</span></h2></section>**

# Customizing Interface Language Based on User Groups - RTL (Right-to-Left)

'**Interface language**' is important as it ensures effective communication and usability for users who speak different languages.

BrainCert comes with complete support for **RTL languages** (Arabic and Hebrew) out of the box without any additional configuration. The RTL option and interface language can be easily set up with a click of a button. Here is how you do it.

<iframe src="https://player.vimeo.com/video/958317918?badge=0&amp;autopause=0&amp;player_id=0&amp;app_id=58479" frameborder="0" allow="autoplay; fullscreen; picture-in-picture; clipboard-write" style="position:absolute;top:0;left:0;width:100%;height:100%;" title="Customizing Interface Language Based on User Groups - RTL">&ZeroWidthSpace;</iframe>

##   

## **Step 1:**

Log in to your BrainCert portal and navigate to '**Global Settings**'. Click on the '**Interface** **Language**' from the list.

![1.png](https://support.braincert.com/kb/attachment/article/47/inline?token=eyJhbGciOiJodHRwOi8vd3d3LnczLm9yZy8yMDAxLzA0L3htbGRzaWctbW9yZSNobWFjLXNoYTI1NiIsInR5cCI6IkpXVCJ9.eyJpZCI6IjQ4OTciLCJvcmdpZCI6IjE2MDMiLCJpc3MiOiJzdXBwb3J0LmJyYWluY2VydC5jb20ifQ.PCvVGyXxkQCZ7hOyUElrPOl54lI4RpmB8Uc4dTofTUE)

## **Step 2:**

- Toggle the '**Enable RTL**' switch to enable or disable RTL support.
- To set an interface language for '**Guests**' on the login/landing page, click the dropdown box and select the desired language.
- Remember to '**Save**' the changes once you have made your selection.

![2.png](https://support.braincert.com/kb/attachment/article/47/inline?token=eyJhbGciOiJodHRwOi8vd3d3LnczLm9yZy8yMDAxLzA0L3htbGRzaWctbW9yZSNobWFjLXNoYTI1NiIsInR5cCI6IkpXVCJ9.eyJpZCI6IjQ4OTgiLCJvcmdpZCI6IjE2MDMiLCJpc3MiOiJzdXBwb3J0LmJyYWluY2VydC5jb20ifQ.doD2J5sfZ9fWU8AgFhPyC8AKUYeneLl1HYYIA7XFULU)

##   

To change the language for '**Group Users**', select the group and choose the language from the dropdown box, then click on the '**Save**' icon to save the changes.

## ![3.png](https://support.braincert.com/kb/attachment/article/47/inline?token=eyJhbGciOiJodHRwOi8vd3d3LnczLm9yZy8yMDAxLzA0L3htbGRzaWctbW9yZSNobWFjLXNoYTI1NiIsInR5cCI6IkpXVCJ9.eyJpZCI6IjQ4OTkiLCJvcmdpZCI6IjE2MDMiLCJpc3MiOiJzdXBwb3J0LmJyYWluY2VydC5jb20ifQ.Ji-lq0K__MFd4meOvfUF-_gume1EPkdPQ9eIEVQR6Dk) 

## **Step 3:**

After toggling the '**Enable RTL**' switch and making the necessary settings changes, the RTL interface will automatically be enforced for groups using RTL languages, as shown in the picture.

![4.png](https://support.braincert.com/kb/attachment/article/47/inline?token=eyJhbGciOiJodHRwOi8vd3d3LnczLm9yZy8yMDAxLzA0L3htbGRzaWctbW9yZSNobWFjLXNoYTI1NiIsInR5cCI6IkpXVCJ9.eyJpZCI6IjQ5MDAiLCJvcmdpZCI6IjE2MDMiLCJpc3MiOiJzdXBwb3J0LmJyYWluY2VydC5jb20ifQ.ApqlRAwQ6tN5LoIuVaKl0qKJjh3te1wChxUL0VKDeW4)

Hope you have found this article to be helpful.

# How to Upload Documents in a Virtual Classroom Session

This article will guide you through the steps to upload documents in the Virtual Classroom.

## **Step 1:**

Login to the Virtual Classroom platform, launch your live class and start using the whiteboard.

Click on the '**Document Tool**' icon at the bottom right side of the screen.

![](https://support.braincert.com/kb/attachment/article/126/inline?token=eyJhbGciOiJodHRwOi8vd3d3LnczLm9yZy8yMDAxLzA0L3htbGRzaWctbW9yZSNobWFjLXNoYTI1NiIsInR5cCI6IkpXVCJ9.eyJpZCI6IjQ0MDMiLCJvcmdpZCI6IjE2MDMiLCJpc3MiOiJzdXBwb3J0LmJyYWluY2VydC5jb20ifQ.lHnuRxvaa9r0Rf0cmI69w8xp_lbpkq9yYMJu8MpT0b8)

## **<u style="box-sizing: border-box;"><br>To Upload a File from Library</u>**

## **Step 2:**

Click on '**Choose From Your Library**' to choose a file from your library.
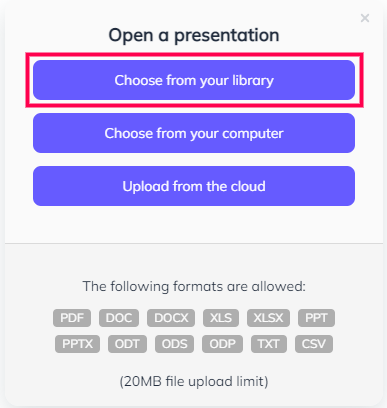

![](https://support.braincert.com/kb/attachment/article/126/inline?token=eyJhbGciOiJodHRwOi8vd3d3LnczLm9yZy8yMDAxLzA0L3htbGRzaWctbW9yZSNobWFjLXNoYTI1NiIsInR5cCI6IkpXVCJ9.eyJpZCI6IjQ0MDQiLCJvcmdpZCI6IjE2MDMiLCJpc3MiOiJzdXBwb3J0LmJyYWluY2VydC5jb20ifQ.iNKHrnU9HOFmo3wcsWeDX0_QLaj3bQGbMKS9YsDqP_Y)

## **Step 3:**

Click on the file from the library that you want to open.
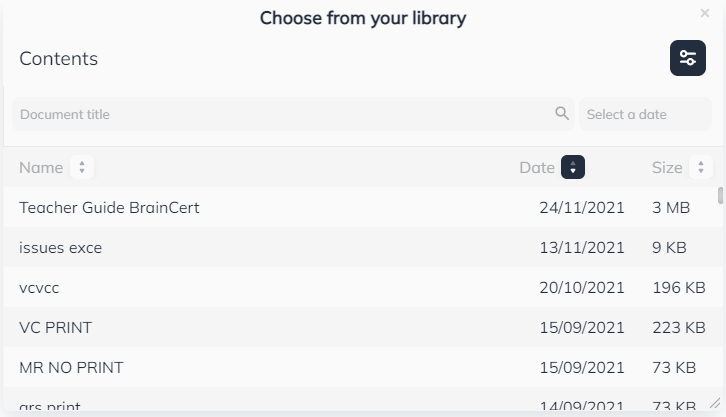

![](https://support.braincert.com/kb/attachment/article/126/inline?token=eyJhbGciOiJodHRwOi8vd3d3LnczLm9yZy8yMDAxLzA0L3htbGRzaWctbW9yZSNobWFjLXNoYTI1NiIsInR5cCI6IkpXVCJ9.eyJpZCI6IjQ0MDUiLCJvcmdpZCI6IjE2MDMiLCJpc3MiOiJzdXBwb3J0LmJyYWluY2VydC5jb20ifQ.PTvbS0tJ6kw4MvM4tJFajwws5P1vILumaWfYzaHDJd8)

##   
**To Upload a File from your Computer**

## **Step 4:**

Click on '**Choose From Your Computer**' to choose a file from your computer and open it in the virtual classroom.
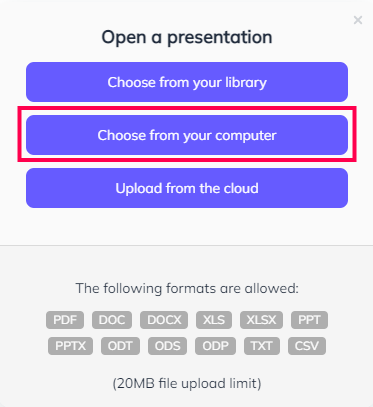

![](https://support.braincert.com/kb/attachment/article/126/inline?token=eyJhbGciOiJodHRwOi8vd3d3LnczLm9yZy8yMDAxLzA0L3htbGRzaWctbW9yZSNobWFjLXNoYTI1NiIsInR5cCI6IkpXVCJ9.eyJpZCI6IjQzODMiLCJvcmdpZCI6IjE2MDMiLCJpc3MiOiJzdXBwb3J0LmJyYWluY2VydC5jb20ifQ.PQnGsBlUn3P7F_6wH3moOBHO0gRPGgV-EwEche0XD9s)

## **<u style="box-sizing: border-box;"><br>To Upload From Cloud</u>**

## **Step 5:**

Click on '**Upload From The Cloud**' to open a file from the cloud in the virtual classroom.
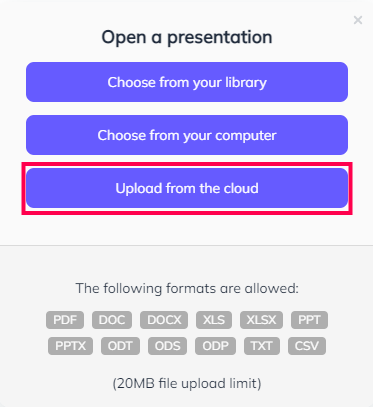

![](https://support.braincert.com/kb/attachment/article/126/inline?token=eyJhbGciOiJodHRwOi8vd3d3LnczLm9yZy8yMDAxLzA0L3htbGRzaWctbW9yZSNobWFjLXNoYTI1NiIsInR5cCI6IkpXVCJ9.eyJpZCI6IjQzODIiLCJvcmdpZCI6IjE2MDMiLCJpc3MiOiJzdXBwb3J0LmJyYWluY2VydC5jb20ifQ.9hNmKnKWuQ0T75cQq09plIsUAJw9aWZ24HZNFr0bthY)

## **Step 6:**

Enter the Link or connect with Dropbox, Google Drive, Evernote, OneDrive, OneDrive Business, Cloud Drive, Box, Flickr, or Facebook to upload the files from the cloud in the virtual classroom.
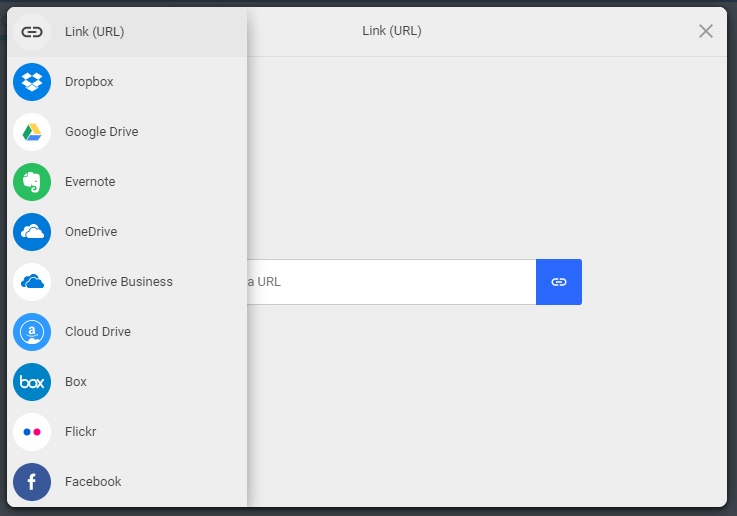

![](https://support.braincert.com/kb/attachment/article/126/inline?token=eyJhbGciOiJodHRwOi8vd3d3LnczLm9yZy8yMDAxLzA0L3htbGRzaWctbW9yZSNobWFjLXNoYTI1NiIsInR5cCI6IkpXVCJ9.eyJpZCI6IjQzODEiLCJvcmdpZCI6IjE2MDMiLCJpc3MiOiJzdXBwb3J0LmJyYWluY2VydC5jb20ifQ.rCRkirhwAiriJty8c6GWW67Hhu0GeNF72T3m_LzOWYo)

Hope this article has guided you on how to upload documents in a Virtual Classroom.

# Steps to Setup Custom Hostname and SSL Certificate for your Virtual Classroom (VC) API Domain

You can easily map your external domain to the BrainCert sub-domain using a CNAME entry in your DNS server in order to receive the performance and security benefits of BrainCert. CNAME stands for '**canonical name**' and is a redirection to the zone file of the entered target domain.

After you have added the CNAME entry in your DNS server, click the '**Hostname & SSL Certificate**' button in the [Virtual Classroom API](https://app.braincert.com/app/virtualclassroom "https://app.braincert.com/app/virtualclassroom") area and BrainCert will attempt to issue an SSL certificate for the custom hostname without any other validation or private key requirements. It's that simple!

HTML5 Virtual Classroom relies on SSL (HTTPS) to function and it will not work with external domains. BrainCert recommends using our native enterprise SSL feature for this service.

Follow the instructions below:

- **Step 1** - Create a Domain in the VC API
- **Step 2** - Create a CNAME record in your DNS server
- **Step 3** - Generate SSL Certificate
- **Step 4** - Turn off CloudFlare orange cloud

- **Step 5** - Testing your SSL hostname
- Check CNAME mapping
- Check SSL Certificate

##   
**Step 1: Create a Domain in the VC API**

Navigate to [Virtual Classroom API](https://app.braincert.com/app/virtualclassroom "https://app.braincert.com/app/virtualclassroom") from BrainCert.

Click on '**Create Domain**' to create a VC API domain.
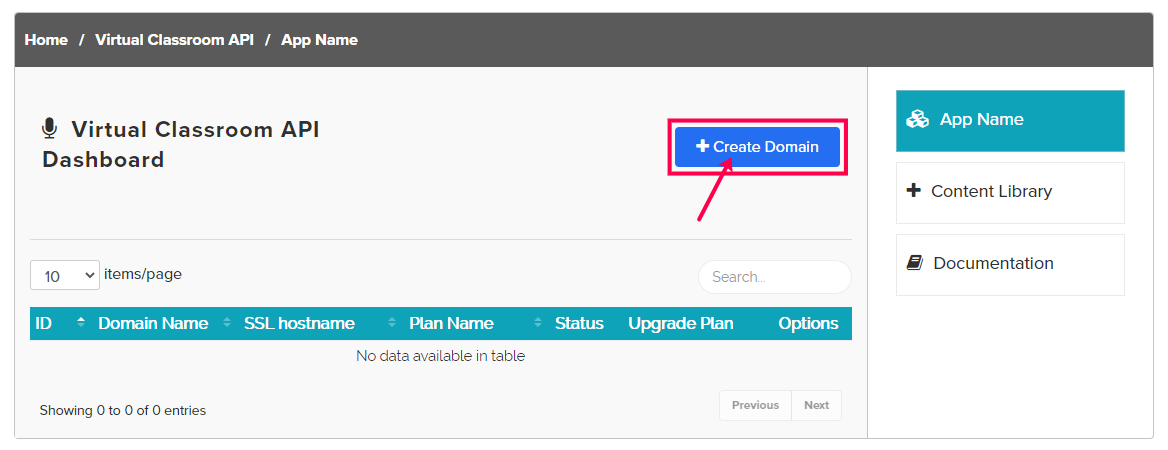

![](https://support.braincert.com/kb/attachment/article/119/inline?token=eyJhbGciOiJodHRwOi8vd3d3LnczLm9yZy8yMDAxLzA0L3htbGRzaWctbW9yZSNobWFjLXNoYTI1NiIsInR5cCI6IkpXVCJ9.eyJpZCI6IjQ0ODEiLCJvcmdpZCI6IjE2MDMiLCJpc3MiOiJzdXBwb3J0LmJyYWluY2VydC5jb20ifQ.Z9zIfmQB6l7iXnj77EpVg0fL00BLv01XocNqiEkvjDI)

Create a domain for VC and Generate the API key.
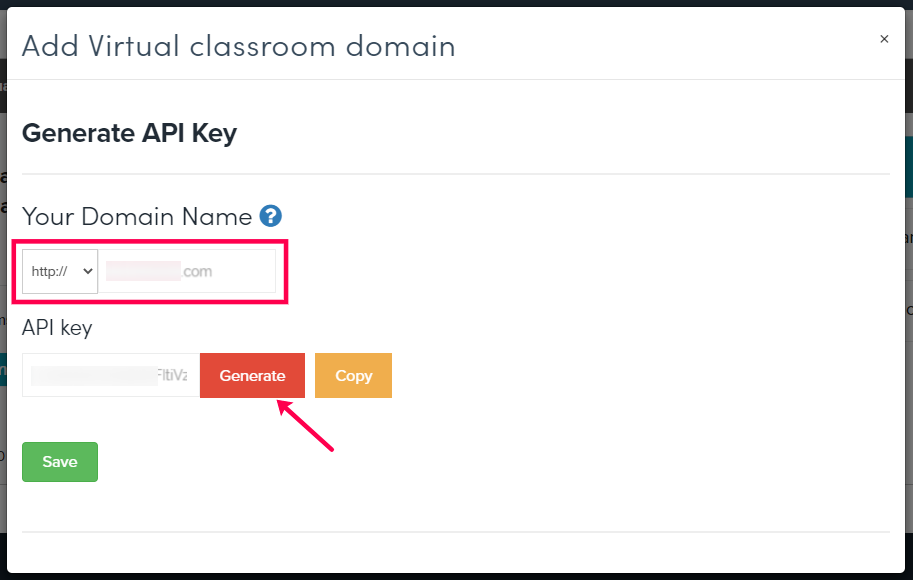

![](https://support.braincert.com/kb/attachment/article/119/inline?token=eyJhbGciOiJodHRwOi8vd3d3LnczLm9yZy8yMDAxLzA0L3htbGRzaWctbW9yZSNobWFjLXNoYTI1NiIsInR5cCI6IkpXVCJ9.eyJpZCI6IjQ0ODIiLCJvcmdpZCI6IjE2MDMiLCJpc3MiOiJzdXBwb3J0LmJyYWluY2VydC5jb20ifQ.t-RDK4EB7kpgVrvmCuyyYqP0MFDNNftPnzcp7XEXjiM)

Please note that SSL certificate is only available to paid subscribers. If you are in a free plan please update your [Virtual Classroom API](https://app.braincert.com/app/virtualclassroom "https://app.braincert.com/app/virtualclassroom") plan to get a SSL certificate for your custom hostname.

If you already have a premium subscription, please click on the Hostname and SSL certificate.
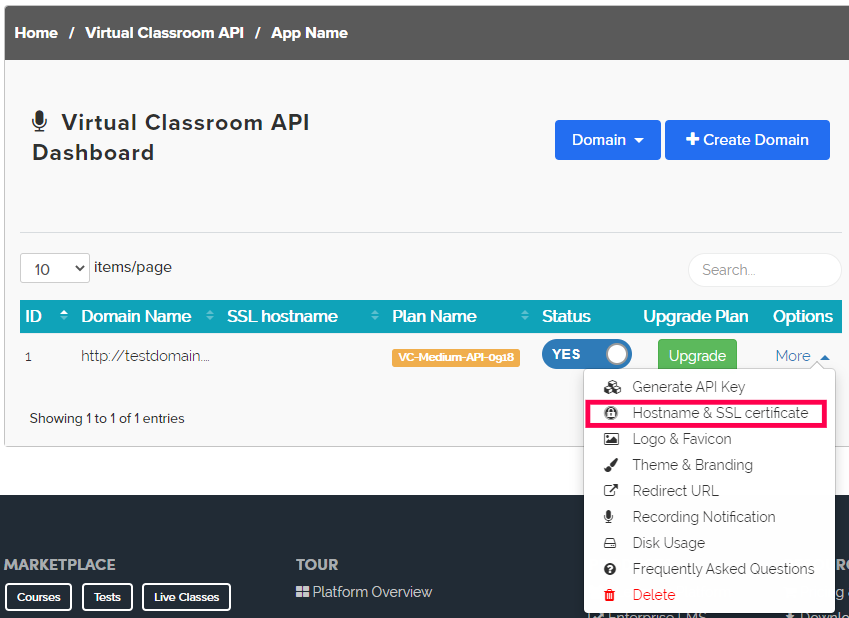

![](https://support.braincert.com/kb/attachment/article/119/inline?token=eyJhbGciOiJodHRwOi8vd3d3LnczLm9yZy8yMDAxLzA0L3htbGRzaWctbW9yZSNobWFjLXNoYTI1NiIsInR5cCI6IkpXVCJ9.eyJpZCI6IjQ0MDkiLCJvcmdpZCI6IjE2MDMiLCJpc3MiOiJzdXBwb3J0LmJyYWluY2VydC5jb20ifQ.XBXLXUfZeuV-dkbD0MrCFw9GF-TbQDe7SLtPz3rtUes)

Enter your custom hostname and click on '**Set custom hostname**'.

Type the custom hostname that you would like to use and click "Set custom hostname". You don't need to type http:// or https:// as a part of the hostname. In this example, we have used live.testdomain.com as the custom hostname.
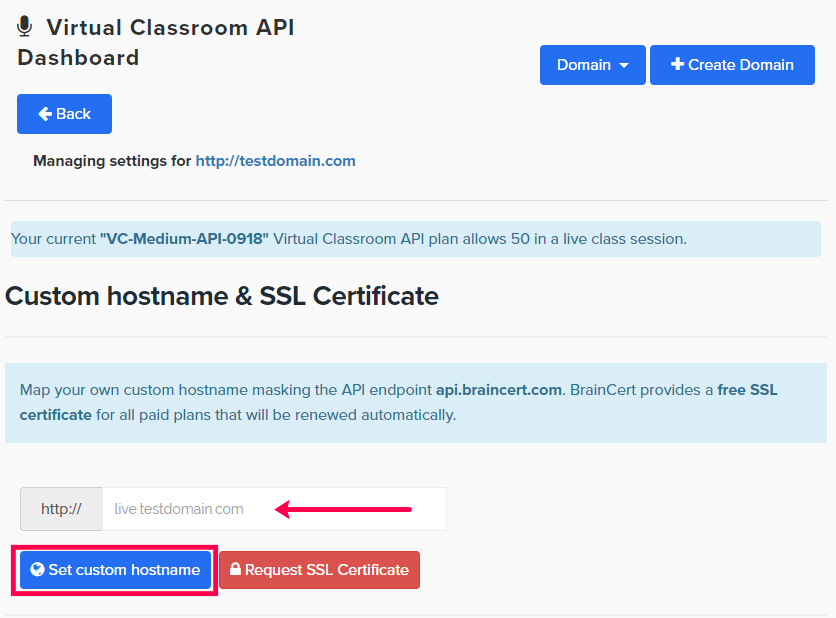

![](https://support.braincert.com/kb/attachment/article/119/inline?token=eyJhbGciOiJodHRwOi8vd3d3LnczLm9yZy8yMDAxLzA0L3htbGRzaWctbW9yZSNobWFjLXNoYTI1NiIsInR5cCI6IkpXVCJ9.eyJpZCI6IjQ0MDgiLCJvcmdpZCI6IjE2MDMiLCJpc3MiOiJzdXBwb3J0LmJyYWluY2VydC5jb20ifQ.mspCJONa2CQE3x1BA9VfgT3Ln4-AsqiZdP-_nWldqMM)

Make sure to click the "**Set custom hostname**" button to save your changes.

## **Step 2: Create a CNAME Record in your DNS Server**

You can easily CNAME your domain to the API endpoint api.braincert.com in order to receive the performance and security benefits of BrainCert. After you add the CNAME entry to your DNS server, click the '**Request SSL Certificate**' button above. Once you click the button, BrainCert will attempt to issue an SSL certificate for the custom hostname without any other validation or private key requirements.

Log in to your domain registrar's site and locate the Zone File Settings, DNS Manager, or similar area of your control panel. Here you will create a CNAME record that points your domain to api.braincert.com. You'll generally see three fields:

- **Alias**  **** - For example, www or live(indicating that the www.yourdomain.com or live.yourdomain.com record should point to api.braincert.com)
- **Record Type**- Should be CNAME(indicating that you would like to point to BrainCert by using its name)
- **Points To** - Should be api.braincert.com

| Note: Depending on your provider you may already have a CNAME set up with your domain Alias. If so, you will need to edit this existing CNAME so that 'Points To' is api.braincert.com

## **Step 3: Generate SSL Certificate**

After completing step 2, it is time to generate your free enterprise SSL certificate. Until today, your best bet with other platforms was to CNAME your hostname to their infrastructure, having you generate a private key and CSR, send the latter to a CA for signing, and then securely provide them with the key material (and again upon renewal). Or maybe you have engineering resources to spend and can build and maintain a solution to generate and securely store private keys, acquire and renew certificates, and push them to a CDN so TLS can be terminated in a performant manner (i.e., as close to your customers’ users as possible). Whichever route you choose, the technical complexity and burden of maintenance are high—either for your customers or your engineering and support teams.

BrainCert's free enterprise SSL certificate was built with these difficulties in mind and solves this with the simplicity that you would expect. With our highly secure SSL certificate, all you have to do is CNAME your domain to the VC API sub-domain in order to receive the performance and security benefits of BrainCert. Furthermore, there is no need to send us your SSL certificate key or CSR.

Click on the button **Request SSL Certificate** to get started.
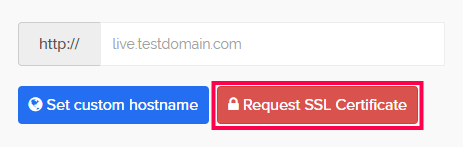

![](https://support.braincert.com/kb/attachment/article/119/inline?token=eyJhbGciOiJodHRwOi8vd3d3LnczLm9yZy8yMDAxLzA0L3htbGRzaWctbW9yZSNobWFjLXNoYTI1NiIsInR5cCI6IkpXVCJ9.eyJpZCI6IjQ0MDciLCJvcmdpZCI6IjE2MDMiLCJpc3MiOiJzdXBwb3J0LmJyYWluY2VydC5jb20ifQ.GpU1bmvdeNKNoK8K-9J_Kw1KsldVCStpMn8vP1npAD0)

You will see a popup with clear instructions guiding you through this SSL certificate process.
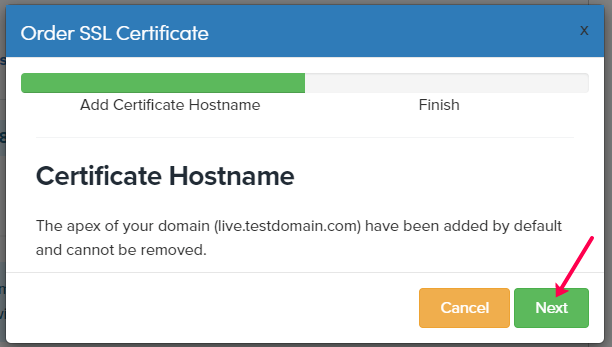

![](https://support.braincert.com/kb/attachment/article/119/inline?token=eyJhbGciOiJodHRwOi8vd3d3LnczLm9yZy8yMDAxLzA0L3htbGRzaWctbW9yZSNobWFjLXNoYTI1NiIsInR5cCI6IkpXVCJ9.eyJpZCI6IjQzNTYiLCJvcmdpZCI6IjE2MDMiLCJpc3MiOiJzdXBwb3J0LmJyYWluY2VydC5jb20ifQ.IOK4Ugko3Vh9UOtWZJ-Y6KUrk9marhpiOV4dqPyoBtA)

![](https://support.braincert.com/kb/attachment/article/119/inline?token=eyJhbGciOiJodHRwOi8vd3d3LnczLm9yZy8yMDAxLzA0L3htbGRzaWctbW9yZSNobWFjLXNoYTI1NiIsInR5cCI6IkpXVCJ9.eyJpZCI6IjQzMzMiLCJvcmdpZCI6IjE2MDMiLCJpc3MiOiJzdXBwb3J0LmJyYWluY2VydC5jb20ifQ.aXFnMRSQu2EfTHav0zhcVNKcs-hu9hpiL3dSvc0-t5g)

Once done, click on the "**Finish**" green button in the popup to finish the SSL setup process. Once the CNAME is in place BrainCert takes care of the rest. We’ll provision the hostname at our edge for forwarding to your specified origin, acquire SSL certificates to enable HTTPS and HTTP/2, and sit in front of any DDoS or L7 attacks that may target your custom hostname. All the benefits of BrainCert's enterprise network, including CDN and content optimization, are extended to your custom hostname without you having to do anything other than adding a simple DNS record.

Additionally, because this SSL solution is built on BrainCert’s industry-leading SSL/TLS implementation, your customers visiting your custom VC API hostname (external domain) will benefit from all of the work we’ve done to make HTTPS fast, secure, and reliable such as deploying OCSP stapling, implementing TLS 1.3 (and 0-RTT), and optimizing TLS over TCP. Most importantly, by terminating these TLS connections as physically close to your customers as possible (as opposed to directly on your origin), your customers will benefit from the most interconnected network on the internet.

Click on the "Hostname and SSL Certificate" tab on the left navigation. You will now see that your domain field is greyed out and cannot be edited. This is because the SSL certificate is now active your this hostname. You will also see the info icon on the right side of the hostname field which also confirms that the SSL certificate is now active.

When you click on the info icon or "**Request SSL Certificate**" button again, you will see a popup with the success message.
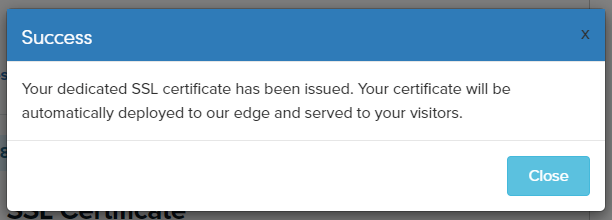

![](https://support.braincert.com/kb/attachment/article/119/inline?token=eyJhbGciOiJodHRwOi8vd3d3LnczLm9yZy8yMDAxLzA0L3htbGRzaWctbW9yZSNobWFjLXNoYTI1NiIsInR5cCI6IkpXVCJ9.eyJpZCI6IjQzMzQiLCJvcmdpZCI6IjE2MDMiLCJpc3MiOiJzdXBwb3J0LmJyYWluY2VydC5jb20ifQ.aNJKwMqFc38G9XsQHcEoaizYO_lLObOCIS-QXzbUxSM)

To change the hostname, click on the delete icon to start all over again.
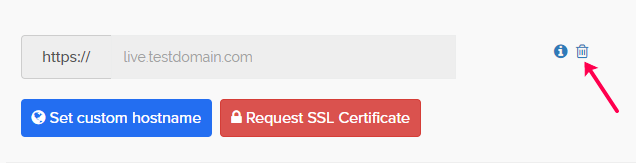

![](https://support.braincert.com/kb/attachment/article/119/inline?token=eyJhbGciOiJodHRwOi8vd3d3LnczLm9yZy8yMDAxLzA0L3htbGRzaWctbW9yZSNobWFjLXNoYTI1NiIsInR5cCI6IkpXVCJ9.eyJpZCI6IjQzMzUiLCJvcmdpZCI6IjE2MDMiLCJpc3MiOiJzdXBwb3J0LmJyYWluY2VydC5jb20ifQ.J1JAACMRTWsaMEYHIYerdwnUCF-Pkm1e3yfDhqQzlbs)

Click on the "**I agree**" green button to confirm the deletion of your SSL certificate.
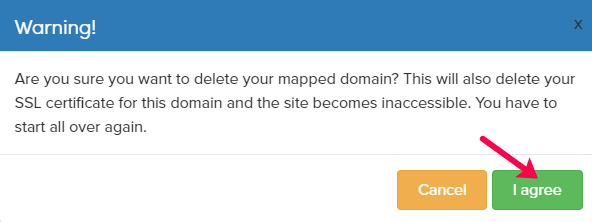

![](https://support.braincert.com/kb/attachment/article/119/inline?token=eyJhbGciOiJodHRwOi8vd3d3LnczLm9yZy8yMDAxLzA0L3htbGRzaWctbW9yZSNobWFjLXNoYTI1NiIsInR5cCI6IkpXVCJ9.eyJpZCI6IjQzMzYiLCJvcmdpZCI6IjE2MDMiLCJpc3MiOiJzdXBwb3J0LmJyYWluY2VydC5jb20ifQ.lYD4hHULgOHGiMYqsClsaO5r92Vi2f1IwdJoPhvBGCE)

## **Step 4: Turn off CloudFlare Orange Cloud**

If you currently use CloudFlare for SSL proxying, we recommend you turn off the orange cloud to the grey cloud to receive the performance and security benefits of BrainCert. Please note that this is required only for the CNAME record that is pointing to api.braincert.com. You may continue to use CloudFlare for all your other records if needed.


![](https://support.braincert.com/kb/attachment/article/119/inline?token=eyJhbGciOiJodHRwOi8vd3d3LnczLm9yZy8yMDAxLzA0L3htbGRzaWctbW9yZSNobWFjLXNoYTI1NiIsInR5cCI6IkpXVCJ9.eyJpZCI6IjQzMzciLCJvcmdpZCI6IjE2MDMiLCJpc3MiOiJzdXBwb3J0LmJyYWluY2VydC5jb20ifQ.MTqcwSv2C1rLqLtyPHE9FIvwFgUVx7MkHe3S-MdjDgs)

Orange clouded connections will not be allowed after August 27, 2017.

##   

## **Step 5 - Testing your SSL hostname**

Congratulations! Now that you have completed all the steps, it is now time to verify the CNAME mapping and SSL certificate.

**Check CNAME mapping**

You can use the dig tool by using your command prompt in Windows or Mac terminal to check the CNAME mapping. You should see your hostname with the correct CNAME mapping to your API hostname api.braincert.com.
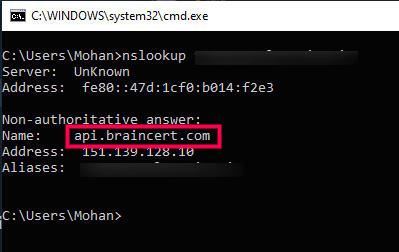

![](https://support.braincert.com/kb/attachment/article/119/inline?token=eyJhbGciOiJodHRwOi8vd3d3LnczLm9yZy8yMDAxLzA0L3htbGRzaWctbW9yZSNobWFjLXNoYTI1NiIsInR5cCI6IkpXVCJ9.eyJpZCI6IjQzMzgiLCJvcmdpZCI6IjE2MDMiLCJpc3MiOiJzdXBwb3J0LmJyYWluY2VydC5jb20ifQ.nKvIVNN_RJ3CTxn4kfwh_lxafYsBkPmhLrCfLrs-fV0)

![](https://support.braincert.com/kb/attachment/article/119/inline?token=eyJhbGciOiJodHRwOi8vd3d3LnczLm9yZy8yMDAxLzA0L3htbGRzaWctbW9yZSNobWFjLXNoYTI1NiIsInR5cCI6IkpXVCJ9.eyJpZCI6IjQzMzkiLCJvcmdpZCI6IjE2MDMiLCJpc3MiOiJzdXBwb3J0LmJyYWluY2VydC5jb20ifQ.VPKcfnGfrX2FOxd9Fn9LvsxA860LJ-qmQEvKGGDa4zY)

**Check SSL Certificate**

Open your browser and go to your external API domain with https:// in the front. You will see a green lock icon that confirms a secure SSL connection.

[https://yourhostname.com/v2](https://yourhostname.com/v2)

![](https://support.braincert.com/kb/attachment/article/119/inline?token=eyJhbGciOiJodHRwOi8vd3d3LnczLm9yZy8yMDAxLzA0L3htbGRzaWctbW9yZSNobWFjLXNoYTI1NiIsInR5cCI6IkpXVCJ9.eyJpZCI6IjQzNDAiLCJvcmdpZCI6IjE2MDMiLCJpc3MiOiJzdXBwb3J0LmJyYWluY2VydC5jb20ifQ.p7vYUZmagAOdSQv1J0Bdnl-QDZjkHIJs8EJpjEufNcE)

![](https://support.braincert.com/kb/attachment/article/119/inline?token=eyJhbGciOiJodHRwOi8vd3d3LnczLm9yZy8yMDAxLzA0L3htbGRzaWctbW9yZSNobWFjLXNoYTI1NiIsInR5cCI6IkpXVCJ9.eyJpZCI6IjQzNDEiLCJvcmdpZCI6IjE2MDMiLCJpc3MiOiJzdXBwb3J0LmJyYWluY2VydC5jb20ifQ.ONw42JqsWa9sgsyWoU5IoLmzhvZuchgxbgKn5pQamMc)

If you see a browser error similar to the message below, it means that your SSL certificate is not set up correctly. The connection is not secure and the virtual classroom will not work.

![](https://support.braincert.com/kb/attachment/article/119/inline?token=eyJhbGciOiJodHRwOi8vd3d3LnczLm9yZy8yMDAxLzA0L3htbGRzaWctbW9yZSNobWFjLXNoYTI1NiIsInR5cCI6IkpXVCJ9.eyJpZCI6IjQzNDIiLCJvcmdpZCI6IjE2MDMiLCJpc3MiOiJzdXBwb3J0LmJyYWluY2VydC5jb20ifQ.kjD71Bzw9eqdEu4awaiQ30qxpFrUksWnFTaBh-Vw6tU)

# How to Activate Dark Mode: A Step-by-Step Guide

Dark mode enhances visual comfort and aesthetics, particularly in low-light environments. This guide will walk you through setting up dark mode.

Follow these simple steps to activate dark mode:

<iframe src="https://player.vimeo.com/video/958316563?badge=0&amp;autopause=0&amp;player_id=0&amp;app_id=58479" frameborder="0" allow="autoplay; fullscreen; picture-in-picture; clipboard-write" style="position:absolute;top:0;left:0;width:100%;height:100%;" title="Activating Dark Mode">&ZeroWidthSpace;</iframe>

##   

## **Setting Up Dark Mode on the Dashboard**

## **Step 1:**

Access your BrainCert account by logging in with your credentials.

Look for the new dark mode icon in the header bar of the BrainCert LMS dashboard. It is typically represented as a moon or a sun icon.

![1.png](https://support.braincert.com/kb/attachment/article/204/inline?token=eyJhbGciOiJodHRwOi8vd3d3LnczLm9yZy8yMDAxLzA0L3htbGRzaWctbW9yZSNobWFjLXNoYTI1NiIsInR5cCI6IkpXVCJ9.eyJpZCI6IjU3NTIiLCJvcmdpZCI6IjE2MDMiLCJpc3MiOiJzdXBwb3J0LmJyYWluY2VydC5jb20ifQ.J88JktIfbdxvbXYuBQiE_WgMbu-54IbQH2-HCASluVc)

##   

## **Step 2:**

Click on the dark mode icon to switch the interface to dark mode. The color scheme of the LMS will change instantly, providing a more comfortable viewing experience.

<section class="info-box"><span style=" font-family: Inter, Roboto, -apple-system, BlinkMacSystemFont, &quot;Segoe UI&quot;, &quot;Helvetica Neue&quot;, sans-serif; font-size: 16px; font-style: normal; font-weight: 400; text-align: left; text-indent: 0px; white-space: normal; display: inline !important; float: none;">You can switch from the default mode to dark mode on any page at any time.</span><br></section>

![2.png](https://support.braincert.com/kb/attachment/article/204/inline?token=eyJhbGciOiJodHRwOi8vd3d3LnczLm9yZy8yMDAxLzA0L3htbGRzaWctbW9yZSNobWFjLXNoYTI1NiIsInR5cCI6IkpXVCJ9.eyJpZCI6IjU3NTMiLCJvcmdpZCI6IjE2MDMiLCJpc3MiOiJzdXBwb3J0LmJyYWluY2VydC5jb20ifQ.IUB-q1lr06Ca5WnDOIdTwoUOibzgXseNrnV3Y4qS-Zw)

That's it! You have successfully activated dark mode in your LMS.

By following these steps, you can enjoy the benefits of dark mode, enhancing your productivity and overall user experience. Experiment with dark mode to see how it transforms your learning and working environment.

# How to Upload a Thumbnail in Your Video Files

The thumbnail feature in Braincert LMS allows course creators to personalize the Course Player and Test Player with visually engaging images. This simple enhancement makes your course content more accessible and visually appealing to learners. Whether you're a course creator aiming to establish your brand identity or simply looking to add a personal touch to your course presentation. In this article, we’ll show you how to quickly upload your thumbnails and improve the overall experience for your learners.

## Step 1: Video Thumbnail

To start upload your Video Thumbnail, Navigate to Products. Now, Click the Dropdown menu and Select **'Contents'.**
<section class="info-box">You can add a Thumbnail to the existing Course and Tests.</section>
Click the **'Select Files to Upload'** to add Video Content from your File Explorer (or) other ways to Publish from Google drive, Box, Dropbox, Amazon Cloud Drive, FTP and more.

![KB 1 - video thumbnail](https://support.braincert.com/kb/attachment/article/243/inline?token=eyJhbGciOiJodHRwOi8vd3d3LnczLm9yZy8yMDAxLzA0L3htbGRzaWctbW9yZSNobWFjLXNoYTI1NiIsInR5cCI6IkpXVCJ9.eyJpZCI6IjY0ODciLCJvcmdpZCI6IjE2MDMiLCJpc3MiOiJzdXBwb3J0LmJyYWluY2VydC5jb20ifQ.af0sS4YnHqeBzgwk2rnERKqbby9hxwno8E-6m-Y2bGs)

## Step 2: Capture Frame for Thumbnail

1. Play the Video Content and Click **'Capture Frame'** to save the Video Image as a Thumbnail. Toggle on button to **'Enable DRM Feature'** at top the Video.  

Refer this Article to Know more about DRM: [How to Enable DRM Protection for Your Content](https://support.braincert.com/kb/article/220/how-to-enable-drm-protection-for-your-content)
2. On the Left side, the Capture image is displayed. Tap the **'+'** Icon to add more Thumbnail Images as you created.

<section class="info-box">You Can Upload up to 5 Thumbnail Images for each Course Player and File Size Under 500 MB.</section>
![KB 2 - video thumbnail](https://support.braincert.com/kb/attachment/article/243/inline?token=eyJhbGciOiJodHRwOi8vd3d3LnczLm9yZy8yMDAxLzA0L3htbGRzaWctbW9yZSNobWFjLXNoYTI1NiIsInR5cCI6IkpXVCJ9.eyJpZCI6IjY0ODgiLCJvcmdpZCI6IjE2MDMiLCJpc3MiOiJzdXBwb3J0LmJyYWluY2VydC5jb20ifQ.4pX0CD-AH8cykSorJJl3l1rjj44dfn73HAMMSFUQgSo)

## Step 3: Edit and Set Default Thumbnail

1. Click 'Pencil' Icon to Rename Title of Your Thumbnail.
2. Click **'More'** option on the Preferred Captured Frame (or) uploaded Images, then Select **'set as default'** and Additional Options Include: Download and Delete the Thumbnail if needed.

![KB 3 - video thumbnail](https://support.braincert.com/kb/attachment/article/243/inline?token=eyJhbGciOiJodHRwOi8vd3d3LnczLm9yZy8yMDAxLzA0L3htbGRzaWctbW9yZSNobWFjLXNoYTI1NiIsInR5cCI6IkpXVCJ9.eyJpZCI6IjY0ODkiLCJvcmdpZCI6IjE2MDMiLCJpc3MiOiJzdXBwb3J0LmJyYWluY2VydC5jb20ifQ.XxLNPFMZ0Qj72SutVs300jCcaymJorS7nQ7w3Km4VZo)

## Step 4: Review Uploaded Thumbnail

This is an example of how the thumbnail appears in a video course content after it has been successfully uploaded.

![KB - 5 video thumbnail](https://support.braincert.com/kb/attachment/article/243/inline?token=eyJhbGciOiJodHRwOi8vd3d3LnczLm9yZy8yMDAxLzA0L3htbGRzaWctbW9yZSNobWFjLXNoYTI1NiIsInR5cCI6IkpXVCJ9.eyJpZCI6IjY0OTEiLCJvcmdpZCI6IjE2MDMiLCJpc3MiOiJzdXBwb3J0LmJyYWluY2VydC5jb20ifQ.ICt4fQx4H2oGyrE4DBf9Uc9H0mSi4hiEgTSf2xrPMO0)

## Step 5: Promotional Video Thumbnail

Add the Thumbnail while creating a course in **'Advanced Settings'**. The Thumbnail also appears in the Courses Promotional Video.

![KB 5 - VIDEO THUMBNAIL](https://support.braincert.com/kb/attachment/article/243/inline?token=eyJhbGciOiJodHRwOi8vd3d3LnczLm9yZy8yMDAxLzA0L3htbGRzaWctbW9yZSNobWFjLXNoYTI1NiIsInR5cCI6IkpXVCJ9.eyJpZCI6IjY0OTgiLCJvcmdpZCI6IjE2MDMiLCJpc3MiOiJzdXBwb3J0LmJyYWluY2VydC5jb20ifQ.zgmh_YHlodHe_Kaowvog0EVVaHF4o2BtKfHkrLCmRBM)

## Step 6: Test Thumbnail in the Video Question

Here is an example of the page that appears after the thumbnail has been uploaded and displayed in the test player.

![KB - 5 video thumbnail](https://support.braincert.com/kb/attachment/article/243/inline?token=eyJhbGciOiJodHRwOi8vd3d3LnczLm9yZy8yMDAxLzA0L3htbGRzaWctbW9yZSNobWFjLXNoYTI1NiIsInR5cCI6IkpXVCJ9.eyJpZCI6IjY0OTYiLCJvcmdpZCI6IjE2MDMiLCJpc3MiOiJzdXBwb3J0LmJyYWluY2VydC5jb20ifQ.6jhNNcldqAPg0NiCN_DVfnKcPw-6jcSacKnQuQY3T3Y)

By following these steps, you can effectively upload and manage thumbnails for your course player, creating an engaging and professional learning environment for your students.

# How to Generate HAR Files for Troubleshooting on BrainCert

When facing issues on BrainCert, generating HTTP Archive (HAR) files can be invaluable for troubleshooting. HAR files capture the exchange between web browsers and websites, allowing our support team to replicate and diagnose problems. This guide outlines how to generate HAR files in popular browsers: Chrome, Firefox, Safari, and Edge.

## Chrome

1. **Close All Incognito Windows**: Ensure all incognito tabs and windows are closed.
2. **Open New Incognito Window**: Launch a new incognito window.
3. **Access Developer Tools**: Click the more actions menu (...) next to the toolbar, select "More tools" &gt; "Developer Tools".
4. **Network Tab**: Click on the "Network" tab.
5. **Start Recording**: Check if a red button is visible, indicating recording. If not, click "Record network log".
6. **Preserve Log**: Select "Preserve Log".
7. **Clear Existing Logs**: Click "Clear network log" to remove any prior logs.
8. **Reproduce the Issue**: Navigate to the problem page and replicate the issue.
9. **Export HAR File**: Click "Export HAR" (down arrow icon) and save the file.

## Firefox

1. **Close All Private Windows**: Ensure all private tabs and windows are closed.
2. **Open New Private Window**: Launch a new private window.
3. **Navigate to Issue Page**: Visit the page you need to record before opening tools.
4. **Web Developer Tools**: Click the application menu (), then "More tools" &gt; "Web Developer Tools".
5. **Network Tab**: In the developer tools, select the "Network" tab.
6. **Reproduce the Issue**: The recording starts as you navigate. Perform actions that trigger the issue.
7. **Pause Recording**: Once done, click "Pause/Resume recording network log".
8. **Save HAR File**: Right-click in the File column, select "Save All as HAR", and save the file.

## Safari

1. **Enable Develop Menu**: If not visible, go to "Safari" &gt; "Settings" &gt; "Advanced" and check "Show Develop menu in menu bar".
2. **Close All Private Windows**: Ensure all private tabs and windows are closed.
3. **Open New Private Window**: Launch a new private window.
4. **Show Web Inspector**: From the "Develop" menu, select "Show Web Inspector".
5. **Network Tab**: Click the "Network" tab.
6. **Reproduce the Issue**: Navigate to and replicate the issue on the page.
7. **Export HAR File**: Click "Export" and save the file.

## Edge

1. **Close All InPrivate Windows**: Ensure all InPrivate tabs and windows are closed.
2. **Open New InPrivate Window**: Press Ctrl + Shift + N to launch a new InPrivate window.
3. **Developer Tools**: Click the "Settings and more" menu (...), then "More tools" &gt; "Developer tools".
4. **Network Tab**: Click on the "Network" tab.
5. **Start Recording**: Check for a red button indicating recording is in progress; if not, click "Record network log".
6. **Reproduce the Issue**: Visit the problem page and perform actions to trigger the issue.
7. **Stop Recording**: Click "Stop recording network log".
8. **Export HAR File**: Click "Export HAR" (down arrow icon) or press Ctrl + S, and save the file.

## Submitting Your HAR File

Once you've generated the HAR file, please submit it to our support team through the help center or as directed by a support representative. This will help us diagnose and resolve your issue more efficiently.

# Virtual Classroom Minimum Requirements

For the best BrainCert experience, leverage the following specs listed below. There are no software downloads or installations necessary to use the virtual classroom.

## **System Requirements**
| System | Description |
| --- | --- |
| Headset | Headsets with a microphone for improved sound quality is recommended. |
| Camera | Any camera compatible with your operating system with the latest device drivers installed. |
| Operating System | Microsoft Windows, Mac OS, Linux, Android and iOS. |
| CPU | <ul style="box-sizing: border-box; margin-bottom: 0px; padding-inline-start: 48px;"><li dir="ltr" style="box-sizing: border-box; color: rgb(0, 0, 0); margin-bottom: 10px; list-style-type: disc; font-size: 11pt; font-family: Arial; font-weight: 700;"><p dir="ltr" style="box-sizing: border-box; margin-bottom: 0pt; color: var(--kb-editor-font-color); font-size: 15px; line-height: 1.2;"><span style="box-sizing: border-box; font-size: 11pt; font-family: Arial; color: rgb(0, 0, 0); font-weight: 700;">Desktop - </span><span style="box-sizing: border-box; font-size: 11pt; font-family: Arial; color: rgb(0, 0, 0); font-weight: 400;">Intel or AMD processors with 2.0 GHz or above. Note that lower-end CPU types may result in poor (lower video resolution) quality.</span></p></li><li dir="ltr" style="box-sizing: border-box; color: rgb(0, 0, 0); margin-bottom: 10px; list-style-type: disc; font-size: 11pt; font-family: Arial; font-weight: 700;"><p dir="ltr" style="box-sizing: border-box; margin-bottom: 0pt; color: var(--kb-editor-font-color); font-size: 15px; line-height: 1.2;"><span style="box-sizing: border-box; font-size: 11pt; font-family: Arial; color: rgb(0, 0, 0); font-weight: 700;">Mobile/Tablet - The latest</span><span style="box-sizing: border-box; font-size: 11pt; font-family: Arial; color: rgb(0, 0, 0); font-weight: 400;"> models with a fast CPU clocked at 1.4 GHz or above are recommended. </span></p></li></ul> |
| RAM | A minimum of 1GB/4GB or more is recommended. At Least 100MB of free memory should be available. |
| Bandwidth | <ul style="box-sizing: border-box; margin-bottom: 0px; padding-inline-start: 48px;"><li dir="ltr" style="box-sizing: border-box; color: rgb(0, 0, 0); margin-bottom: 10px; list-style-type: disc; font-size: 11pt; font-family: Arial; font-weight: 700;"><p dir="ltr" style="box-sizing: border-box; margin-bottom: 0pt; color: var(--kb-editor-font-color); font-size: 15px; line-height: 1.2;"><span style="box-sizing: border-box; font-size: 11pt; font-family: Arial; color: rgb(0, 0, 0); font-weight: 700;">Video - </span><span style="box-sizing: border-box; font-size: 11pt; font-family: Arial; color: rgb(0, 0, 0); font-weight: 400;">Minimum 1 Mbps per stream. Max 5 Mbps (All attendees).</span></p></li><li dir="ltr" style="box-sizing: border-box; color: rgb(0, 0, 0); margin-bottom: 10px; list-style-type: disc; font-size: 11pt; font-family: Arial; font-weight: 400;"><p dir="ltr" style="box-sizing: border-box; margin-bottom: 0pt; color: var(--kb-editor-font-color); font-size: 15px; line-height: 1.2;"><span style="box-sizing: border-box; font-size: 11pt; font-family: Arial; color: rgb(0, 0, 0); font-weight: 700;">Audio</span><span style="box-sizing: border-box; font-size: 11pt; font-family: Arial; color: rgb(0, 0, 0); font-weight: 400;"> </span><span style="box-sizing: border-box; font-size: 11pt; font-family: Arial; color: rgb(0, 0, 0); font-weight: 700;">- </span><span style="box-sizing: border-box; font-size: 11pt; font-family: Arial; color: rgb(0, 0, 0); font-weight: 400;">Minimum 500 kbps per stream. Max 1 Mbps (All attendees).</span></p></li><li dir="ltr" style="box-sizing: border-box; color: rgb(0, 0, 0); margin-bottom: 10px; list-style-type: disc; font-size: 11pt; font-family: Arial; font-weight: 700;"><p dir="ltr" style="box-sizing: border-box; margin-bottom: 0pt; color: var(--kb-editor-font-color); font-size: 15px; line-height: 1.2;"><span style="box-sizing: border-box; font-size: 11pt; font-family: Arial; color: rgb(0, 0, 0); font-weight: 700;">Recording - </span><span style="box-sizing: border-box; font-size: 11pt; font-family: Arial; color: rgb(0, 0, 0); font-weight: 400;">Minimum 5 Mbps. Max 10 Mbps (instructor/presenter only)</span></p></li><li dir="ltr" style="box-sizing: border-box; color: rgb(0, 0, 0); margin-bottom: 10px; list-style-type: disc; font-size: 11pt; font-family: Arial; font-weight: 400;"><p dir="ltr" style="box-sizing: border-box; margin-bottom: 0pt; color: var(--kb-editor-font-color); font-size: 15px; line-height: 1.2;"><span style="box-sizing: border-box; font-size: 11pt; font-family: Arial; color: rgb(0, 0, 0); font-weight: 700;">Screen Sharing</span><span style="box-sizing: border-box; font-size: 11pt; font-family: Arial; color: rgb(0, 0, 0); font-weight: 400;"> - Minimum 5 Mbps. Max 10 Mbps (instructor/presenter only)</span></p></li></ul> |
| Compatible Browsers | <ul style="box-sizing: border-box; margin-bottom: 0px; padding-inline-start: 48px;"><li dir="ltr" style="box-sizing: border-box; color: rgb(0, 0, 0); margin-bottom: 10px; list-style-type: disc; font-size: 11pt; font-family: Arial; font-weight: 700;"><p dir="ltr" style="box-sizing: border-box; margin-bottom: 0pt; color: var(--kb-editor-font-color); font-size: 15px; line-height: 1.2;"><span style="box-sizing: border-box; font-size: 11pt; font-family: Arial; color: rgb(0, 0, 0); font-weight: 700;">Desktop - </span><span style="box-sizing: border-box; font-size: 11pt; font-family: Arial; color: rgb(0, 0, 0); font-weight: 400;">Google Chrome (updated version) - </span><span style="box-sizing: border-box; font-size: 11pt; font-family: Arial; color: rgb(0, 0, 0); font-weight: 700;">Recommended</span></p></li><li dir="ltr" style="box-sizing: border-box; color: rgb(0, 0, 0); margin-bottom: 10px; list-style-type: disc; font-size: 11pt; font-family: Arial; font-weight: 700;"><p dir="ltr" style="box-sizing: border-box; margin-bottom: 0pt; color: var(--kb-editor-font-color); font-size: 15px; line-height: 1.2;"><span style="box-sizing: border-box; font-size: 11pt; font-family: Arial; color: rgb(0, 0, 0); font-weight: 700;">Desktop - </span><span style="box-sizing: border-box; font-size: 11pt; font-family: Arial; color: rgb(0, 0, 0); font-weight: 400;">Firefox (updated version) - </span><span style="box-sizing: border-box; font-size: 11pt; font-family: Arial; color: rgb(0, 0, 0); font-weight: 700;">Recommended</span></p></li><li dir="ltr" style="box-sizing: border-box; color: rgb(0, 0, 0); margin-bottom: 10px; list-style-type: disc; font-size: 11pt; font-family: Arial; font-weight: 700;"><p dir="ltr" style="box-sizing: border-box; margin-bottom: 0pt; color: var(--kb-editor-font-color); font-size: 15px; line-height: 1.2;"><span style="box-sizing: border-box; font-size: 11pt; font-family: Arial; color: rgb(0, 0, 0); font-weight: 700;">Android - </span><span style="box-sizing: border-box; font-size: 11pt; font-family: Arial; color: rgb(0, 0, 0); font-weight: 400;">Google Chrome (updated version) - </span><span style="box-sizing: border-box; font-size: 11pt; font-family: Arial; color: rgb(0, 0, 0); font-weight: 700;">Recommended</span></p></li><li dir="ltr" style="box-sizing: border-box; color: rgb(0, 0, 0); margin-bottom: 10px; list-style-type: disc; font-size: 11pt; font-family: Arial; font-weight: 700;"><p dir="ltr" style="box-sizing: border-box; margin-bottom: 0pt; color: var(--kb-editor-font-color); font-size: 15px; line-height: 1.2;"><span style="box-sizing: border-box; font-size: 11pt; font-family: Arial; color: rgb(0, 0, 0); font-weight: 700;">Android - </span><span style="box-sizing: border-box; font-size: 11pt; font-family: Arial; color: rgb(0, 0, 0); font-weight: 400;">Opera (updated version) - </span><span style="box-sizing: border-box; font-size: 11pt; font-family: Arial; color: rgb(0, 0, 0); font-weight: 700;">Recommended</span></p></li><li dir="ltr" style="box-sizing: border-box; color: rgb(0, 0, 0); margin-bottom: 10px; list-style-type: disc; font-size: 11pt; font-family: Arial; font-weight: 700;"><p dir="ltr" style="box-sizing: border-box; margin-bottom: 0pt; color: var(--kb-editor-font-color); font-size: 15px; line-height: 1.2;"><span style="box-sizing: border-box; font-size: 11pt; font-family: Arial; color: rgb(0, 0, 0); font-weight: 700;">MAC - </span><span style="box-sizing: border-box; font-size: 11pt; font-family: Arial; color: rgb(0, 0, 0); font-weight: 400;">Google Chrome (updated version) - </span><span style="box-sizing: border-box; font-size: 11pt; font-family: Arial; color: rgb(0, 0, 0); font-weight: 700;">Recommended</span></p></li><li dir="ltr" style="box-sizing: border-box; color: rgb(0, 0, 0); margin-bottom: 10px; list-style-type: disc; font-size: 11pt; font-family: Arial; font-weight: 700;"><p dir="ltr" style="box-sizing: border-box; margin-bottom: 0pt; color: var(--kb-editor-font-color); font-size: 15px; line-height: 1.2;"><span style="box-sizing: border-box; font-size: 11pt; font-family: Arial; color: rgb(0, 0, 0); font-weight: 700;">iOS Mobile - </span><span style="box-sizing: border-box; font-size: 11pt; font-family: Arial; color: rgb(0, 0, 0); font-weight: 400;">Safari (updated version) - </span><span style="box-sizing: border-box; font-size: 11pt; font-family: Arial; color: rgb(0, 0, 0); font-weight: 700;">Recommended</span></p></li></ul> |
| Screen Sharing | <ul style="box-sizing: border-box; margin-bottom: 0px; padding-inline-start: 48px;"><li dir="ltr" style="box-sizing: border-box; color: rgb(0, 0, 0); margin-bottom: 10px; list-style-type: disc; font-size: 11pt; font-family: Arial; font-weight: 700;"><p dir="ltr" style="box-sizing: border-box; margin-bottom: 0pt; color: var(--kb-editor-font-color); font-size: 15px; line-height: 1.2;"><span style="box-sizing: border-box; font-size: 11pt; font-family: Arial; color: rgb(0, 0, 0); font-weight: 700;">Chrome - </span><span style="box-sizing: border-box; font-size: 11pt; font-family: Arial; color: rgb(0, 0, 0); font-weight: 400;">No plugins necessary </span></p></li><li dir="ltr" style="box-sizing: border-box; color: rgb(0, 0, 0); margin-bottom: 10px; list-style-type: disc; font-size: 11pt; font-family: Arial; font-weight: 700;"><p dir="ltr" style="box-sizing: border-box; margin-bottom: 0pt; color: var(--kb-editor-font-color); font-size: 15px; line-height: 1.2;"><span style="box-sizing: border-box; font-size: 11pt; font-family: Arial; color: rgb(0, 0, 0); font-weight: 700;">Firefox - </span><span style="box-sizing: border-box; font-size: 11pt; font-family: Arial; color: rgb(0, 0, 0); font-weight: 400;">No plugins necessary</span><span style="box-sizing: border-box; font-size: 11pt; font-family: Arial; color: rgb(0, 0, 0); font-weight: 700;"> </span></p></li></ul> |
| Video resolution | From 180p@30fps to 720@30fps |

## **Browser-Specific Features Supported**
| Web (Windows, Mac, Linux) | Android | iOS (iPhone/iPad) |
| --- | --- | --- |
| Works on the most recent versions of Chrome & Firefox desktop browsers. | Mobile browsers such as Opera and Chrome on Android are fully supported. | Safari 11 browser version or higher versions. |
| Microsoft Internet Explorer is supported. | The versions from Safari 11 browsers on macOS and iPhone/iPad devices are now supported. |
| Microsoft Edge browser is supported but may not work very well. We recommend Chrome or Firefox browsers. |  |
| Apple recently released Safari Technology Preview release 32 version, which is built into macOS High Sierra and will support WebRTC required for audio & video conferencing. |  |  |
| Safari compatibility is limited to only Safari 11. To get Safari 11, you can download the Safari Technology preview, Mac OS 10.13, or iOS 11 and more. |  |  |

| Browser | Audio | Video | Recording | Screen sharing | Whiteboard |
| --- | --- | --- | --- | --- | --- |
| Desktop - Google Chrome (Latest release version) | Yes | Yes | Yes | Yes | Yes |
| Desktop - Firefox (latest release version) | Yes | Yes | Yes | Yes | Yes |
| Desktop - Microsoft Edge (latest release version) | Yes | Yes | No | No | Yes |
| Android -Google Chrome (latest release version) | Yes | Yes | No | No | Yes |
| Android - Samsung Internet (latest release version) | Yes | Yes | No | No | Yes |
| Android - Opera (latest release version) | Yes | Yes | No | No | Yes |
| iOS - Safari (latest release version) | Yes | Yes | No | No | Yes |
## **Network Ports**

Connections made to BrainCert WebRTC cloud across all global regions use the following TCP and UDP ports. If the UDP port is blocked then calls will connect over TLS instead of the more efficient UDP protocol. It can lead to quality issues with video, audio, and content sharing. It is important that firewall ports are opened to BrainCert servers. We have implemented technology to work if you are behind strict corporate firewalls and NAT environments. If you can't get the audio/video working inside the virtual classroom, then most likely our IP is blocked by your firewall. For specific IP ranges of BrainCert's global Virtual Classroom servers, contact support.
| Name | Ports |
| --- | --- |
| Whiteboard | <ul style="box-sizing: border-box; margin-bottom: 0px; padding-inline-start: 48px;"><li dir="ltr" style="box-sizing: border-box; color: rgb(0, 0, 0); margin-bottom: 10px; list-style-type: disc; font-size: 11pt; font-family: Arial; font-weight: 400;"><p dir="ltr" style="box-sizing: border-box; margin-bottom: 0pt; color: var(--kb-editor-font-color); font-size: 15px; line-height: 1.2;"><span style="box-sizing: border-box; font-size: 11pt; font-family: Arial; color: rgb(0, 0, 0); font-weight: 400;">TCP - 443</span></p></li></ul> |
| WebRTC - Audio/Video | <ul style="box-sizing: border-box; margin-bottom: 0px; padding-inline-start: 48px;"><li dir="ltr" style="box-sizing: border-box; color: rgb(0, 0, 0); margin-bottom: 10px; list-style-type: disc; font-size: 11pt; font-family: Arial; font-weight: 400;"><p dir="ltr" style="box-sizing: border-box; margin-bottom: 0pt; color: var(--kb-editor-font-color); font-size: 15px; line-height: 1.2;"><span style="box-sizing: border-box; font-size: 11pt; font-family: Arial; color: rgb(0, 0, 0); font-weight: 400;">TCP - 443</span></p></li><li dir="ltr" style="box-sizing: border-box; color: rgb(0, 0, 0); margin-bottom: 10px; list-style-type: disc; font-size: 11pt; font-family: Arial; font-weight: 400;"><p dir="ltr" style="box-sizing: border-box; margin-bottom: 0pt; color: var(--kb-editor-font-color); font-size: 15px; line-height: 1.2;"><span style="box-sizing: border-box; font-size: 11pt; font-family: Arial; color: rgb(0, 0, 0); font-weight: 400;">UDP - 30000-65535</span></p></li></ul> |
| STUN/TURN (Network traversal) | <ul style="box-sizing: border-box; margin-bottom: 0px; padding-inline-start: 48px;"><li dir="ltr" style="box-sizing: border-box; color: rgb(0, 0, 0); margin-bottom: 10px; list-style-type: disc; font-size: 11pt; font-family: Arial; font-weight: 400;"><p dir="ltr" style="box-sizing: border-box; margin-bottom: 0pt; color: var(--kb-editor-font-color); font-size: 15px; line-height: 1.2;"><span style="box-sizing: border-box; font-size: 11pt; font-family: Arial; color: rgb(0, 0, 0); font-weight: 400;">TCP - 443, 80, 3478, 5349</span></p></li><li dir="ltr" style="box-sizing: border-box; color: rgb(0, 0, 0); margin-bottom: 10px; list-style-type: disc; font-size: 11pt; font-family: Arial; font-weight: 400;"><p dir="ltr" style="box-sizing: border-box; margin-bottom: 0pt; color: var(--kb-editor-font-color); font-size: 15px; line-height: 1.2;"><span style="box-sizing: border-box; font-size: 11pt; font-family: Arial; color: rgb(0, 0, 0); font-weight: 400;">UDP - 80, 3478</span></p></li></ul> |
###   

## **System Test Tool**

Virtual Classroom uses WebRTC technology for real-time audio and video conferencing. Use the following links to test your browser.
| Name | URL |
| --- | --- |
| WebRTC Troubleshooter | [https://webcasts.com/webrtc/](https://webcasts.com/webrtc/) |

# How to Export Reports in BrainCert: A Step-by-Step Guide

BrainCert's reporting and analytics tools make it easy to export detailed data for courses and tests. This article will walk you through how to export reports and create custom reports.
<section class="info-box"><span style=" font-family: Inter; font-size: 14px; font-style: normal; font-weight: 400; text-align: left; text-indent: 0px; white-space: normal; display: inline !important; float: none;">Follow the same steps outlined below for 'Test Reports' and 'Course Bundles Reports' by navigating to the 'Tests' and 'Course Bundles' tab instead of the Courses tab.</span><br></section>
## **Exporting Reports**

## **Step 1:**

From your dashboard, click on '**Reports & Analytics**' and then open '**Courses**'.

![1](https://support.braincert.com/kb/attachment/article/233/inline?token=eyJhbGciOiJodHRwOi8vd3d3LnczLm9yZy8yMDAxLzA0L3htbGRzaWctbW9yZSNobWFjLXNoYTI1NiIsInR5cCI6IkpXVCJ9.eyJpZCI6IjYxNTMiLCJvcmdpZCI6IjE2MDMiLCJpc3MiOiJzdXBwb3J0LmJyYWluY2VydC5jb20ifQ.EZyKORt-l8EUhWH1c6NBWlNdBf-FCjP-_T4vH5FwaIk)

## **Step 2:**

'**Select a course for reports**' from the dropdown menu, and choose the desired report duration.

![2](https://support.braincert.com/kb/attachment/article/233/inline?token=eyJhbGciOiJodHRwOi8vd3d3LnczLm9yZy8yMDAxLzA0L3htbGRzaWctbW9yZSNobWFjLXNoYTI1NiIsInR5cCI6IkpXVCJ9.eyJpZCI6IjYxNjgiLCJvcmdpZCI6IjE2MDMiLCJpc3MiOiJzdXBwb3J0LmJyYWluY2VydC5jb20ifQ.DM6asKc-SHzzRaZXOVg_XtpTrTsqafLAs_Jd2aC5Y_E)

## **Step 3:**

You can filter the report by registration fields (Optional) to narrow down the data if necessary.

Refer to the article '[**How to Include Custom Registration Fields Filter in Reports**](https://support.braincert.com/kb/article/216/how-to-include-custom-registration-fields-filter-in-reports "https://support.braincert.com/kb/article/216/how-to-include-custom-registration-fields-filter-in-reports")' to learn more.

## ![3](https://support.braincert.com/kb/attachment/article/233/inline?token=eyJhbGciOiJodHRwOi8vd3d3LnczLm9yZy8yMDAxLzA0L3htbGRzaWctbW9yZSNobWFjLXNoYTI1NiIsInR5cCI6IkpXVCJ9.eyJpZCI6IjYxNTUiLCJvcmdpZCI6IjE2MDMiLCJpc3MiOiJzdXBwb3J0LmJyYWluY2VydC5jb20ifQ.hvWVVduqbqYtXeCZYlY69Nx8hzI95iuA9oXOKcwqq2Q)

## **Step 4:**

Use the dropdown to filter by groups if needed, then click the '**Export**' button.

![4](https://support.braincert.com/kb/attachment/article/233/inline?token=eyJhbGciOiJodHRwOi8vd3d3LnczLm9yZy8yMDAxLzA0L3htbGRzaWctbW9yZSNobWFjLXNoYTI1NiIsInR5cCI6IkpXVCJ9.eyJpZCI6IjYxNTYiLCJvcmdpZCI6IjE2MDMiLCJpc3MiOiJzdXBwb3J0LmJyYWluY2VydC5jb20ifQ.AHAnduwZAxt-H1VyTr12FGuEfkOWlNPV9Rk482oXqZA)

## **Step 5:**

**Choose your preferred file type, either '****CSV****' or '****XLSX****'. Select the number of records to export: '****10 records****' or '****All records****'.**

![5](https://support.braincert.com/kb/attachment/article/233/inline?token=eyJhbGciOiJodHRwOi8vd3d3LnczLm9yZy8yMDAxLzA0L3htbGRzaWctbW9yZSNobWFjLXNoYTI1NiIsInR5cCI6IkpXVCJ9.eyJpZCI6IjYxNTciLCJvcmdpZCI6IjE2MDMiLCJpc3MiOiJzdXBwb3J0LmJyYWluY2VydC5jb20ifQ.KbNjjRbOjUucs79DQpSXL4FF8_2HXdGWjo_ygwXBA-Y)

## **Step 6:**

Now, click the '**Export**' button to get the reports.

![6](https://support.braincert.com/kb/attachment/article/233/inline?token=eyJhbGciOiJodHRwOi8vd3d3LnczLm9yZy8yMDAxLzA0L3htbGRzaWctbW9yZSNobWFjLXNoYTI1NiIsInR5cCI6IkpXVCJ9.eyJpZCI6IjYxNTgiLCJvcmdpZCI6IjE2MDMiLCJpc3MiOiJzdXBwb3J0LmJyYWluY2VydC5jb20ifQ.hvtRIZnM4qIOY4-bmdfBaw_brdUhzs9Ry7FCm6Tdxv4)

## **View Exported Files**

## **Step 7:**

Click on '**My Exports**' to view the exported files.

![7](https://support.braincert.com/kb/attachment/article/233/inline?token=eyJhbGciOiJodHRwOi8vd3d3LnczLm9yZy8yMDAxLzA0L3htbGRzaWctbW9yZSNobWFjLXNoYTI1NiIsInR5cCI6IkpXVCJ9.eyJpZCI6IjYxNTkiLCJvcmdpZCI6IjE2MDMiLCJpc3MiOiJzdXBwb3J0LmJyYWluY2VydC5jb20ifQ.SULD1M_SusDx3HhCskmXlbmwOvbK--Nb-26vgnCPixM)

You will be redirected to a page where you can download the exported files. Click '**Download**' to save it to your device.

![8](https://support.braincert.com/kb/attachment/article/233/inline?token=eyJhbGciOiJodHRwOi8vd3d3LnczLm9yZy8yMDAxLzA0L3htbGRzaWctbW9yZSNobWFjLXNoYTI1NiIsInR5cCI6IkpXVCJ9.eyJpZCI6IjYxNjAiLCJvcmdpZCI6IjE2MDMiLCJpc3MiOiJzdXBwb3J0LmJyYWluY2VydC5jb20ifQ.vg0q-c4FCOwXLowpxs0GwpntSfdXqLMmbX_1X1NWUxA)

## **Step 8:**

Alternatively, you can click on your profile icon and select '**My Exports**' from the menu to view and download exported files at any time.

![9](https://support.braincert.com/kb/attachment/article/233/inline?token=eyJhbGciOiJodHRwOi8vd3d3LnczLm9yZy8yMDAxLzA0L3htbGRzaWctbW9yZSNobWFjLXNoYTI1NiIsInR5cCI6IkpXVCJ9.eyJpZCI6IjYxNjEiLCJvcmdpZCI6IjE2MDMiLCJpc3MiOiJzdXBwb3J0LmJyYWluY2VydC5jb20ifQ.bhm5p6E7vouKpAsrsn224m9QxwUJP03H01ykp73y7q0)

## **Creating Custom Reports**

**For more personalized data, follow these steps to create a custom report:**

## **Step 1:**

Click on '**Create Custom Report**'.

![11](https://support.braincert.com/kb/attachment/article/233/inline?token=eyJhbGciOiJodHRwOi8vd3d3LnczLm9yZy8yMDAxLzA0L3htbGRzaWctbW9yZSNobWFjLXNoYTI1NiIsInR5cCI6IkpXVCJ9.eyJpZCI6IjYxNjIiLCJvcmdpZCI6IjE2MDMiLCJpc3MiOiJzdXBwb3J0LmJyYWluY2VydC5jb20ifQ.i0qIQSuXhQbyIOSVzrLiUK3n8vLFSzzcpOxkqTLMgXA)

## **Step 2:**

**Choose specific '****Users****', '****Groups****', or '****Custom Fields****' you want to include in the report.** Select the '**Table Columns**' you want to display in the report for more targeted data.

Once you've set your preferences, click '**Submit**' to generate the report.

![12](https://support.braincert.com/kb/attachment/article/233/inline?token=eyJhbGciOiJodHRwOi8vd3d3LnczLm9yZy8yMDAxLzA0L3htbGRzaWctbW9yZSNobWFjLXNoYTI1NiIsInR5cCI6IkpXVCJ9.eyJpZCI6IjYxNjMiLCJvcmdpZCI6IjE2MDMiLCJpc3MiOiJzdXBwb3J0LmJyYWluY2VydC5jb20ifQ.crQTp_Kt6qc812ezc3jHspfjdMjiZwqRhzVYXim4YP8)

## **Step 3:**

Click '**Save Report**' to save it for future use.

![13](https://support.braincert.com/kb/attachment/article/233/inline?token=eyJhbGciOiJodHRwOi8vd3d3LnczLm9yZy8yMDAxLzA0L3htbGRzaWctbW9yZSNobWFjLXNoYTI1NiIsInR5cCI6IkpXVCJ9.eyJpZCI6IjYxNjUiLCJvcmdpZCI6IjE2MDMiLCJpc3MiOiJzdXBwb3J0LmJyYWluY2VydC5jb20ifQ.t8GJtgRRF_ej11Rkv_jldLpNoGQKPAdWO18cBl_X1gQ)

## **Step 4:**

**Enter a name for your custom report in the '****Report Name****' field and click '****Save report****'.**

![14](https://support.braincert.com/kb/attachment/article/233/inline?token=eyJhbGciOiJodHRwOi8vd3d3LnczLm9yZy8yMDAxLzA0L3htbGRzaWctbW9yZSNobWFjLXNoYTI1NiIsInR5cCI6IkpXVCJ9.eyJpZCI6IjYxNjYiLCJvcmdpZCI6IjE2MDMiLCJpc3MiOiJzdXBwb3J0LmJyYWluY2VydC5jb20ifQ.ZLpZ-6L2Dty0sDkaLqB3jZ0lMFakx8pcwZ9KTQbZBQ0)

## **Step 5:**

Select your custom report from the '**Dropdown Box**' under saved reports. Click '**Export**' to download the report in your chosen format.

![15](https://support.braincert.com/kb/attachment/article/233/inline?token=eyJhbGciOiJodHRwOi8vd3d3LnczLm9yZy8yMDAxLzA0L3htbGRzaWctbW9yZSNobWFjLXNoYTI1NiIsInR5cCI6IkpXVCJ9.eyJpZCI6IjYxNjciLCJvcmdpZCI6IjE2MDMiLCJpc3MiOiJzdXBwb3J0LmJyYWluY2VydC5jb20ifQ.XGwXrcgjPunpOfoP4fROkEwB__unQJ1NNj9o0ZxPQA0)

With these simple steps, you can easily export detailed reports for courses, tests, and course bundles in BrainCert. Whether you need CSV or XLSX formats or want to create custom reports for specific groups or fields, BrainCert offers flexible options to fit your reporting needs.

# Adding Multiple Whiteboards and Renaming them in Virtual Classroom

This article will guide you through the steps tp to add multiple whiteboards and rename them to the topic that is being taught.

## **Step 1:**

Click on the ‘**+**' Plus icon to add a whiteboard.
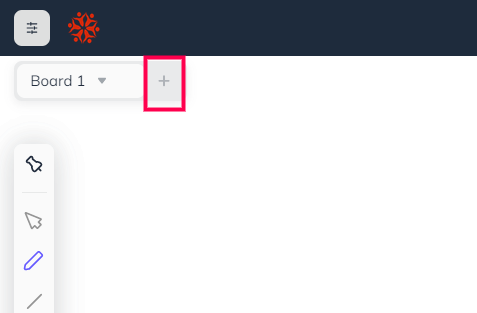

![](https://support.braincert.com/kb/attachment/article/124/inline?token=eyJhbGciOiJodHRwOi8vd3d3LnczLm9yZy8yMDAxLzA0L3htbGRzaWctbW9yZSNobWFjLXNoYTI1NiIsInR5cCI6IkpXVCJ9.eyJpZCI6IjQzNjAiLCJvcmdpZCI6IjE2MDMiLCJpc3MiOiJzdXBwb3J0LmJyYWluY2VydC5jb20ifQ.PkbS58ur1rdj3T5IJPiKreIcL1cUhg1CS6GuCjjU9JY)

## **Step 2:**

Double-click on any whiteboard tab to rename it.
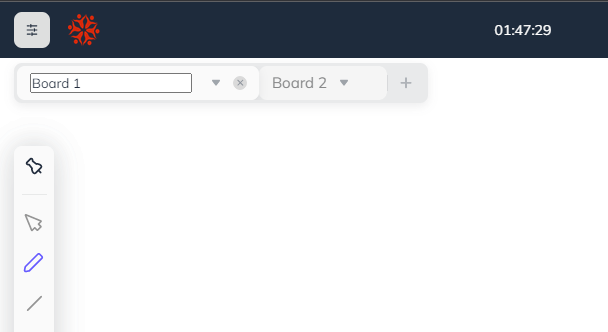

![](https://support.braincert.com/kb/attachment/article/124/inline?token=eyJhbGciOiJodHRwOi8vd3d3LnczLm9yZy8yMDAxLzA0L3htbGRzaWctbW9yZSNobWFjLXNoYTI1NiIsInR5cCI6IkpXVCJ9.eyJpZCI6IjQzNjEiLCJvcmdpZCI6IjE2MDMiLCJpc3MiOiJzdXBwb3J0LmJyYWluY2VydC5jb20ifQ.e26GOR_h69H3J0nmETfndFGSQVw9WTEsof0KWUqZmM0)

## **Step 3:**

Here is how the renamed whiteboard will look.
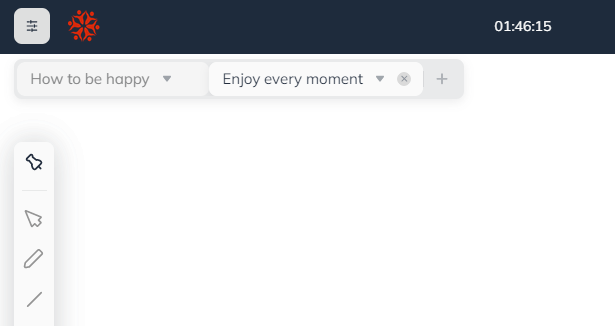

![](https://support.braincert.com/kb/attachment/article/124/inline?token=eyJhbGciOiJodHRwOi8vd3d3LnczLm9yZy8yMDAxLzA0L3htbGRzaWctbW9yZSNobWFjLXNoYTI1NiIsInR5cCI6IkpXVCJ9.eyJpZCI6IjQzNjIiLCJvcmdpZCI6IjE2MDMiLCJpc3MiOiJzdXBwb3J0LmJyYWluY2VydC5jb20ifQ.XN5_0okrKcoYzpHSBXZQKdKTz2nYPbkElFs-RwgeAps)

**Note**: The whiteboard's name will only be displayed in upper case.

# A Guide to Online Shop Category Creation

Categories in an online store play a vital role by organizing products, improving navigation for customers, aiding in search engine optimization, and facilitating informed decision-making during the shopping process.

<iframe src="https://player.vimeo.com/video/1005348538?h=806a23f274&amp;title=0&amp;byline=0&amp;portrait=0&amp;badge=0&amp;autopause=0&amp;player_id=0&amp;app_id=58479" frameborder="0" allow="autoplay; fullscreen; picture-in-picture; clipboard-write" style="position:absolute;top:0;left:0;width:100%;height:100%;" title="A Guide to Online Shop Category Creation">&ZeroWidthSpace;</iframe>

This article walks you through the process of creating and managing categories.

## **Step 1:**

Go to '**Global** **Settings**' and open '**Online** **Shop**' from the menu. **![1.png](https://support.braincert.com/kb/attachment/article/187/inline?token=eyJhbGciOiJodHRwOi8vd3d3LnczLm9yZy8yMDAxLzA0L3htbGRzaWctbW9yZSNobWFjLXNoYTI1NiIsInR5cCI6IkpXVCJ9.eyJpZCI6IjU1NTAiLCJvcmdpZCI6IjE2MDMiLCJpc3MiOiJzdXBwb3J0LmJyYWluY2VydC5jb20ifQ.gWI9cw7AX3a8zImuw84ehxJ5HRqPktVvdjtPBiusIb4)**
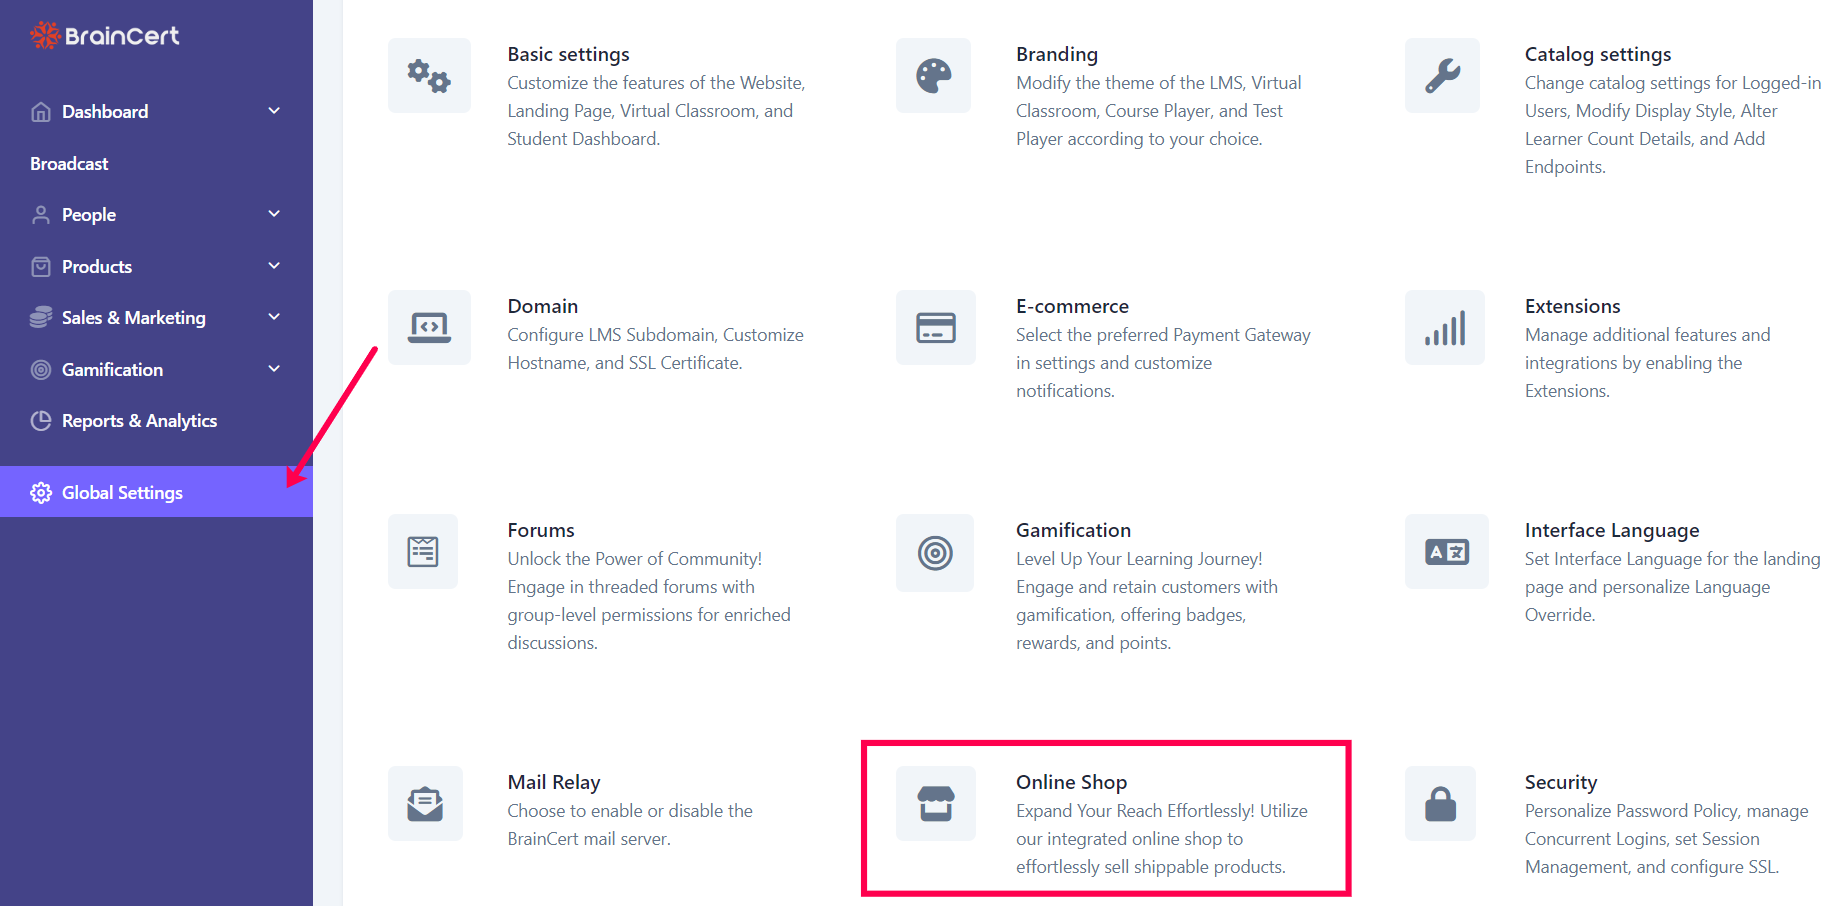

##   

## **Step 2:﻿﻿**

Scroll down to '**Product Categories**' and toggle the switch to enable.

**![2.png](https://support.braincert.com/kb/attachment/article/187/inline?token=eyJhbGciOiJodHRwOi8vd3d3LnczLm9yZy8yMDAxLzA0L3htbGRzaWctbW9yZSNobWFjLXNoYTI1NiIsInR5cCI6IkpXVCJ9.eyJpZCI6IjU1NTEiLCJvcmdpZCI6IjE2MDMiLCJpc3MiOiJzdXBwb3J0LmJyYWluY2VydC5jb20ifQ.vAlGUlnrVnnn8Ue7VRD6LFGzrZchBroSpikSXiuwmuA)**
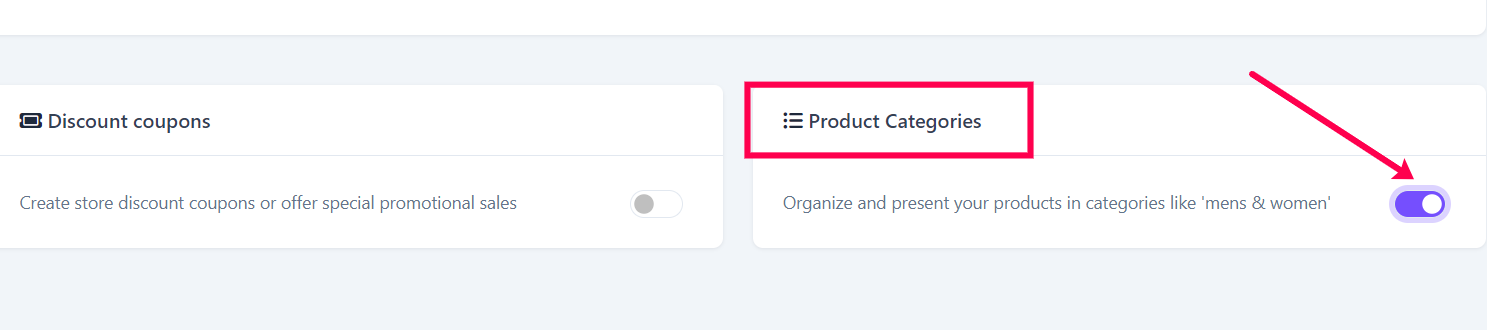

##   

## **Step 3:﻿﻿**

Next, navigate to '**Categories**' under '**Online Store**' and click on '**Add Category**' to create a new one.

**![3.png](https://support.braincert.com/kb/attachment/article/187/inline?token=eyJhbGciOiJodHRwOi8vd3d3LnczLm9yZy8yMDAxLzA0L3htbGRzaWctbW9yZSNobWFjLXNoYTI1NiIsInR5cCI6IkpXVCJ9.eyJpZCI6IjU1NTIiLCJvcmdpZCI6IjE2MDMiLCJpc3MiOiJzdXBwb3J0LmJyYWluY2VydC5jb20ifQ.4aTHNA6x5__YrYL5lzov_CjjyVcerql9C18lxO87MqU)**
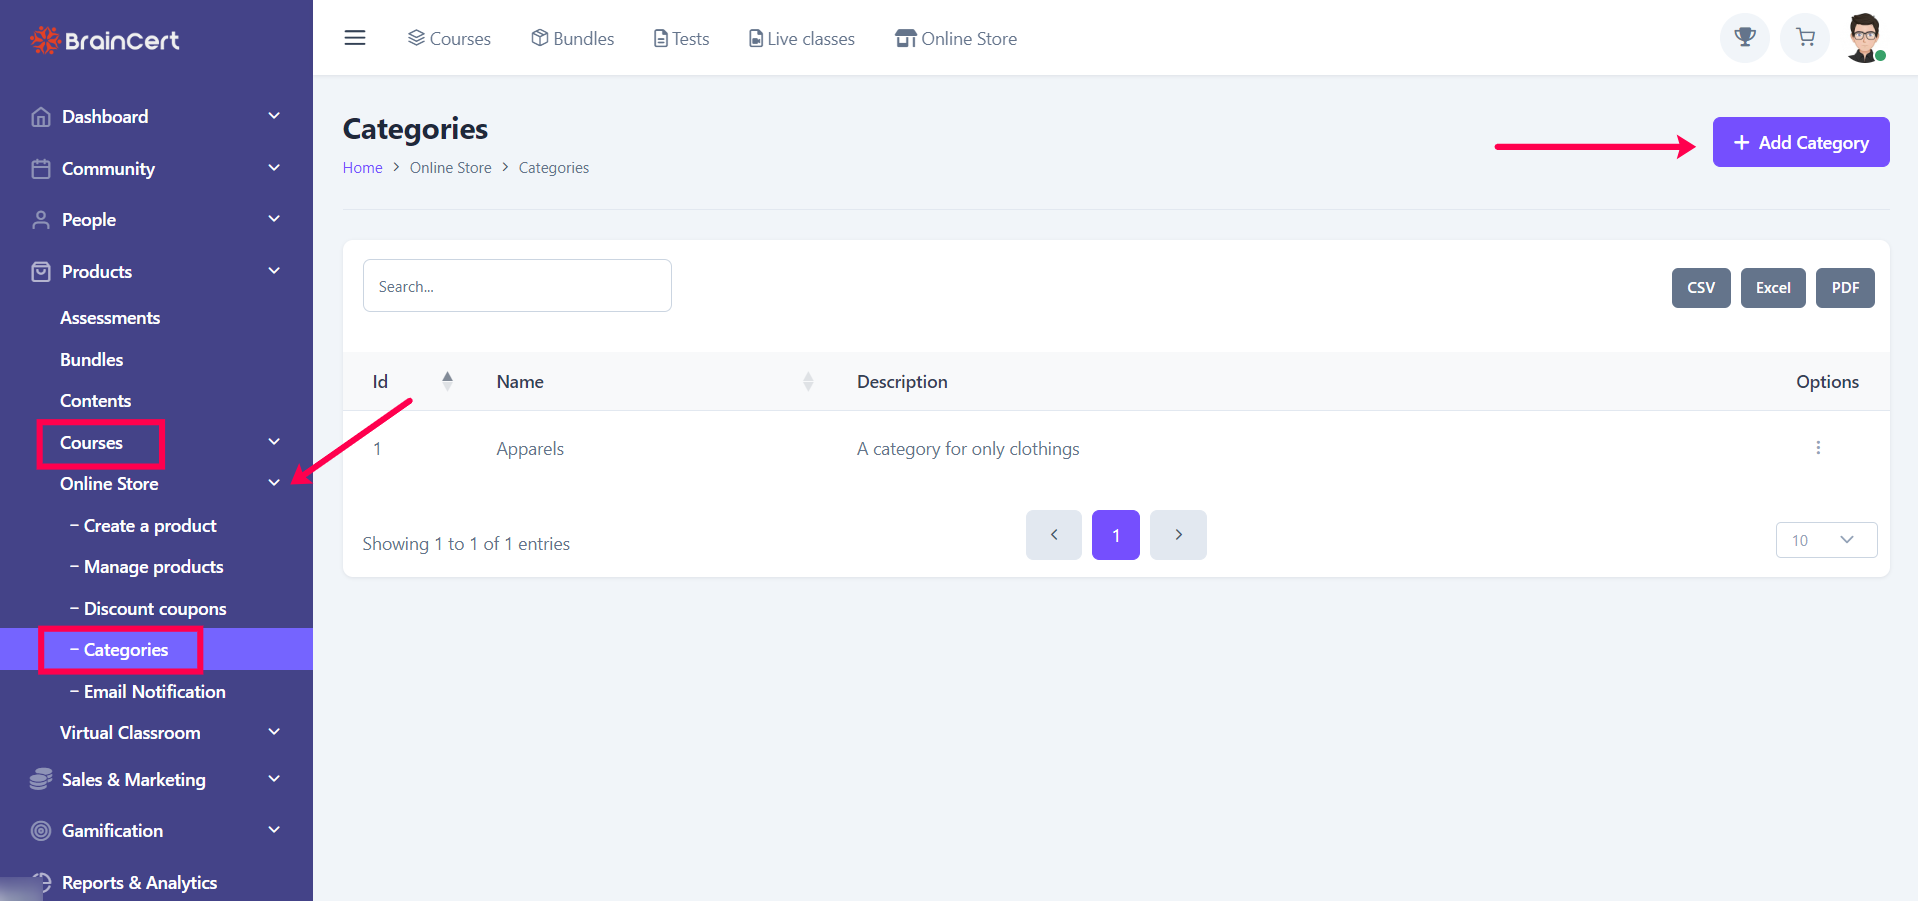

##   

## **﻿Step 4:﻿**

Type the '**Category Name**' and '**Description**' in the given field and click on '**Save**'.

**![4.png](https://support.braincert.com/kb/attachment/article/187/inline?token=eyJhbGciOiJodHRwOi8vd3d3LnczLm9yZy8yMDAxLzA0L3htbGRzaWctbW9yZSNobWFjLXNoYTI1NiIsInR5cCI6IkpXVCJ9.eyJpZCI6IjU1NTMiLCJvcmdpZCI6IjE2MDMiLCJpc3MiOiJzdXBwb3J0LmJyYWluY2VydC5jb20ifQ.roSKxs3ZTHVxqqRzGutePTOGTF30BwsEeBpfCo2FHQY)**
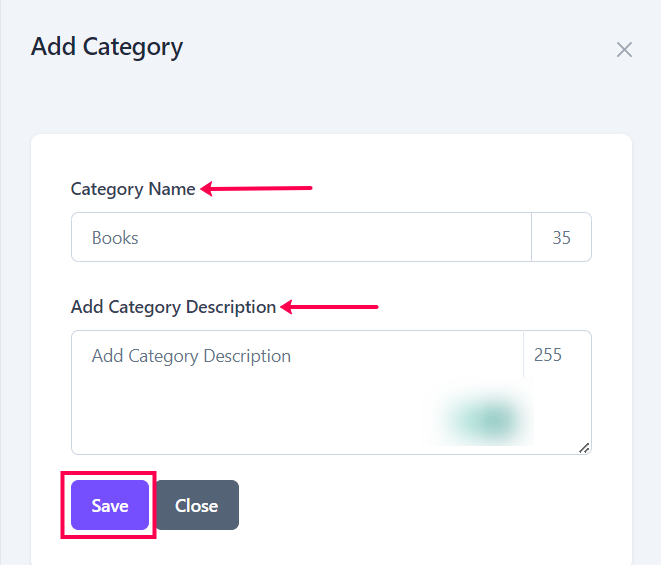

﻿﻿

Once it is saved, the category will be displayed under categories.

## **![5.png](https://support.braincert.com/kb/attachment/article/187/inline?token=eyJhbGciOiJodHRwOi8vd3d3LnczLm9yZy8yMDAxLzA0L3htbGRzaWctbW9yZSNobWFjLXNoYTI1NiIsInR5cCI6IkpXVCJ9.eyJpZCI6IjU1NTQiLCJvcmdpZCI6IjE2MDMiLCJpc3MiOiJzdXBwb3J0LmJyYWluY2VydC5jb20ifQ.jS7_xvENSmnHXiaNr8J3b4RzthuA1KnbKifmmk4PNJY)**  
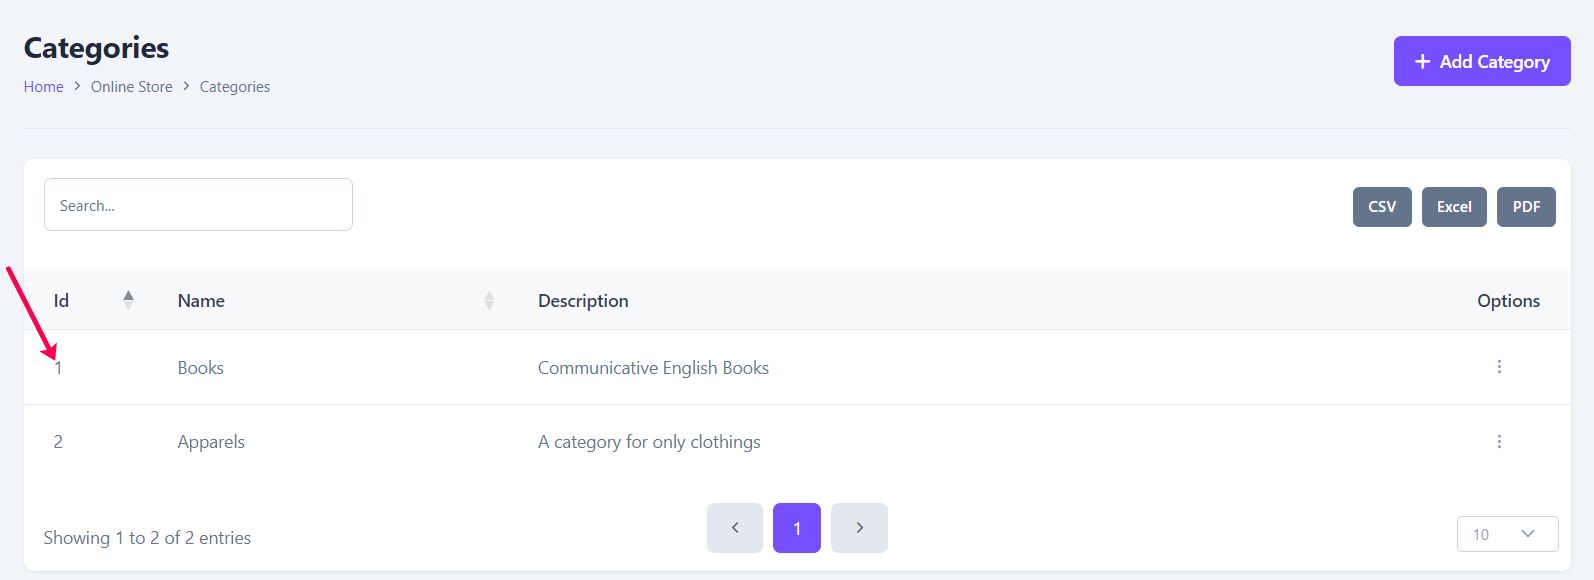
  
**﻿﻿Step 5:**

Now, navigate to '**Create a product**' under '**Online Store**'. Scroll down to '**Product Category**' and click on the dropdown menu. You'll have the created categories in it.

Select the category from the menu and '**Save**' the changes.

**![6.png](https://support.braincert.com/kb/attachment/article/187/inline?token=eyJhbGciOiJodHRwOi8vd3d3LnczLm9yZy8yMDAxLzA0L3htbGRzaWctbW9yZSNobWFjLXNoYTI1NiIsInR5cCI6IkpXVCJ9.eyJpZCI6IjU1NTUiLCJvcmdpZCI6IjE2MDMiLCJpc3MiOiJzdXBwb3J0LmJyYWluY2VydC5jb20ifQ.43jiitSby079iBvWweTWf4FmYivNQHy-zIGvZhAK9m0)**﻿﻿To learn how to create a product, refer to the guide on '[How to Create a New Product in Online Shop](https://support.braincert.com/kb/article/86/how-to-create-a-new-product-in-online-shop "https://support.braincert.com/kb/article/86/how-to-create-a-new-product-in-online-shop")'.
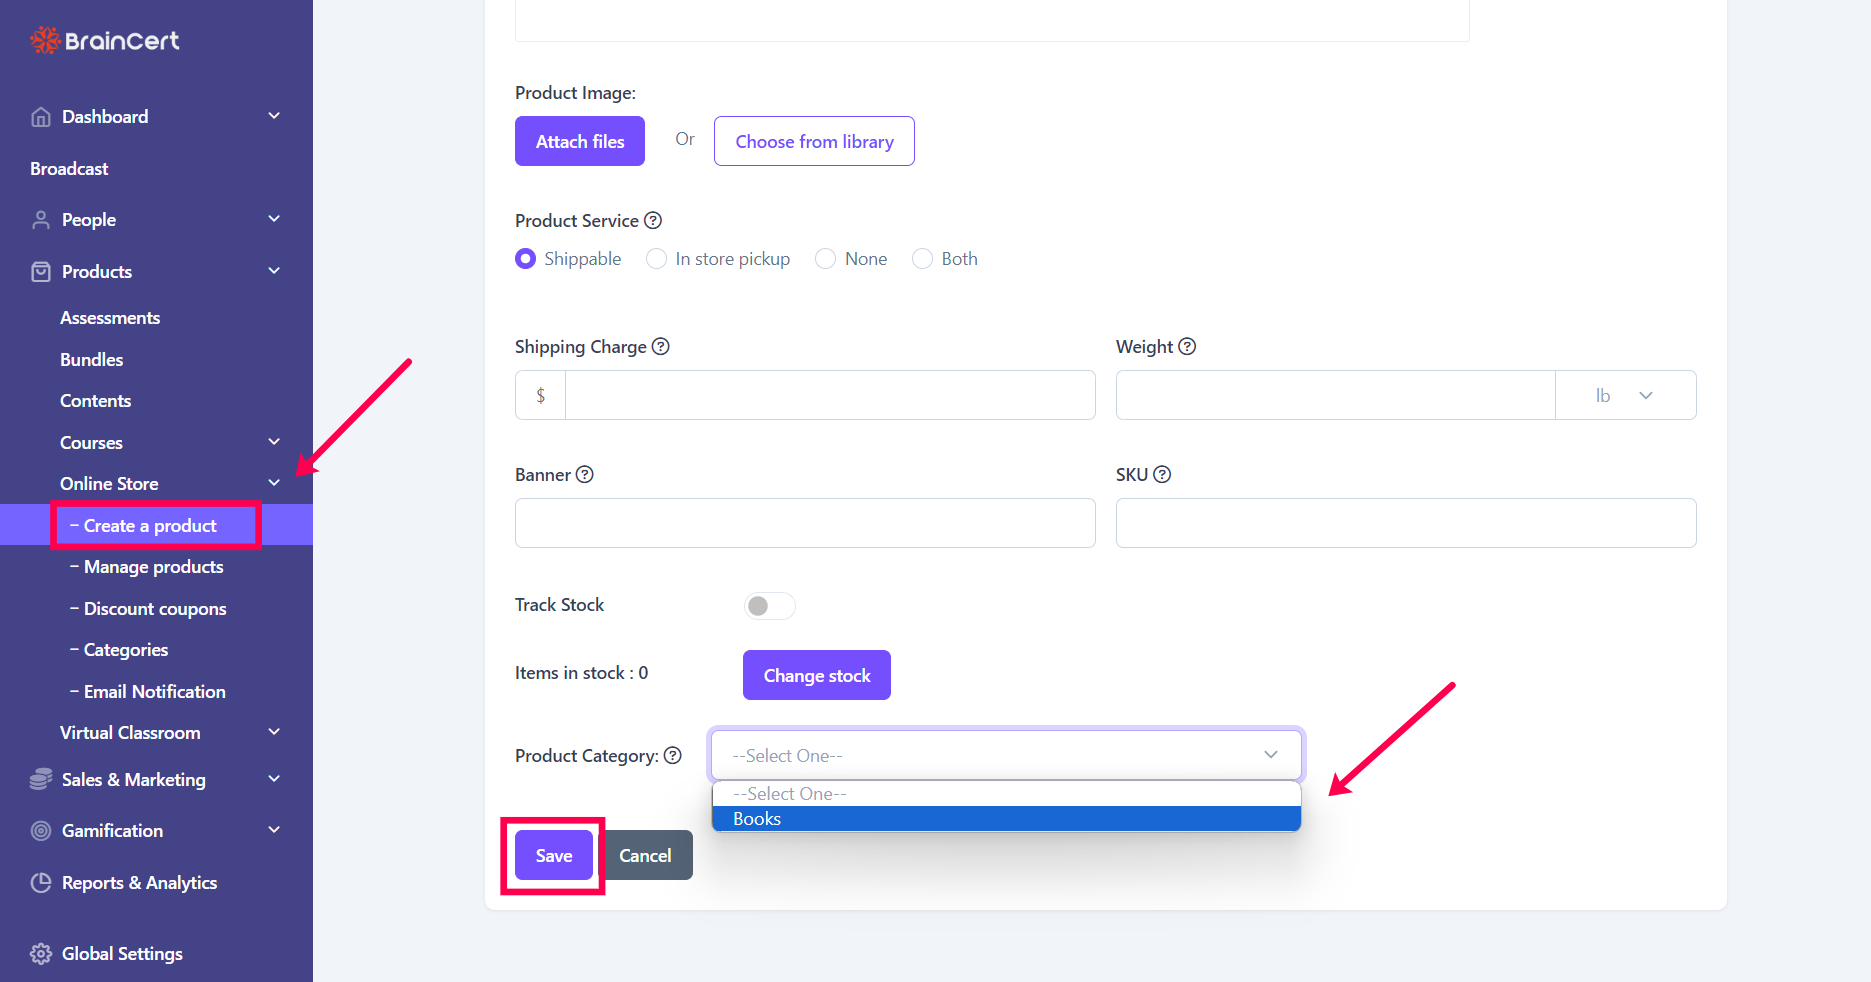

##   
**Step 6:**

To view the product, go to '**Online Store**' on the catalog and click on the product to which the category has been added.

**![7.png](https://support.braincert.com/kb/attachment/article/187/inline?token=eyJhbGciOiJodHRwOi8vd3d3LnczLm9yZy8yMDAxLzA0L3htbGRzaWctbW9yZSNobWFjLXNoYTI1NiIsInR5cCI6IkpXVCJ9.eyJpZCI6IjU1NTYiLCJvcmdpZCI6IjE2MDMiLCJpc3MiOiJzdXBwb3J0LmJyYWluY2VydC5jb20ifQ.jW47hwmOw7M3gAAXp2ycBQnaeI9zXq4eiErTACSKX08)** You'll be able to see the product category as shown in the image.  
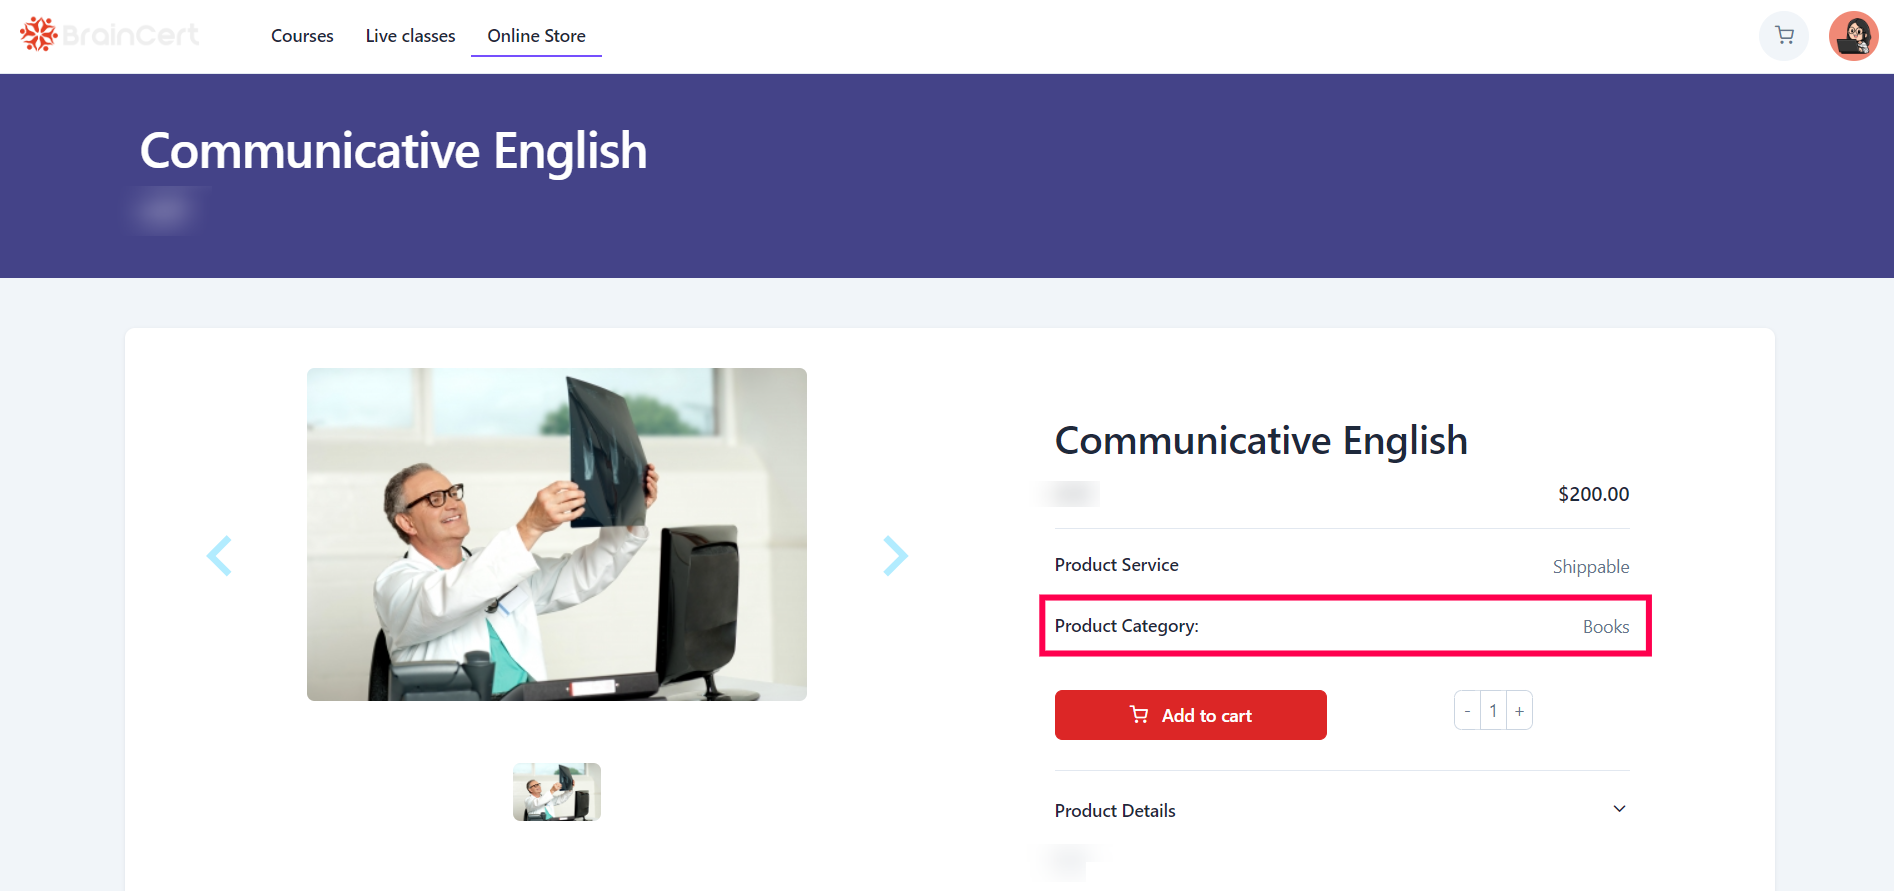
![8.png](https://support.braincert.com/kb/attachment/article/187/inline?token=eyJhbGciOiJodHRwOi8vd3d3LnczLm9yZy8yMDAxLzA0L3htbGRzaWctbW9yZSNobWFjLXNoYTI1NiIsInR5cCI6IkpXVCJ9.eyJpZCI6IjU1NTciLCJvcmdpZCI6IjE2MDMiLCJpc3MiOiJzdXBwb3J0LmJyYWluY2VydC5jb20ifQ.LqYdvWW7OJh2-VB_6Qu0QgaFEEOinQc1Nbt3nrkTQ3s) Categorize your products to help learners easily identify and purchase them.

# How to Create Scenario Based Question

Scenario-based questions gives an idea of how you would respond to a hypothetical future situation. Here are the steps to create a scenario-based question.

## **Step 1:**

Navigate to '**Assessments**' under '**Products**'.

Click on the '**Options**' of the test to which questions are to be added, and then click on '**Questions**'.
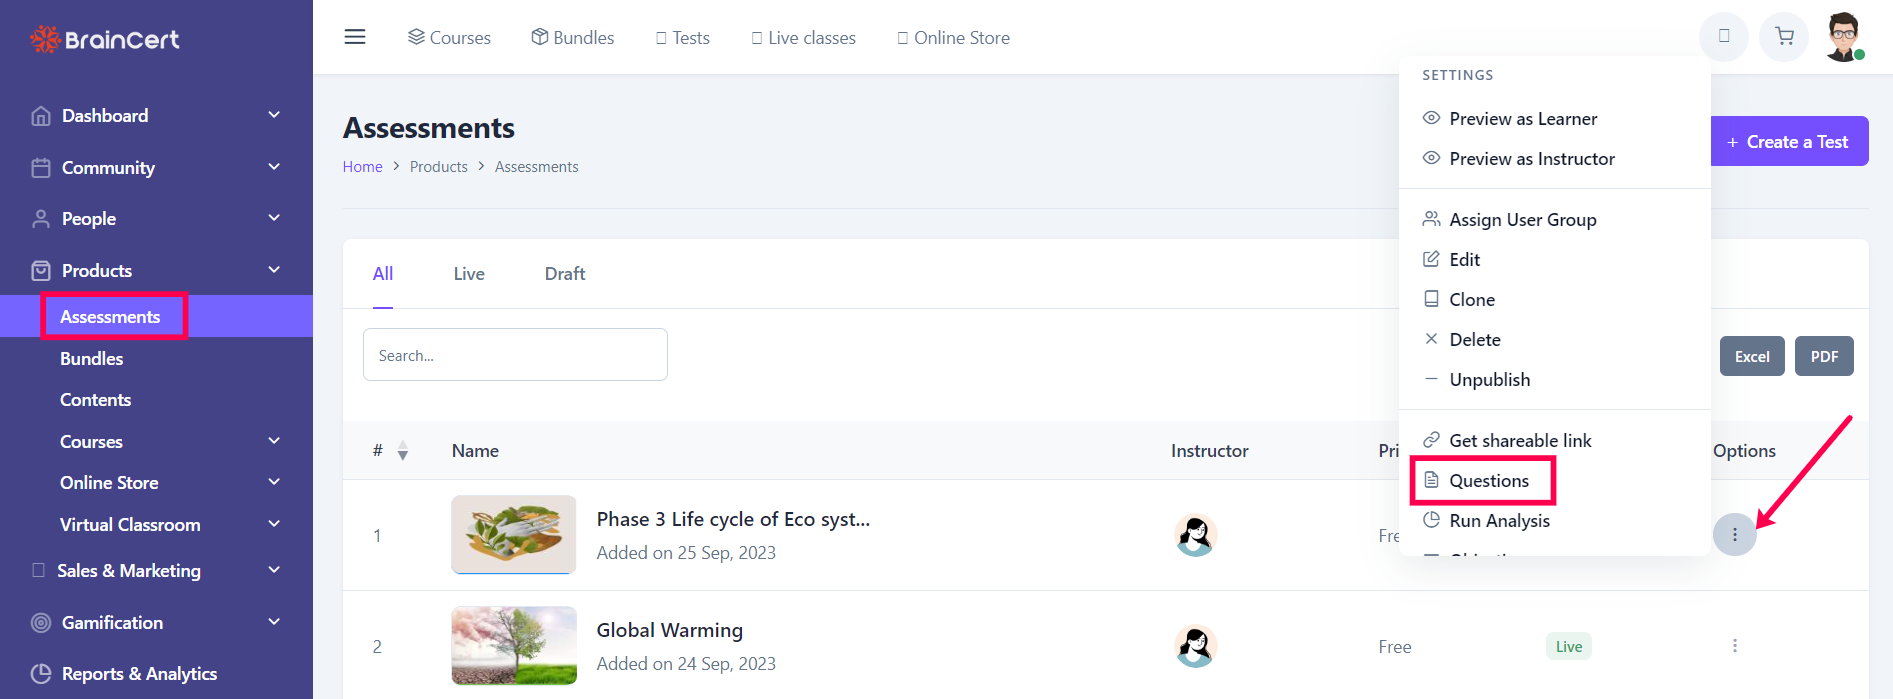

![1.png](https://support.braincert.com/kb/attachment/article/36/inline?token=eyJhbGciOiJodHRwOi8vd3d3LnczLm9yZy8yMDAxLzA0L3htbGRzaWctbW9yZSNobWFjLXNoYTI1NiIsInR5cCI6IkpXVCJ9.eyJpZCI6IjUyNjciLCJvcmdpZCI6IjE2MDMiLCJpc3MiOiJzdXBwb3J0LmJyYWluY2VydC5jb20ifQ.SKuBVlXonqzhjWAo8lYnGItYD-OFzR17Iio_UpVyzao)

## **Step 2:**

Click on '**Add Test Questions**' to insert scenario-based questions.![2.png](https://support.braincert.com/kb/attachment/article/36/inline?token=eyJhbGciOiJodHRwOi8vd3d3LnczLm9yZy8yMDAxLzA0L3htbGRzaWctbW9yZSNobWFjLXNoYTI1NiIsInR5cCI6IkpXVCJ9.eyJpZCI6IjUyNjgiLCJvcmdpZCI6IjE2MDMiLCJpc3MiOiJzdXBwb3J0LmJyYWluY2VydC5jb20ifQ.JY5E3ZtNuT24FLT2TPkSIx9YZDqE5ODdN5UlDQTziXI)


##   

## **Step 3:** **​**

**​**You can find the '**Scenario Question**' from the  dropdown by clicking on the '**Question Type**'.![3.png](https://support.braincert.com/kb/attachment/article/36/inline?token=eyJhbGciOiJodHRwOi8vd3d3LnczLm9yZy8yMDAxLzA0L3htbGRzaWctbW9yZSNobWFjLXNoYTI1NiIsInR5cCI6IkpXVCJ9.eyJpZCI6IjUyNjkiLCJvcmdpZCI6IjE2MDMiLCJpc3MiOiJzdXBwb3J0LmJyYWluY2VydC5jb20ifQ.aVZ8bjDSEp5UE0pq4anIymNOweZZ8SIdTy7rJf0ypQc)
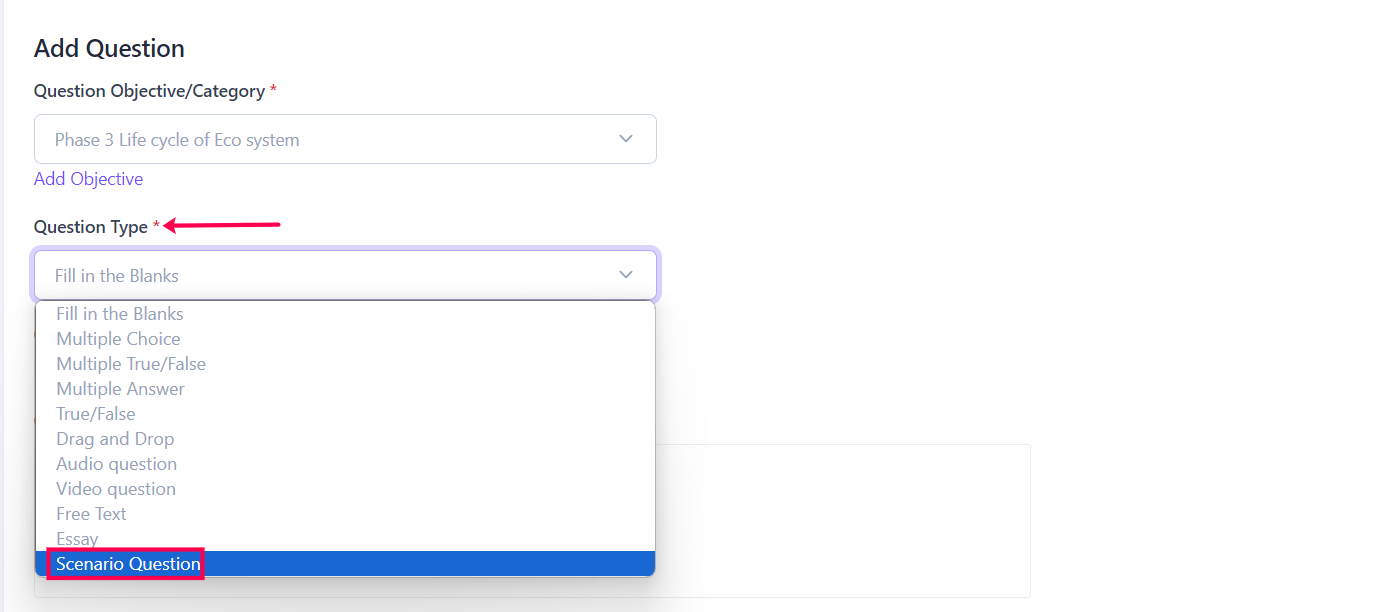

##   
**Step 4:**  

There is a wide range of advanced scenario types available in BrainCert, such as multiple choice, fill-in-the-blanks, multiple answers, and true/false. From the dropdown list, select the question type you need.
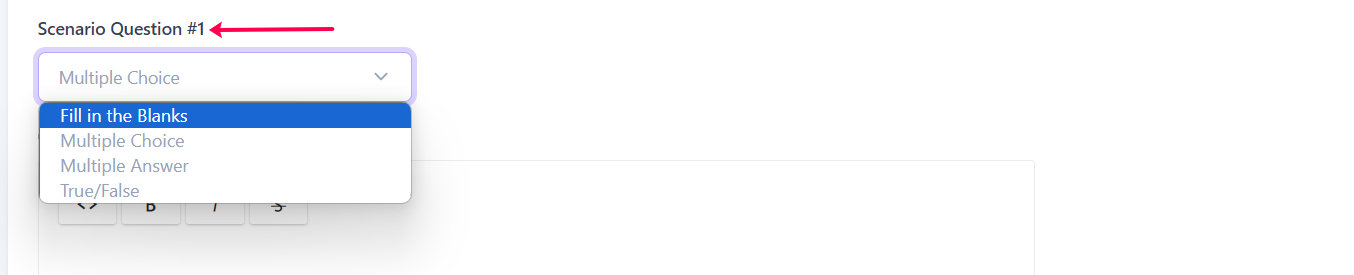

![4.png](https://support.braincert.com/kb/attachment/article/36/inline?token=eyJhbGciOiJodHRwOi8vd3d3LnczLm9yZy8yMDAxLzA0L3htbGRzaWctbW9yZSNobWFjLXNoYTI1NiIsInR5cCI6IkpXVCJ9.eyJpZCI6IjUyNzAiLCJvcmdpZCI6IjE2MDMiLCJpc3MiOiJzdXBwb3J0LmJyYWluY2VydC5jb20ifQ.Zze_cnZ_kYwbiXmWEfdvTjXYNjS-HZAzGNNEY9o5kPA)

##   

##   

## **Step 5:**

A new scenario question can be instantly added by clicking on the blue '**Add New Scenario Question'** button.

**A list of other important features and options**

- **Reference (URL)** - Give the test taker a link to read more.
- **Question Status** - Leave the default option "**Published**" to make it live, or mark it as "**Not Published**" to publish later.
- **Include in Demo** - All users are shown questions in Demo status when taking this test. Before a user purchases the full version of the test, you can show them some sample questions.

If you wish to save this question and create a new one after adding the question and question type, click '**Save & Add New**'. Alternatively, you can click '**Save & Exit**' to save and exit the question.![6.png](https://support.braincert.com/kb/attachment/article/36/inline?token=eyJhbGciOiJodHRwOi8vd3d3LnczLm9yZy8yMDAxLzA0L3htbGRzaWctbW9yZSNobWFjLXNoYTI1NiIsInR5cCI6IkpXVCJ9.eyJpZCI6IjUyNzEiLCJvcmdpZCI6IjE2MDMiLCJpc3MiOiJzdXBwb3J0LmJyYWluY2VydC5jb20ifQ.LhUAao_lWIQ8LBMKQiMXZOlB7E_Kxsh1nDx_rG1nXZs)Hope you found this article useful.
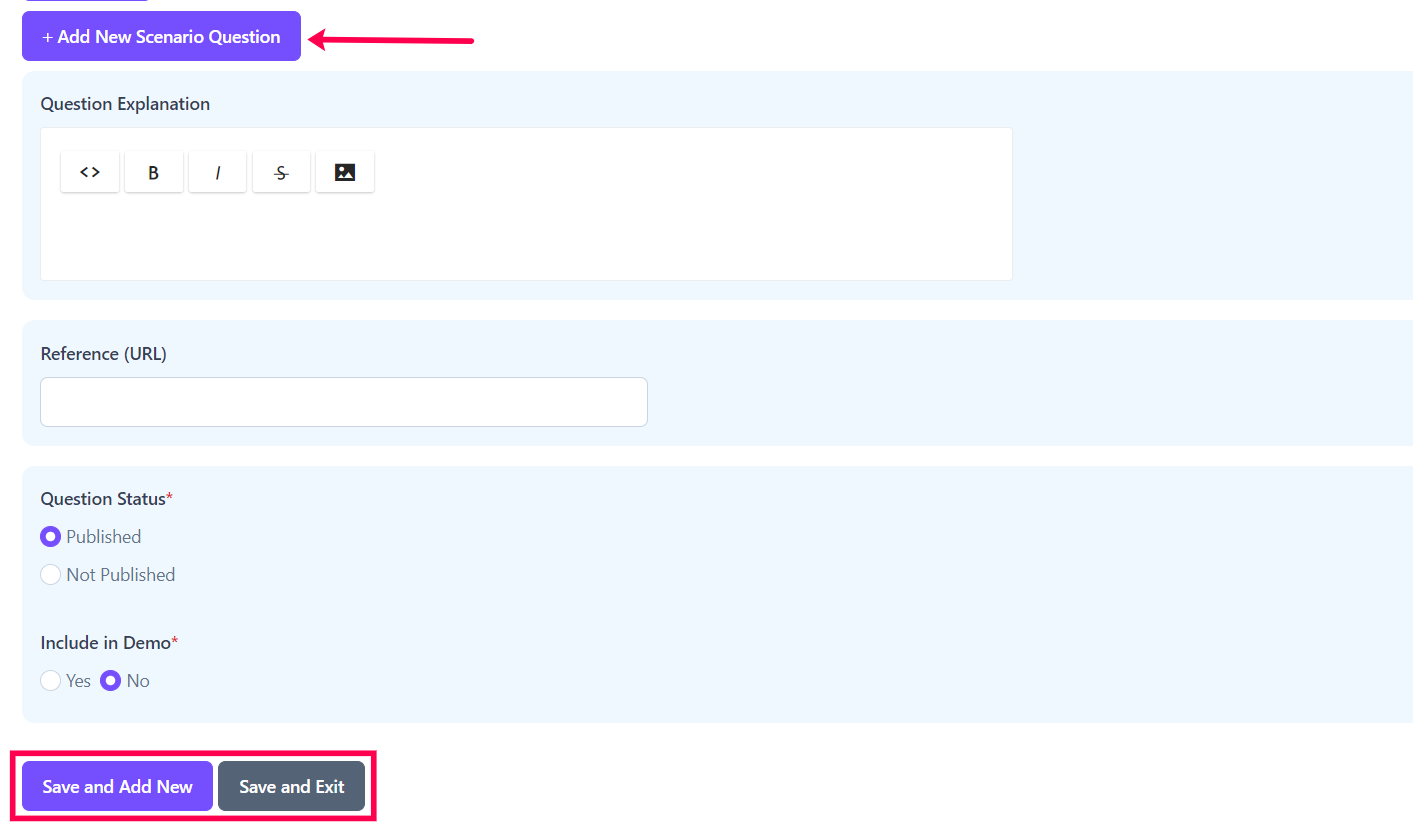
[NextPage](https://support.braincert.com/llms-full.txt/1)