Using ‘Roles’ to Create Role-Based Navigation Structure
With Role-based content, BrainCert enables users - from employees and customers to partners and suppliers - to focus exclusively on data relevant to them. You can also create and customize new roles with specific permissions and then assign them to 'Groups'. LMS roles define how content is grouped together and how it is displayed in the Portal. By assigning a group to a role, you restrict all users part of that group from doing certain activities.
For example, you can create a role that allows a group to only create and manage courses, but not tests.
You can also design a new dashboard (welcome) page based on the group the user belongs to.
This article helps to understand the process of creating a role-based navigation structure in the LMS platform.
Step 1:
Step 2:
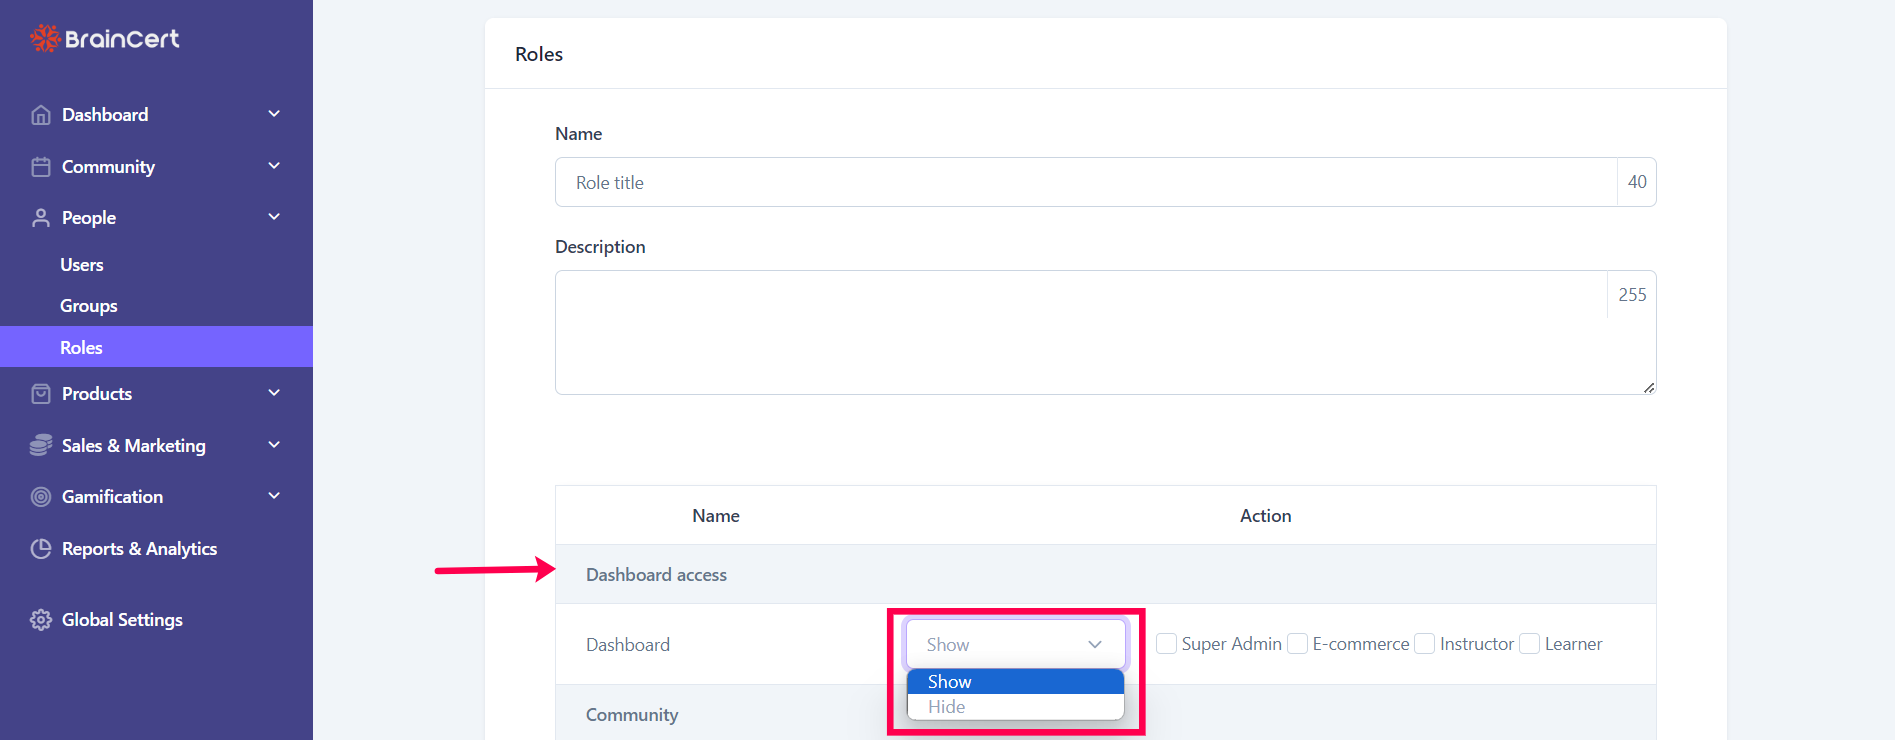
Step 3:
Enter the “Name” and “Description” of the Role to be assigned. Choose between 'Show' or 'Hide' under Dashboard to make sure the access for the dashboard is defined for this role.
Step 4:
The following permission levels are supported for menu item objects:
- None – No permission is set.
- Read – Provides read-only access to the object.
- Change - Provides all permissions permitted by read, write, edit, and save.
- Full Control - Provides all permissions permitted by read, write, edit, save, and delete.
- No Access - Denies access to all.
Step 5:
Step 6:
Step 7:
List Roles:
- The roles dashboard provides options to edit, assign groups, and delete a role.
- Click on the Group icon to assign roles to user groups. When the user logs on, the system displays the LMS menu items and pages defined in the roles assigned to the user.
