How to Configure and Enable Gamification Extension
To solve the issue of declining learner engagement, the BrainCert training platform comes with native support for a Gamification engine. Gamification has been added as an extension in the platform to give users a free hand to activate/deactivate the feature when they choose to.
Core Gamification Features on BrainCert
Core gamification features in BrainCert include
- Custom badges
- Points
- Leaderboards
- Reward system.
Here is a blog article to learn about the gamification engine on BrainCert.
This KB article will guide you through the steps to enable and configure the gamification feature on BrainCert. Here is how you enable gamification on BrainCert.
Enable & Configure Gamification Elements on BrainCert
Step 1:
Login to your BrainCert admin account and navigate to 'Extensions' under 'Global Settings'.
Step 2:
Once you select Extensions, you will be redirected to a page containing the list of all extensions. Navigate to 'Gamification' and enable it using the toggle switch.
Note: Once you enable Gamification from extensions, the gamification elements will only be visible to the Super Admins by default.
Step 3:
To enable gamification for all your users navigate to the 'Gamification' in the 'Global Settings'.
- Enable Activate Gamification for all learners to enable gamification for all learners.
- Enable Enable Rewards for all learners to enable rewards for all learners.
- Enable Enable Leaderboard for all learners to enable leaderboard for all learners.
Now that you have enabled gamification, let's discuss the steps to customize the badges & points.
Step 4:
Points
- Open 'Points', under 'Gamification'.
- This points to several actions, such as logging in, completing the course, following the login path, taking assessments, joining virtual classroom sessions, downloading course completion certificates, test completion certificates, and more actions.
- Enable the options, add the required Points, and click on 'Save'.
Step 5:
Badges
Navigate to 'Badges' under 'Gamification' and you will be redirected to a page with a list of existing badge icons, names, and points.
Step 6:
Create New Badge
- Once you select Create New Badge you will be redirected to the page where you can set up a new badge.
- Fill in the Badge name, Badge mini text, and Badge description.
- You can choose to add your customized badges or use the ones from the library.
- To add custom badges select 'Attach files' and add the required badges.
Step 7:
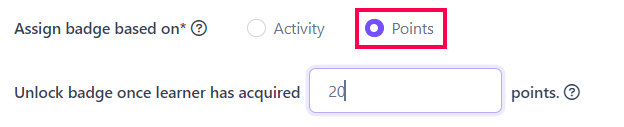
You can assign the badge based on 'Activity' or 'Points'.
To award badges based on points, choose 'Points', enter the minimum point the learner should score to get the badge, and click 'Save'.
Step 8:
To edit an existing badge, select the 'Edit' option corresponding to the badge you need to edit, and make the necessary changes to it.
