Customizing User Types: A Guide to Implementing Tailored User Permissions in Your LMS
Customizing user roles and permissions is essential in managing systems or platforms efficiently. The 'User Type' feature meets this need by allowing administrators to define and assign unique roles with specific permissions, providing more flexibility than standard roles. This is ideal for various settings like educational platforms and corporate systems, ensuring users have access rights that match their roles and needs.
How to Implement User Types
Step 1:
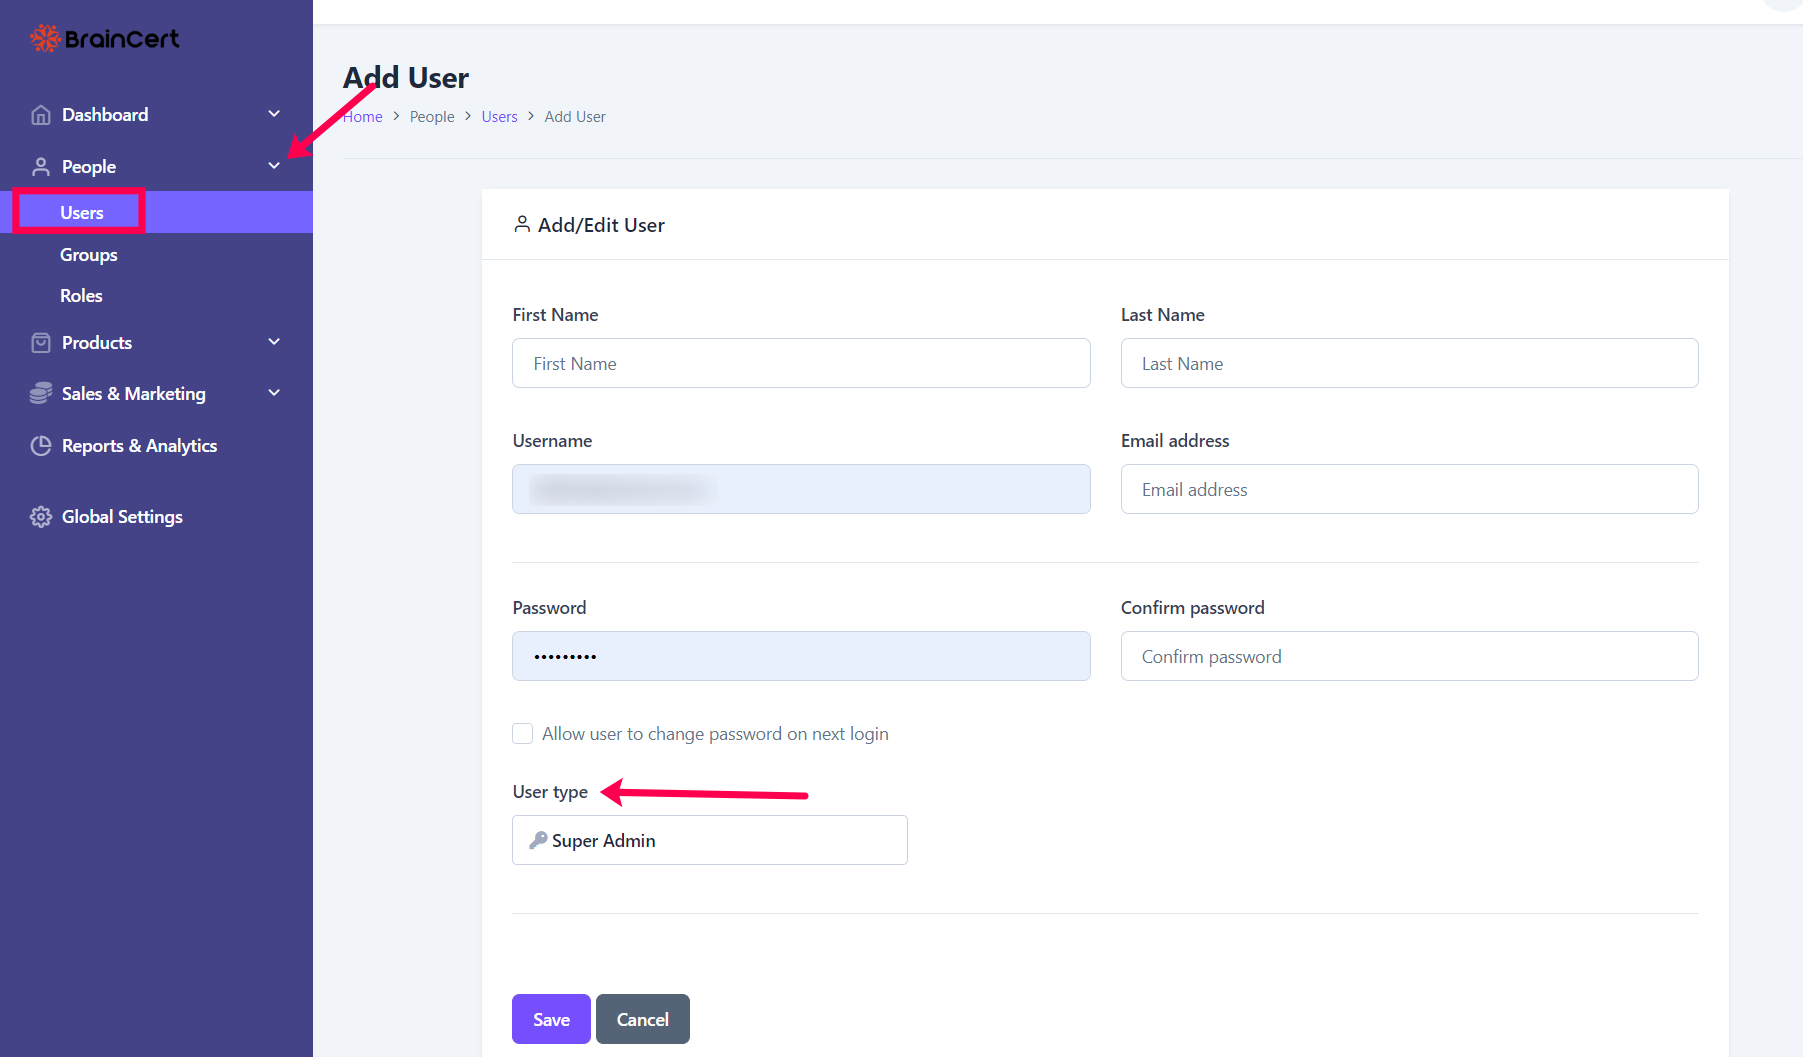
Navigate to 'Users' under 'People'.
Edit the existing user or add a new user by clicking on 'Create New User'. Fill in the details under 'Add/Edit User'.

Step 2:
Click on the 'User Type' and select the required option from the dropdown menu.
- Super Admin: Unrestricted access to all platform features, including courses, content, settings, and reports.
- Teacher: Access to most pages, excluding global settings, and full access to content.
- Learner: Access is limited to content assigned to their group memberships or personal invitations. Students may independently enroll in additional content through catalog pages. A Learner must purchase 'Paid' content in order to gain access to that course, test, and live class.
- Custom: Access is role-based, limited to specific groups. Courses and other content are not automatically assigned. Like students, they can enroll in additional content as needed.
By implementing user types, organizations and educational institutions can significantly enhance their operational efficiency and user experience. This feature not only streamlines user management but also aligns system access with the unique roles and requirements of different users.
